Welcome back! This is part two of a three-part blog series on Unity 3D. In part one we discussed how to get started with Unity 3D. Now, moving along, we are going to discuss how to use C# to control Unity 3D.
We left off after just having gained a solid understanding of how to get started with Unity 3D and had just created a new project.
Our new project has by default created four folders: Assets, Library, ProjectSettings and Temp. Unity3D create and set itself up as a default, unsaved theme that we’re now working in. Don’t be afraid: this post looks long, but there are a lot of screenshots to make sure it’s easy for you to follow along.
…. Now To The Fun Stuff
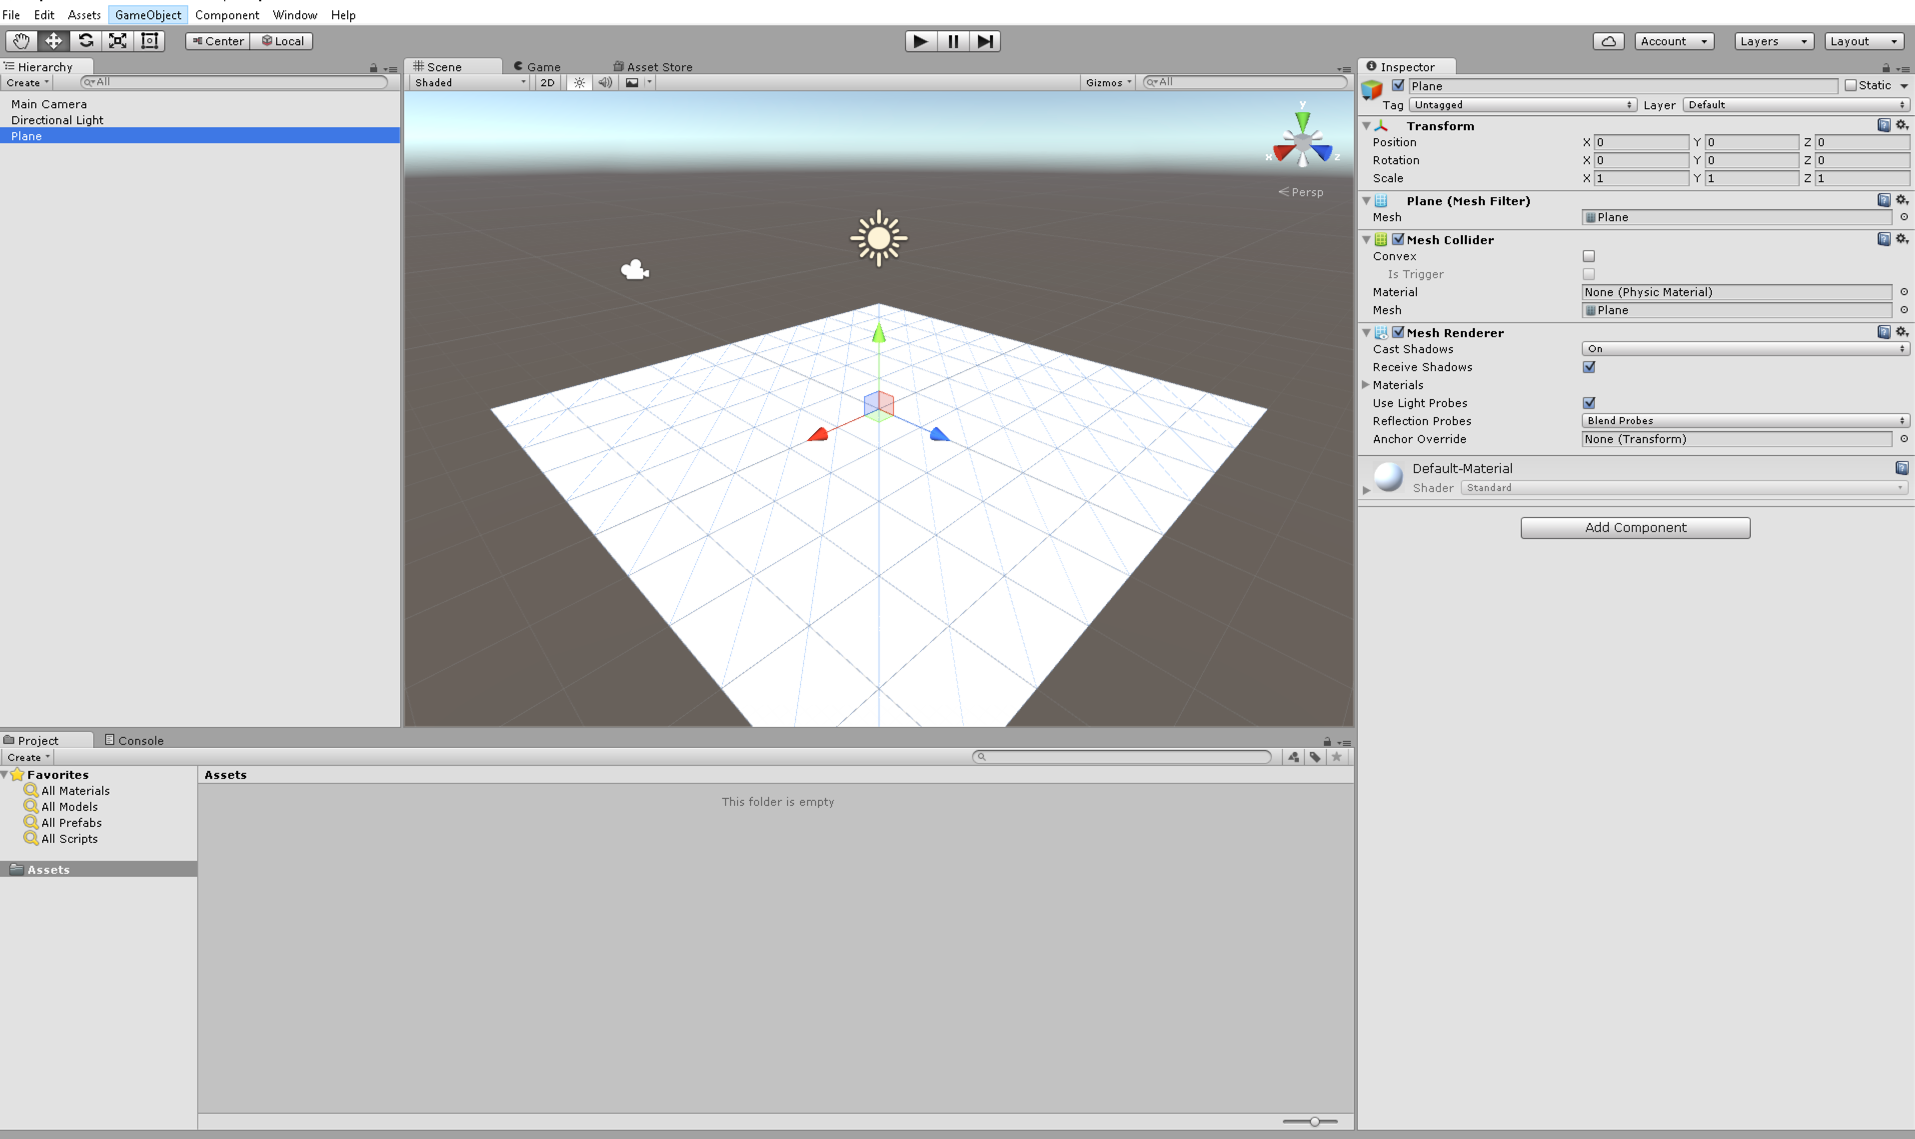
To begin, let’s add a plane game object to act as our world floor. This can be completed a couple of different ways.
We can either right-click on the hierarchy window and select 3D Object -> Plane, or use the top toolbar and click “GameObject” -> “3D Object” -> “Plane.” This adds a game object that will have a 10 x 10 mesh plane inside which will draw white. This will also have a mesh collider (added by default) which will trigger onCollision in the physics engine as well as in any script we add to the game object.
Setting The Scene
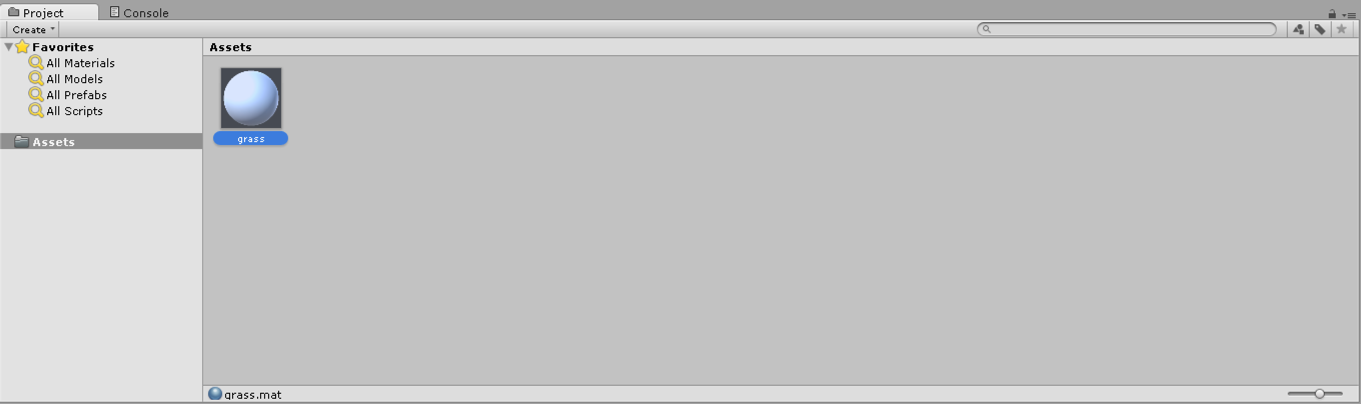
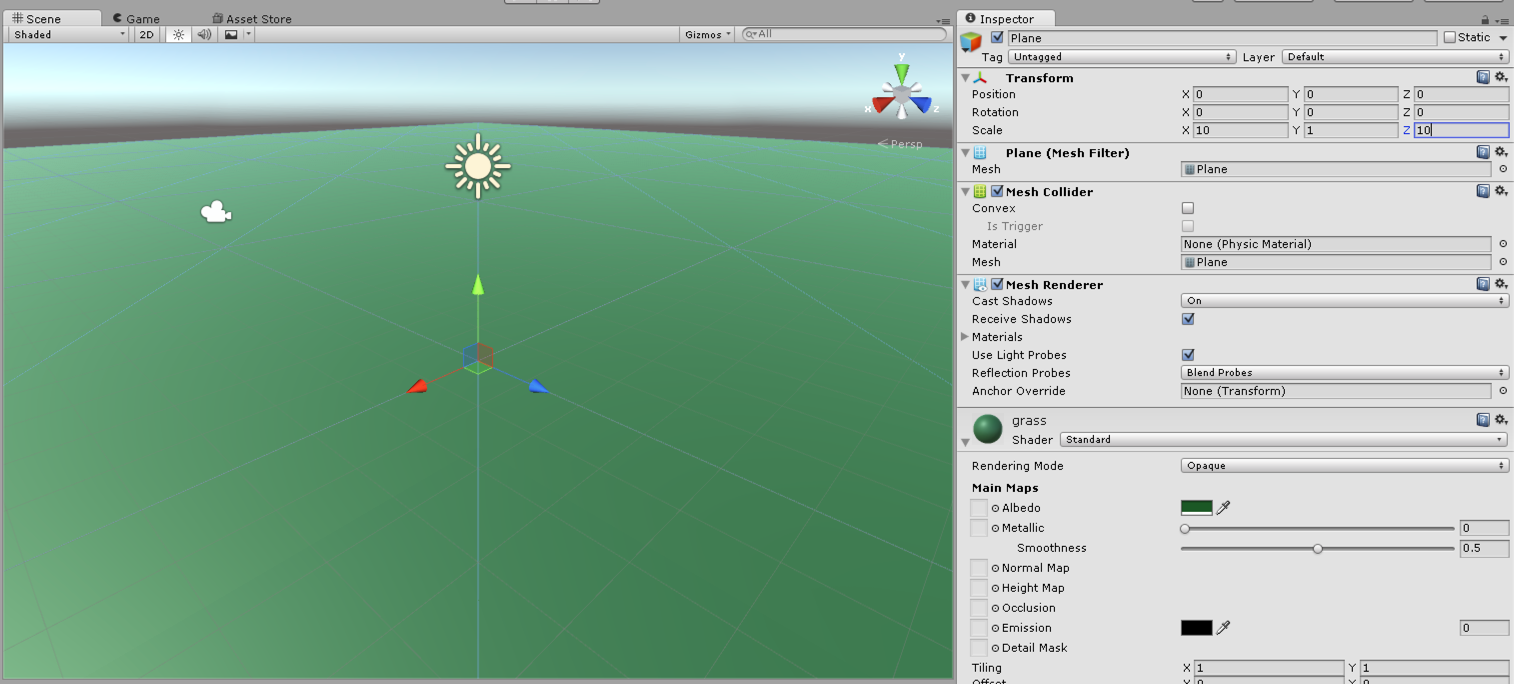
Let’s add a material to change the color of the plane to green to have a more grass-like feel. To do this we need to create a material asset that we can assign to the plane. Right-click in the Asset window and click Create -> Material. This will add a new material we can edit. Let’s name this material “grass.”
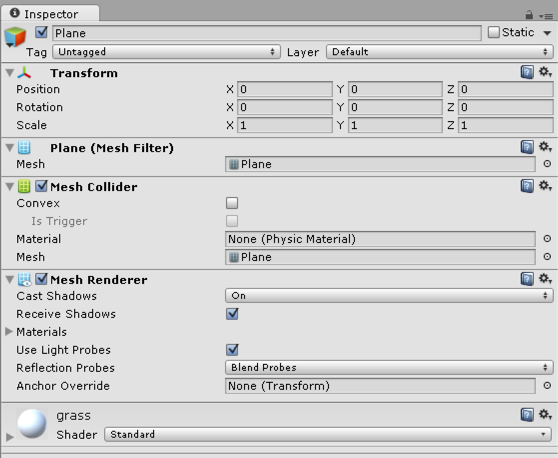
Now that we have our grass material, we’ll drag and assign it to our plane. Click and drag the material over to the hierarchical view and drop it on the Plane object. This will add it to the plane. Now click on the plane object in the hierarchical view and that will show the plane object inside of the inspector. At the bottom of the inspector, we should now see a grass object material.
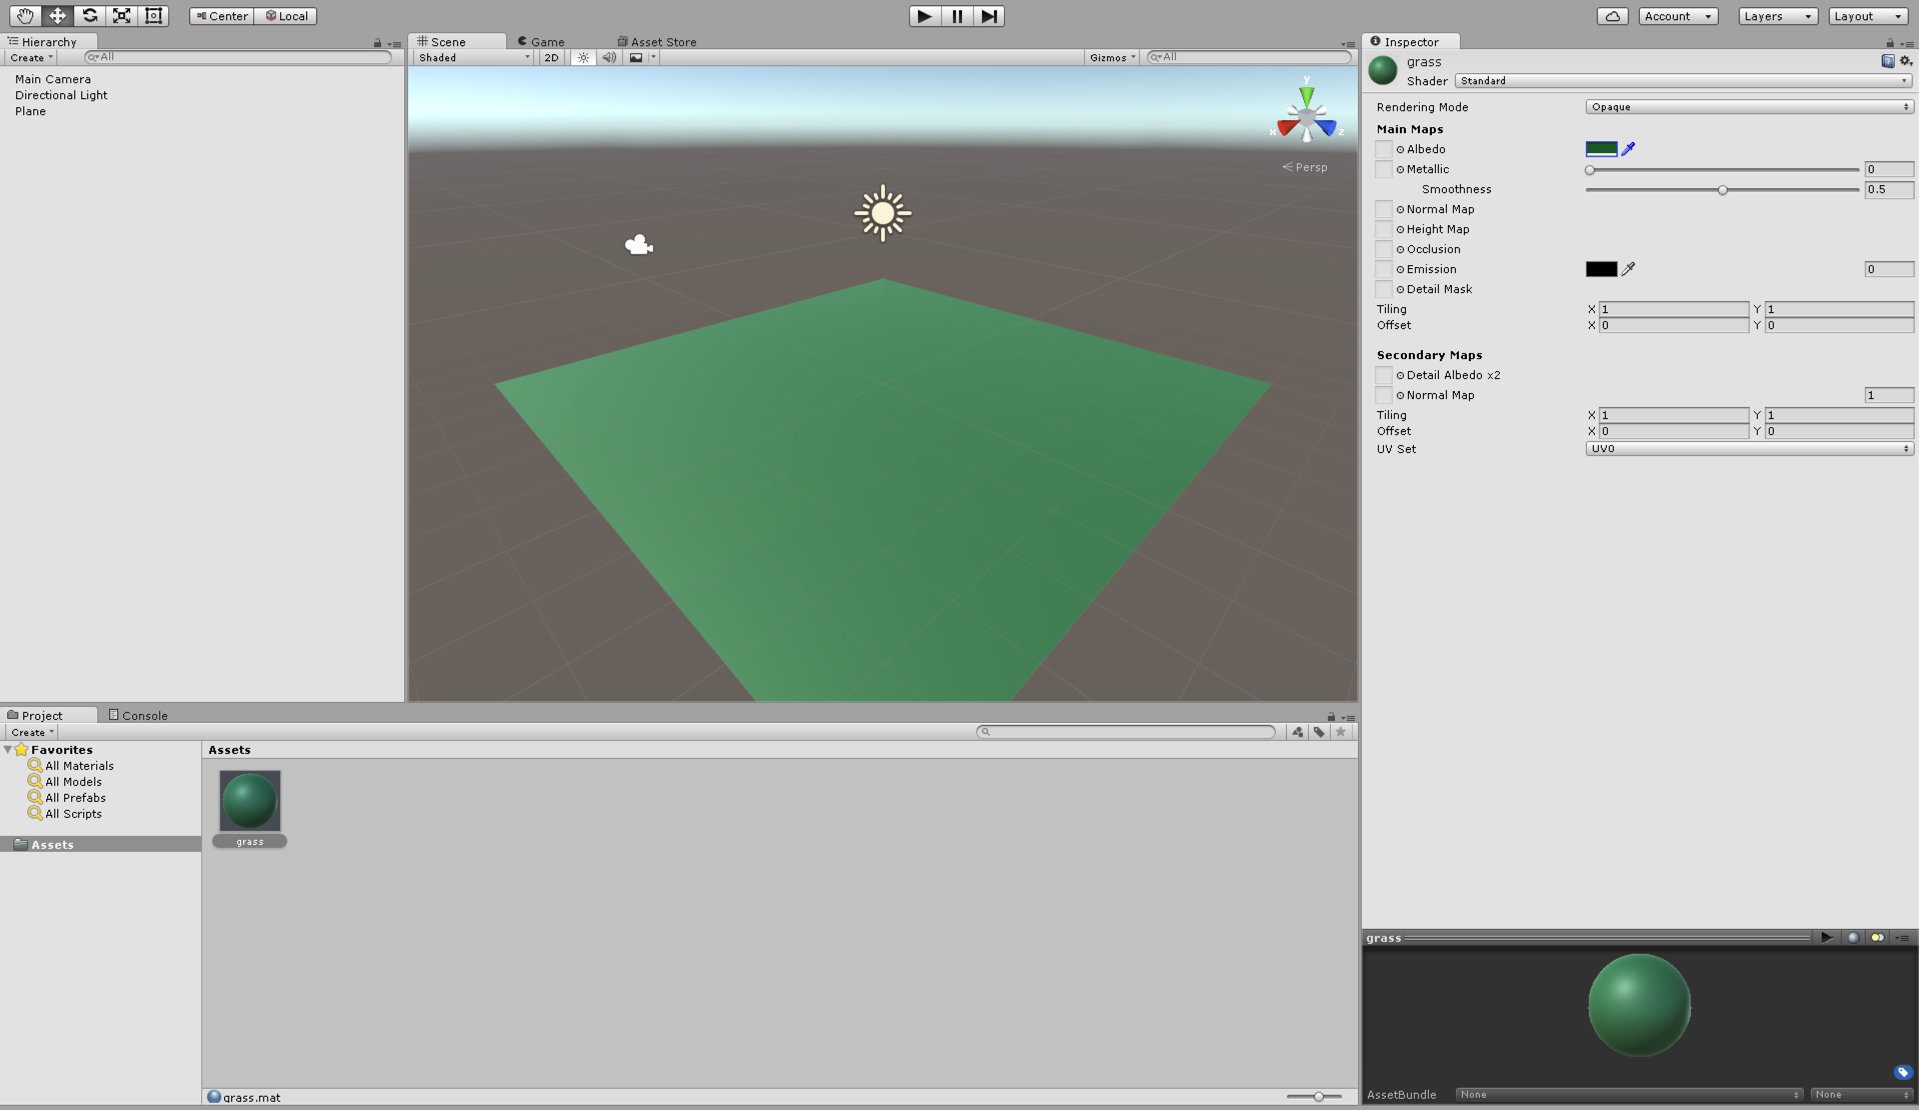
Let’s edit that material so it is more colorful and more grass-like than grey.
First we are going to click the dark gray arrow on the left of the grass material, which will expand that material and show a bunch of settings that we can change.
For now let’s just change the albedo color. We do this by clicking the color plate next to albedo, which will bring a color palette up for us to use. Let’s enter in Red 34, Green 86, Blue 34, and leave alpha at 255. This will give us a nice dark green to use as grass.

We should now see a nice green plane for our grass.
Now to edit the size of our field. We can once again select our plane, and in the inspector you will see at the top an object called Transform. This is the object the renderer uses as its base for position, rotation, and scale. For us to be able to resize the static plane object, we can scale the object. The scale includes 3 different values each of them relating to a dimensions, X Y Z. In unity we can think of those directions as x being width, y being height, and z being length. Unity uses a Y-up coordinate system, and since we are working with a plane, we only have two dimensions X and Z, for width and length. Let’s set both values to 10, making our plane 10 times bigger than before. This should give us plenty of room to move around.
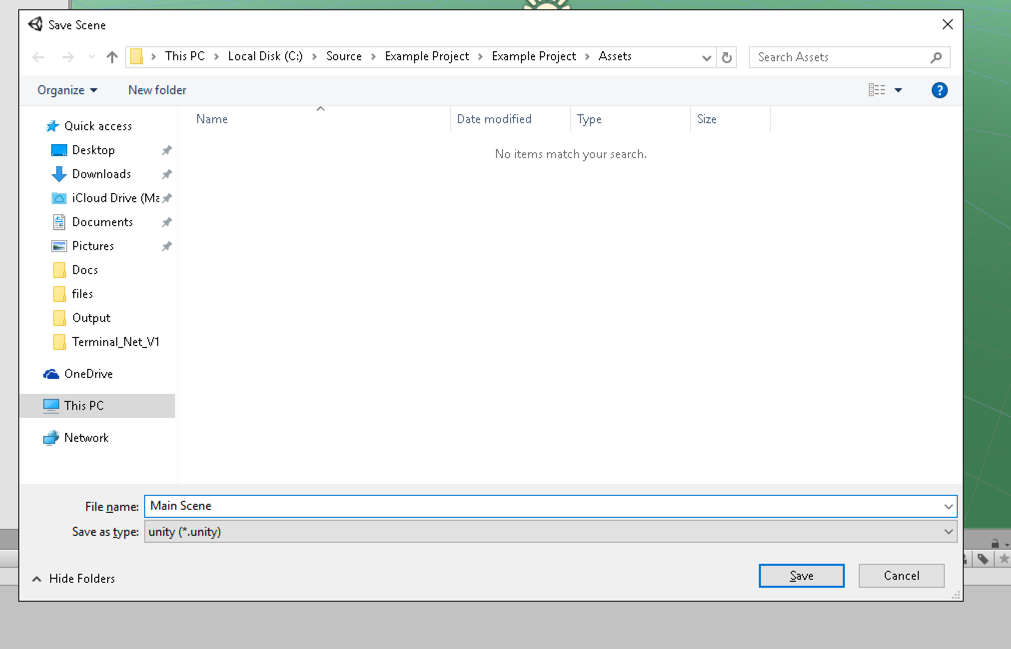
Now that we have some changes in our scene, let’s save the scene to our Assets folder allowing us to reuse and not lose our current work. We do this by going to the toolbar and clicking “File” -> “Save Scene.” Let’s save the scene with the name “Main Scene” in Assets.
Adding Objects To Our Scene
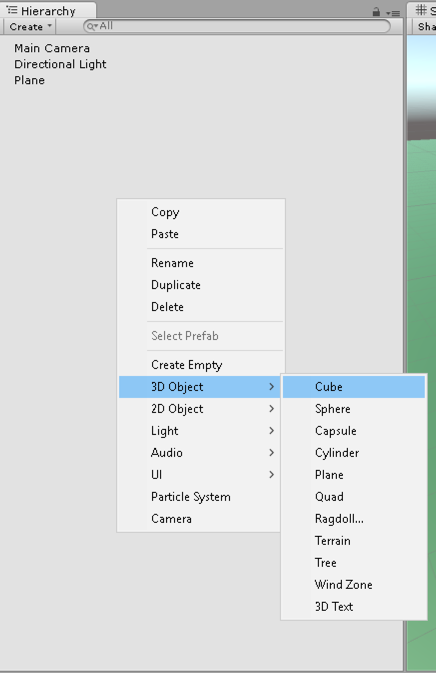
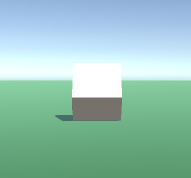
Now let’s add an object into the game world that will allow us to move around; it will act as our character. We will use a cube to represent this in the game. To add a cube, go down to the Hierarchy window and right-click 3D Object -> Cube.
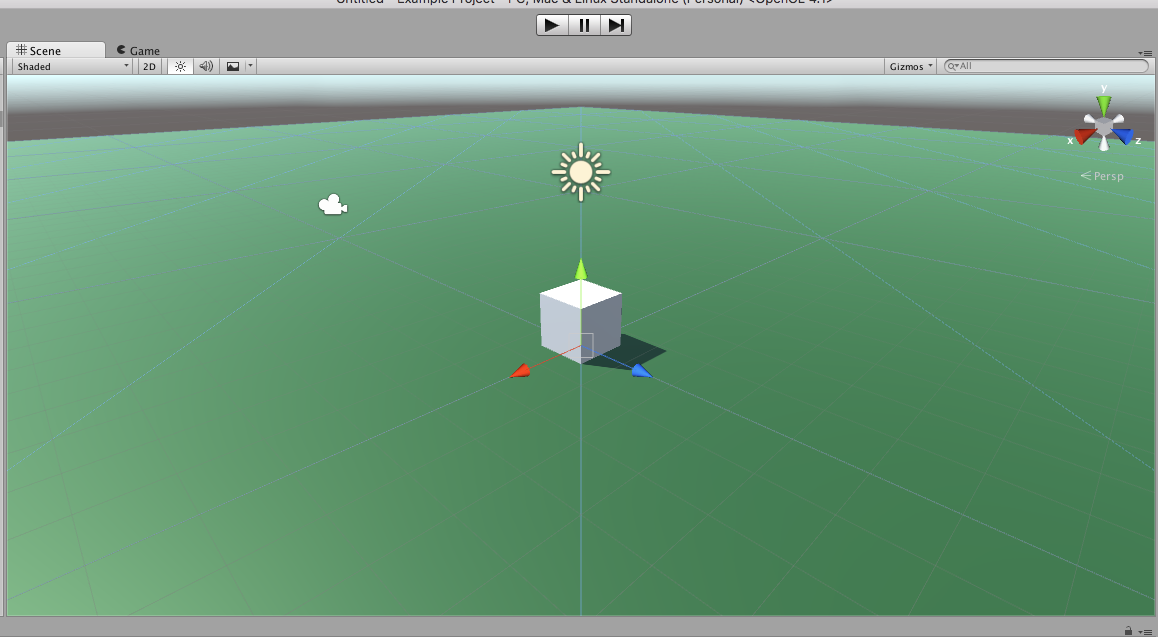
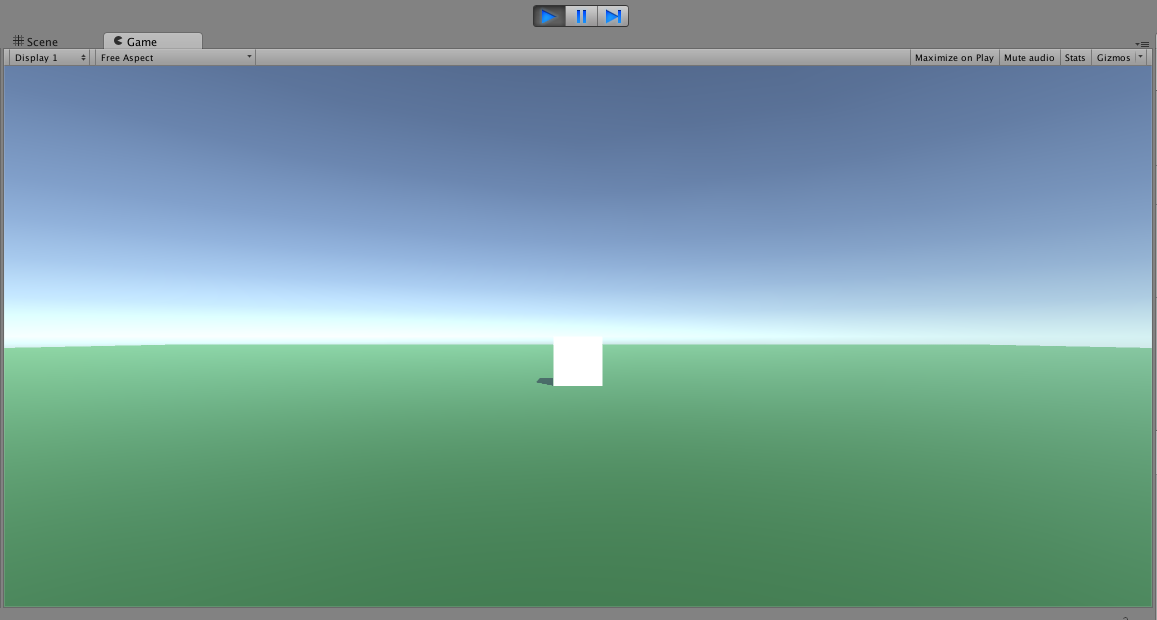
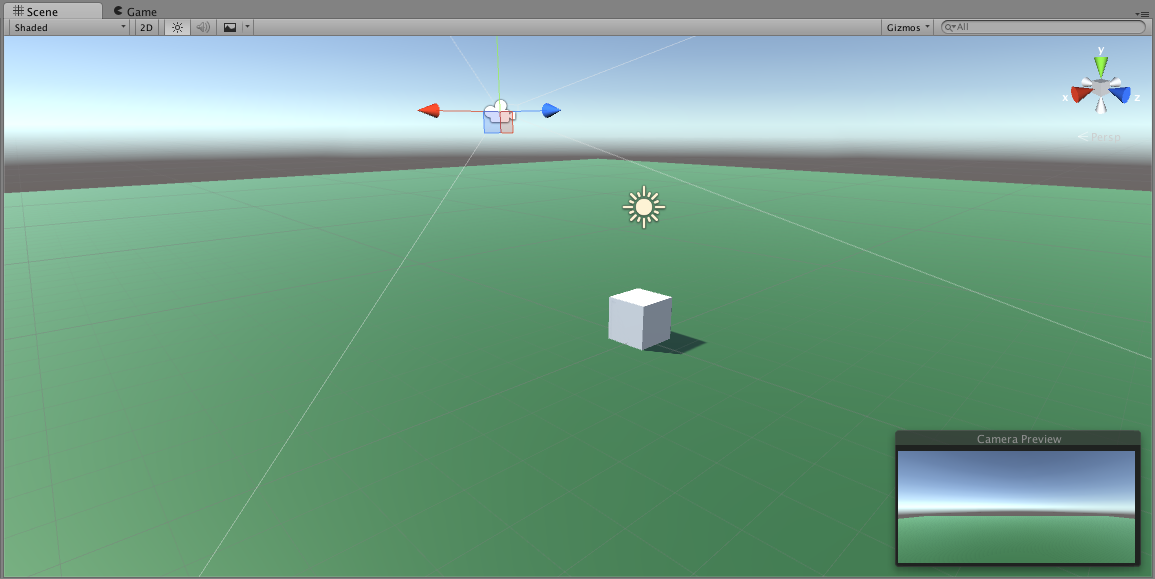
Our scene should look something like this which has our cube and plane in it.

Notice how our cube is halfway in the ground. That is because the cube point of origin, or point at which the objects transforms at, is at center.
We can offset this by moving the object along its Y-axis up 0.5, which is half of our 1x1x1 cube. We can make this change by selecting the cube object from our Hierarchy view and in the Inspector, find the Transform object. We will need to change the position of the object to be x = 0, y = 0.5, z = 0.

Unity3D works off the principle of nested objects or objective model. This means that everything is either a parent or child of another with the root being a “game object.” This allow us to nest things like meshes and materials into a single object which can have a single action or transform completed on it.
Finally let’s run the game world for the first time. At the top of the editor there are three buttons” Play, Pause, and Step. The Play button will start the game running using the default view (where the game window in underneath the scene view). The game view will come to the top.
Press Play. You should see a different look than what the scene view was showing before. That is because we weren’t looking through the camera before, we were looking through the Scene View Finder.
Go ahead and deselect Play. The editor will return to Scene View.
Now let’s look at the “Main Camera” Game Object. To do this, select “Main Camera” in the Hierarchy View. This is the object we use in the Game Viewer, or our main viewing camera. Like all other objects, it is nested in a game object with a default transform.

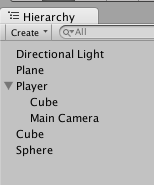
We can nest objects into the Main Camera object or nest the camera into other objects, so let’s do so. Create a new game object by right-clicking (without anything selected) inside the Hierarchy view and selecting “Create Empty.” This will add an empty game object (with transform) to our scene allowing us to use it as a “folder” in some sense. Let’s name it “Player.”
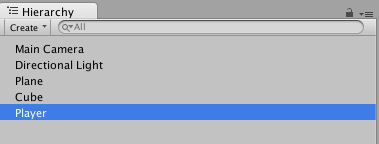
Now let’s click and drag the Main Camera and Cube game object onto the Player object, which will nest the two objects together under Player. The Main Camera and Cube object are now a child of the Player object (parent). This will allow us to act on the Player object and affect the two children. If we move the player object, the cube and main camera will move along with them without requiring us to write extra moves.
Finally Diving Into Some Code
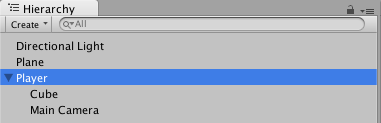
Let’s add a script to our Player object to be able to control it. To do so, select the “Player” object in the Hierarchy View, and in the Inspector, click “Add component.” From here type the name of the script you want to create “PlayerController” which will narrow the options down to new script. Click “New Script,” that will bring up another menu asking the name of the script and what language we want to select.
For this example, we will keep the name equal to PlayerController and select C# for the language. Click “Create and Add.” This will then add a nested script object onto your Player object and create the script in your Asset View.
Let’s open the script. Double-click on the script in your Asset Viewer, which will open either Visual Studio or MonoDevelop. For this example I am going to use MonoDevelop for our code and debugging.
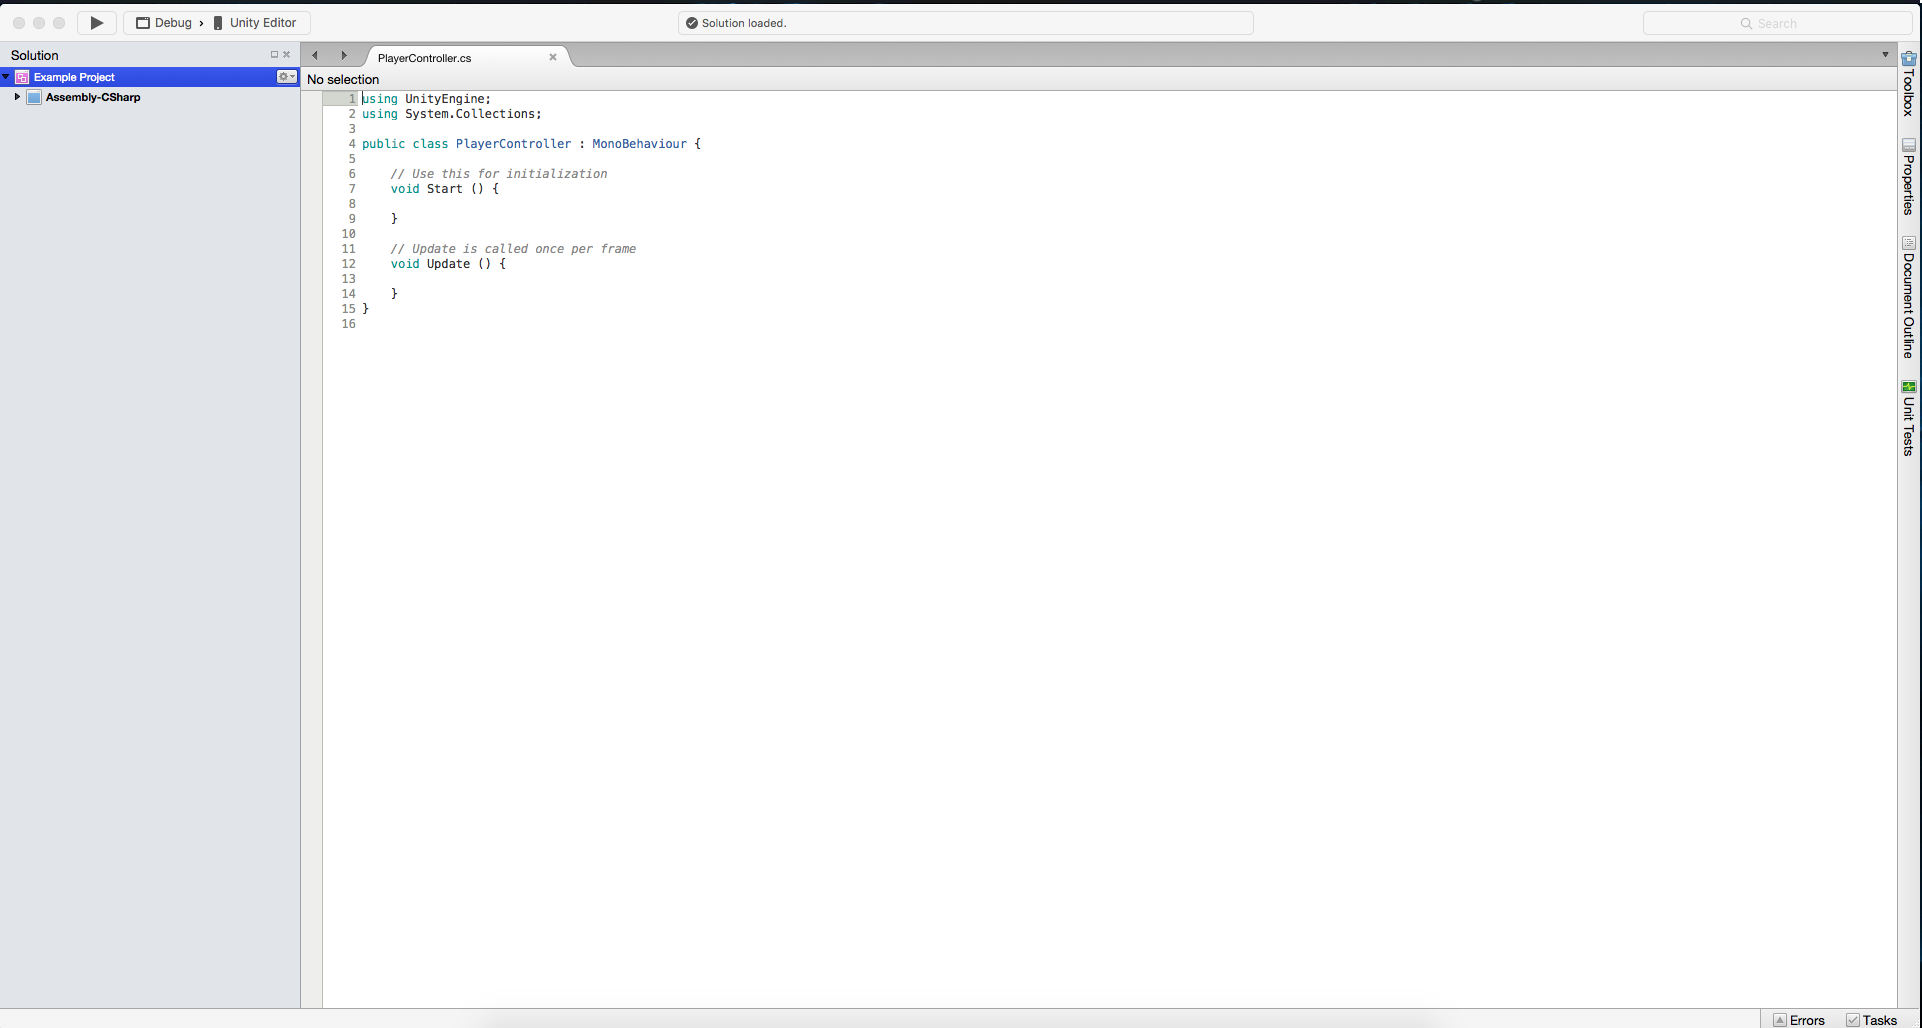
Inside this script there are a few things that Unity3d implemented for you as a start. First it includes two using statements first UnityEngine, which includes all libraries to interact with the Unity game engine and Unity Editor. The next is a System.Collections, which give access to Mono System Collections library. It then add a class PlayerController, which is the name of the script that is derived from the MonoBehaviour class which is part of the UnityEngine library as a base.
There are two default functions it adds: Start and Update. Start is just like it sounds, it is a function that is called at the start of the application once the object has been constructed. Update is fired every Unity cycle which is based off the Unity engine main loop.
Now let’s write some code to make our cube do something, like rotate.
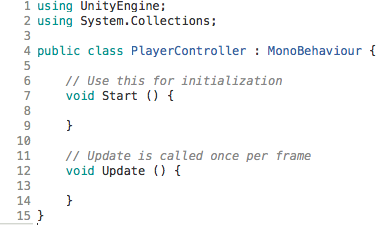
First we need to get a hold of the object we want to take action on. Since we want to cube to rotate but not the camera, we don’t want to just rotate the Player object. So let’s write some code to get the cube. To do so, add public GameObject cube above our State function; this will give us a object called cube in our class to work with.
This object has been created but we haven’t pointed it to anything yet. Let’s go back to the Unity editor and in the Hierarchy View select Player object. Now over in the Inspector, we now see that there is a Cube Object (Game Object) inside our nested script object.

This will allow us to drag our Cube object over to our game object to have controller over. Now we can select the Cube object underneath our Player object and drag it over to the Cube. Or you can click the circle next to the object and it will give you a list of objects in your Scene/Asset list to use.

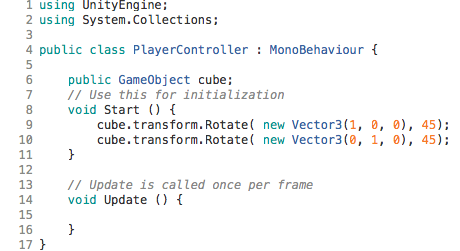
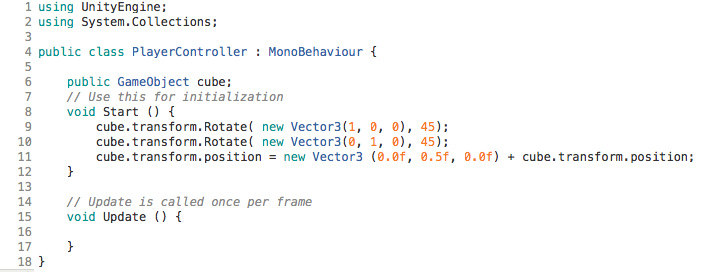
Now let’s go back to our code. Now in our code we can write to rotate it 45 degrees so it stands on a point of the cube. So in our Start function write the following code:
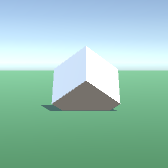
cube.transform.Rotate( new Vector3(1,0,0), 45). This code is taking our Cube object and acting on the Transform object telling it to Rotate. The first parameter is a vector3 which is a point in 3D space represented by three dimensions: X Y Z. Here we are saying in the first parameter that we want it to act on only the X dimension of the vector3. We are saying in the second parameter we are setting for the X dimension to angle 45 which should set it on an edge.
Let’s go back to the Unity editor and press Play:
Now to get it on a point? We can just add another rotation, but this time set the Y dimension only like
cube.transform.Rotate( new Vector3(0,1,0), 45). Again let’s go back to the Unity editor and press Play.
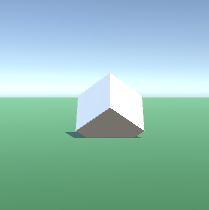
Oops, we are clipping through the ground; this was caused because we only rotated… we didn’t move the object when we rotated. So because the origin is still in the middle like before, we are only 0.5 away which is too close.
To fix this, let’s write some code to move the object up 0.50 units more. Let’s add this code just below the last rotation and add cube.transform.position = new Vector3(0,0.5,0). Now let’s go press Play again and see the results.
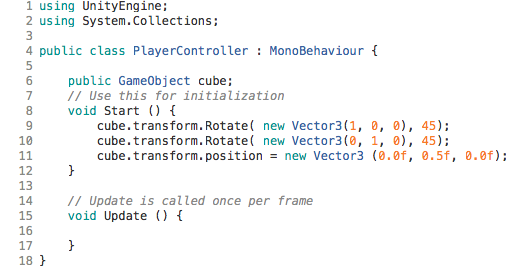
Didn’t seem to change much. That’s because when we set the position, we didn’t add our position; we set the position to a new Vector3 which just happen to be the same position we were in before. Now to fix this we can add the current position to the position we wanted it to transform to/from. Let’s add
+ cube.transform.position to the end of line 11 where we are setting our position. Cube.transform.position is the current position vector3 of the origin of our cube. Once we have done that, let’s Play again.
Moving It Around With Arrows
Now that we have some basics down on rotation and movement, let’s make a more player-like cube transaction where we can use the arrow keys on the keyboard to move him around.
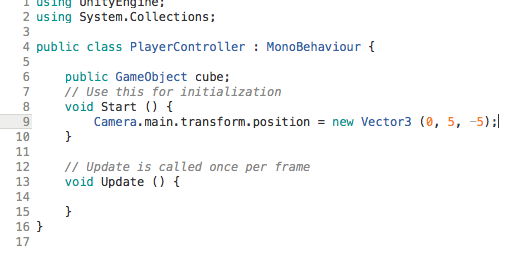
First let’s remove the code we wrote to rotate and move the position of your cube. Let’s now instead move the Camera to be more friendly on the world. Let’s go back to MonoDevelop and delete our cube code from start. Let’s also add some actions on the camera.
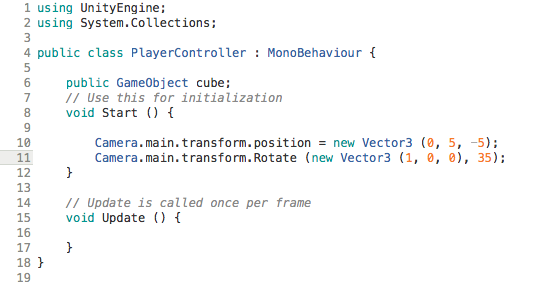
Now we could add a reference to the camera object like we did the cube object, but Unity3D automagically gives this already as part of the static object Camera. So let’s write a position transform directly to that object. Camera.main.transform.position = new Vector3(0,5,-5);. Unlike when we added the current position to the cube, we don’t need to do that here because we want to move the camera in relation to the players absolute position. Press Play.
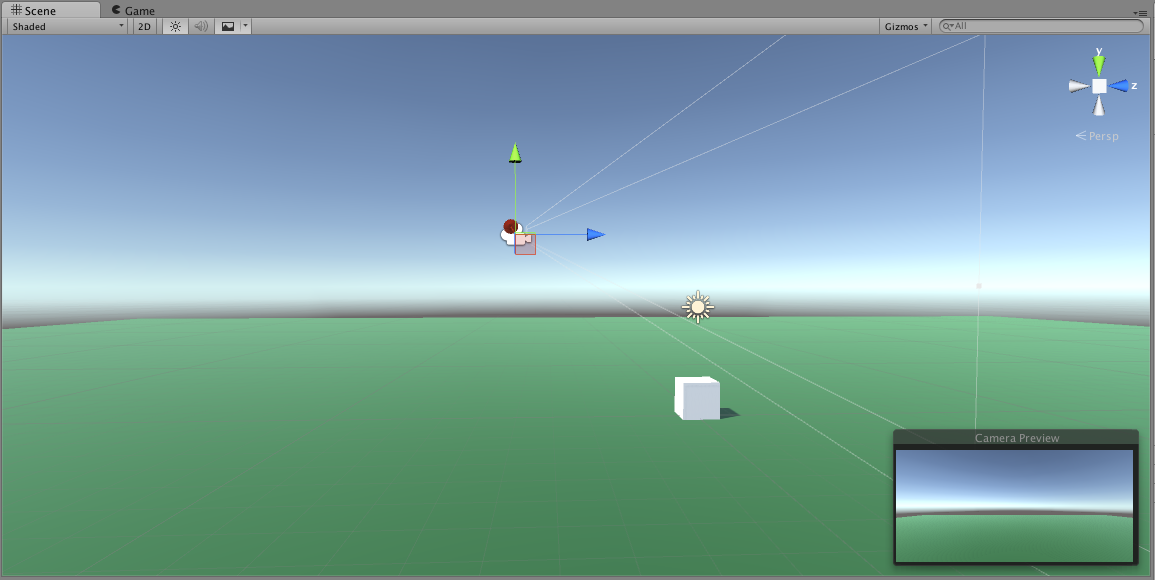
Now we no longer see our cube. Why is that? Well, we have no rotation. But to test and see why, let’s look back at the Scene Viewer while staying in Play mode.
We see four objects and a camera preview. The camera preview is a great tool that will allow you (while having the camera selected) to see a Static View of the Game View. We also see we have a camera, a cube, a directional light, and our green plane. If we select the Camera View, we see arrows and four white lines.
Those four white lines are the bounding box that the camera sees. A nice trick you can do is in the Hierarchy View, you can double-click on an object and in the Scene View it will center that object. This will make it loads easier to find. You can also scroll in and out to zoom. If you hold your right mouse button down while over the Scene View and use W S A D keys, you can then fly around the scene as needed.
If you zoom out and position yourself so that the camera red arrow is pointing right at the you, you can see that the bounding box is no longer encompassing our cube, therefore we would not be able to see it.
To fix this, let’s write some code to rotate our camera down to about 35 degrees so we have a bird’s eye view. After our camera position code, let’s add a rotate:
Camera.main.transform.Rotate(new Vector3(1,0,0), 35);. This will rotate our camera in the X axis downward 35 degrees pointing it at our cube. Let’s now go back to Unity Editor and press Play again.
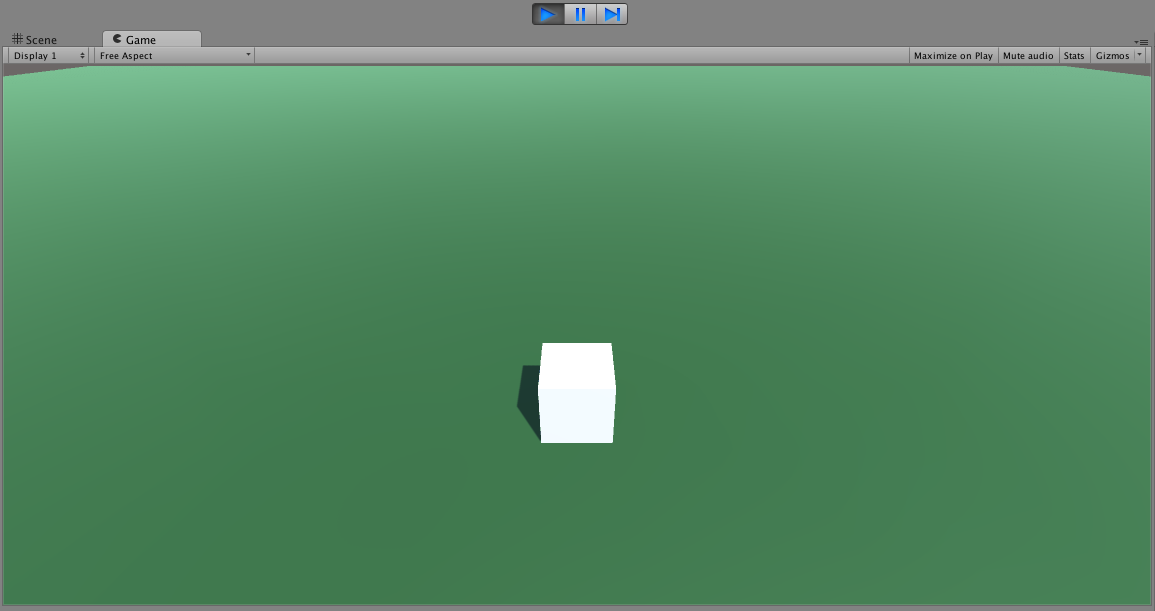
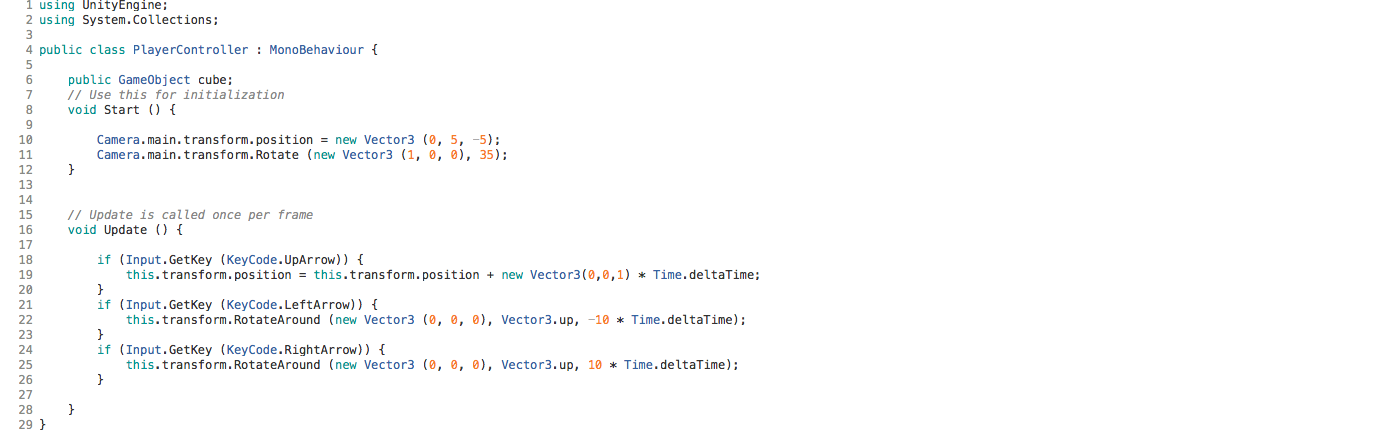
That’s more like it. Now we can see our cube and is more bird’s-eye game-like. Now let’s get back to our moving with the arrows. Just like before, we want to do this on every update so let’s add some code to the update function. Let’s first write code to detect we have pressed down the forward(up) arrow key.
if(Input.GetKey(KeyCode.UpArrow)){
	This.transform.position = this.transform.position + new Vector3(0,0,1) * Time.deltaTime;
}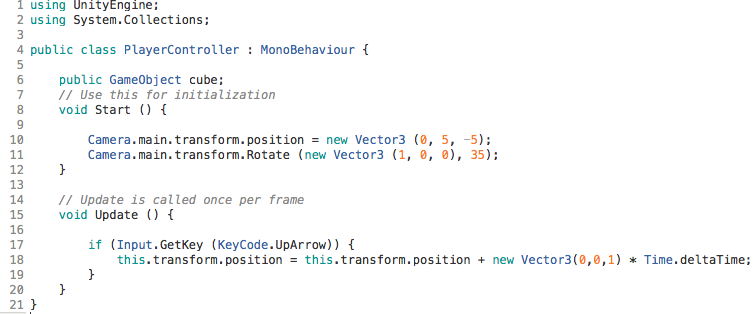
Now we move forward when pressing and holding down the Up-Arrow key. How this is working is that we are setting the this.transform position, which is to parent level game object we created called “Player” and we take the current position and then add one unit forward but then multiply that by the time passed between each frame. We can increase or decrease this by changing the added vector.
Let’s add some more objects in the work to get a Ref to be able to see while we move around. Let’s go back to the editor and make sure we are not playing. Once that is true, then go to the Hierarchy View with nothing selected, right-click, add another cube, and a sphere. The object may not be added at world origin so let’s select each object we added in the Hierarchy View and set transform back to world origin(0,0,0).
Now let’s use the editor instead of code to move the static objects we just added into place. We will do that by selecting one object in the Hierarchy View, and then while in the Scene View, drag that object around. Let’s put the cube some where near the -5,3,9 area so it is in the view of the camera, and the sphere in the 2,2,2 area.

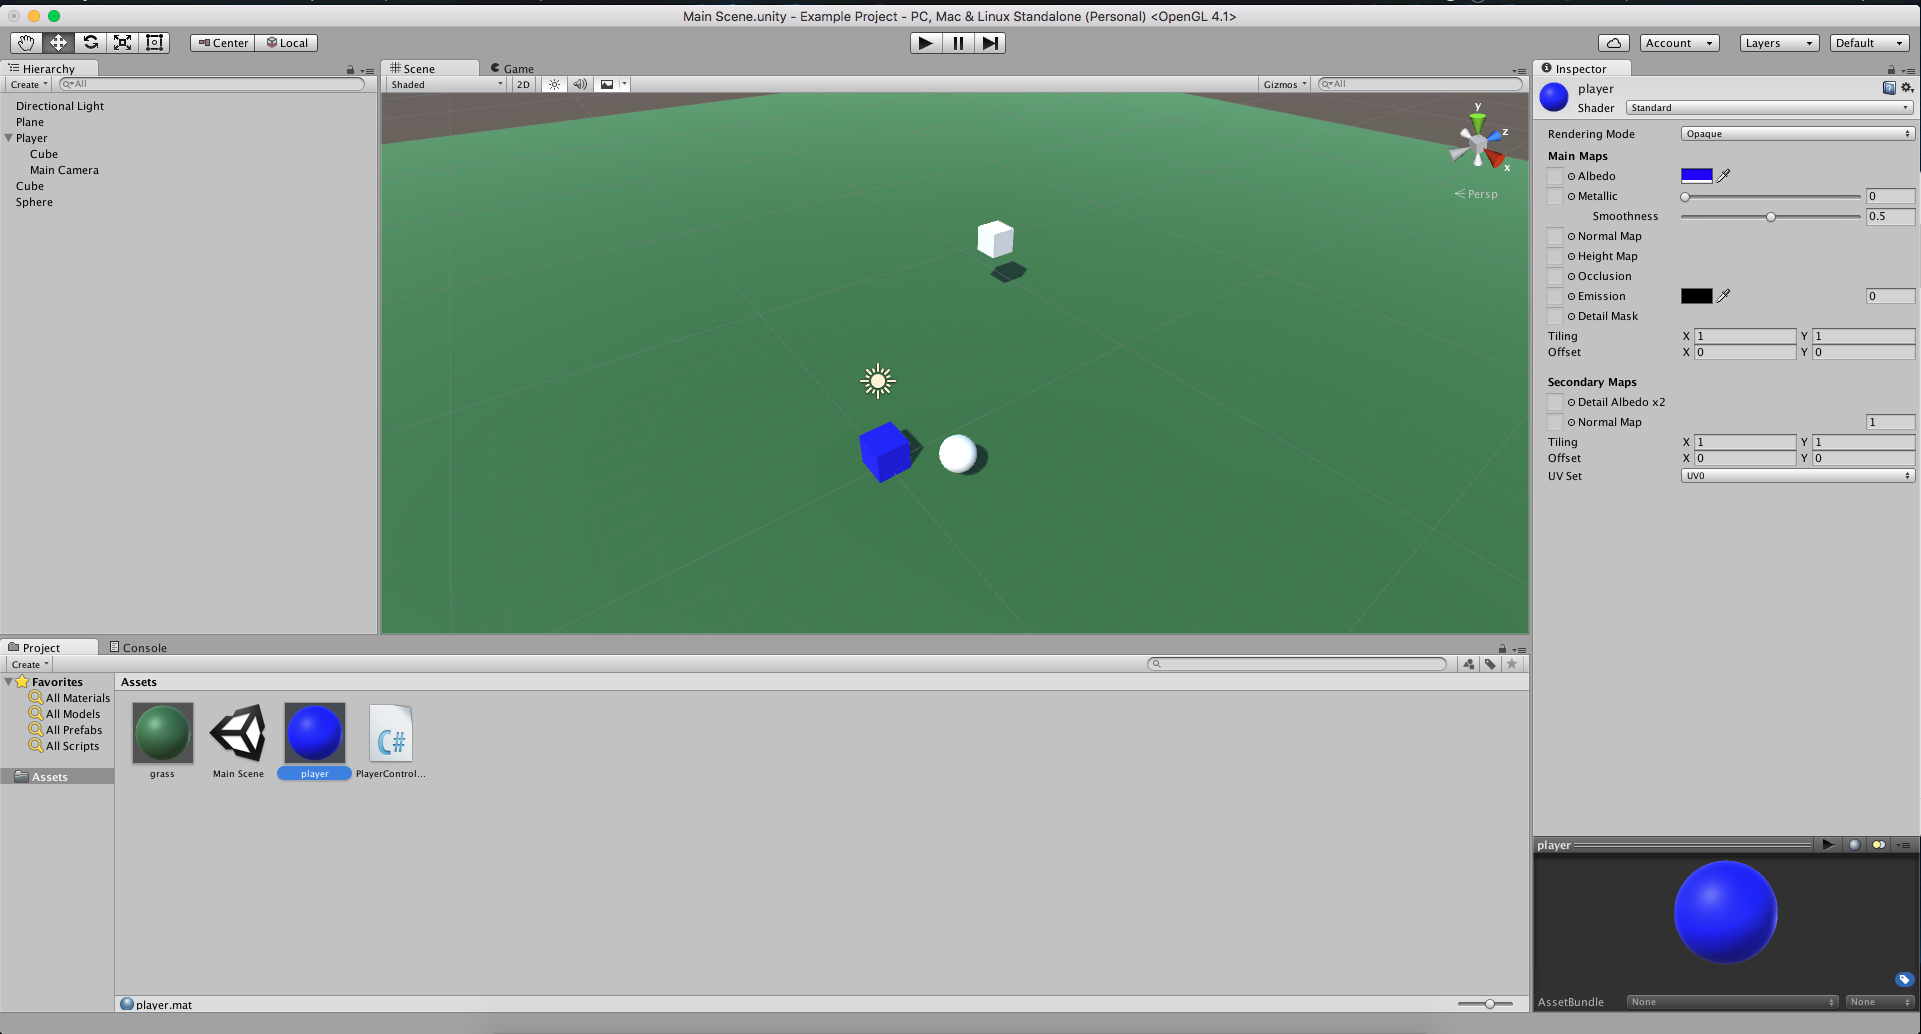
Let’s give our Player Cube a material so we can see which one is ours. Go to the project window and right-click “Create Material.” Set that material albedo to blue (0000FFFF) and drag that material to our Cube inside of our Player Object.
Now Press Play. Once the game view appears, press the up arrow on your keyboard. We should now see our cube move forward.

Adding Physics To Objects
Now let’s add some physics into these objects. To add physics we need to go to the Unity3d editor and select the Sphere object. Then go over to the inspector. At the bottom of the inspector there is an “Add Component” button, click that, and then select Physics -> Rigidbody. This adds the object to the physics engine. Let’s do the same process with the white Cube, and then to our parent Player game object. Afterwards, press Play. Now we should see the ball and cube fall as if gravity was acting on them.
So to make it look really interesting, let’s add some more code onto our player controller that will allow us to turn and go backwards. In the Assets Window, double-click our PlayerController script which will bring MonoDevelop back up and allow us to add some more code.
Let’s add a couple new lines of code so that when we press left or right arrow key the player object turns left or right.
if(Input.GetKey(KeyCode.LeftArrow)){
	this.transform.RotateAround( new Vector3(0,0,0), Vector.up, -10 * Time.deltaTime);
}
if(Input.GetKey(KeyCode.RightArrow)){
	this.transform.RotateAround( new Vector3(0,0,0), Vector.up, 10 * Time.deltaTime);
}
Let’s press Play and see what happens. This should allow us to rotate and move forward and back but once we turn the cube forward, it will no longer be in the direction we are facing. To fix this we will need to change some code we had written for the movement above.
Change
This.transform.position = this.transform.position + new Vector3(0,0,1) * Time.deltaTime;

To
This.transform.position = this.transform.position + (this.transform.rotation * new Vector3(0,0,1)) * Time.deltaTime;
This will multiply the rotation by the direction giving us a new vector3 that will be the new forward direction.

Now press Play. We should be able to go forward and turn left and right. Now you should be able to run into the sphere and white cube pushing them away based off of the rigid body physics we applied.
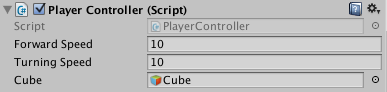
Movement is really slow. Let’s add a couple of new editable variables to our code that will allow us to tweak movement speeds via the editor. In our code above our public GameObject cube, let’s add two new floats and make them public. By making them public, it will add a field in the Unity editor to allow you to edit it via the inspector.
public float forwardSpeed = 10.0f;
public float turningSpeed = 10.0f;
Now that we have those controls, let’s add those fields into our movement code replacing our hard coded values.
if(Input.GetKey(KeyCode.UpArrow)){
this.transform.position = this.transform.position + (this.transform.rotation * new Vector3(0,0,forwardSpeed)) * Time.deltaTime;
}
if(Input.GetKey(KeyCode.LeftArrow)){
	this.transform.RotateAround( new Vector3(0,0,0), Vector.up, turningSpeed * Time.deltaTime);
}
if(Input.GetKey(KeyCode.RightArrow)){
	this.transform.RotateAround( new Vector3(0,0,0), Vector.up, turningSpeed * Time.deltaTime);
}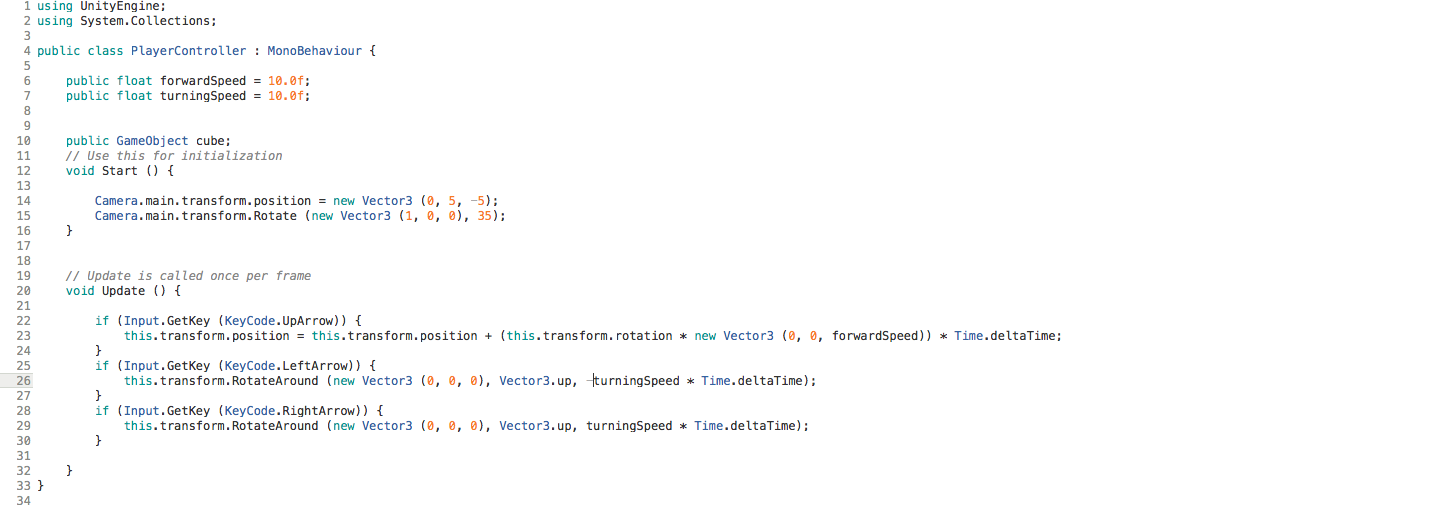
Now if you haven’t noticed, there is something weird with turning. It’s like it turns around the world or around the origin point. That is because there is a new function we used called RotateAround, instead of what we used before (which is just Rotate). The first parameter of the RotateAround function sets the location of what you are rotating around.
We put new Vector3(0,0,0) which is world center/origin. Let’s instead make that the origin of our object so when we turn our camera it is via the center of the object. Let’s change our code to look like this:
if(Input.GetKey(KeyCode.LeftArrow)){
	this.transform.RotateAround( this.transform.position, Vector.up, turningSpeed * Time.deltaTime);
}
if(Input.GetKey(KeyCode.RightArrow)){
	this.transform.RotateAround( this.transform.position, Vector.up, turningSpeed * Time.deltaTime);
}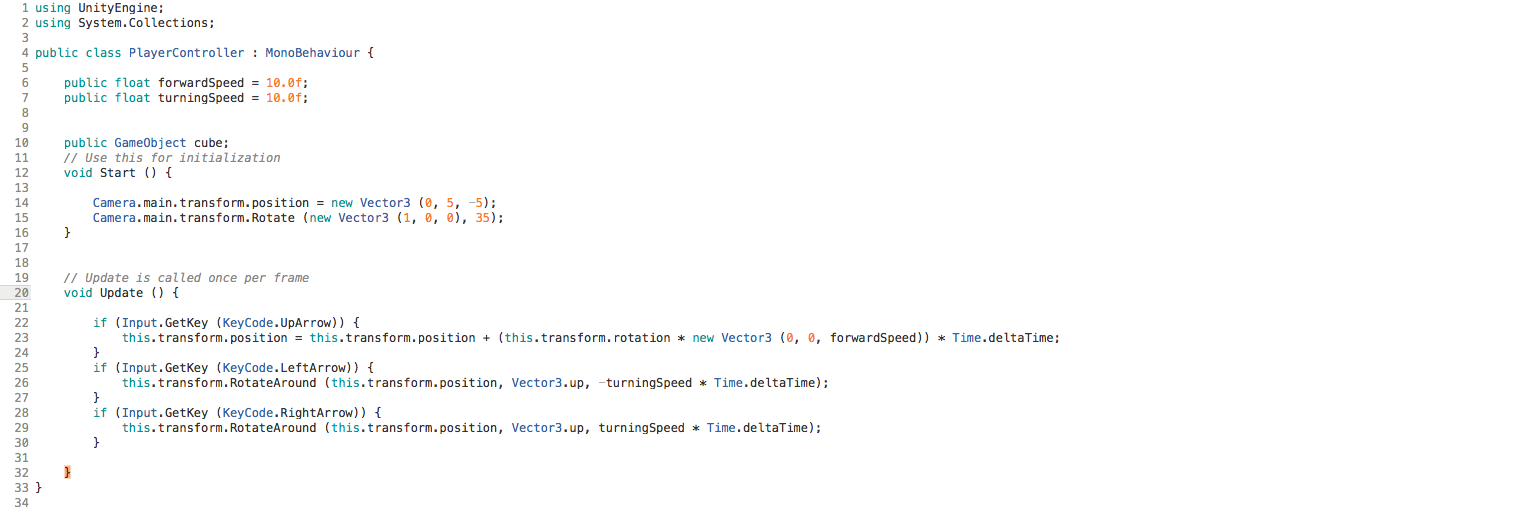
Now press Play and all should be normal.
Part Two Wrap Up
Woohoo! Now you should have a better understanding of how to control Unity3D using C#.
Stay tuned for part three scheduled for next week. The third and final post in this series will delve into actually making these changes into a simple game using Unity3D.
| Reference: | Controlling Unity3D Using C#, Part 2 from our JCG partner Greg Yotz at the Keyhole Software blog. |
