Building Identity Management, including authentication and authorization? Try Stormpath! Our REST API and robust Java SDK support can eliminate your security risk and can be implemented in minutes. Sign up, and never build auth again!
We just released a major upgrade of our Java SDK, which now includes Java Webapp (Servlet 3.0+) support with a ton of user automation. Just drop our Servlet plugin into your Java web application and boom – instant user management with little to no coding required.
This post is a quick tutorial to show you just how quickly you can build a Java web app with a complete set authentication and user management features and user interfaces with Stormpath.
If you’ve built a Java web application, you know the time and pain involved in building out proper authentication and user management.
Even if you use a great framework like Apache Shiro or Spring Security, there’s still a lot of boring UI work and high risk backend work.
At a minimum, you have to build UI screens for registration, login, and forgot password in addition to controllers processing each view, logout handlers, etc.
And then you have to worry about security issues like password hashing schemes, updating hashing algorithms as computation improves, cross-site request forgery (CSRF) protection, cross-site scripting (xss) attacks, and more.
Stormpath hooks into typical Java web applications and gives developers all the authentication, authorization, and user security out-of-the-box so you can get on with what you really care about – your application. In fact, you get full user interfaces without writing a single line of code. Awesome.
By the time you’re done with this tutorial (less than 15 minutes), you’ll have a fully-working Java web application. We will focus on our Stormpath-Servlet plugin that has a ton of user automation. You just drop a plugin into your web application and boom – instant user management with little to no coding required.
What You’ll Build in this Java Servlet Tutorial:
You’ll build a simple Java web application using the standard Servlet 3+ and JSP APIs. When you’re done, you’ll be able to:
- Create (register) a new user account with email and password
- Validate the new user account’s registered email address
- Login (authenticate) to your new account with email and password
- Display a customizable user account dashboard after login, only accessible to logged-in users
- Redirect unauthenticated users who try to access the dashboard to the login page
- Allow a logged-in user to logout
- Allow a user to reset their password via an email-based forgot password workflow
And here’s the best part – for all of the above, you won’t have to write a single line of code – just some configuration!
But, just for fun, we will code a simple welcome page and a user account dashboard page that are likely to exist in real applications.
All the code for this example is in the Stormpath Java SDK project.
Sound good? Great! Let’s get started!
What You’ll Need: Stormpath, JDK, Maven or Gradle
- About 15 minutes of time
- A Stormpath API Key to communicate with Stormpath
- JDK 1.6 or later
- Maven 3.0+ or Gradle 2.2+
How to Complete this Guide
You can start from scratch and complete each step or you can skip the basic setup steps, if you’re already set up with a Stormpath API Key and built your project with Maven/Gradle.
Start the Tutorial from Scratch
If you’d like to start from scratch, you’ll need to first get a Stormpath API Key.
Then you’ll need to Build With Maven or Build With Gradle, depending on your preferences.
Download a Stormpath API Key
All communication with Stormpath must be authenticated with an API Key.
- If you haven’t already, sign up for Stormpath for free. You’ll be sent a verification email.
- Click the link in the verification email.
- Log in to the Stormpath Admin Console using the email address and password you used during registration.
- Click the Manage API Keys link on the middle-right of the dashboard.
- Under Security Credentials, click Create API Key.This will generate your API Key and download it to your computer as an
apiKey.propertiesfile. - Save the file in your home directory in the following location:
~/.stormpath/apiKey.propertieson Unix, Linux and Mac OSC:\Users\YOUR_USERNAME\.stormpath\apiKey.propertieson Windows
- Change the file permissions to ensure only you can read this file. For example:
chmod go-rwx ~/.stormpath/apiKey.properties
- To be safe, you might also want to prevent yourself from accidentally writing/modifying the file:
chmod u-w ~/.stormpath/apiKey.properties
On Windows, you can set the API Key file permissions similarly.
Choose a directory that you wish to use for your project. Within that directory, create the following maven pom.xml file:
pom.xml
<?xml version="1.0" encoding="UTF-8"?>
<project xmlns="http://maven.apache.org/POM/4.0.0" xmlns:xsi="http://www.w3.org/2001/XMLSchema-instance"
    xsi:schemaLocation="http://maven.apache.org/POM/4.0.0 http://maven.apache.org/maven-v4_0_0.xsd">
    <modelVersion>4.0.0</modelVersion>

    <groupId>com.stormpath.samples</groupId>
    <artifactId>stormpath-webapp-tutorial</artifactId>
    <version>0.1.0</version>
    <packaging>war</packaging>

    <dependencies>
        <dependency>
            <groupId>com.stormpath.sdk</groupId>
            <artifactId>stormpath-servlet-plugin</artifactId>
            <version>1.0.RC9.2</version>
        </dependency>
        <dependency>
            <groupId>javax.servlet</groupId>
            <artifactId>javax.servlet-api</artifactId>
            <version>3.1.0</version>
            <scope>provided</scope>
        </dependency>
        <dependency>
            <groupId>javax.servlet</groupId>
            <artifactId>jstl</artifactId>
            <version>1.2</version>
        </dependency>
        <dependency>
            <groupId>ch.qos.logback</groupId>
            <artifactId>logback-classic</artifactId>
            <version>1.1.7</version>
            <scope>runtime</scope>
        </dependency>
    </dependencies>

    <build>
        <plugins>
            <plugin>
                <groupId>org.apache.tomcat.maven</groupId>
                <artifactId>tomcat7-maven-plugin</artifactId>
                <version>2.2</version>
                <configuration>
                    <path>/</path>
                </configuration>
            </plugin>
        </plugins>
    </build>

</project>Choose a directory that you wish to use for your project. Within that directory, create the following build.gradle file:
build.gradle
buildscript {
    repositories {
        jcenter()
    }

    dependencies {
        classpath 'com.bmuschko:gradle-tomcat-plugin:2.0'
    }
}

apply plugin: 'java'
apply plugin: 'war'
apply plugin: 'com.bmuschko.tomcat'

sourceCompatibility = 1.6
version = '0.1.0'
war.baseName = 'stormpath-webapp-tutorial'

repositories {
    mavenLocal()
    mavenCentral()
}

dependencies {
    compile group: 'com.stormpath.sdk', name: 'stormpath-servlet-plugin', version: '1.0.RC9.2'
    compile group: 'javax.servlet', name: 'jstl', version: '1.2'
    providedCompile group: 'javax.servlet', name: 'javax.servlet-api', version: '3.1.0'
    runtime group: 'ch.qos.logback', name: 'logback-classic', version: '1.1.7'

    def tomcatVersion = '7.0.57'
    tomcat "org.apache.tomcat.embed:tomcat-embed-core:${tomcatVersion}",
            "org.apache.tomcat.embed:tomcat-embed-logging-juli:${tomcatVersion}"
    tomcat("org.apache.tomcat.embed:tomcat-embed-jasper:${tomcatVersion}") {
        exclude group: 'org.eclipse.jdt.core.compiler', module: 'ecj'
    }
}

tomcatRun.contextPath = '/'
tomcatRunWar.contextPath = '/'

task wrapper(type: Wrapper) {
    gradleVersion = '2.2.1'
}
Skip The Tutorial Basics
Add the dependency to your web app (.war) project:
Maven:
<dependency>
    <groupId>com.stormpath.sdk</groupId>
    <artifactId>stormpath-servlet-plugin</artifactId>
    <version>1.0.RC9.2</version>
</dependency>
Gradle:
dependencies {
  compile 'com.stormpath.sdk:stormpath-servlet-plugin:1.0.RC9.2'
}
Build the App’s Directory Structure
We’ll need to create some files in various directories. Ensure the following directory structure exists under your project directory:
-- src/
 |-- main/
   |-- java/
   |   |-- tutorial/
   |-- webapp
     |-- WEB-INF/
       |-- jsp/
       |-- tags/
For example, on *nix operating systems:
mkdir -p src/main/java/tutorial
mkdir -p src/main/webapp/WEB-INF/jsp
mkdir -p src/main/webapp/WEB-INF/tags
Create a Page Template for your App with JSP tags
We’ll likely want our web app’s pages to have the same look and feel. We can do this easily using a page template. And because JSP 2.0 supports page templates automatically via JSP Tags, there is no need to pull in additional template libraries. Let’s create a new template tag file with the following contents:
src/main/webapp/WEB-INF/tags/page.tag
<%@tag description="Default Page template" pageEncoding="UTF-8"%>
<%@taglib uri="http://java.sun.com/jsp/jstl/core" prefix="c"%>
<%@taglib prefix="fn" uri="http://java.sun.com/jsp/jstl/functions" %>
<%@attribute name="title" required="false" %>

<!DOCTYPE html>
<html>
<head>
    <meta charset="utf-8">
    <meta http-equiv="X-UA-Compatible" content="IE=edge">
    <meta name="viewport" content="width=device-width, initial-scale=1">
    <title>Stormpath Webapp Sample | <c:out value="${!empty title ? title : ''}"/></title>
    <link href="//maxcdn.bootstrapcdn.com/bootstrap/3.3.2/css/bootstrap.min.css" rel="stylesheet">
    <%-- <link href="${pageContext.request.contextPath}/assets/css/style.css" rel="stylesheet" --%>
    <!-- HTML5 shim and Respond.js for IE8 support of HTML5 elements and media queries -->
    <!-- WARNING: Respond.js doesn't work if you view the page via file:// -->
    <!--[if lt IE 9]>
    <script src="https://oss.maxcdn.com/html5shiv/3.7.2/html5shiv.min.js"></script>
    <script src="https://oss.maxcdn.com/respond/1.4.2/respond.min.js"></script>
    <![endif]-->
    <!-- jQuery (necessary for Bootstrap's JavaScript plugins) -->
    <script src="https://ajax.googleapis.com/ajax/libs/jquery/1.11.2/jquery.min.js"></script>
    <script src="//maxcdn.bootstrapcdn.com/bootstrap/3.3.2/js/bootstrap.min.js"></script>
</head>
<body>
    <div class="container">

        <div class="header">

            <ul class="nav nav-pills pull-right">
                <c:set var="uri" value="${requestScope['javax.servlet.forward.request_uri']}"/>
                <li<c:if test="${fn:endsWith(uri,'/')}"> class="active"</c:if>><a href="${pageContext.request.contextPath}/">Home</a></li>

                <%-- Change upper right context menu depending on if the user is logged in or not: --%>
                <c:choose>
                    <c:when test="${!empty account}">
                        <li<c:if test="${fn:endsWith(uri,'dashboard')}"> class="active"</c:if>><a href="${pageContext.request.contextPath}/dashboard">Dashboard</a></li>
                        <li><a href="${pageContext.request.contextPath}/logout">Logout</a></li>
                    </c:when>
                    <c:otherwise>
                        <li<c:if test="${fn:endsWith(uri,'login')}"> class="active"</c:if>><a href="${pageContext.request.contextPath}/login">Login</a></li>
                    </c:otherwise>
                </c:choose>
            </ul>

            <h3 class="text-muted">Stormpath Webapp Sample</h3>

        </div>

        <jsp:doBody/>

    </div>
</body>
</html>
This is just a standard JSP file with a .tag extension instead of a .jsp extension. The element will be replaced with the page content for any page that uses this template.
Write a Home Controller
For security reasons, we like to ensure that JSP files themselves are never directly accessible during a request. Instead, we want a Controller to process the request and then render the JSP to the request. To do this, we’ll create a simple ‘Home’ controller that renders the internal home.jsp page:
src/main/java/tutorial/HomeController.java:
package tutorial;

import javax.servlet.ServletException;
import javax.servlet.http.HttpServlet;
import javax.servlet.http.HttpServletRequest;
import javax.servlet.http.HttpServletResponse;
import java.io.IOException;

public class HomeController extends HttpServlet {

    public static final String VIEW_TEMPLATE_PATH = "/WEB-INF/jsp/home.jsp";

    @Override
    protected void doGet(HttpServletRequest req, HttpServletResponse resp) throws ServletException, IOException {
        req.getRequestDispatcher(VIEW_TEMPLATE_PATH).forward(req, resp);
    }
}
src/main/webapp/WEB-INF/jsp/home.jsp:
<%@ page session="false"%>
<%@ page contentType="text/html;charset=UTF-8" pageEncoding="UTF-8" %>
<%@ taglib prefix="t" tagdir="/WEB-INF/tags" %>
<%@ taglib prefix="c" uri="http://java.sun.com/jsp/jstl/core" %>

<t:page>
    <jsp:attribute name="title">Welcome!</jsp:attribute>
    <jsp:body>
        <div class="jumbotron" id="welcome">

            <h1>Welcome to the Stormpath Webapp Sample Application!</h1>

            <p class="lead">
                <br/>
                <br/>
                Welcome to this <i>gloriously simple</i>
                <a href="https://docs.stormpath.com/java/servlet-plugin/">Stormpath Java Webapp</a> sample application!
                <ul>
                    <li>First, take a look through this very basic site.</li>
                    <li>Then, check out this project's source code
                        <a href="https://github.com/stormpath/stormpath-sdk-java/examples/servlet">on GitHub</a>.</li>
                    <li>Lastly, integrate Stormpath into your own sites!</li>
                </ul>
            </p>

            <br/>
            <br/>

            <h2>What This Sample App Demonstrates</h2>

            <br/>
            <br/>

            <p>This simple application demonstrates how easy it is to register, login, and securely authenticate
                users on your website using the Stormpath Servlet Plugin.</p>

            <p>Not a Stormpath user yet? <a href="https://stormpath.com">Go signup now!</a></p>

            <br/>
            <br/>

            <p class="bigbutton"><a class="bigbutton btn btn-lg btn-danger"
                                    href="${pageContext.request.contextPath}/register" role="button">Register</a></p>
        </div>
    </jsp:body>
</t:page>
Finally, we’ll need to add a web.xml file to tell the servlet container to invoke our Home Controller when the web app’s default path is accessed:
src/main/webapp/WEB-INF/web.xml
<?xml version="1.0" encoding="UTF-8"?>
<web-app version="3.1"
         xmlns="http://xmlns.jcp.org/xml/ns/javaee"
         xmlns:xsi="http://www.w3.org/2001/XMLSchema-instance"
         xsi:schemaLocation="http://xmlns.jcp.org/xml/ns/javaee http://xmlns.jcp.org/xml/ns/javaee/web-app_3_1.xsd">

    <servlet>
        <servlet-name>HomeController</servlet-name>
        <servlet-class>tutorial.HomeController</servlet-class>
    </servlet>
    <servlet-mapping>
        <servlet-name>HomeController</servlet-name>
        <url-pattern>/</url-pattern>
    </servlet-mapping>

    <servlet-mapping>
        <servlet-name>default</servlet-name>
        <url-pattern>/assets/*</url-pattern>
    </servlet-mapping>

</web-app>
Start Up Your Webapp with Maven or Gradle
Can you believe that after adding a single home page, you’d have a functional web application with full user management capability?
Don’t believe me? Let’s try it!
Using your build tool of choice, let’s start up the web application. For example:
Maven:
mvn tomcat7:run
Gradle:
gradle tomcatRun
Open up a browser and visit http://localhost:8080. You’ll see the home page we just created above:
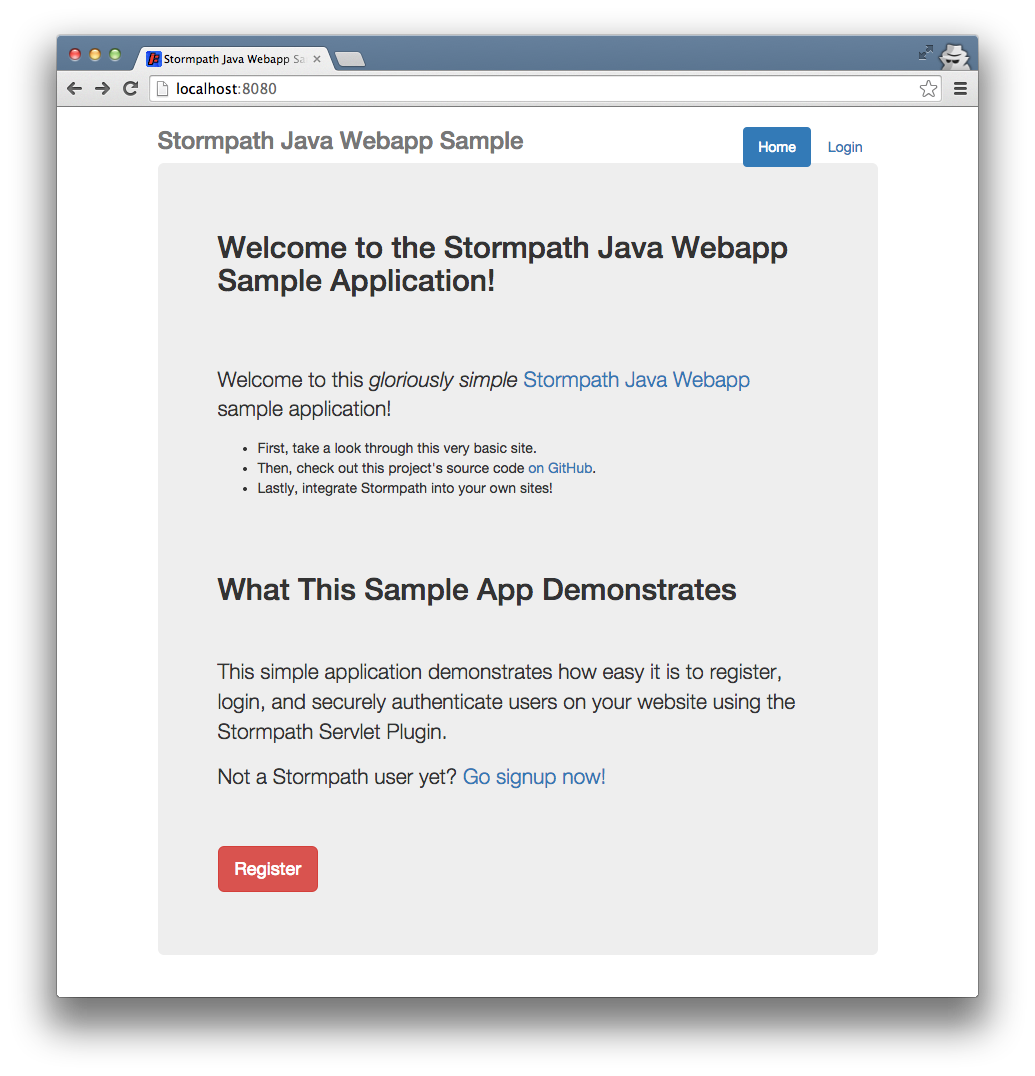
Pretty cool! Now, to be honest, this isn’t wildly exciting. That is what is supposed to happen after all. But the awesome features – the part you have been waiting for – is all the automatic stuff. For example, the login page!
Try the Stormpath User Login Page
Click the Login button at the top right of the page, or manually visithttp://localhost:8080/login, and you’ll see this:
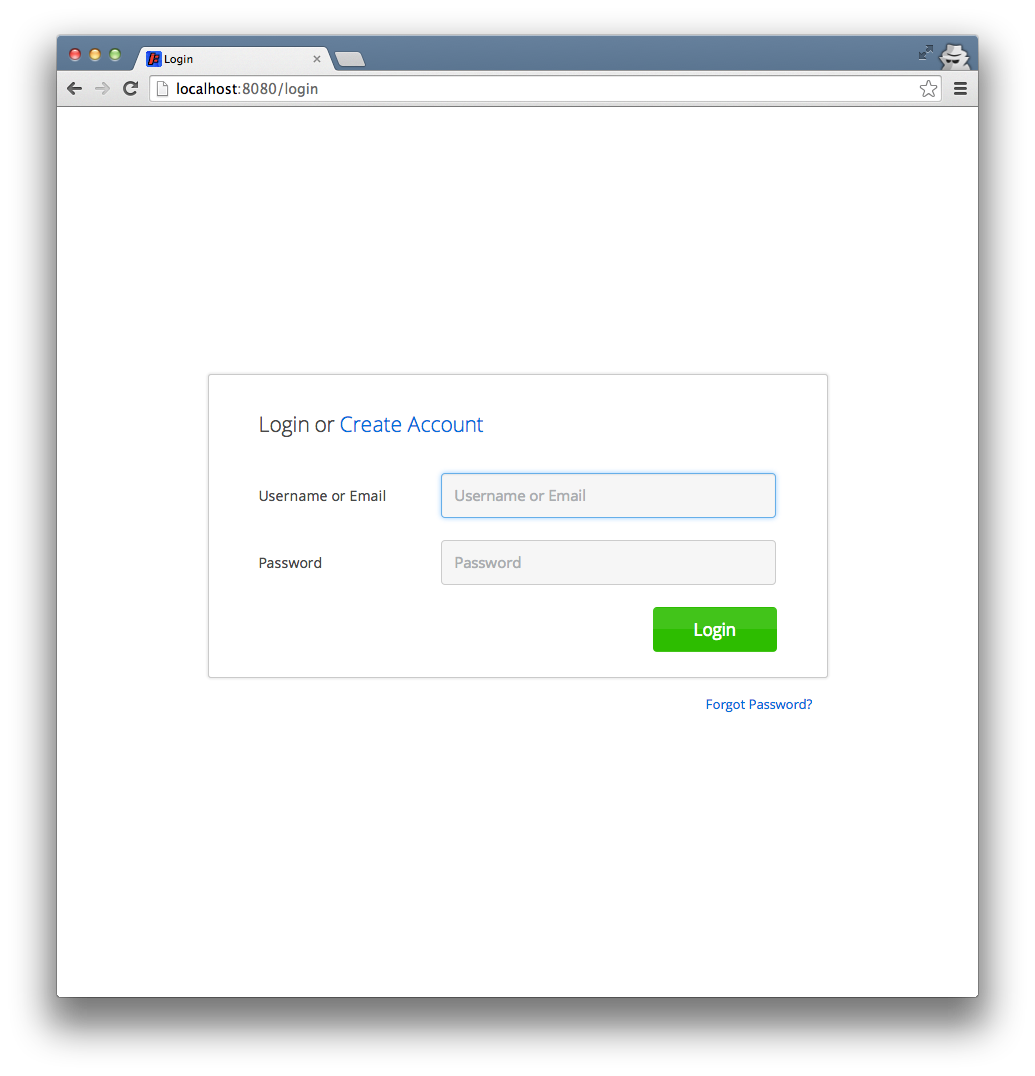
That’s right! A login page with best practice cross-site request forgery (CSRF)-protection built right in, and you didn’t have to write a single line of it. Now that is awesome! You can customize which fields are displayed in which order, as well as the entire look and feel if you wanted, with full internationalization (i18n) capabilities. That’s out of scope for this article, but you can read about customizing views later if you wanted.
It doesn’t stop there of course – you get all sorts of goodies, like user account registration, email verification and forgot password automation, token authentication and much more!
Register a New User with Stormpath
Now you can’t login until you create a user account, so go ahead and click the ‘Create Account’ link or manually visit the http://localhost:8080/register page and you’ll see this:
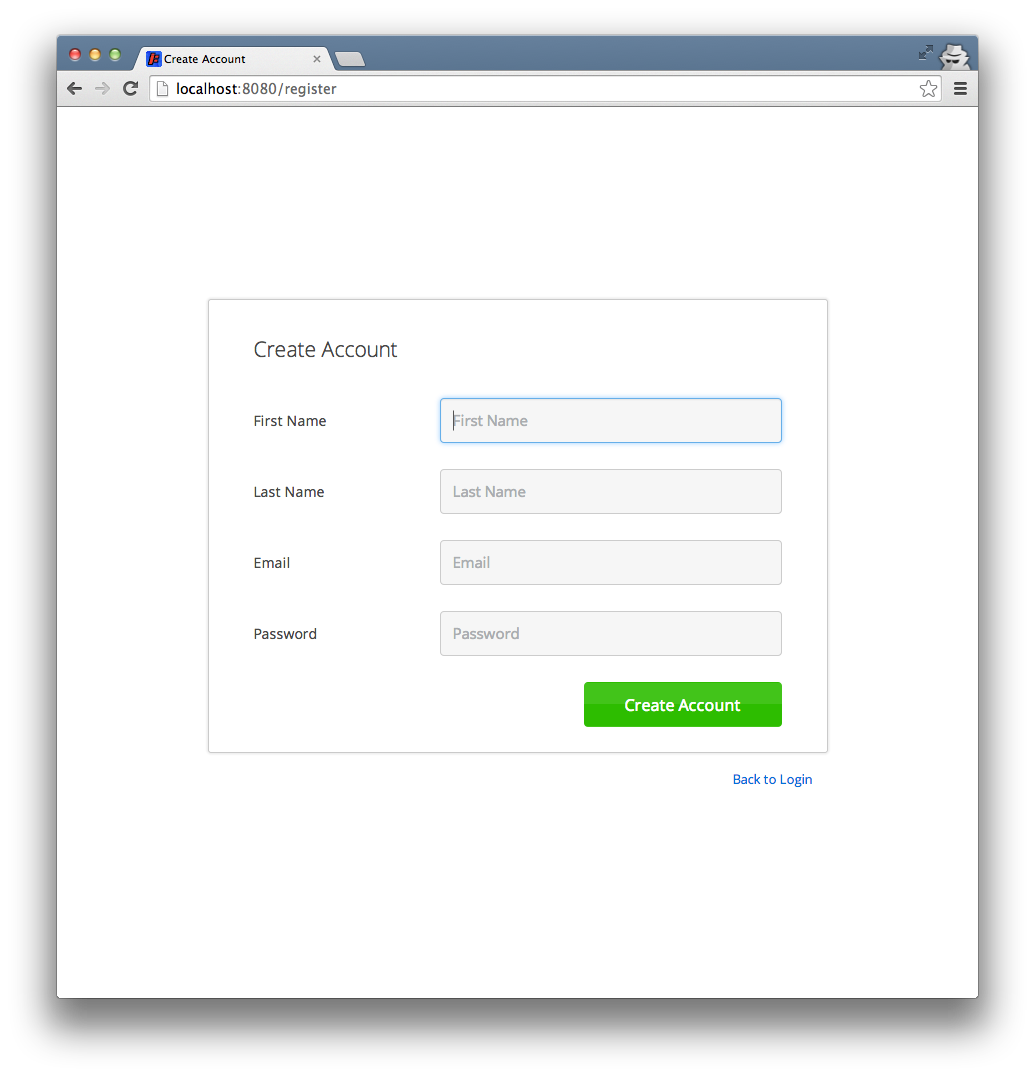
Go ahead and fill out and submit the form – you’ll be given a new user account that you can use to log in right away.
Verify User Email Addresses
Now, what about email verification? Many web applications want to ensure that newly registered users must verify their email address before they can login to the application. This helps ensure that:
- Email addresses cannot be abused by people that do not own them
- The application has a way of communicating with the user if necessary
- The registration process was completed by a human being (and not a ‘bot’ performing automatic registration, which could be used for malicious purposes).
This is covered too! You just have to enable email verification as described in the documentation. Since this is a shorter tutorial, we’ll move on, but feel free to turn that on if you like and try it out.
Logout your User
If you are still logged in, click the logout button on the upper right. This will visit /logout, which will automatically log you out and then redirect you back to the web app’s context root page (/) by default (you can customize this next URI later).
We’ll also make one more change to the web app, so go ahead and shut down the application by pressing CTRL-C.
Implement Views for Forgot Password, Change Password and More
The plugin supports other views out of the box as well, which you can read about in the documentation. But we want to show you one more thing before we wrap up this tutorial: access control.
Enforce Access Control (Authorization) with Stormpath
The Stormpath Java Webapp Plugin also has the ability to enforce access control based on URI path. For example, you
can ensure that only authenticated users may visit the /account URI within your application. Or that maybe only
accounts within the admin group can visit the /admin URI.
To demonstrate this, we’ll create a /dashboard view that only authenticated users should be able to see. This represents a common ‘landing page’ that a user might be shown immediately after login.
Let’s create a ‘Dashboard’ controller:
src/main/java/tutorial/DashboardController.java
package tutorial;

import com.stormpath.sdk.account.Account;
import com.stormpath.sdk.directory.CustomData;
import com.stormpath.sdk.lang.Strings;
import com.stormpath.sdk.servlet.account.AccountResolver;

import javax.servlet.ServletException;
import javax.servlet.http.HttpServlet;
import javax.servlet.http.HttpServletRequest;
import javax.servlet.http.HttpServletResponse;
import java.io.IOException;

public class DashboardController extends HttpServlet {

    private static final String VIEW_TEMPLATE_PATH = "/WEB-INF/jsp/dashboard.jsp";

    @Override
    protected void doGet(HttpServletRequest req, HttpServletResponse resp) throws ServletException, IOException {

        String birthday = "";
        String color = "";

        Account account = AccountResolver.INSTANCE.getAccount(req);
        if (account != null) {
            CustomData data = account.getCustomData();
            birthday = (String)data.get("birthday");
            color = (String)data.get("color");
        }

        req.setAttribute("birthday", birthday);
        req.setAttribute("color", color);
        req.getRequestDispatcher(VIEW_TEMPLATE_PATH).forward(req, resp);
    }

    @Override
    protected void doPost(HttpServletRequest req, HttpServletResponse resp) throws ServletException, IOException {

        String birthday = req.getParameter("birthday");
        String color = req.getParameter("color");

        //get the currently-logged-in account:
        Account account = AccountResolver.INSTANCE.getAccount(req);
        if (account != null) {

            CustomData data = account.getCustomData();

            if (Strings.hasText(birthday)) {
                data.put("birthday", birthday);
            } else {
                data.remove("birthday");
            }

            if (Strings.hasText(color)) {
                data.put("color", color);
            } else {
                data.remove("color");
            }

            data.save();
        }

        req.setAttribute("birthday", birthday);
        req.setAttribute("color", color);
        req.getRequestDispatcher(VIEW_TEMPLATE_PATH).forward(req, resp);
    }
}
The DashboardController demonstrates a really nice Stormpath feature: the ability to ‘attach’ your own custom data directly to Stormpath REST resources, such as a user account’s birthday or favorite color.
Let’s create the view file that will be rendered by the controller:
src/main/webapp/WEB-INF/jsp/dashboard.jsp
<%@ page session="false"%>
<%@ page contentType="text/html;charset=UTF-8" pageEncoding="UTF-8" %>
<%@ taglib prefix="t" tagdir="/WEB-INF/tags" %>
<%@ taglib prefix="c" uri="http://java.sun.com/jsp/jstl/core" %>

<t:page>
    <jsp:attribute name="title">Dashboard</jsp:attribute>
    <jsp:body>
        <div class="dashboard">
            <div class="row">
                <div class="col-lg-12">
                    <div class="jumbotron">
                        <h1>Dashboard</h1>

                        <br/>
                        <br/>

                        <p>Welcome to your user dashboard!</p>

                        <p>This page displays some of your account information and also allows you to change custom
                            data.</p>

                        <p>If you click the Logout link in the navbar at the top of this page, you'll be logged out
                            of your account and redirected back to the main page of this site.</p>
                        <br/>
                        <br/>

                        <h2>Your Account Custom Data</h2>
                        <br/>
                        <br/>

                        <p>Your Email: <span class="data">${account.email}</span></p>

                        <c:set var="noBirthday" value="You haven't entered a birthday yet!"/>
                        <p>Your Birthday: <span class="data">${!empty account.customData['birthday'] ? account.customData['birthday'] : noBirthday}</span></p>

                        <c:set var="noColor" value="You haven't entered a color yet!"/>
                        <p>Your Favorite Color: <span class="data">${!empty account.customData['color'] ? account.customData['color'] : noColor}</span></p>

                        <br/>
                        <br/>

                        <p>Stormpath allows you to store up to 10MB of custom user data on
                            each user account. Data can be anything (in JSON format). The above
                            example shows two custom fields (<code>birthday</code> and
                            <code>color</code>), but you can add whatever fields you'd like.</p>

                        <p>You can also store complicated nested JSON documents!</p>
                        <br/>
                        <br/>

                        <h2>Update Custom Data</h2>
                        <br/>
                        <br/>

                        <p>If you enter values below, we'll send and store these
                            values with your user account on Stormpath.</p>

                        <p>Please note, we are not doing any validation in this simple
                            example -- in a real world scenario, you'd want to check user input on the server side!</p>
                        <br/>
                        <br/>

                        <form method="post" class="bs-example form-horizontal" action="${pageContext.request.contextPath}/dashboard">
                            <div class="form-group">
                                <label for="birthday" class="col-lg-2 control-label">Birthday</label>

                                <div class="col-lg-4">
                                    <input type="text" class="form-control" id="birthday" name="birthday" placeholder="mm/dd/yyyy"
                                           value="${!empty account.customData['birthday'] ? account.customData['birthday'] : ''}">
                                </div>
                            </div>
                            <div class="form-group">
                                <label for="color" class="col-lg-2 control-label">Favorite Color</label>
                                <div class="col-lg-4">
                                    <input type="text" class="form-control" id="color" name="color" placeholder="color"
                                           value="${!empty account.customData['color'] ? account.customData['color'] : ''}">
                                </div>
                            </div>
                            <div class="form-group">
                                <div class="col-lg-10 col-lg-offset-2">
                                    <button type="submit" class="btn btn-primary">Update Custom Data</button>
                                </div>
                            </div>
                        </form>
                    </div>
                </div>
            </div>
        </div>
    </jsp:body>
</t:page>
And we’ll need to update web.xml to tell the Servlet Container about our new view. web.xml should now look like this:
src/main/webapp/WEB-INF/web.xml
<?xml version="1.0" encoding="UTF-8"?>
<web-app version="3.1"
         xmlns="http://xmlns.jcp.org/xml/ns/javaee"
         xmlns:xsi="http://www.w3.org/2001/XMLSchema-instance"
         xsi:schemaLocation="http://xmlns.jcp.org/xml/ns/javaee http://xmlns.jcp.org/xml/ns/javaee/web-app_3_1.xsd">

    <servlet>
        <servlet-name>HomeController</servlet-name>
        <servlet-class>tutorial.HomeController</servlet-class>
    </servlet>
    <servlet-mapping>
        <servlet-name>HomeController</servlet-name>
        <url-pattern>/</url-pattern>
    </servlet-mapping>
    <servlet>
        <servlet-name>DashboardController</servlet-name>
        <servlet-class>tutorial.DashboardController</servlet-class>
    </servlet>
    <servlet-mapping>
        <servlet-name>DashboardController</servlet-name>
        <url-pattern>/dashboard</url-pattern>
    </servlet-mapping>


    <servlet-mapping>
        <servlet-name>default</servlet-name>
        <url-pattern>/assets/*</url-pattern>
    </servlet-mapping>

</web-app>
Configure the Java Servlet Plugin for your App
Notice that, until now, we did not need to configure the plugin itself at all: everything ‘just works’. But now that we have some application-specific enforcement rules, we’ll need to tell the plugin what to do via a simple stormpath.properties configuration file. Let’s create this file:
src/main/webapp/WEB-INF/stormpath.properties
stormpath.web.login.nextUri = /dashboard

stormpath.web.uris./dashboard = authc
- The first line means “After the user successfully logs in, I want the next URI they visit to be
/dashboard“. The plugin’s login controller will automatically redirect the newly authenticated user to this location. - The second line means “in order for anyone to visit the
/dashboardURI, they must be authenticated (‘authc’ is short for ‘authenticated’). This enforces all requests to be authenticated by a valid user account before being allowed to continue. If they are not, they will be redirected to the login page to login first, and then automatically be redirected back to their originally requested URI.
Run the Updated Application
Now that we’ve added a dashboard view and controller, and a simple stormpath.properties file, let’s try it out!
If you haven’t already, shut down the application by pressing CTRL-C.
Now start it up:
Maven:
mvn tomcat7:run
Gradle:
gradle tomcatRun
Now try to visit http://localhost:8080/dashboard – you will be redirected to login as expected. Log in with a user account you created previously and then it will automatically redirect you back to the dashboard. Nice!

Stormpath Java Servlet Plugin — Advanced Features
Congratulations! You now have a complete web application, with automatic user registration, login, forgot password/reset workflows, logout, custom data editing, and access control enforcement!
But we’ve just scratched the surface of what you can do. Also supported:
- Full default view customization with internationalization (i18n) support.
- Authorization assertions (based on account data, like username, which groups they belong to, etc)
- Token Authentication for Javascript and mobile clients (we implemented OAuth for you)
- HTTP Basic Authentication for both username/password and API Keys
- Event listeners to react to login, logout, registration, etc events.
- Caching for enhanced performance.
- Convienent filter chain definitions for custom authentication or authorization rules.
- Easy Stormpath SDK Client configuration and request access
- and more!
Please see the complete Stormpath Java Servlet Plugin Documentation for full information.
Building Identity Management, including authentication and authorization? Try Stormpath! Our REST API and robust Java SDK support can eliminate your security risk and can be implemented in minutes. Sign up, and never build auth again!

Cool!
very cool!
It doesn’t work for me. It doesn’t find the ~/.stormpath/apiKey.properties folder (Access is denied). I’m on Windows. Could you help me. Thank you.