Not so long ago, Vagrant was the prime tool that attempted to solve that time-immemorial problem of “it works on my machine.” Developers could create shareable Vagrant files to allow coworkers to spin up replica machines for testing code and the interconnecting parts of a typical modern project. Vagrant is far from dead, but it suffers from a couple of long-lasting issues, including the resource footprint of virtual machines created, the speed of sharing files between the host and virtual machine, and the speed of making configuration changes to virtual machines.
Then along came Docker, fixing some of these issues (and creating others of its own) and taking a lot of Vagrant’s user base with it.
Both Vagrant and Docker were, from square one, developer tools, and deploying projects from within these environments was never as simple as it should be. Docker did a lot to solve this, but Vagrant was never designed with this in mind and has only recently added this functionality.
Hashicorp, the creators of Vagrant, acknowledge that maybe Vagrant is due for replacement and are slowly encouraging users to switch to Otto, which is built upon Vagrant. Otto has a strong focus on microservice-based infrastructures and has the following differences to Vagrant:
- Application Level. Vagrant focuses on setting the configuration at a machine level, while Otto focuses at an application level. This allows for far more complex, interconnected configuration and dependencies.
- Deployment. While it’s possible to deploy straight from a Vagrant file, it’s never been an ideal or optimal task. With Otto, deployment to production is baked straight in.
Setting Up
Otto is available as pre-configured binaries and Homebrew with Cask (brew cask install otto) for Mac users. I’ll use a Rails application in this example, but Otto also ships with built-in support for Java and Python.
rails new ottotest
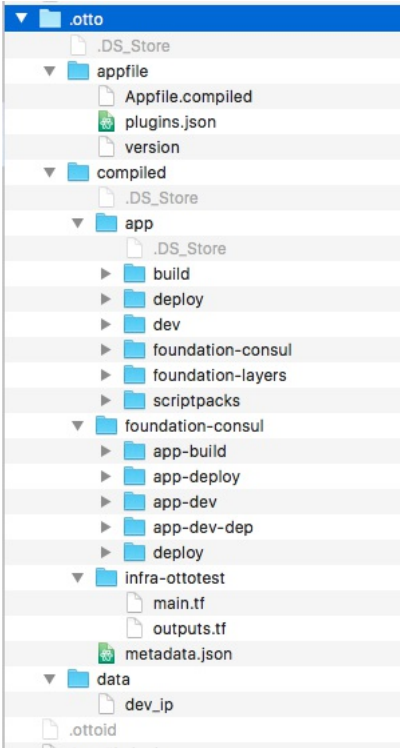
Next, to manage the project with Otto and compile its source code into a number of files contained within a new .otto folder, run the following command:
otto compile
Otto makes some smart decisions about the default settings for this command, but if you want more control, you can create an Appfile inside the project to override these settings. A simple example to specify the application name and Ruby version is:
application {
  name = "Otto Test"
  type = "ruby"
}

customization {
  ruby_version = "2.3"
}Develop with Otto
Running the following:
bash

otto dev
will create an entire virtualized development environment suitable to your application needs. This still uses Vagrant and Virtualbox, so Otto is more of a utility for Vagrant than a replacement for it. When running this command for the first time, it can take a while to build, as Otto will create the VMs for developing this specific application development, and also the shared VMs used by Otto.
You can now use:
otto dev ssh
To access the development ‘machine’ and issue any commands you may want to, for example:
bundle && rackup --host 0.0.0.0
Otto should have given you an IP address at this point, but if you need reminding, you can use this command:
otto dev address
Add Infrastructure
Otto has a command for adding your deployment infrastructure, but it currently only supports AWS. That’s limiting, but there are more to come soon. If you do have and AWS account, then run:
otto infra
Otto will walk you through the setup process to connect your application and AWS account.
Build and Deploy
The next step is to build the application ready for deployment. What happens exactly at this stage is somewhat dependent on your application. It may be creating a Docker image, an AMI (Amazon Machine Image), or something else. One of the underlying principles of Otto is that you don’t need to worry about what’s happening and it will “just work,” but I remain healthily skeptical of projects that claim this.
otto build
The
otto buildcommand requires that your project has version control setup, but this isn’t made clear in the documentation.
You can see the status of your build by using the following command:
otto status
The final step is to run:
otto deploy
This steps connects the last two steps by taking the result of the build command, launching a server with it on your infrastructure, and giving you an IP address to access the application.
There is more Otto ‘automagic’ at work here. It will detect if your application needs (or you defined it) multiple servers and then set up a load balancer to handle the traffic appropriately.
What’s Next?
Is Otto Hashicorp’s attempt to pull the plug on the shortcomings of Vagrant and some of their competitors? In this post’s simple demo, Otto still generated over 3GB of virtual machines. While some of these are used by other applications, this is still a larger footprint than container technologies.
The big promise of Otto is “all you need to do is run command x,” which is a great promise. But we’ve all seen projects and products that promise this, and in reality, it’s rarely the case.
For Otto to be a success (and more flexible), Hashicorp needs to add support for more languages and infrastructure providers. They also need to add some more detailed documentation. Too many sections gloss over what’s really happening, and there are some things missing. For example, I couldn’t find any mention of how to stop and remove the VMs created by Otto, short of doing this in VirtualBox.
It’s early days for the project, but if you’re looking for a new solution for your development to deployment workflow and Otto suits your needs, then take a look.
| Reference: | Otto: The Next Generation of Vagrant from our JCG partner Chris Ward at the Codeship Blog blog. |
