The Apache Hadoop community has give us a great set of tools that allow us to interact with the Hadoop Distributed File System. These tools obfuscate the complexities of countless machines in the background by showing us one simple and easy to understand interface.
A great tool to get started with Hadoop is hadoop fs . The hadoop fs toolset runs a generic filesystem user client that interacts with the distributed file system similar to the way we interact with a Unix file system (but with a much limited set of commands). One can list, change permissions, move, copy, and perform other operations to files and directories in the distributed file system. A comprehensive list of hadoop fs commands can be found in hadoop.apache.org
However, since HDFS is a read-only file system, and since the hadoop fs toolset was made for HDFS, one cannot find any tools for editing files such as vim or nano. In order to edit files à la linux, MapR provides NFS access to the MapR File System so that all Unix commands can be used on Hadoop1. If you are interested in understanding the importance and the differences between the MapR read/write filesystem and the HDFS read-only filesystem, please read this blog post.
1 another great blog post explaining MapR NFS
Intro to MapRCLI
In addition to all the Hadoop shell commands, MapR provides a fully complementary toolset that builds on Hadoop to give you a lot more power and insight into the MapR File System. These tools are incredibly useful for administrators who operate the Hadoop cluster, as well as for developers trying to debug Hadoop applications. In this blog post (Intro to the MapR Command Line Interface), I will introduce the maprcli node list command and discuss how to use it to learn more about your cluster. In future blog posts, I will cover how to use the maprcli to work with MapR Volumes and Storage Pools, MapR Access Control Lists and much more!
MapR CLI Node List
The first thing to do in an existing cluster is to see how many nodes you are working with, to find out what services are running in the cluster, and to find out where these services are located. The maprcli allows you to see this and a LOT more information pertaining to all the nodes in the cluster. Try it out yourself by running :
$ maprcli node list
This is what the output would look like:
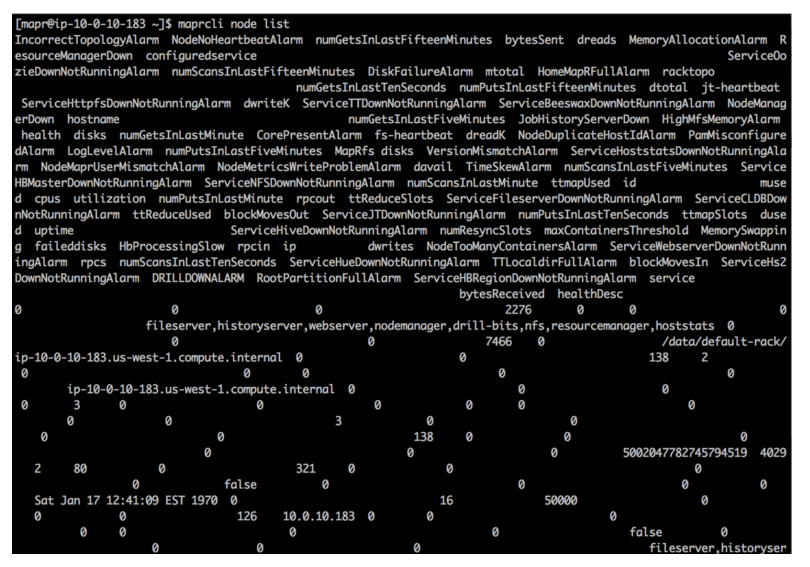
Actually, if you tried the command, you would have seen that the amount of information outputted is way too much to digest. A different approach is to have the data return in JSON format by simply running:
$ maprcli node list -json
This is what the output would look like:
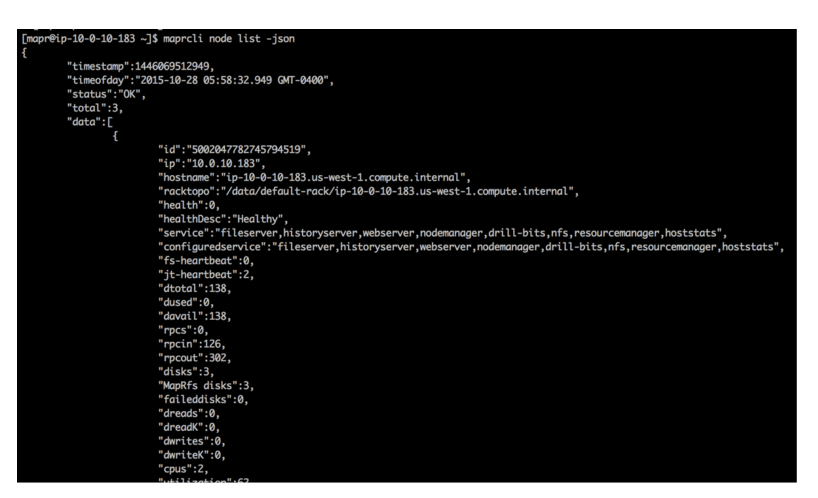
That looks a lot better, but unless you are trying to do a full audit, there is still too much information and it will be very hard to find any specific things you might be looking for. In order to hone in on specific information, you can pass the “-columns” argument and specify the key (column names) for the data that you want. By default, the hostname and IP of the nodes are returned, but if you want to see what the services in the cluster are, try this:
$ maprcli node list -columns service

This is incredibly useful, as we now know what we are working with in our cluster. The command told us exactly how many nodes are running, the services running in each node, and also the hostname and IPs associated with each node. How about the rest of the information? How can you leverage the rest of the possible information that you don’t even know exists? To do this, simply list the column names of all the information this command can output for each node by running:
for f in `maprcli node list | head -1`; do echo $f; done | sort
Now that you know where each service is, you can manage each of them by using the same tool with different arguments. One reason you may want to stop/start services is so that new configuration changes can kick in. For example, if you are running Spark jobs that require more memory than the default allocated memory, you might want to change the “yarn.scheduler.maximum-allocation-mb” property in the yarn-site.xml. In order for YARN to know the new configuration, it is necessary to restart the Resource Manager as follows:
maprcli node services -name resourcemanager -action stop -nodes
<space separated RM hostnames>
Verify that the services are no longer running:
maprcli node list -columns service
And start the Resource Manager again:
maprcli node services -name resourcemanager -action start -nodes
<space separated RM hostnames>
Similarly, you can simply replace the initial “stop” with “restart.”
Play around with this tool. There are countless other options and arguments you can provide to this command to get lots of new information you didn’t know you could get.
In the next blog post, we will cover how to create MapR volumes, how to set volume-specific characteristics such as replication factors, quotas, and permissions, and how they can be easily used for HA and Disaster Recovery.
If you have any questions about using the MapR Command Line, please ask them in the comments section below.
| Reference: | Getting Started with the MapR Command Line (Part I) from our JCG partner Nelson Estrada at the Mapr blog. |
