This article is part of our Academy Course titled Apache Lucene Fundamentals.
In this course, you will get an introduction to Lucene. You will see why a library like this is important and then learn how searching works in Lucene. Moreover, you will learn how to integrate Lucene Search into your own applications in order to provide robust searching capabilities. Check it out here!
Table Of Contents
- 1. Introduction
-
- 1.1 What is full-text search
- 1.2 Why do we need full-text search engines
- 1.3 How Lucene works
- 1.4 Basic Lucene workflow
- 2. Basic components for Indexing
-
- 3. Basic components for searching
-
- 4. A Simple Search Application
-
- 4.1 Create a new Maven Project with Eclipse
- 4.2 Maven Dependencies
- 4.3. A simple indexer class
- 4.4. A simple searcher class
- 4.5 Download the source code
- 5. Final notes
1. Introduction
In this course we are going to dive into Apache Lucene. Lucene is a rich, open source, full-text search suit. This means that Lucene is going to help you implement a full-text search engine, tailored to your applications needs. We are going to deal with the Java flavor of Lucene, but bear in mind that there are API clients for a variety of programming languages.
1.1 What is full-text search
It is a common need for users to want to retrieve list of documents or sources that match certain criteria. For example a library user needs to be able to find all of the books written by a specific author. Or all of the books that have a specific word or phrase in their title. Or all of the books published in a specific year from a specific publisher. The above queries can be easily handled by well know relational database. If you hold a table that stores (title,author, publisher, year of publishing) tuples, the above searches can be completed efficiently. Now, what if a user wants to obtain all the documents that contain a certain word or phrase in their actual content? If you try to use a traditional database and store the raw content of all the documents in a field of a tuple, searching would take unacceptably long.
That’s because in a full text search, the search engine has to scan all of the words of the text document, or text stream in general, and try to match several criteria against it, e.g. find certain words or phrases in its content. That kind of queries in a classic relational database would be hopeless. Granted, many database systems, like MySQL and PostgreSQL support full text searching, either natively or using external libraries. But that are not efficient, nor fast enough or customizable. But the biggest problem is scalability. They just cannot handle the amount of data that full-text searched engines can.
1.2 Why do we need full-text search engines
The process of generating vast amounts of data is one of the defining characteristics of our time and a major consequence of technological advancements. It goes by the term information overload. Having said that, gathering and storing all that data is beneficial only if you are able to extract useful information out of them, plus make them reachable by your application’s end users. The most well known and used tool to achieve that is, of course, searching.
One could argue that searching files for a word or a phrase is as simple as scanning it in a serial manner from top to bottom, just like you would using a grep command. This might actually suffice for a small number of documents. But what about huge file systems with millions of files, and if that seems extraordinary to you, what about web pages, databases, emails, code repositories, to name just a few, and what about all of them combined. It becomes easy to understand that the information each individual user needs, might reside in a little document, somewhere in a vast ocean of different information resources. And the retrieval of that document has to seem as easy as breathing.
One can now see why fully customized search-based applications are gaining lots of attention and traction. Adding to that, is the fact that searching has become such an important aspect of end user’s experience that for modern web applications, varying from simple blogs to big platforms like Twitter or Facebook and even military grade applications, is incomprehensible not to have searching facilities. And that’s why big vendors don’t want to risk messing up their searching features and want to keep them as fast and yet as simple as possible. That has led to the need to upgrade searching from a simple feature to a full platform. A platform that has power, effectiveness, the necessary flexibility and customization. And Apache Lucene delivers, that’s why is used in most of the aforementioned applications.
1.3 How Lucene works
So, you must be wondering how Lucene can perform very fast full-text searches. Not surprisingly, the answer is that it uses an index. Lucene indexes fall into the category of inverted indexes. Instead of having a classic index where for every document you have the full list of words (or terms) it contains, inverted indexes do it the other way round. For every term (word) in the documents, you have a list of all of the documents that contain that term. That is hugely more convenient when performing full text searches.
The reason that inverted indexes work so good can be seen in the following diagrams. Imagine you have 3 very large document. A classic index you be of the form:
Classic index:
|
1
2
3
|
Document1 -> { going, to, dive, into, Apache, Lucene, rich, open, source, full, text, search,... }Document2 -> { so, must, wonder, Lucene, can, achieve, very, fast, full, text, search, not,... }Document3 -> { reason, that, inverted, index, work, good ,can, be, seen, following, diagrams,... } |
For every document you have a huge list of all of the terms it contains. In order to find if a document contains a specific term you have to scan, probably sequentially these vast lists.
On the other hand an inverted index would have that form:
Inverted index:
|
1
2
3
4
5
6
7
|
reason -> { (3,0} }Lucene -> { (1,6), (2,4) }full -> { (1,10),(2,9) }going -> { (1,0) }index -> { (3,3) }search -> { (1,11), (2,10)}... |
For every term we maintain a list with all of the documents that contain that term, followed by the position of the term inside the document (of course additional information can be kept). Now, when a user searches for the term “Lucene”, we can instantly answer that the term “Lucene” is located inside Document1 in position 6 and inside Document2 in position 4. To sum up, inverted indexes use a very big number of very small lists that can be searched instantly. In contrast a classic index would use a small number of extremely big lists that is impossible to search quickly.
1.4 Basic Lucene workflow
So, Lucene has to have some work done before the actual search. And presumably that is to create the index. The basic work flow of the indexing process is depicted bellow:
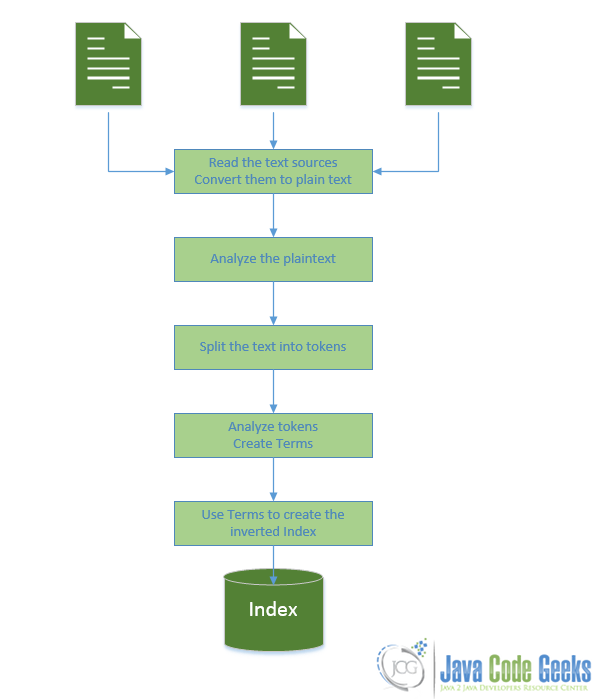
As you can see in the above diagram:
- You feed it with text documents/sources
- For every document it analyzes the text and splits it into terms (words). Meanwhile it can perform all kinds of analysis in the plain text. You can tailor that step to suit the needs of you own application.
- For every term of the documents it creates the previously described inverted lists.
- Now the index is ready to be searched. You can write queries in many different formats and as a result you will get a list of all of the documents that satisfy the criteria specified in the query.
So far Lucene seems to be a very powerful tool as it can analyze the text, create the indexes and perform queries on the index. But you have to do some work yourself, like selecting the documents to be indexed, organize and manage the whole process and the several aspects of it, as well as eventually getting the search queries from the users and presenting to them any possible results.
2. Basic components for Indexing
In this section we are going to describe the basic components and the basic Lucene classes used to create Indexes.
2.1 Directories
A Lucene Index is hosted simply in a normal file system location, or in memory when extra performance is needed and you don’t want it to be stored permanently on your drive. You can even choose to store your index in a database, via JDBC. The implementations of the aforementioned options, extend the abstract Directory class.
To keep things simple, let’s just say that it uses a directory in your file system, although there aren’t many differences when using memory or databases, but the normal directory is more intuitive in my opinion. Lucene will use that directory to store everything that is necessary for the index. You can work with such a directory using FSDirectory class, feeding it with an arbitrary path of your file system (when working with memory, you use RAMDirectory). FSDirectory class is simply an abstraction above normal Java File manipulation classes.
This is how you can create an FSDirectory:
|
1
|
Directory directory = FSDirectory.open( new File("C:/Users/nikos/Index")); |
An this is how you can create a RAMDirectory:
|
1
|
Directory ramDirectory = new RAMDirectory(); |
2.2 Documents
As you remember, we said that it is your responsibility to choose the documents (text files, PDFs, Word Documents etc) and any text sources you want to make searchable, and thus indexed. For every document you want to index, you have to create one Document object that represents it. At this point, it is important to understand that Documents are indexing components, and not the actual text sources. Naturally, because a Document represents an individual physical text source, it is the building unit of the Index. After creating such a Document you have to add it to the Index. Later, when dispatching a search, as a result, you will a get a list of Document objects that satisfy your query.
This is how you can create a new empty Document:
|
1
|
Document doc = new Document(); |
Now it’s time to fill the Document with Fields.
2.3 Fields
Document objects are populated with a collection of Fields. A Field is simply a pair of (name,value) items. So, when creating a new Document object you have to fill it with that kind of pairs. A Field can be stored in the index, in which case both name and value of the field are literally stored in the Index. Additionally a Field can be indexed, or to be more precise inverted, in which case the value of the field gets analyzed and tokenized into Terms and is available for searching. A Term represents a word from the text of a Field‘s value. A Field can be both stored and indexed/inverted, but you don’t have to store a Field to make it indexed/inverted. Storing a Field and indexing/inverting a Field are two different, independent things.
As I mentioned before, when deploying a search, in return you will get a list of Document objects (representing the physical text sources) that satisfy your query. If you want to have access to the actual value of a Field, you have to declare that Field stored. This is usually helpful when you want to store the name of the file that this Document represents, last modification date, full file path, or any additional information about the text source you want to have access to. For example, if the text source your are indexing is an email, your Document object that represents that email could have those fields:
Example Document representing an email:
|
Field |
Stored |
Indexed |
|
|
Name |
Value |
||
|
Title |
Email from example |
Yes |
No |
|
Location |
location of the email |
Yes |
No |
|
From |
example@javacodegeeks.com |
Yes |
No |
|
To |
foo@example.com |
Yes |
No |
|
Subject |
Communication |
Yes |
No |
|
Body |
Hi there ! Nice meeting you… |
No |
Yes |
In the above Document, I’ve chosen to index/invert the body of the email, but not to store it. This means that the body of the email will be analyzed and tokenized into searchable terms, but it will not be literally stored in the Index. You can follow that tactic when the volume of the contents of your text source is very big and you want to save space. On the other hand, I’ve chosen to store but not to index all the other fields. When I perform a search, only the body will be searched,while all the other Fields are not taken under consideration in the search as they are not indexed.
If the Body‘s aforementioned tokenized terms satisfy the query, this Document will be included in the results. Now, when you access that retrieved Document, you can only view its stored Fields and their values. Thus, the actual body of the file will not be available to you through the Document object, despite being searchable. You can only see the Title, Location ,From, To Subject Fields. Storing the location of that email, will help me have access to its actual body content. Of course, you can store the body of the email as well, if you want to retrieve it through the Document object and thus make it both searchable and stored (same goes for the other fields).
So let’s see how you would create the above Document. To create the stored-only fields we are going to use StoredField class. And to create the non stored and indexed body of the text we are going to use a TextField class.
|
01
02
03
04
05
06
07
08
09
10
11
12
13
14
15
16
|
Document doc = new Document();Field title = new StoredField("fileName", "Email from example");doc.add(title);Field location = new StoredField("location", "C:/users/nikos/savedEmail");doc.add(location);Field from = new StoredField("from", "example@javacodegeks.com");doc.add(from);Field to = new StoredField("to", "foo@example.com");doc.add(to);Field body = new TextField("body", new FileReader(new File("C:/users/nikos/savedEmail")));doc.add(body); |
As you can see, we’ve given a FileReader as the value of the "body" field. This FileReader will be used inside the analysis phase, to extract the plain text from that source. After extracting the plain text from the file, special components of Lucene will analyse it and split it into indexed terms.
2.4 Terms
A Term represents a word from the text. Terms are extracted from the analysis and tokenization of Fields’ values, thus Term is the unit of search. Terms are composed of two elements, the actual text word ( this can anything from literally words to email address, dates etc), and the name of the Field this word appeared into.
It is not absolutely necessary to tokenize and analyze a Field to extract Terms out of it. In the previous example, if you want to make the From Field indexed, you don’t really have to tokenize it. The email address example@javacodegeeks.com can serve as a Term.
2.5 Analyzers
An Analyzer is one of the most crucial components of the indexing and searching process. It is responsible for taking plain text and converting it to searchable Terms. Now, it is important to understand that Analyzers work with plain text inputs. It’s the programmer’s responsibility to provide a parser that is able to convert a text source, like an HTML page or a file form your file system, to plain text. This parser is usually a Reader. For example in case of files this could be a FileReader.
An Analyzer, internally uses a Tokenizer. The Tokenizer can take as input the aforementioned Reader and use it to extract plain text from a specific source (e.g a File). After obtaining the plain text, the Tokenizer simply splits the text into words. But an Analyzer can do much more that simple text splitting. It can perform several kinds of text and word analysis like :
- Stemming : Replacing words with their stems. For example, in English the stem of “oranges” is “orange”. So if the end user searches for “orange”, documents that contained “oranges” and “orange” will be obtained.
- Stop Words Filtering : Words like “the”, “and” and “a” are not of any particular interest when performing a search and one could might as well consider them “noise”. Removing them, will result in better performance, and more accurate results.
- Text Normalization : Removes accents and other character markings.
- Synonym Expansion : Adds in synonyms at the same token position as the current word.
These are only some of the analysis tools that are built-in to Lucenes Analyzer classes. The most commonly used built in Analyzer is the StandardAnalyzer that can remove stop words, convert words to lowercase and also do stemming. As you know, different languages have different grammar rules. Lucene community is trying to embed as many grammars for as many different languages as possible. But still, if none of the Lucene’s built in Analyzers is suitable for your application, you can create your own.
2.6 Interacting with the Index
So far, we’ve seen how to create an Index Directory, create a Document and add Fields to it. Now we have to write the Document to the Directory and thus add it to the Index. This is also the step where Analyzers and Tokenizers play their parts.
There is no special class called Index (or something like that) in Lucene, as you would expect. The way you interact with the Index is through an IndexWriter, when you want to push content to your Index (and generally manipulate it), an IndexReader when you want to read from your Index and an IndexSearcher, when you want to search the index of course.
Now let’s see how we can create the IndexWriter we want:
|
1
2
3
4
5
6
7
|
Directory directory = FSDirectory.open( new File("C:/Users/nikos/Index"));Analyzer analyzer = new StandardAnalyzer(Version.LUCENE_46);IndexWriterConfig config = new IndexWriterConfig(Version.LUCENE_46, analyzer);IndexWriter indexWriter = new IndexWriter(directory , config); |
We’ve chosen to use a StandardAnalyzer instance for this. Its constructor takes Version.LUCENE_46 as an argument. That is helpful to discover compatibility dependencies across several releases of Lucene. Keep in mind that StandardAnalyzer, internally uses StandardTokenizer. Then, we create an IndexWriterConfig instance. This is a helper class that can hold all the configuration options for an IndexWriter. As you can see, we’ve specified that we want our IndexWriter to use the previously created analyzer and to be set to the appropriate version. Finally, we create the IndexWriter instance. In its constructor arguments we give the FSDirectory instance and the previously created configuration options.
Now you can go ahead and add the previously created Document to the Index, using the above IndexWriter:
|
1
|
indexWriter.addDocument(doc); |
And that’s it. Now, when addDocument is called, all the previously described operations take place:
- The
Tokenizeruses theFileReaderto read the file and converts it to plain text. It then breaks it into tokens. - The
Analyzermeanwhile can performs all kinds of syntactic and grammar analysis on the plain text and then on the individual tokens. - From the token analysis,
Termsare created and used to generate the inverted index. - Finally all the necessary files, holding all the info for the
Documentand the Index, are written to the specified path:"C:/Users/nikos/Index".
Our document is now indexed. The same process is followed for every Document you add to the Index.
Now that everything is more clear, let’s see the indexing process with the classes we used in a diagram :
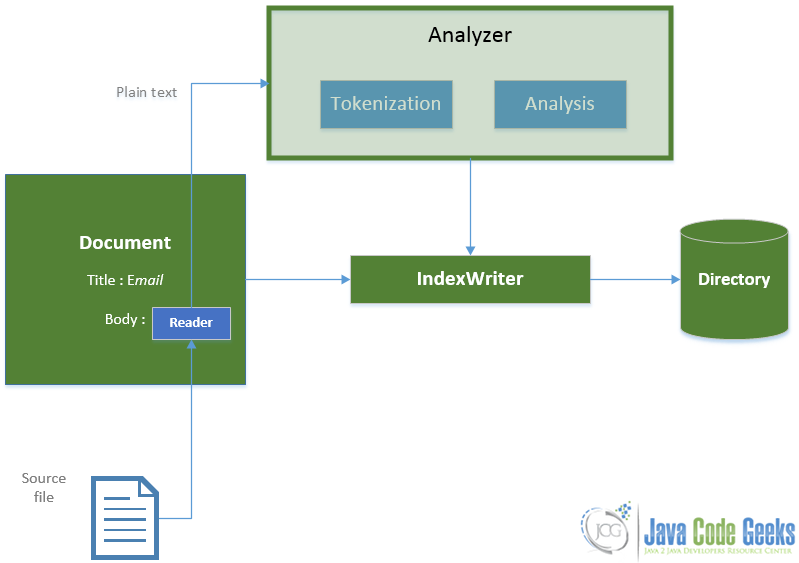
As you can see:
- We pass the
Documentobject to theIndexWriter. - He uses the
Analyzerto generateTermsfrom the plain text obtained by theReader. - Then, he writes everything that is necessary to update the index to the
Directory.
Indexing is the hard bit when trying to build your search engine, because you have to:
- Choose the documents and text sources you want to index.
- Provide Reader classes that read the text sources and convert them to plain text. There is wide variety of built in classes (or external libraries) that can read a big number of document formats. But if non of them is suitable for your documents, you will have to write your own Reader that will parse them and convert them to plain text.
- Decide on the tokenization and analysis policy that suits your application’s needs. The great majority of applications will do just fine with the StandardAnalyzer and StandardTokenizer. But, it is possible that you want to customize the analysis step a bit further and that requires some work to be done.
- Decide what kind of Fields to use and which of them to store and/or index.
3. Basic components for searching
In this section we are going to describe the basic components and the basic Lucene classes used to perform searched. Searching is the target of platforms like Lucene, so it has to be as nimble and as easy as possible.
3.1 QueryBuilder and Query
In Lucene, every query passed to the Index is a Query object. So before actually interacting with the Index to perform a search, you have to build such objects.
Everything starts with the query string. It can be like query strings you put on well know search engines, like Google. It can be an arbitrary phrase, or a more structured one, as we will see in the next Lesson. But it would be useless to just send this raw string to be searched in the index. You have to process it, like you did with the indexed plain text. You have to split the query string into words and create searchable Terms. Presumably, this can be done using an Analyzer.
Note: It is important to note that you should use the same Analyzer sub class, to examine the query, as the one you used to the indexing process, to examine the plain text.
Here is how you would create a simple Query, processed with StandardAnalyzer:
|
1
2
3
4
5
|
Analyzer analyzer = new StandardAnalyzer(Version.LUCENE_46);QueryBuilder builder = new QueryBuilder(analyzer);Query query = builder.createBooleanQuery("content", queryStr); |
We bind a QueryBuilder object with an instance of StandarAnalyzer. You can now use that QueryBuilder instance to create Query objects.
Query is an abstract class and many concrete sub classes are available, like:
TermQuerythat searches for Documents that contain a specific term.BooleanQuerythat creates Boolean combinations of other queriesWildcardQueryto implement wild card searches, e.g for query strings like ” *abc* “.PhraseQueryto search for whole phrases, not just for individual Terms.PrefixQuerysearch for Terms with a predefined prefix.
All of these different Query flavors will determine the nature of the search that is going to be performed over your index. And each one of them can be obtained through that QueryBuilder instance. In our example we have chosen to use createBooleanQuery method. It takes two arguments. The first one is the name of the Field whose (surely indexed and probably tokenized) value is going to be searched. And the second one is the query string that is going to be analyzed with the StandardAnalyzer. createBooleanQuery can either return a TermQuery or a BooleanQuery depending on the syntax of the query string.
3.2 IndexReader
Presumably, to do a search in the Index, first you have to open it. You can use an IndexReader to open and access it. All processes that need to pull data out of the index, go through that abstract class.
It’s very easy to open an already created index with IndexReader:
|
1
2
3
|
Directory directory = FSDirectory.open(new File("C:/Users/nikos/Index"))IndexReader indexReader = DirectoryReader.open(directory); |
As you can see we use a DirectoryReader to open the Directory in which the Index is stored. DirectoryReader returns a handle for the index, and that’s what the IndexReader is.
3.3 IndexSearcher
The IndexSearcher is the class you use to search a single Index. It is bound with an IndexReader.
Here is how you can create one:
|
1
2
3
|
IndexReader indexReader = DirectoryReader.open(directory);IndexSearcher searcher = new IndexSearcher(indexReader); |
You use an IndexSearcher to pass Query objects to the IndexReader. Here is how :
|
1
2
3
|
Query query = builder.createBooleanQuery("content", queryStr);TopDocs topDocs =searcher.search(query, maxHits); |
We used public TopDocs search(Query query, int n) method of IndexSearcher to perform the search. This method takes two argumets. The first one is the Query object. The second is an integer that sets a limit on the number of the returned search results. If, for example, you have 10000 documents that satisfy your query you might not want all of them to be returned. You can state that you want only the first n results. Finally, that method returns a TopDocs instance.
3.4 TopDocs
The TopDocs class represents the hits that satisfy your query. TopDocs has a public ScoreDoc[] class field.
3.5 ScoreDoc
A SocreDoc represents a hit for a query. It consists of :
- A
public int docfield, that is the id of theDocumentthat satisfied the query. - And a
public float scorefield, that is the score that theDocumentachieved in the query.
The scoring formula is very a essential and complex part of any search platform and it is what makes Lucene work so good. This formula is used to provide a relevance measure for the retrieved Document. The higher the score is, the more relevant that Document is to your query. This helps to characterize “good” and “bad” Documents and ensures that you are provided with high quality results that are as close as possible to the Documents you really need. You can find some useful information on scoring in the documentation of the current’s version Similarity class, and on the older one , as well as this Information Retrieval article.
4. A Simple Search Application
We are going to build a simple search application that will demonstrate the basic steps for indexing and the searching. In this application we are going to use an input folder that contains a bunch of java source files. Every file in this document will be processed and added to the index. Then we are going to perform simple queries over that index to see how it works.
We are going to use:
- Eclipse Kepler 4.3 as our IDE.
- JDK 1.7.
- Maven 3 to build our project.
- Lucene 4.6.0, the latest version of Lucene.
First of all, let’s create our Maven Project with Eclipse.
4.1 Create a new Maven Project with Eclipse
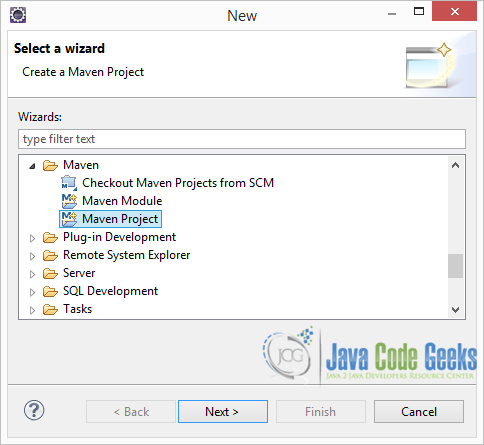
Open Eclipse and go to File -> New -> Other -> Maven -> Maven Project and click Next
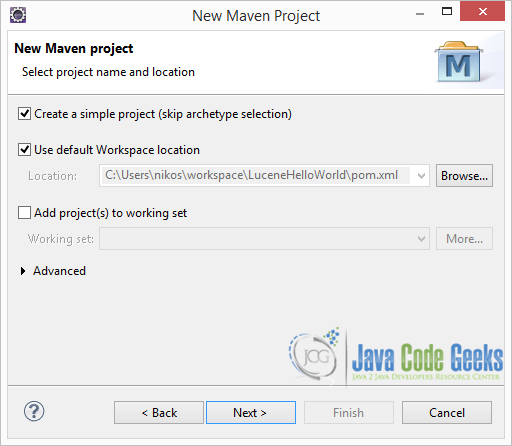
In the next window select the “Create a simple project (skip archetype selection)” option and click Next :
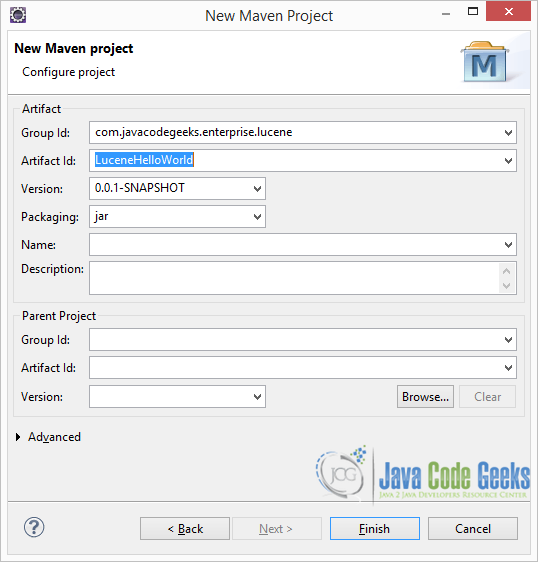
In the next window fill in the Group Id and Artifact Id, as shown in the picture below, and click Finish:
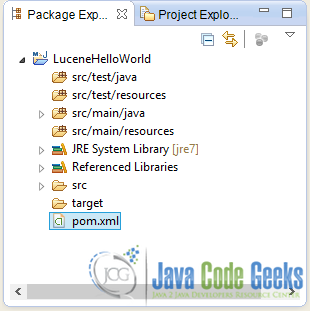
A new Maven project will be created with the following structure:
4.2 Maven Dependencies
Open pom.xml and add the dependencies required to use Lucene libraries:
pom.xml:
|
01
02
03
04
05
06
07
08
09
10
11
12
13
14
15
16
17
18
19
20
21
22
23
24
25
|
<project xmlns="http://maven.apache.org/POM/4.0.0" xmlns:xsi="http://www.w3.org/2001/XMLSchema-instance" <modelVersion>4.0.0</modelVersion> <groupId>com.javacodegeeks.enterprise.lucene.index</groupId> <artifactId>LuceneHelloWorld</artifactId> <version>0.0.1-SNAPSHOT</version> <dependencies> <dependency> <groupId>org.apache.lucene</groupId> <artifactId>lucene-core</artifactId> <version>4.6.0</version> </dependency> <dependency> <groupId>org.apache.lucene</groupId> <artifactId>lucene-analyzers-common</artifactId> <version>4.6.0</version> </dependency> </dependencies></project> |
As you can see we are importing lucene-core-4.6.0.jar which provides all the core classes, and lucene-analyzers-common-4.6.0.jar package which provides all the classes neccesery for text analysis.
4.3. A simple indexer class
To create this class go to the Package Explorer of Eclipse. Under src/java/main create a new package named com.javacodegeeks.enterprise.lucene.index. Under the newly created package, create a new class named SimpleIndexer.
Let’s see the code of that class, which will do the indexing:
SimpleIndexer.java:
|
01
02
03
04
05
06
07
08
09
10
11
12
13
14
15
16
17
18
19
20
21
22
23
24
25
26
27
28
29
30
31
32
33
34
35
36
37
38
39
40
41
42
43
44
45
46
47
48
49
50
51
52
53
54
55
56
57
58
59
60
61
62
63
64
65
66
67
68
|
package com.javacodegeeks.enterprise.lucene.index;import java.io.File;import java.io.FileReader;import java.io.IOException;import org.apache.lucene.analysis.Analyzer;import org.apache.lucene.analysis.standard.StandardAnalyzer;import org.apache.lucene.document.Document;import org.apache.lucene.document.StoredField;import org.apache.lucene.document.TextField;import org.apache.lucene.index.IndexWriter;import org.apache.lucene.index.IndexWriterConfig;import org.apache.lucene.store.FSDirectory;import org.apache.lucene.util.Version;public class SimpleIndexer { private static final String indexDirectory = "C:/Users/nikos/Desktop/LuceneFolders/LuceneHelloWorld/Index"; private static final String dirToBeIndexed = "C:/Users/nikos/Desktop/LuceneFolders/LuceneHelloWorld/SourceFiles"; public static void main(String[] args) throws Exception { File indexDir = new File(indexDirectory); File dataDir = new File(dirToBeIndexed); SimpleIndexer indexer = new SimpleIndexer(); int numIndexed = indexer.index(indexDir, dataDir); System.out.println("Total files indexed " + numIndexed); } private int index(File indexDir, File dataDir) throws IOException { Analyzer analyzer = new StandardAnalyzer(Version.LUCENE_46); IndexWriterConfig config = new IndexWriterConfig(Version.LUCENE_46, analyzer); IndexWriter indexWriter = new IndexWriter(FSDirectory.open(indexDir), config); File[] files = dataDir.listFiles(); for (File f : files) { System.out.println("Indexing file " + f.getCanonicalPath()); Document doc = new Document(); doc.add(new TextField("content", new FileReader(f))); doc.add(new StoredField("fileName", f.getCanonicalPath())); indexWriter.addDocument(doc); } int numIndexed = indexWriter.maxDoc(); indexWriter.close(); return numIndexed; }} |
In the above class we specified our input folder where the text files are placed to be in C:/Users/nikos/Desktop/LuceneFolders/LuceneHelloWorld/SourceFiles, and also the folder where the index is going to be stored to be in C:/Users/nikos/Desktop/LuceneFolders/LuceneHelloWorld/Index.
On the index method, first we create a new StandardAnalyzer instance and a new IndexWriter instance. The IndexeWriter will use the StrandardAnalyzer to analyze the text, and will store the index in the FSDirectory pointing to the aforementioned index path.
The interesting bit is on the for loop. For every file in the source directory :
- We create a new
Documentinstance. - We add a new
Filed, aTextFieldto be precise, that represents the content of the file. Remember thatTextFieldis used to create a field that its value is going to be tokenized and indexed but not stored. - We add another
Field, this time aStoredFiled, that holds the name of the file. Remember that aStoredFieldis for fields that are just stored, not indexed and not tokenized. Because we store the file name as its full path, we can later use it to access, present and examine its contents. - Then we simply add the
Documentto the index.
After the loop:
- We call
maxDoc()method ofIndexWriterthat returns the number of indexedDocuments. - We close the
IndexWriter, because we don’t need it anymore, and thus the system can reclaim its resources.
When I run this code, here is the output it produces:
|
01
02
03
04
05
06
07
08
09
10
11
12
13
14
15
|
Indexing file C:\\Users\\nikos\\Desktop\\LuceneFolders\\LuceneHelloWorld\\SourceFiles\\Cart.javaIndexing file C:\\Users\\nikos\\Desktop\\LuceneFolders\\LuceneHelloWorld\\SourceFiles\\CartBean.javaIndexing file C:\\Users\\nikos\\Desktop\\LuceneFolders\\LuceneHelloWorld\\SourceFiles\\MyServlet.javaIndexing file C:\\Users\\nikos\\Desktop\\LuceneFolders\\LuceneHelloWorld\\SourceFiles\\Passivation.javaIndexing file C:\\Users\\nikos\\Desktop\\LuceneFolders\\LuceneHelloWorld\\SourceFiles\\PassivationBean.javaIndexing file C:\\Users\\nikos\\Desktop\\LuceneFolders\\LuceneHelloWorld\\SourceFiles\\Product.javaIndexing file C:\\Users\\nikos\\Desktop\\LuceneFolders\\LuceneHelloWorld\\SourceFiles\\PropertyObject.java<Indexing file C:\\Users\\nikos\\Desktop\\LuceneFolders\\LuceneHelloWorld\\SourceFiles\\SecondInterceptor.javaIndexing file C:\\Users\\nikos\\Desktop\\LuceneFolders\\LuceneHelloWorld\\SourceFiles\\ShoppingCartServlet.javaIndexing file C:\\Users\\nikos\\Desktop\\LuceneFolders\\LuceneHelloWorld\\SourceFiles\\SimpleEJB.javaIndexing file C:\\Users\\nikos\\Desktop\\LuceneFolders\\LuceneHelloWorld\\SourceFiles\\SimpleIndexer.javaIndexing file C:\\Users\\nikos\\Desktop\\LuceneFolders\\LuceneHelloWorld\\SourceFiles\\SimpleInterceptor.javaIndexing file C:\\Users\\nikos\\Desktop\\LuceneFolders\\LuceneHelloWorld\\SourceFiles\\SimpleSearcher.javaIndexing file C:\\Users\\nikos\\Desktop\\LuceneFolders\\LuceneHelloWorld\\SourceFiles\\TestSerlvet.javaTotal files indexed 14 |
Here is the index folder in my system. As you can see, several special files are created (more on that next lessons):

Now let’s search that index.
4.4. A simple searcher class
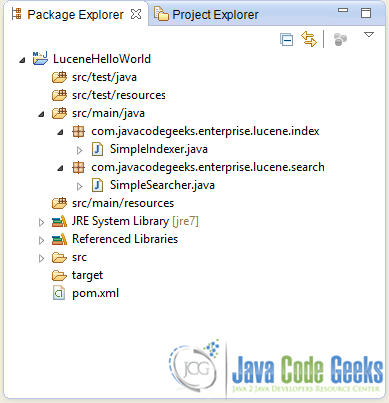
To create this class go to the Package Explorer of Eclipse. Under src/java/main create a new package named com.javacodegeeks.enterprise.lucene.search. Under the newly created package, create a new class named SimpleSearcher.
To get a more clear view of he final structure of the project, have a look at the image bellow:
Let’s see the code of that class, which will do the searching:
SimpleSearcher.java:
|
01
02
03
04
05
06
07
08
09
10
11
12
13
14
15
16
17
18
19
20
21
22
23
24
25
26
27
28
29
30
31
32
33
34
35
36
37
38
39
40
41
42
43
44
45
46
47
48
49
50
51
52
53
54
55
56
57
58
59
60
61
62
63
64
65
66
67
|
package com.javacodegeeks.enterprise.lucene.search;import java.io.File;import org.apache.lucene.analysis.Analyzer;import org.apache.lucene.analysis.standard.StandardAnalyzer;import org.apache.lucene.document.Document;import org.apache.lucene.index.DirectoryReader;import org.apache.lucene.index.IndexReader;import org.apache.lucene.search.IndexSearcher;import org.apache.lucene.search.Query;import org.apache.lucene.search.ScoreDoc;import org.apache.lucene.search.TopDocs;import org.apache.lucene.store.Directory;import org.apache.lucene.store.FSDirectory;import org.apache.lucene.util.QueryBuilder;import org.apache.lucene.util.Version;public class SimpleSearcher { private static final String indexDirectory = "C:/Users/nikos/Desktop/LuceneFolders/LuceneHelloWorld/Index"; private static final String queryString = "private static final String"; private static final int maxHits = 100; public static void main(String[] args) throws Exception { File indexDir = new File(indexDirectory); SimpleSearcher searcher = new SimpleSearcher(); searcher.searchIndex(indexDir, queryString); } private void searchIndex(File indexDir, String queryStr) throws Exception { Directory directory = FSDirectory.open(indexDir); IndexReader indexReader = DirectoryReader.open(directory); IndexSearcher searcher = new IndexSearcher(indexReader); Analyzer analyzer = new StandardAnalyzer(Version.LUCENE_46); QueryBuilder builder = new QueryBuilder(analyzer); Query query = builder.createPhraseQuery("content", queryStr); TopDocs topDocs =searcher.search(query, maxHits); ScoreDoc[] hits = topDocs.scoreDocs; for (int i = 0; i < hits.length; i++) { int docId = hits[i].doc; Document d = searcher.doc(docId); System.out.println(d.get("fileName") + " Score :"+hits[i].score); } System.out.println("Found " + hits.length); }} |
In the searchIndex method we pass the index directory and the query string as arguments. So I’m going to search for “private static final String”. Remember that the files I’ve indexed were Java source files,
The code is pretty self explanatory:
- We open the index directory and obtain the
IndexReaderandIndexSearcherclasses. - We then use the
QueryBuilder, fed with theStrandardAnalyzer, to build ourQueryobject. We usedcreateBooleanQueryto obtain theQueryobject. Our query string does not have a boolean format (as we will see in the next lesson), so the method will createTermQueriesfor the analyzed and tokenized terms of the query string. - We then use the search method of the
IndexSearcherto perform the actual search. - We obtain the
ScoreDocsthat satisfied the query from theTopDocsreturned from thesearchmethod. For every ID in thatScoreDocsarray, we obtain the correspondingDocumentfrom theIndexSearcher. - From that
Document, usinggetmethod, we obtain the name of the file, stored in the value of the “fileName”Field. - We finally print the name of the file and the score it achieved.
Let’s run the program and see what is the output:
|
01
02
03
04
05
06
07
08
09
10
11
|
C:\\Users\\nikos\\Desktop\\LuceneFolders\\LuceneHelloWorld\\SourceFiles\\Product.java Score :0.6318474C:\\Users\\nikos\\Desktop\\LuceneFolders\\LuceneHelloWorld\\SourceFiles\\PropertyObject.java Score :0.58126664C:\\Users\\nikos\\Desktop\\LuceneFolders\\LuceneHelloWorld\\SourceFiles\\SimpleSearcher.java Score :0.50096965C:\\Users\\nikos\\Desktop\\LuceneFolders\\LuceneHelloWorld\\SourceFiles\\SimpleIndexer.java Score :0.31737804C:\\Users\\nikos\\Desktop\\LuceneFolders\\LuceneHelloWorld\\SourceFiles\\ShoppingCartServlet.java Score :0.3093049C:\\Users\\nikos\\Desktop\\LuceneFolders\\LuceneHelloWorld\\SourceFiles\\TestSerlvet.java Score :0.2769966C:\\Users\\nikos\\Desktop\\LuceneFolders\\LuceneHelloWorld\\SourceFiles\\MyServlet.java Score :0.25359935C:\\Users\\nikos\\Desktop\\LuceneFolders\\LuceneHelloWorld\\SourceFiles\\SimpleEJB.java Score :0.05496885C:\\Users\\nikos\\Desktop\\LuceneFolders\\LuceneHelloWorld\\SourceFiles\\PassivationBean.java Score :0.03272106C:\\Users\\nikos\\Desktop\\LuceneFolders\\LuceneHelloWorld\\SourceFiles\\CartBean.java Score :0.028630929Found 10 |
It is important to understand that these files do not certainly contain the whole phrase "private static final String". Intuitively, the documents with the higher score contain most of the words of that sentence and more frequently than documents with smaller scores. Of course the scoring formula is much more complex than that, as we said earlier.
For example if you change:
|
1
|
Query query = builder.createBooleanQuery("content", queryStr); |
to
|
1
|
Query query = builder.createPhraseQuery("content", queryStr); |
the whole phrase will be searched. Only documents that contain the whole phrase will be returned. When you run the code with that minor change, here is the output:
|
1
2
3
4
5
|
C:\\Users\\nikos\\Desktop\\LuceneFolders\\LuceneHelloWorld\\SourceFiles\\Product.java Score :0.9122286C:\\Users\\nikos\\Desktop\\LuceneFolders\\LuceneHelloWorld\\SourceFiles\\SimpleSearcher.java Score :0.7980338C:\\Users\\nikos\\Desktop\\LuceneFolders\\LuceneHelloWorld\\SourceFiles\\SimpleIndexer.java Score :0.4561143C:\\Users\\nikos\\Desktop\\LuceneFolders\\LuceneHelloWorld\\SourceFiles\\ShoppingCartServlet.java Score :0.36859602Found 4 |
These files contain the whole query string "private static final String" in their contents.
4.5 Download the source code
You can download the Eclipse project of this example here: LuceneHelloWorld.zip
5. Final notes
It is important to mention that an IndexReader reads the “image” that the index has the moment he opens it. So, if your application is dealing with text sources that change over short periods of time, it is possible that you have to re-index those files at run time. But you want to be sure that the changes are reflected when you search the Index, while your application is still running and you have already opened an IndexReader (who now is outdated). In this case you have to obtain an updated IndexReader like this:
|
1
2
|
//indexReader is the old IndexReaderIndexReader updatedIndexReader = DirectoryReader.openIfChanged(indexReader); |
This will ensure that you get a new more updated IndexReader, but only if the index has changed. Furthermore, if you want to achieve fast, near real time searches ( e.g for stream data) you can obtain your IndexReader like so:
|
1
2
|
//indexWriter is your IndexWriterIndexReader nearRealTimeIndexReader = DirectoryReader.open(indexWriter,true); |
For performance reasons, the IndexWriter doesn’t flush the changes of the index immediately to the disk. It uses buffers instead, and persists the changes asynchronously. Opening an IndexReader like in the above snippet, gives him immediate access to the write buffers of the IndexWriter, and thus he has instant access to index updates.
Finally, it’s worth mentioning that IndexWriter is thread safe, thus you can use the same instance in many threads to add Documents one particular index. The same goes for the IndexReader and IndexSearcher. Many threads can use the same instance of these classes to simultaneously read or search the same index.
