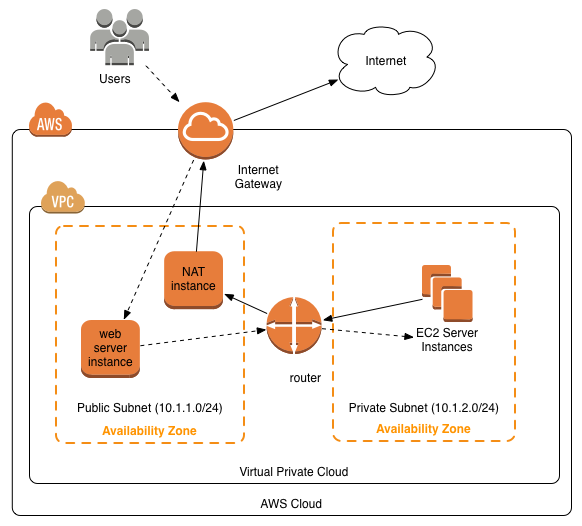
![]() In a previous post I described how to setup a VPC with both private and public subnets with AWS. In the post I showed a basic configuration in which we saw that the instances in the private subnet didn’t have internet access, which was necessary to run ‘yum update’, for instance. In this post I will show you one way to solve that by adding a NAT instance to your VPC and have your EC2 instances in the private subnet use that to access internet resources. Here is the diagram I used in the previous post:
In a previous post I described how to setup a VPC with both private and public subnets with AWS. In the post I showed a basic configuration in which we saw that the instances in the private subnet didn’t have internet access, which was necessary to run ‘yum update’, for instance. In this post I will show you one way to solve that by adding a NAT instance to your VPC and have your EC2 instances in the private subnet use that to access internet resources. Here is the diagram I used in the previous post:
The steps to create a NAT are:
- Create a new NAT security group
- Create the NAT instance
- Assign Elastic IP address
- Disable the ‘Source/Destination check’
- Create a new Route
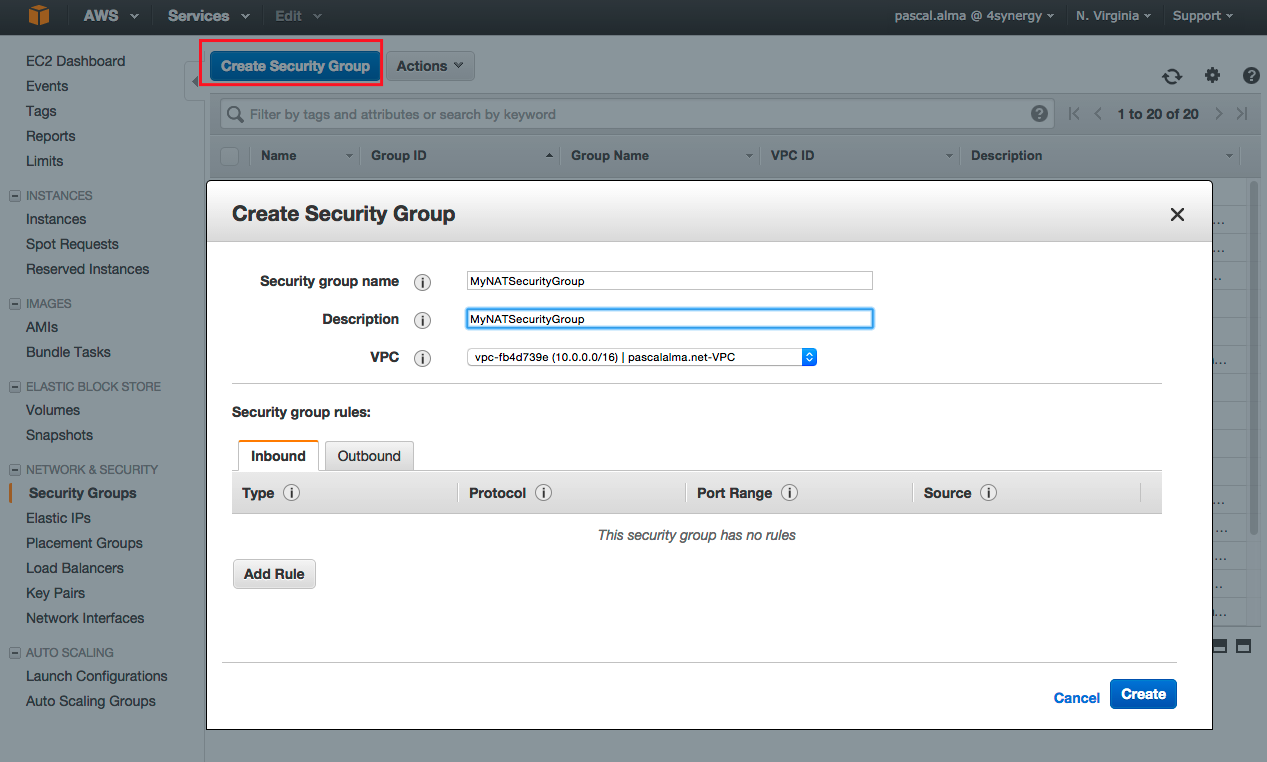
Create a new NAT security group
Create a new security group in the EC2 Services overview. In this security group we will create our NAT instance. It will receive traffic from our private subnet and send out to the internet. First create the group like this:
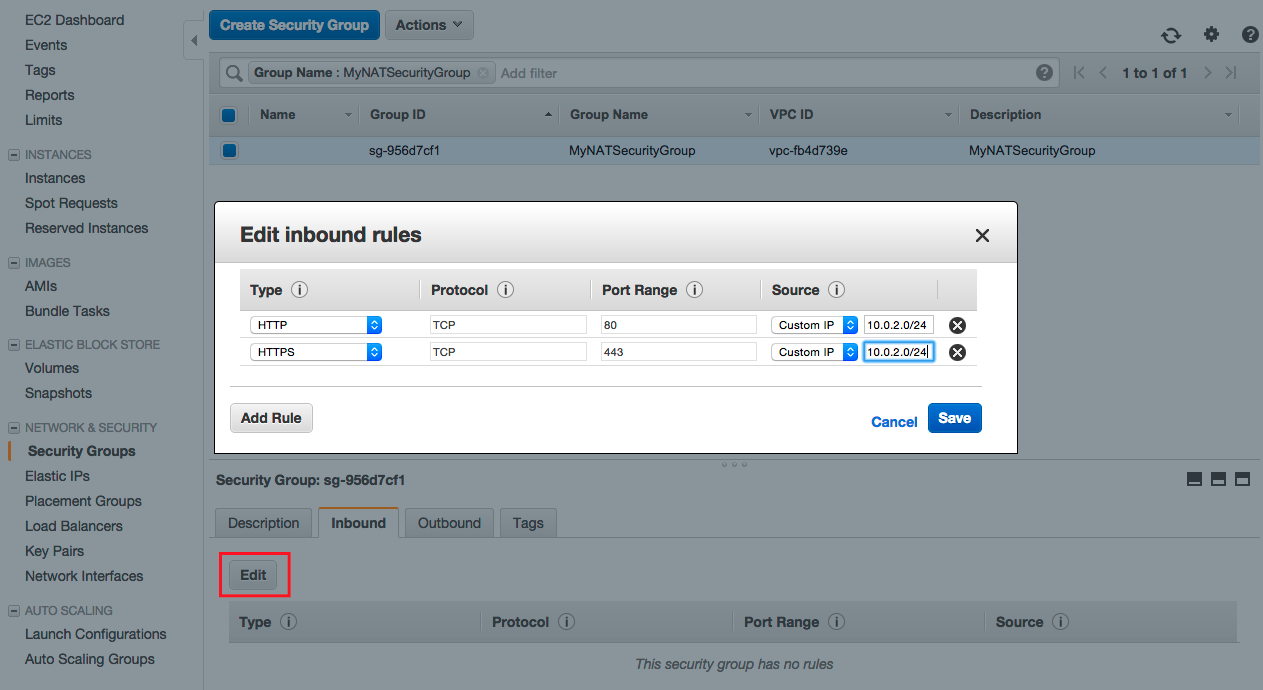
Now set up the rules for our outbound and inbound traffic. The rules should reflect the fact that we want to use HTTP and HTTPS traffic to flow from our private subnet to the public subnet. So the inbound rules look like this:
For the outbound I just squeeze down the options by only allowing HTTP and HTTPS:
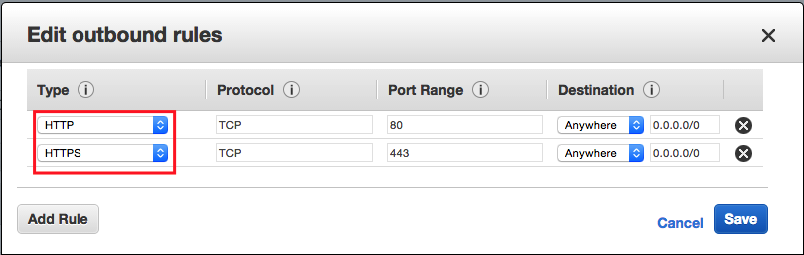
So this Security Group allows instances in our private subnet to communicate with our NAT instance that we create next.
Create the NAT instance
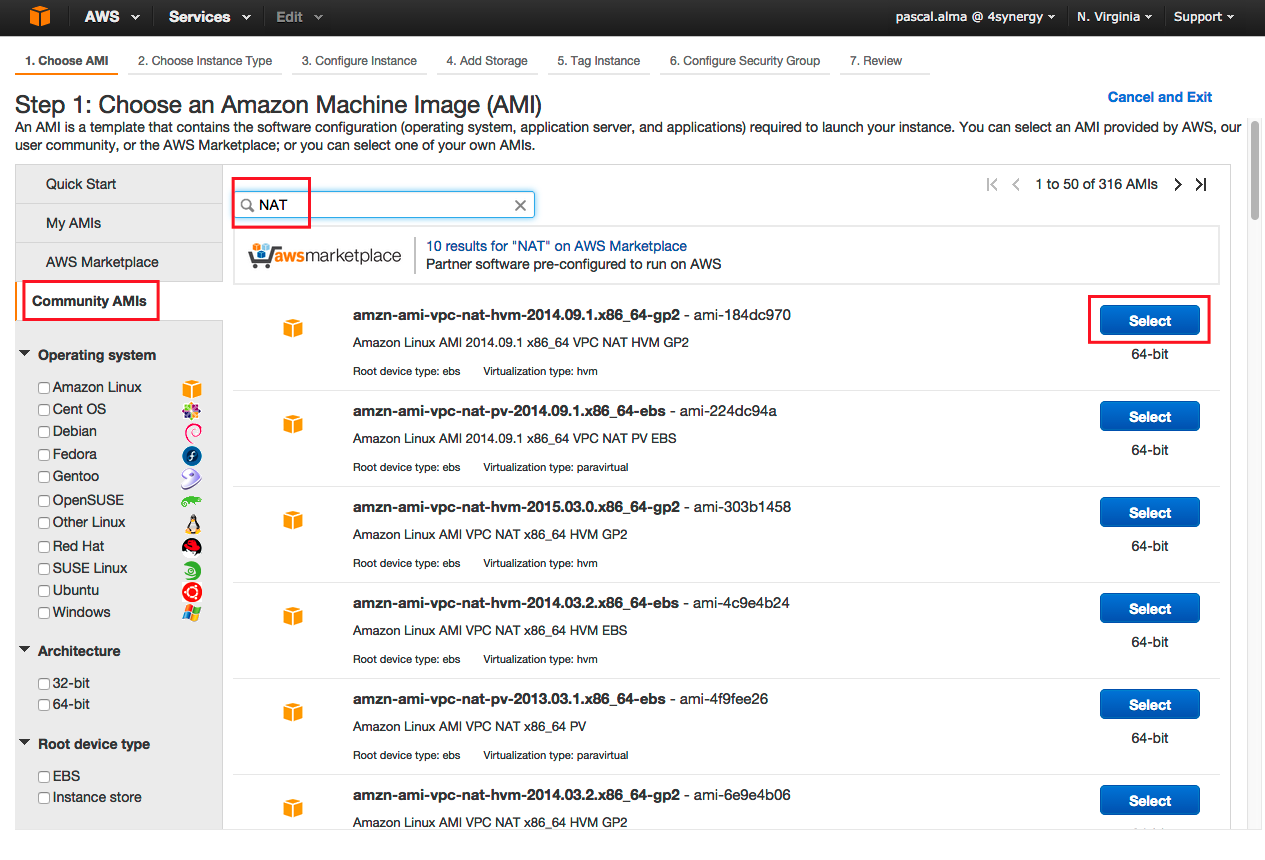
Go to the EC2 service and select an AMI that will act as our image for the NAT instance. Easiest to ‘Launch new Instance’, select the ‘Community AMIs’ and filter on ‘NAT’. Pick now one of the choices available:
In step 2 just pick the instance type you think you need. For this demo I use a micro.t2 but if you are expecting heavy traffic through the NAT instance you can of course pick a heavier type.
In step 3 make sure you pick the correct VPC and subnet (the public one). I also disable the auto-assign step here as I will assign an IP later on manually:

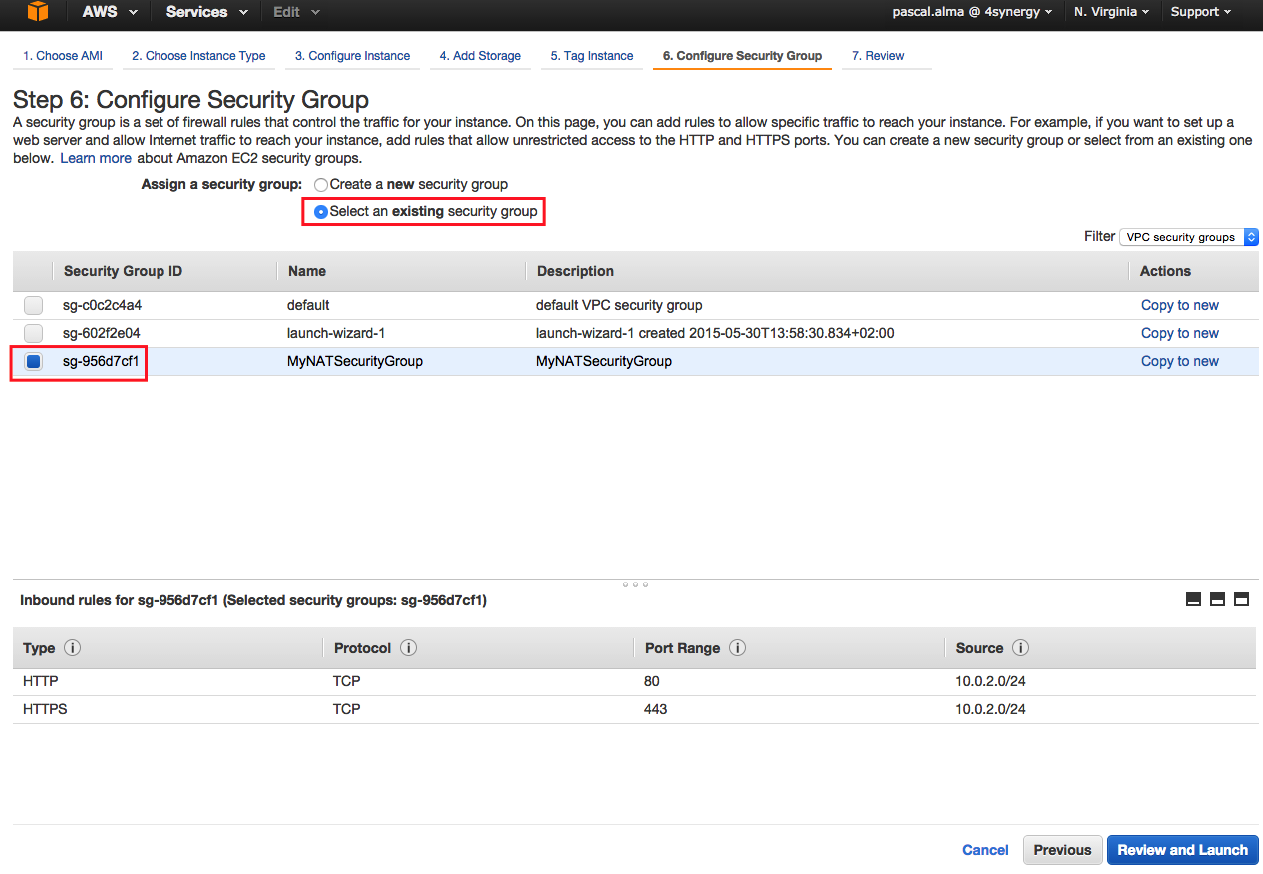
in step 4 accept the defaults, in step 5 give the instance a name like ‘MyNATInstance’ and in step 6 assign it to the Security Group we created in the previous step:
After this step you will receive a warning saying that the instance won’t be accessible via SSH, which is fine in this case since our instance is only meant to behave like a router so just click ‘Continue’:

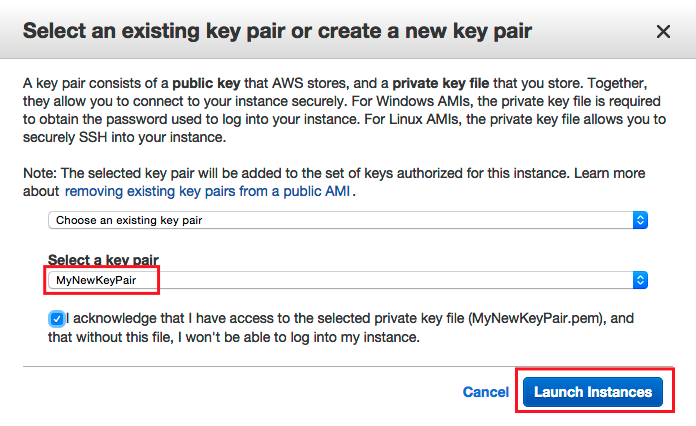
After reviewing the settings click ‘Launch’ and select the existing key-pair ‘MyNewKeyPair’ I also created at an earlier stage:
Now we have our new instance up and running and lets assign a IP address to it.
Assign Elastic IP address
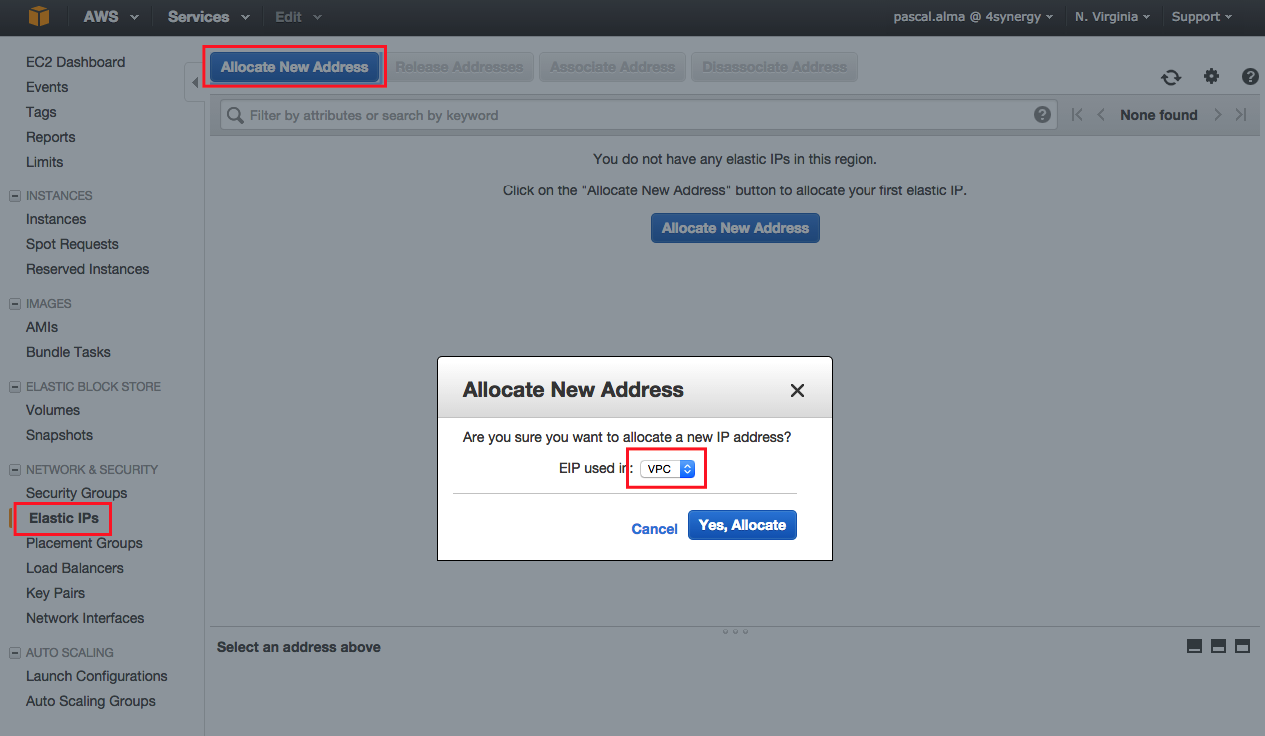
Go to ‘Elastic IPs’ in the left menu, click ‘Allocate New Address’ and set EIP used in ‘VPC’:
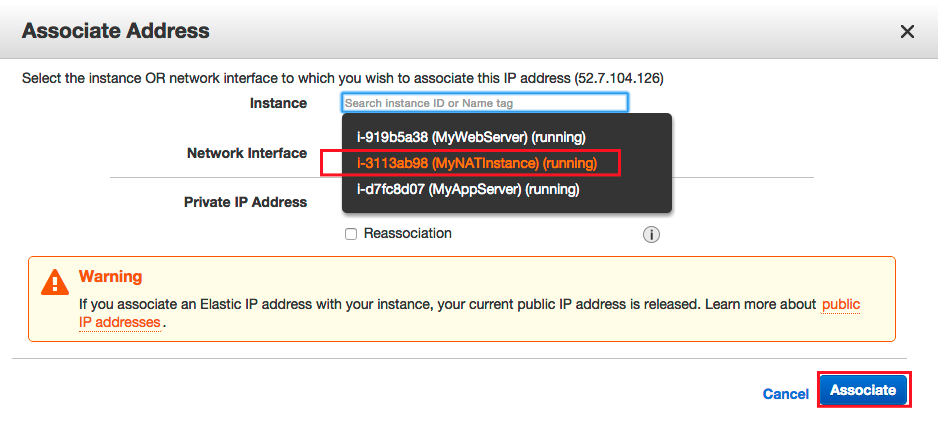
After allocating it we can assign it to the NAT instance by clicking ‘Associate Address’:
Disable the ‘Source/Destination check’
The next thing to do is the go back to the EC2 overview screen and select the NAT instance, open the ‘Actions’ menu and find the item ‘Change Source/Dest. Check’:
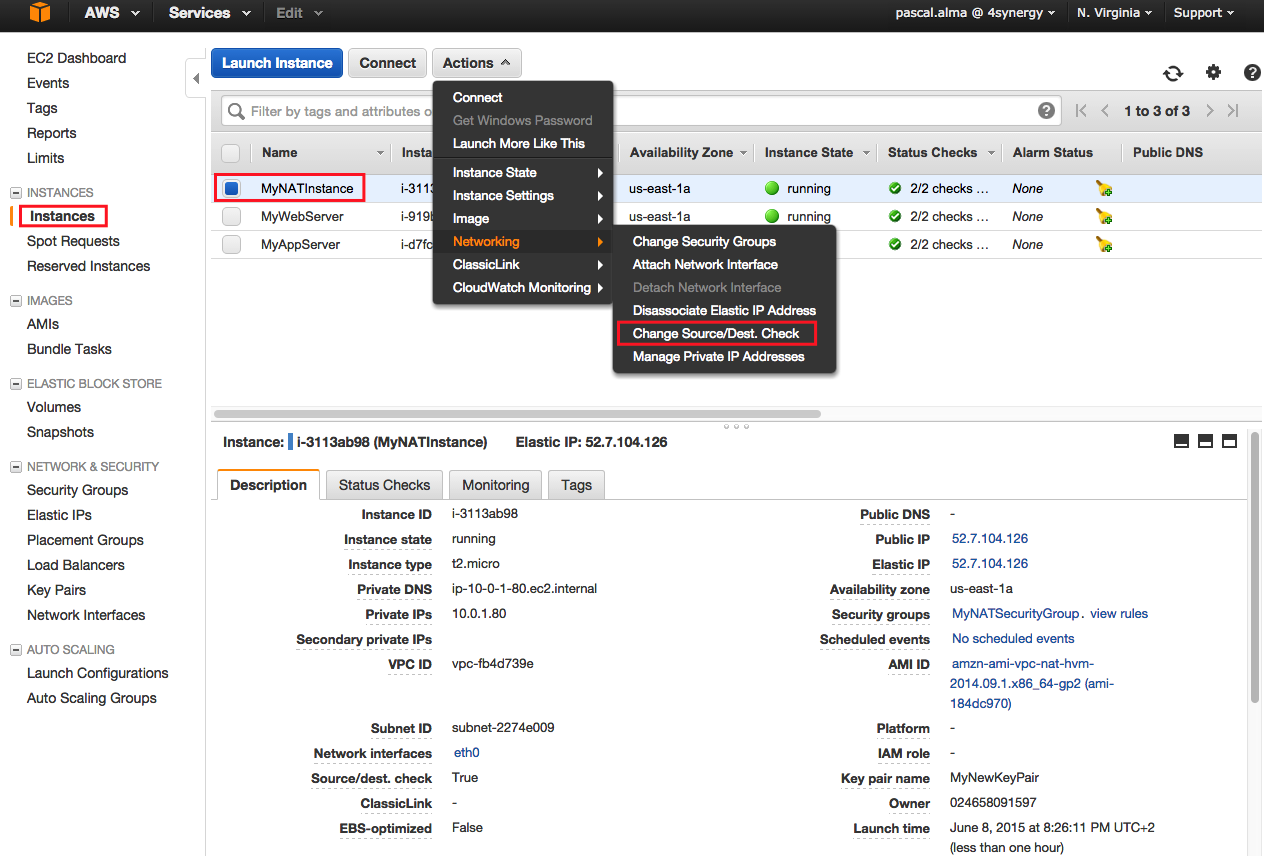
After disabling this check the NAT instance is able to act as a router.
Create a new Route
The final step is to add a rule to our private subnet so it is able to speak to our NAT instance and have internet access that way. So I open the VPC overview and go to the Route Tables and edit the Routes for the ‘default’ Route Table:
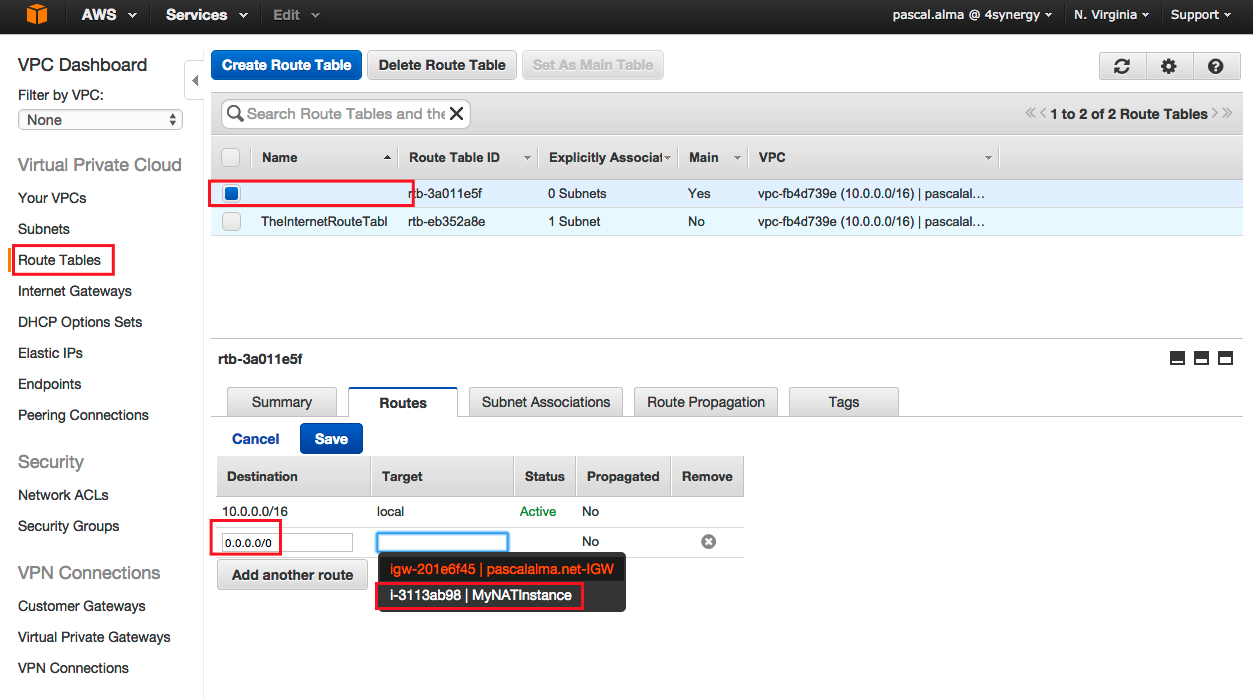
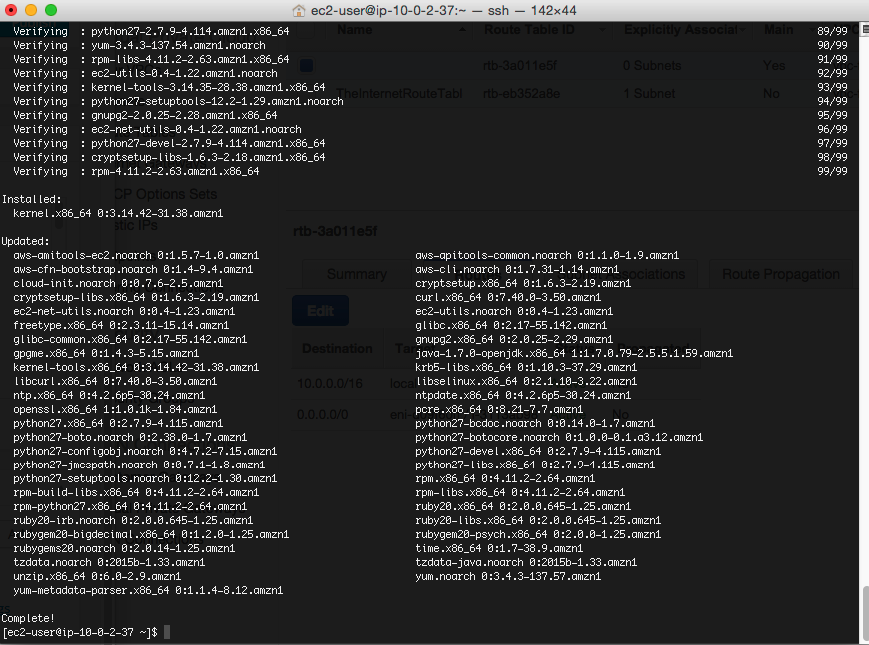
As Destination we fill in 0.0.0.0/0 to allow traffic from any source and as Target we pick our NAT instance. Thats it, so lets test it. I logon to our ‘WebServer’ instance which resides in the DMZ. From there I open up an SSH terminal to our ‘ApplicationServer’. If I now perform a ‘sudo yum update’ we see that this instance has a connection to the internet to download the necessary packages (which failed at the end of my previous post since we didn’t have internet access without the NAT):
| Reference: | Adding a NAT to your AWS VPC from our JCG partner Pascal Alma at the The Pragmatic Integrator blog. |
