Ubuntu->VMware->MINIX 3
Unix-like Microkernel Open-Source Operating System
 Meet MINIX 3 a Unix-like, robust and compact operating system that is capable of recovering from drivers crashes. Current MINIX version is stable enough to suit perfectly Real-Time Embedded systems and systems that require stability over long periods of time without restart. Here is the quote from the official MINIX site.
What Is MINIX 3?
MINIX 3 is a free, open-source, operating system designed to be highly reliable, flexible, and secure. It is based on a tiny microkernel running in kernel mode with the rest of the operating system running as a number of isolated, protected, processes in user mode. It runs on x86 and ARM CPUs, is compatible with NetBSD, and runs thousands of NetBSD packages. Get MINIX 3 now and join our community!
‘Without MINIX there wouldn`t be Linux and Android’ – Andrew Tanenbaum
In his talk about the impact of MINIX Andrew Tanenbaum who is the developer of the OS told that without MINIX it wouldn`t be Linux, and without Linux it wouldn`t be Android. The world would be a somewhat different place than it is today. Well, If you are curious at this point what this MINIX is all about then that`s delve into practical installation steps.
How to run MINIX?
I used to work on Windows powered machine, but times change and Linux has fascinated me lately. As a consequence, I`ll describe here the process of installation of MINIX under VMware Player virtual machine running in Ubuntu Linux distribution. Certainly, it is possible to run MINIX under VM in Widows or as a stand alone operating system. But I find this scenarios more difficult to start with if all you want is simply to get first impression from MINIX.
Windows and Ubuntu Dual boot
If currently you are using Linux or Mac OS powered machine then skip this step and go to VMware Player chapter. Else welcome to Windows and Ubuntu dual boot installation description main steps.
- First of all, backup your Windows system and create recovery disc.
- Next thing is to download latest version of Ubuntu image and burn it to DVD disc or figure out how to use USB boot. In my case it was Ubuntu 14.04 LTS on Windows 7.
- There are two ways to setup partitioning during Ubuntu installation: automatic and manual. I chose automatic and had no problems. You may choose whatever you like.
- After this installation is straight forward, but if you do not sure how to proceed see this detailed video tutorial.
VMware Player
It seems you`ll pretty fast get how to use Ubuntu, since it feels like very intuitive system. Remember Google search and Ubuntu forms is your friends. Now that you are familiar with Ubuntu proceed to this tutorial on how to install VMware Palyer. If you need more tangible explanation watch this video tutorial on the subject.
MINIX 3
OK. Here we are, only few steps left to follow.
- Download the MINIX version that you need from here. I used the 3.3.0 image downloaded for that matter.
- When you`ve downloaded it there is a need to decompress it using bzip2 application.
bzip2 -d filename.bz2
- Here are the steps to setup VMware Player that you`ve installed previously. The steps were taken from official MINIX site VM installation description with my adaptations.
Virtual Machine Setup
Before you install Minix 3, you will need to create a new virtual machine configuration. The VM configuration specifies the parameters of your Virtual machine, e.g., how much memory you want the VM to use, how big you want the virtual hard disk to be, etc.
Create a Virtual Machine — VMware Workstation and VMware Player (version > 3)
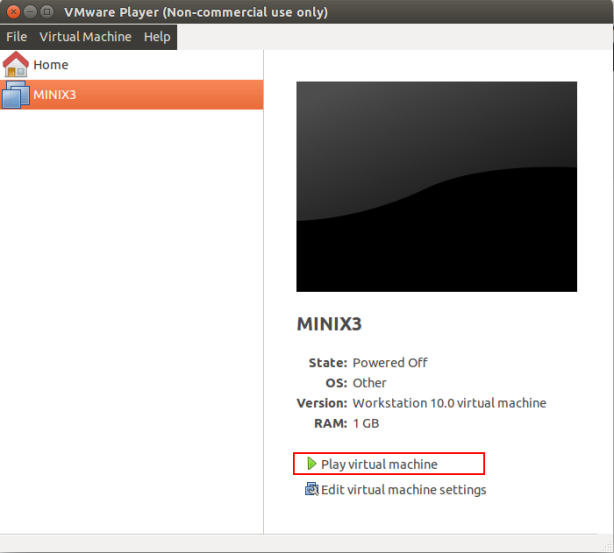
- Open VMware Player and choose to Create a New Virtual Machine.
- Select Use ISO image radio-button and browse to where you`ve decompressed MINIX image file; and then, press Next.
- At the Select a Guest Operating System, select Other and Version Other.
- For Virtual Machine Name, enter Minix3 or some other meaningful name.
- At the Specify Disk Capacity, enter 2 GB, which is enough for all packages and sources. You can make it larger if you need to add more source files. (Note, however, that maybe you`ll need 8 GB due a problem with X Window System configuration that we`ll encounter in a minute. Andrei)
- At the Ready to Create Virtual Machine, ensure that Power on this virtual machine after creation is not checked; and then, press Finish.
You will need to edit the memory settings according to your needs. In the Devices section, select the Memory, and adjust the memory accordingly. Note that, in order to run the X Window System on Minix, you need at least 384MB.
When VM starts after you`ve pressed Finish in step 6 or you`ve played VM manually proceed to regular MINIX installation that were taken form this tutorial.
Installing
These steps correspond to the steps on the screen.
Running the Setup script
When the login prompt appears, login as root. Press Enter when prompted for a password.
To start the installation of MINIX on the hard disk, type
setup
After this and all other commands, be sure to type ENTER (RETURN). When the installation script ends a screen with a colon, hit ENTER to continue.
If the screen suddenly goes blank, press CTRL-F3 to select software scrolling (should only be needed on very old computers). Note that CTRL-key means depress the CTRL key and while holding it down, press “key.”
Select keyboard type
When you are asked to select your national keyboard, do so. This and other steps have a default choice, in square brackets. If you agree with it, just hit ENTER. In most steps, the default is generally a good choice for beginners. The us-swap keyboard interchanges the CAPS LOCK and CTRL keys, as is conventional on UNIX systems.
Create or select a partition for MINIX
You will first be asked if you are an expert in MINIX disk partitioning. If so, you will be placed in the part program to give you full power to edit the Master Boot Record (and enough rope to hang yourself). If you are not an expert, press ENTER for the default action, which is an automated step-by-step guide to formatting a disk partition for MINIX.
Select a disk
An IDE controller may have up to four disks. The setup script will now look for each one. Just ignore any error messages. When the drives are listed, select one. and confirm your choice.
Select a disk region
Now choose a region to install MINIX into. You have three choices:
- Select a free region
- Select a partition to overwrite
- Delete a partition to free up space and merge with adjacent free space
For choices (1) and (2), type the region number. For (3) type:
delete
then give the region number when asked. This region will be overwritten and its previous contents lost forever.
Confirm your choices
You have now reached the point of no return. You will be asked if you want to continue. If you do, the data in the selected region will be lost forever. If you are sure, type:
yes
and then ENTER. To exit the setup script without changing the partition table, hit CTRL-C.
Reinstall choice
If you chose an existing MINIX partition, in this step you will be offered a choice between a Full install, which erases everything in the partition, and a Reinstall, which does not affect your existing /home partition. This design means that you can put your personal files on /home and reinstall a newer version of MINIX when it is available without losing your personal files.
Select the size of /home
The selected partition will be divided into three subpartitions: root, /usr, and /home.
- /home, will contain only your own personal files. Specify how much of the partition should be set aside for your files. You will be asked to confirm your choice.
- /usr, contains most of the software, as well as all the optional packages. It is advised to give it several gigabytes if possible. It’s size is computed as the remaining of space left on the MINIX partition, so the bigger /home is, the smaller /usr is.
Select a block size
Disk block sizes of 1-KB, 2-KB, 4-KB, and 8-KB are supported, but to use a size larger than 4-KB you have to change a constant and recompile the system. Use the default (4 KB) here.
Select your Ethernet chip
You will now be asked which (if any) of the available Ethernet drivers you want installed. Network settings can be changed after installation. Please see Network Configuration for details.
Restart
When the copying is complete, MINIX is installed. Shut the system down by typing:
poweroff
Always stop MINIX this way to avoid data loss as MINIX keeps some files on the RAM disk and only copies them back to the hard disk at shutdown time.
Next Steps
Note! The MINIX installation does not install the things like X11 and GCC automatically. You have to do this after reboot according to Post installation instructions.
What`s next?
Now it is time to update default packages that comes with MINIX and install additional ones you need. I propose to install all available packages. The steps below are taken from here.
Installing Binary Packages
pkgin
pkgin is the binary package manager for MINIX 3. This page describes how to use it.
Software packages also can built from their source code. See Installing Source Packages for details.
Using pkgin
First, you will need to fetch the package list and populate the package database:
# pkgin update
This step can be re-run to update the package list.
If you would like to install a package, you can run:
# pkgin install git-base
# pkgin install binutils
# pkgin install clang
Also, there is a way to install everything:
# pkgin_all
X Window System mystery
So far, there is some problem, at least for me to install X Window System on MINIX. Update me if you`ll succeed.
Take care.
| Reference: | Ubuntu->VMware->MINIX 3 from our JCG partner Andrei Cheremskoy at the GetToCode.com blog. |


