EDITORIAL NOTE: JavaServer Pages (JSP) technology allows you to easily create web content that has both static and dynamic components. JSP technology makes available all the dynamic capabilities of Java Servlet technology but provides a more natural approach to creating static content.
The main features of JSP technology include a language for developing JSP pages, which are text-based documents that describe how to process a request and construct a response, an expression language for accessing server-side objects and mechanisms for defining extensions to the JSP language.
This a standalone, reference post to provide a framework on how to work with JSPs and help you quickly kick-start your own applications. Enjoy!
Table Of Contents
1. Introduction
Java Server Pages (JSP) is used for creating dynamic web pages. Java code can be inserted in HTML pages by using JSP tags. The tags are used for retrieving information from the database, sharing information between pages etc. IDE’s generally used for running JSP pages is NetBeansIDE and EclipseIDE.
1.1. Why JSP is preferred over Servlets?
- JSP provides an easier way of creating and managing dynamic web pages.
- It doesn’t require additional files, like java class file and web.xml
- As JSP is handled by the web container for any update in their code, it doesn’t need recompilation like servlets do.
- A JSP page can be accessed directly, whereas Servlet requires mapping with web.xml.
2. Life Cycle
The JSP life cycle is the same as Servlet life cycle with an additional step. In this step the JSP is compiled into servlet. The life cycle is shown in the figure given below:
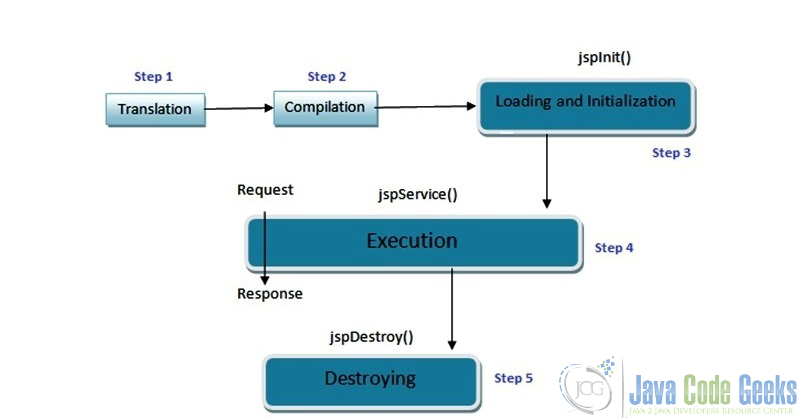
2.1. Translation
In the first stage, the web container translates the JSP document into an equivalent Java code. This java code is a servlet. Translation is automatically done by the Web server which locates, validates the correctness and writes the servlet for the JSP page.
2.2. Compilation
In this stage, the JSP container compiles the java source code in order to create the corresponding servlet and generated class file.
2.3. Loading and Initialization
In the third stage, the JSP container loads the servlet generated in the previous two stages. After correctly loading it, the JSP container creates an instance of the servlet class. Here, it uses a no-argument constructor.
Now, the JSP container initializes the instantiated object by invoking the init method. This is implemented by the container by calling the jspInit() method.
public void jspInit() {
  // Initialization code...
}
2.4. Execution
In this step, the JSP engine invokes the _jspService() method. The method has two parameters i.e. HttpServletRequest and HttpServletResponse and is invoked once per request. It is also responsible for generating response for this request.
void _jspService(HttpServletRequest request, HttpServletResponse response)
{
}
2.5. Destroying
The last step completes the life cycle. In this the container removes the JSP by using the jspDestroy() method.
public void jspDestroy()
{
   // any cleanup code
}
3. Demo: To start With
This is an example of JSP use. Follow these steps to start with your first JSP Application using the Eclipse IDE. The technologies used are given below:
- Java 1.8
- Eclipse IDE: Eclipse Java EE IDE for Web Developers 4.4.1
- JSP
- Apache Tomcat 8
Figure 1: Let us start with creating a new Dynamic Web Project:
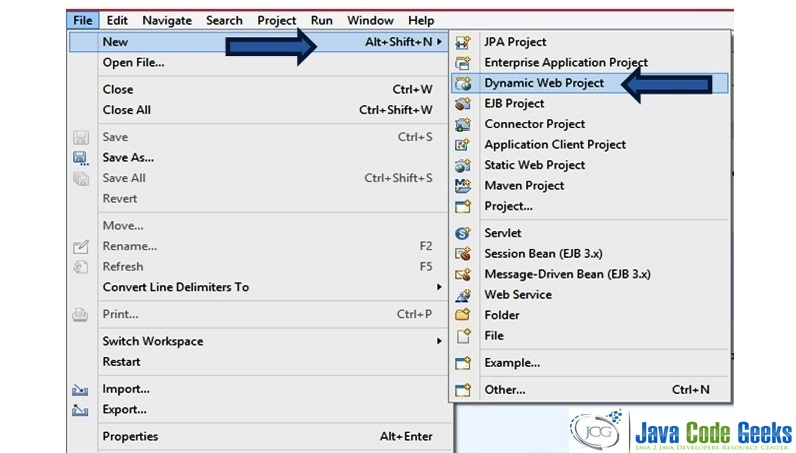
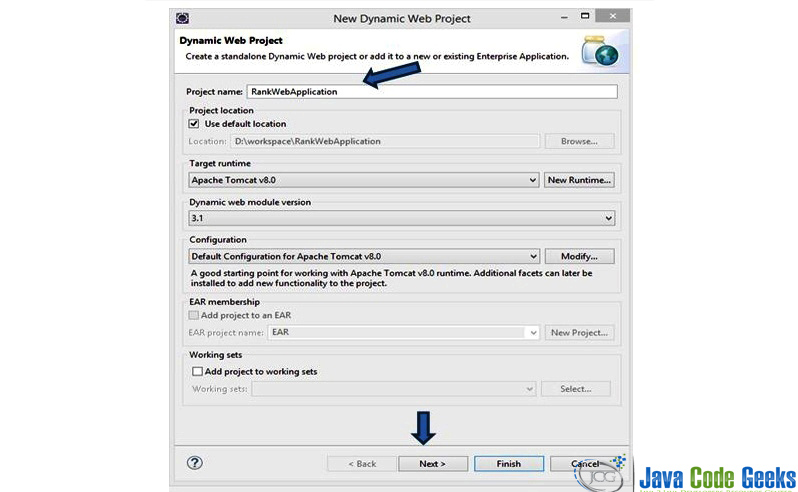
Figure 2: Add project name as RankWebApplication and click on Next:
Skip this step for configuring project and click on Next as we are focusing on a simple demo project.
Figure 3: Configure project:

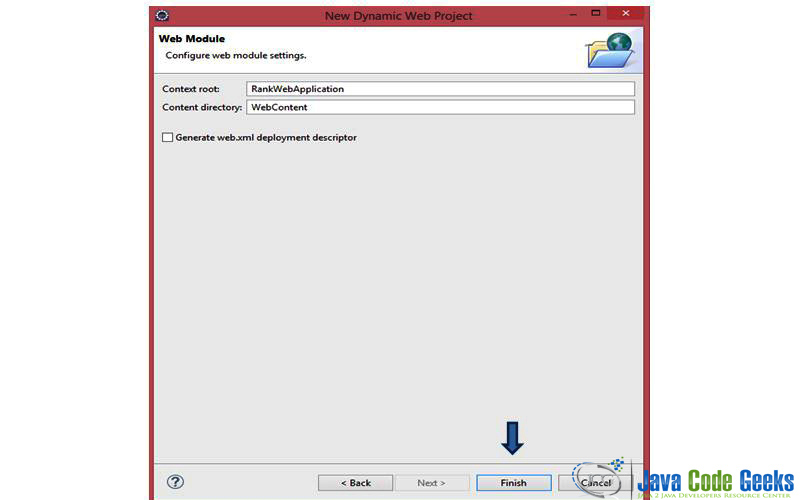
Figure 4: Configure web module settings; avoid generating web.xml file as it is not needed in this demo project.
After clicking on Finish, dynamic web project gets created. The directory of the project is visible on the left panel under “Package Explorer”:
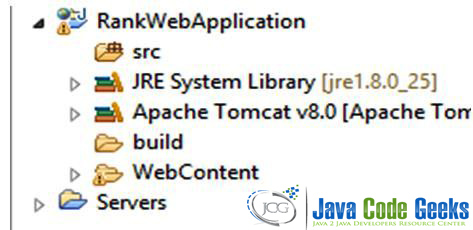
Figure 5: Project directory structure:
Right click on WebContent directory and add new JSP file to the project.
Figure 6: Now, add JSP file in dynamic web project:
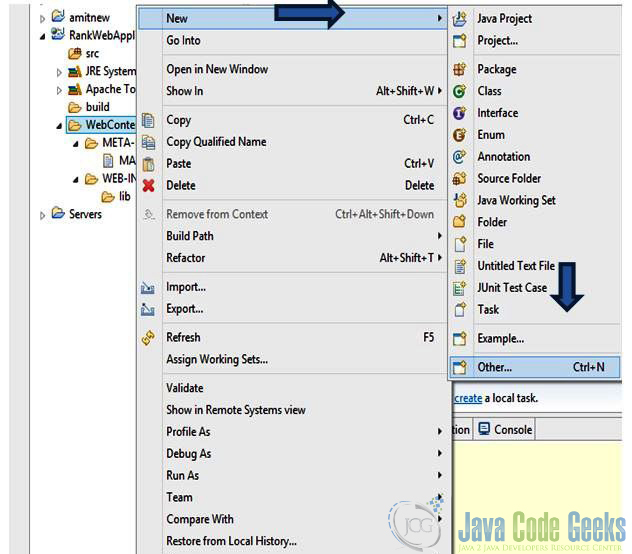
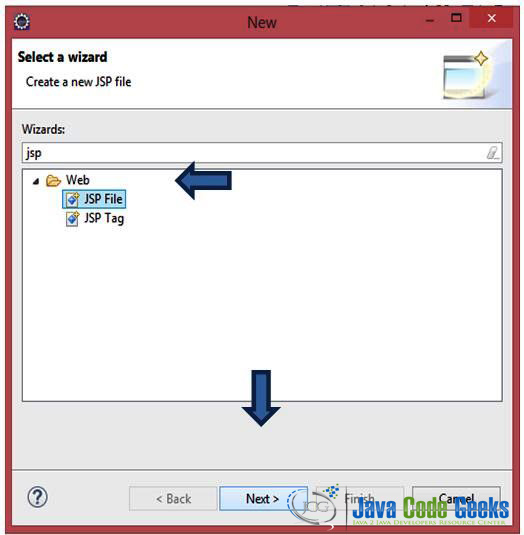
Figure 7: Add new JSP File from the wizard:
After clicking on Next above, name the new file as NewRankFile.jsp and click on Next.
Figure 8: NewRankFile.jsp added:
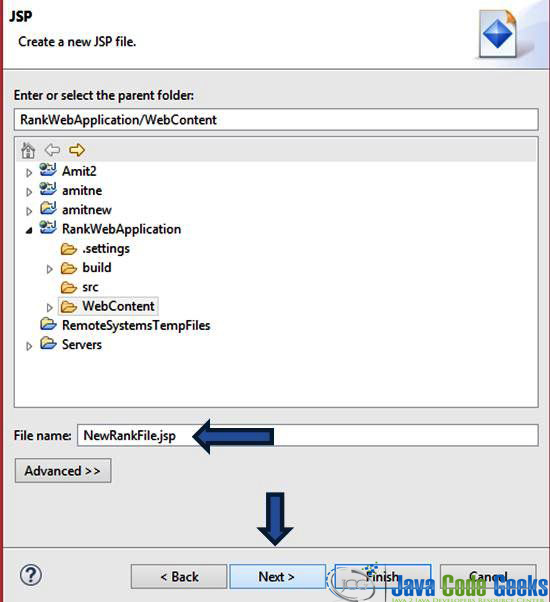
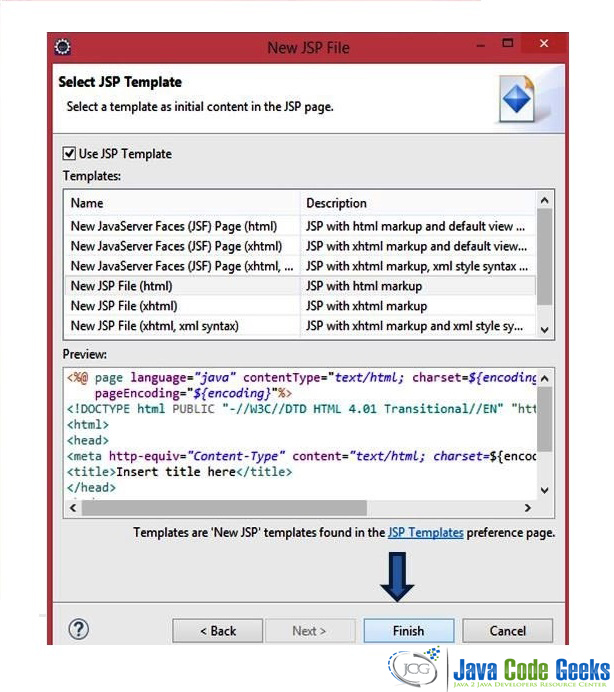
Figure 9: Set the JSP Template:
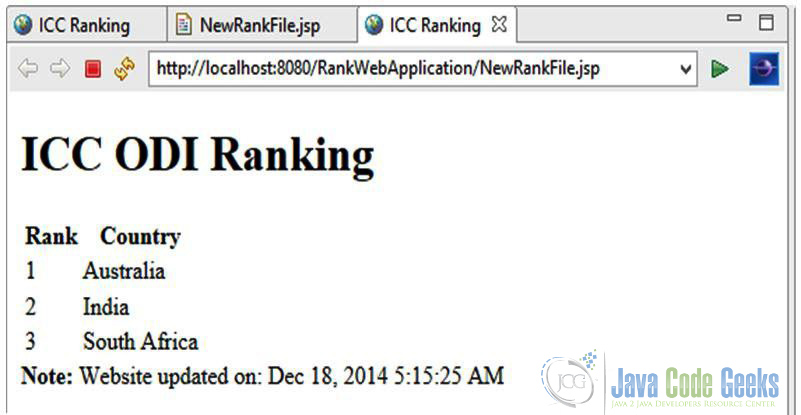
Clicking on Finish above will create the new file. Now, add the below given code in Listing1 which prints the ranking of cricket teams.
Listing1: NewRankFile.jsp
<%@ page language="java" contentType="text/html; charset=ISO-8859-1"
    pageEncoding="ISO-8859-1"%>
<!DOCTYPE html PUBLIC "-//W3C//DTD HTML 4.01 Transitional//EN" "http://www.w3.org/TR/html4/loose.dtd">
<html>
<head>
<meta http-equiv="Content-Type" content="text/html; charset=ISO-8859-1">
<title>ICC Ranking</title>
</head>
<body>
<h1>ICC ODI Ranking</h1>
  <table>
    <tr>
       <th>Rank</th><th>Country</th>
    </tr>
    <tr>
       <td>1</td><td>Australia</td>
    </tr>
    <tr>
       <td>2</td><td>India</td>
    </tr>
    <tr>
       <td>3</td><td>South Africa</td>
    </tr>
  </table>
  <!--  JSP Expression is used here for getting system date -->
  <b>Note:</b> Website updated on: <%= (new java.util.Date()).toLocaleString()%>

</body>
</html>
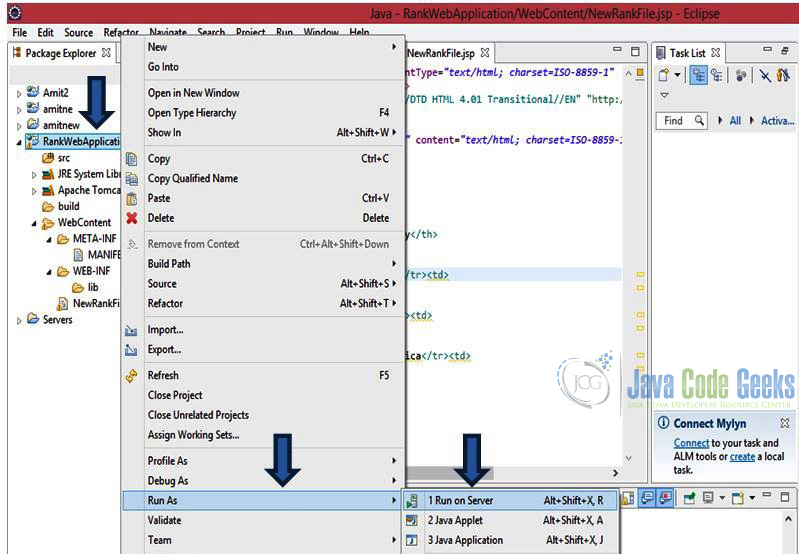
Run the project by right-clicking and selecting Run As.
Figure 10: From the options click Run on Server:
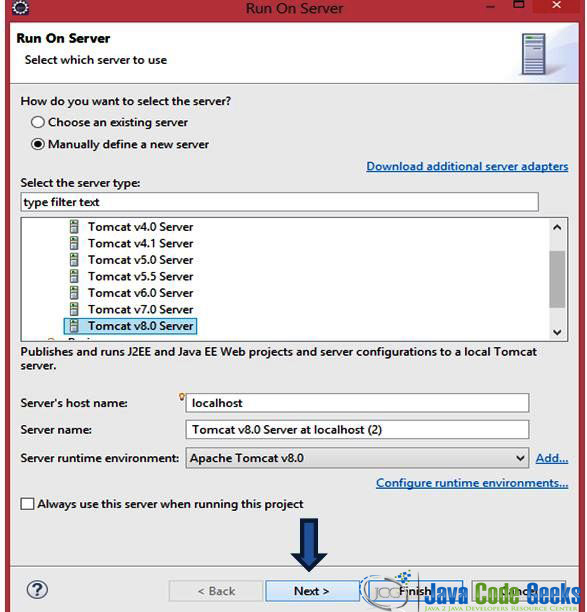
Select Run on Server and Manually define a new server “Tomcat” as we’re running our first project in EclipseIDE. Check “Always use this server while running this project” to avoid repetition of this selection:
Figure 11: Select server:
Here, the output displays ICC Rankings and website updating time which is generating using JSP Expressions. Output link: http://localhost:8080/RankWebApplication/NewRankFile.jsp
Figure 12: Output displaying ICC ODI rankings and website updating time:
4. Directives
Directive tags are used to give directions and instructions used at the translation stage of JSP life cycle.
4.1. Syntax
<%@ directive attribute="value" %>
Here directives can have a number of attributes.
4.2. Types
Figure 13: Types of Directive tags:
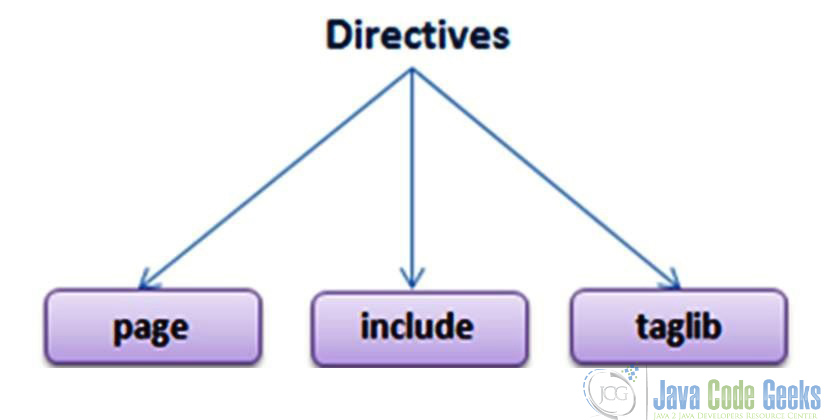
4.2.1. Page directive
The page directive tag provides the instructions used by the translator at the time of translation stage of JSP life cycle. It can be included anywhere, but according to conventions it is considered as a good programming style of including it at the top. The syntax is given below:
<%@page attribute ="value" %>
The XML equivalent is shown below:
<jsp:directive.page attribute="value" />
Let us take an example with attribute as import to be included at the top of the page.
<%@ page import="java.util.Date" %>
The attributes used in the page directive tag is given below:
| Attribute | Value |
| autoFlush | It has two value – true and false with default being true. It specifies whether the output is to be flushed automatically when buffer is full. |
| Buffer | It specifies the buffering model with buffer size in kilobytes. |
| contentType | It specifies the character encoding scheme with default being text/html. |
| Extends | It takes a qualified class name extended by servlet equivalent class. |
| errorPage | It specifies the URL path of another page to which a request is to be dispatched to handle run time exceptions thrown by current JSP page. |
| Import | The value is comma separated list of Java classes, |
| Info | It specifies a string that can be accessed by getServletInfo() method. |
| isErrorPage | It specifies whether or not the current page is an error page with two value true and false. The default value is false. |
| pageEncoding | It specifies the encoding type. |
4.2.2 Include Directive
This tag is used during the translation stage of JSP lifecycle to include a file. It merges the content of two of more files. Include directives can be included at any place in the page. The syntax is given below:
<%@ include file="path/url" >
Let us take an example with file as newFile.jsp which can be placed where it is required.
<%@ include file="newFile.jsp" %>
4.2.3 Taglib
It is used to define a custom tag library in a JSP page. This is done so that the related tags can be used in the same page. The syntax is given below:
<%@ taglib uri="URI" prefix="TagPrefix" %>
5. Scripting Tags
JSP scripting tags allow adding script code into the java code of a generated JSP page. This page is generated by the JSP translator.
5.1. Types
There are three types of Scriptlet tags or Scriptlet elements as shown below:
5.1.1. Scriptlet Tag
Scriptlet tag implements the _jspService method functionality by writing script/java code. It is used for writing java code in JSP page. Syntax is given below:
<% Java code %>
The XML equivalent:
script code
Example is given below:
<% out.println(value); %>
5.1.2. Declarative Tag
Declarative tag is used to declare class variables and implementing class methods jspInt and jspDestroy. Syntax is given below:
<%!
   Declaration
%>
The XML equivalent:
<jsp:declaration>
     script code
</jsp:declaration>
Example is given below:
<%!
   int value = 25;
%>
5.1.3. Expression Tag
Expression Tag is used to write a java expression. Never end an expression with a semi-colon (;) placed inside expression tag. The syntax is given below:
<%= Java Expression %>
The XML equivalent:
<jsp:expression>
     script code
</jsp:expression>
Examples are given below:
<%= --value %>
<%= (3*9) %>
5.2. Example
This is an example showing the three types of Scripting Tags. Follow the steps given in Demo section in order to create a project in EclipseIDE. The technologies used are the same.
Let us start with creating a Dynamic Web Project ExampleApplication in Eclipse IDE:
Figure 14: Creating Example Application:
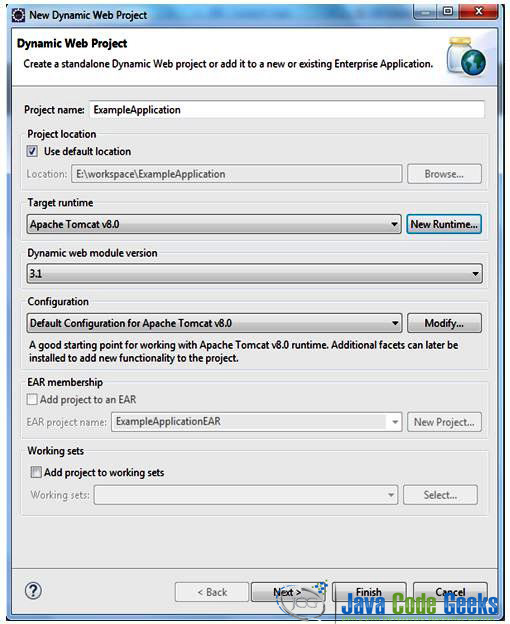
Figure 15: Creating exampleCalculation.jsp:
Listing 2: example.jsp
<%@ page language="java" contentType="text/html; charset=ISO-8859-1"
    pageEncoding="ISO-8859-1"%>
<!DOCTYPE html PUBLIC "-//W3C//DTD HTML 4.01 Transitional//EN" "http://www.w3.org/TR/html4/loose.dtd">
<html>
<head>
<meta http-equiv="Content-Type" content="text/html; charset=ISO-8859-1">
<title>Scriptlet Tag Example</title>
</head>
<h1>Example to print k iterations</h1>
  <%!
       int k;
   %>
  <body>
  <%
         for(k=1;k<=10;++k) {
           out.println(k);
         }
%>
<br>
<%
  out.println("The value of --k is:");
  %>
  <%= --k %>
  <br>
  Updated on: <%= (new java.util.Date()).toLocaleString() %>
</body>
</html>
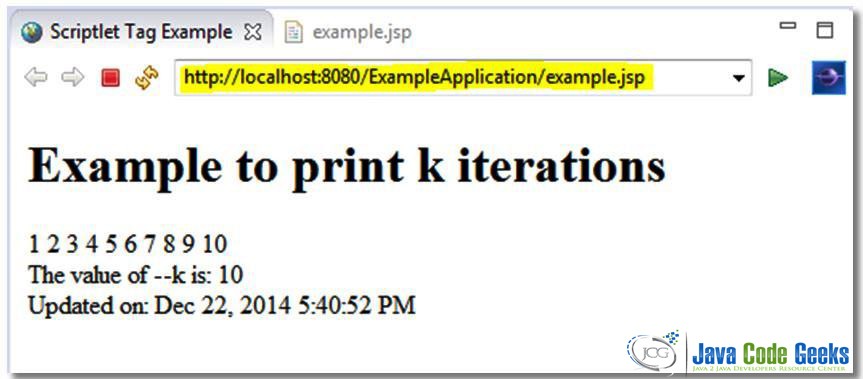
Figure 16: Output printing k iterations and website updating date:

6. Expression Language
A language that enables JSP developers for accessing application data stored in JavaBeans components. It was introduced in JSP2.0
The EL expressions are enclosed between the “$” and “}” characters.
6.1. Operators
6.1.1. Arithmetic Operators
These arithmetic operators can be used in EL expressions: _, -, /, *, %
6.1.2. Relational Operators
The relational operators used in EL expressions can be denoted by the below given symbols and short text form:
| Operators | Short text form | Descriptions | Example |
| > | gt | Greater than | ${150 > 5} |
| < | lt | Less than | ${15 < 65} |
| >= | ge | Greater than equal to | ${20 >= 20} |
| <= | le | Less than equal to | ${15 <= 15} |
| == | eq | Equal to | ${5 == 5} |
| != | ne | Not Equal to | ${15 != 65} |
6.1.3. Logical Operators
The logical operators are && (AND Operator), || (OR Operator) and ! (NOT Operator)
6.2. Implicit Objects
The implicit objects can directly be used in an EL expression. Users can use these objects to get attributes from different scopes and parameter values. Some of the types of implicit objects are given below:
| Object | Description |
| pageContext | It manipulates page attributes. |
| pageScope | It maps page-scoped attribute names to their values. |
| requestScope | It maps request-scoped attribute names to their values. |
| sessionScope | It maps session-scoped attribute names to their values. |
| applicationScope | It maps application-scoped attribute names to their values. |
| Param | It maps parameter names to a single String parameter value. |
| paramValues | It maps parameter names to a String[]. |
| Header | It maps header names to a single String header value. |
| headerValues | It maps header names to a String[]. |
6.2.1. Example
This is an example showing implicit object param. Follow the steps given in Demo section for creating a project in EclipseIDE. The technologies used are the same.
Let us start with creating a Dynamic Web Project UserApplication in Eclipse IDE:
Figure 17: Creating UserApplication:
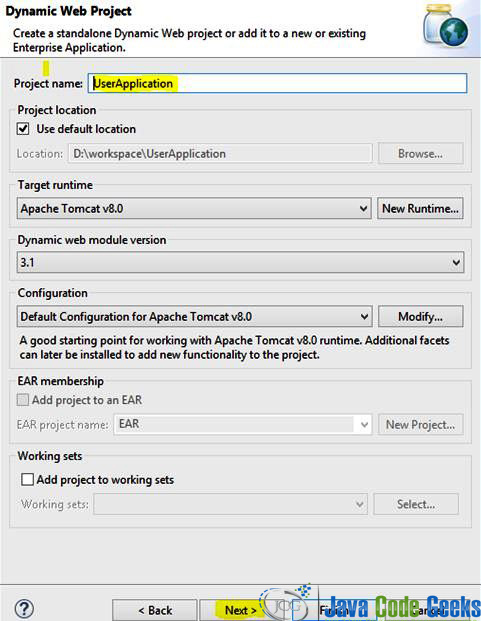
Figure 18: Create new jsp file home.jsp
Listing 3: home.jsp
<%@ page language="java" contentType="text/html; charset=ISO-8859-1"
    pageEncoding="ISO-8859-1"%>
<!DOCTYPE html PUBLIC "-//W3C//DTD HTML 4.01 Transitional//EN" "http://www.w3.org/TR/html4/loose.dtd">
<html>
<head>
<meta http-equiv="Content-Type" content="text/html; charset=ISO-8859-1">
<title>Welcome</title>
</head>
<body>
<h1>Fill the form given below:</h1>
<form method="post" action="success.jsp">
User : <input type="text" name="userName"><br>
Email: <input type="email" name="emailID">
<input type="submit" value="submit">
</form>

</body>
</html>
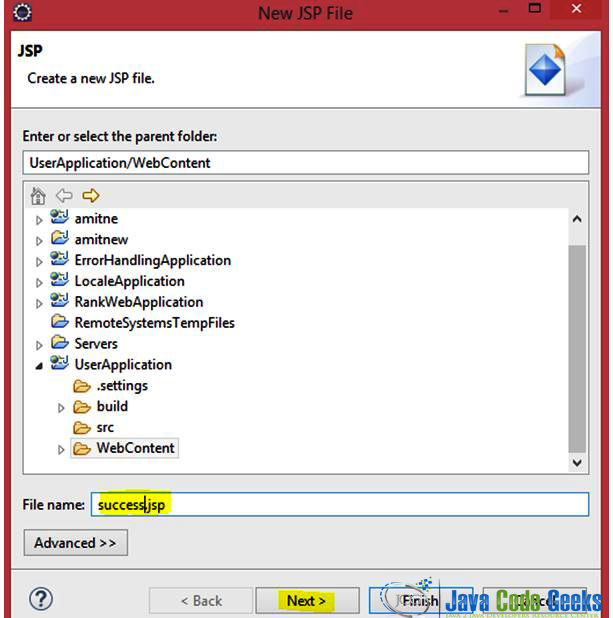
Figure 19: Create new jsp file success.jsp:
Listing 4: success.jsp
<%@ page language="java" contentType="text/html; charset=ISO-8859-1"
    pageEncoding="ISO-8859-1"%>
<!DOCTYPE html PUBLIC "-//W3C//DTD HTML 4.01 Transitional//EN" "http://www.w3.org/TR/html4/loose.dtd">
<html>
<head>
<meta http-equiv="Content-Type" content="text/html; charset=ISO-8859-1">
<title>Email Successfully sent</title>
</head>
<body>
<h1>Success</h1>
<br>
<p>Hi ${param.userName}, thanks for giving the details.</p>
<p>Your unique password has been sent to you on <b>${param.emailID}</b></p>
</body>
</html>
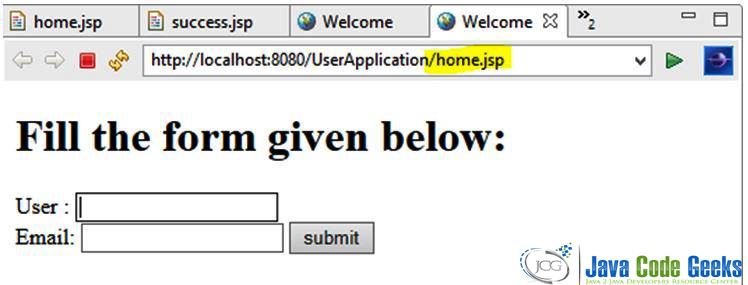
Now, we will run UserApplication in EclipseIDE. The localhost address is: http://localhost:8080/UserApplication/home.jsp
Figure 20: home.jsp after running the application:
Here, you can add your own email. I have considered the email, demo@email.com
Figure 21: Adding the username and email:
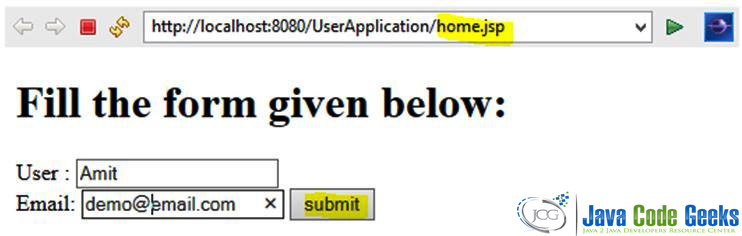
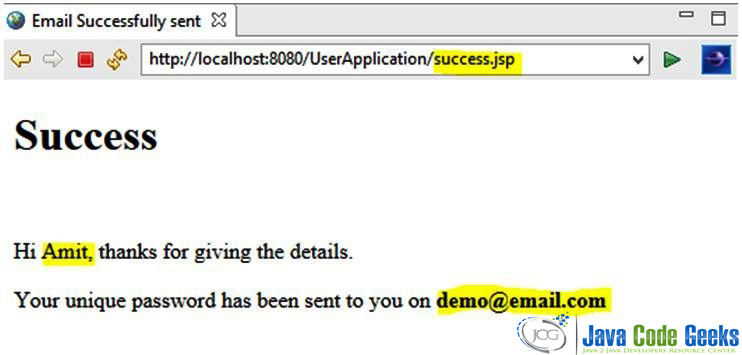
Figure 22: The output is shown here after clicking on submit button:
7. Exception Handling
7.1. Introduction
An exception is an abnormal/unforeseen condition in the normal execution flow of a program. These exceptions may occur due to invalid input, accessing unavailable files on disk etc.
Handling these exceptions at runtime is known as exception handling. A user may experience the following types of errors in a JSP code:
7.1.1. Errors
These are the problems which are beyond the control of users. For Example, stack overflow will lead to an error.
7.1.2. Checked Exceptions
These are the exceptions which cannot be ignored at the time of compilation and is considered as user error. For Example, IOException
7.1.3. Runtime Exceptions/Unchecked Exceptions
These exceptions can be ignored at runtime. For Example, NullPointerException
7.2. Methods
Here is a list of important methods available in Throwable class. You can refer the complete list from the official oracle documentation.
| Methods | Description |
| public Throwable getCause() | Returns the cause of this throwable. It returns null if the cause is unknown. |
| public String getMessage() | Returns the message string of this throwable. |
| public String toString() | Returns a description of this throwable. |
| public void printStackTrace() | It prints the stack trace. |
| public Throwable fillInStackTrace() | It fills in the execution stack trace. |
7.3. ErrorPage and isErrorPage
The ErrorPage attribute of page directive is used for setting up an error page. For this use the below given directive. Any jsp page can be set as an error page, here it is “DisplayError.jsp“:
<%@ page errorPage="DisplayError.jsp" %>
The isErrorPage attribute is used for generating the exception instance variable by including the following directive. You have to also write DisplayError.jsp:
<%@ page DisplayError="true">
7.3.1. Example
This is an example showing the usage of both the directives discussed above. Follow the steps given in Demo section for creating a project in EclipseIDE. The technologies used are the same.
Let us start with creating a Dynamic Web Project ErrorHandlingApplication in Eclipse IDE:
Figure 23: Creating ErrorHandlingApplication:
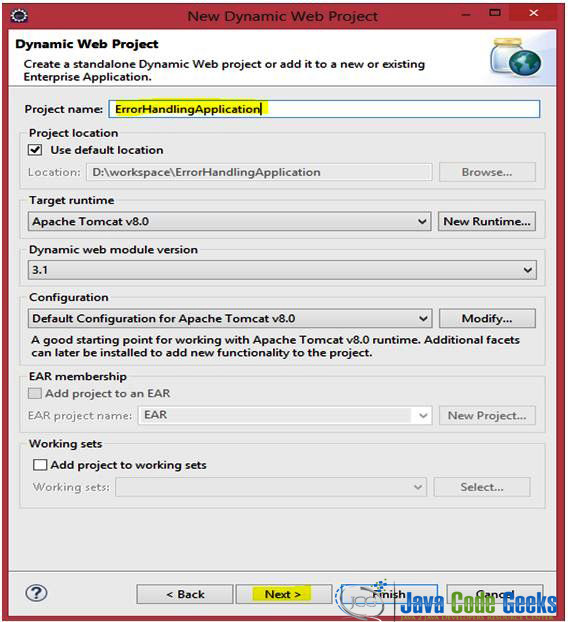
Figure 24: Creating jsp file conditionChecker.jsp:
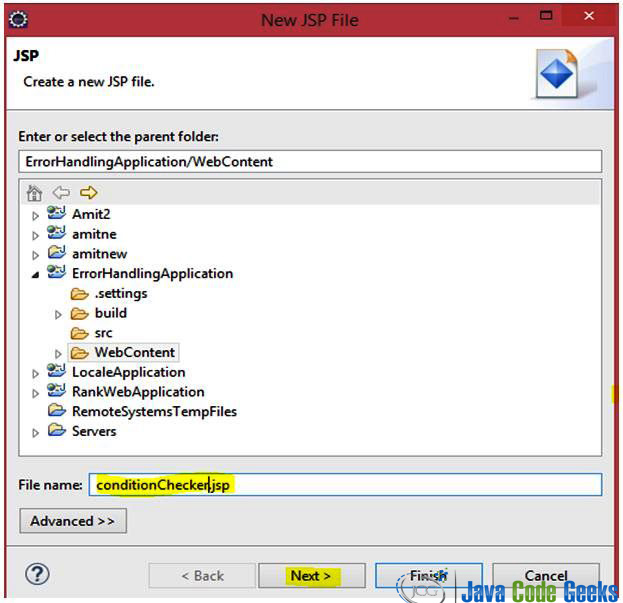
Here, the errorPage is set as DisplayError.jsp:
Listing 5: conditionChecker.jsp
<%@ page language="java" contentType="text/html; charset=ISO-8859-1"
    pageEncoding="ISO-8859-1"%>
<!DOCTYPE html PUBLIC "-//W3C//DTD HTML 4.01 Transitional//EN" "http://www.w3.org/TR/html4/loose.dtd">
<%@ page errorPage="DisplayError.jsp" %>

<html>
<head>
   <title>Error Handling Example</title>
</head>
<body>
<%
   // Throw an exception to invoke the error page
   int s = 10;
   if (s < 5) {
      out.println("Bingo!!well done!! You're right");
   }
   else {
	  throw new RuntimeException("Error found - ");
   }
%>
</body>
</html>
Figure 25: Creating error file DisplayError.jsp:
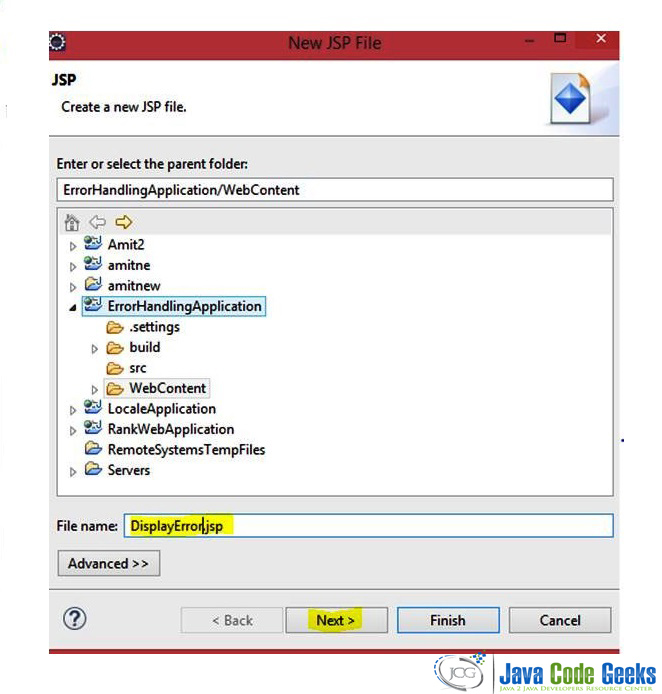
Here, attribute isErrorPage is set as true:
Listing 6: DisplayError.jsp
<%@ page language="java" contentType="text/html; charset=ISO-8859-1"
    pageEncoding="ISO-8859-1"%>
<!DOCTYPE html PUBLIC "-//W3C//DTD HTML 4.01 Transitional//EN" "http://www.w3.org/TR/html4/loose.dtd">
<%@ page isErrorPage="true" %>
<html>
<head>
<title>Error Page</title>
</head>
<body>
<h1>Sorry :Error occurred</h1>
<b>Stack trace:</b>
<pre>
<% exception.printStackTrace(response.getWriter()); %>
</pre>
</body>
</html>
7.4. in web.xml
<Error-page> can be included in deployment descriptor i.e. web.xml. Through this users can also configure different error pages for different exception types, and even for HTTP error codes.
The jsp file anyErrorPage.jsp gets called when an error with status code 404 occurs as shown below:
Listing 7: For Error code 404
<error-page>
  <error-code>404</error-code>
  <location>/anyErrorPage.jsp</location>
</error-page>
If the application throws IOException, then anyErrorPage.jsp gets called:
Listing 8: For Exception-TypeIOException
<error-page>
  <exception-type>java.io.IOException</exception-type >
  <location>/HandlerClass</location>
</error-page>
If you want to avoid the overhead of adding separate elements, then use java.lang.Throwable as exception-type:
Listing 9: For all exceptions mention java.lang.Throwable:
<error-page>
  <exception-type>java.lang.Throwable</exception-type >
  <location>/HandlerClass</location>
</error-page>
8. Internationalization
Web Applications are accessed by people all over the world; this rises the need of Internationalization. Internationalization enables a web application to work in different countries and regions without changes and recompiling the code.
8.1. Locale Class
International Java applications use java.util.Locale class. Locale defines language and geographic region.
8.1.1. Constructors of Locale Class
It has three constructors through which a locale object can be constructed:
| Constructor | Description |
| Locale(String lang) | It constructs a Locale object with language code |
| Locale(String lang, String country) | It constructs a Locale object with language code and country code. |
| Locale(String lang, String country, String variant) | It constructs a Locale object with language code, country code and variant. |
This is an example of Internationalization. Follow the steps given in Demo section for creating a project in EclipseIDE. The technologies used are the same.
Let us start with creating a Dynamic Web Project LocaleApplication in Eclipse IDE
Figure 26: Dynamic Web Project LocaleApplication:
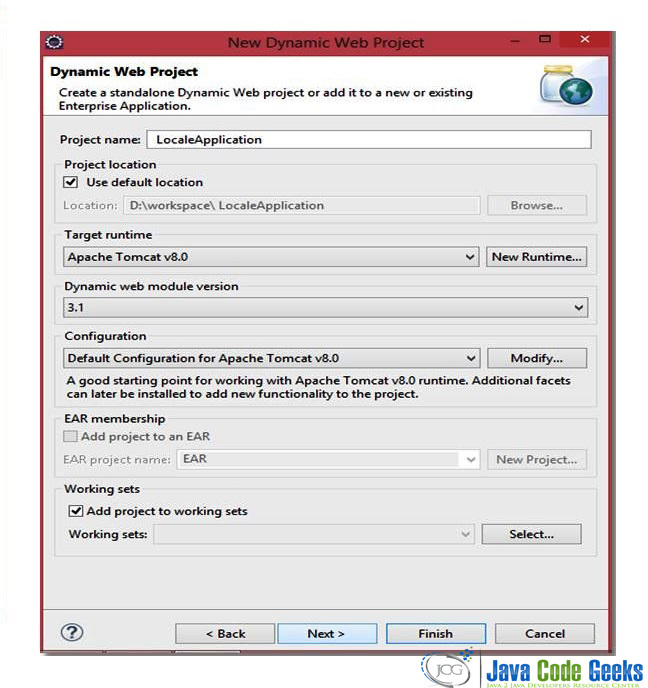
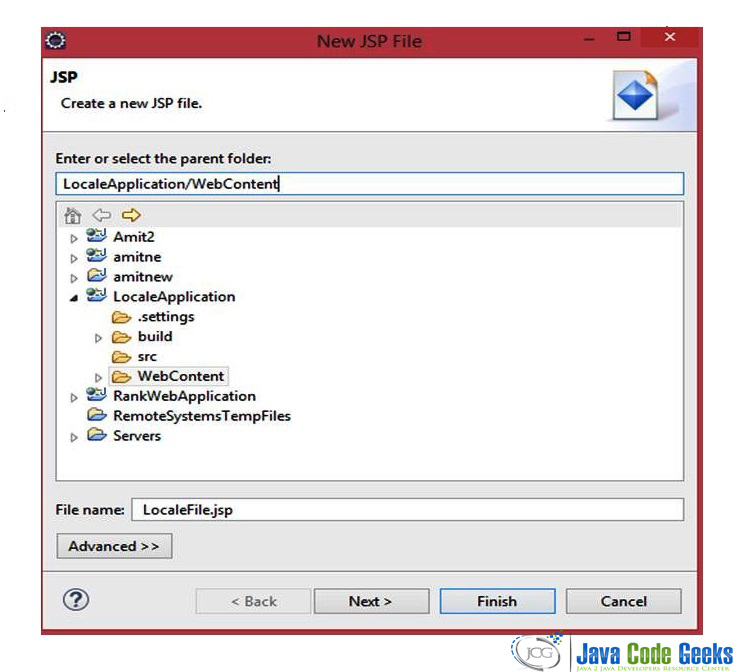
Figure 27: Create new jsp file LocaleFile.jsp:
Listing 10: LocaleFile.jsp
<%@ page language="java" contentType="text/html; charset=ISO-8859-1"
pageEncoding="ISO-8859-1"%>
<!DOCTYPE html PUBLIC "-//W3C//DTD HTML 4.01 Transitional//EN" "http://www.w3.org/TR/html4/loose.dtd">
<%@ page import="java.io.*,java.util.Locale" %>
<%@ page import="javax.servlet.*,javax.servlet.http.* "%>
<%
// get the user's Locale
Locale userLocale = request.getLocale();
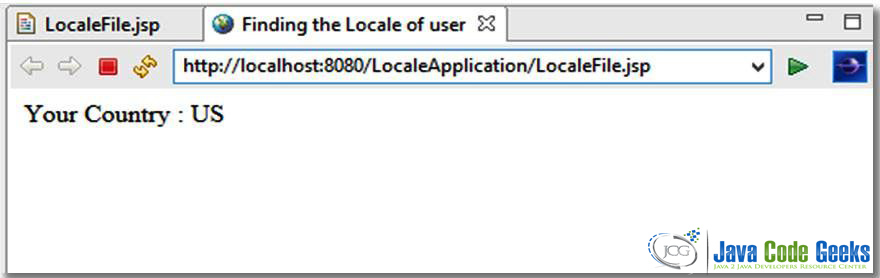
String userCountry = userLocale.getCountry();
%>
<html>
<head>
<meta http-equiv="Content-Type" content="text/html; charset=ISO-8859-1">
<title>Finding the Locale of user</title>
</head>
<body>
<%
out.println("Your Country : " + userCountry);
%>
</body>
</html>
Figure 28: Output as shown at http://localhost:8080/LocaleApplication/LocaleFile.jsp:
9. Sessions
Session is a collection of HTTP requests between client and server. These 3 ways are used to maintain session between server and client i.e. cookies, URL rewriting and hidden form fields. JSP also makes use of HttpSession interface provided by servlets. Some methods are listed below with description:
9.1. Methods
Some important methods in session object:
| Methods | Description |
| public Object getAttribute(String name) | Returns the object bound with the specified name in this session, or null if no object is bound under the name. |
| public String getId() | Returns a string containing the unique identifier assigned to this session. |
| public long getLastAccessedTime() | Returns the last time the client sent a request associated with this session, as the number of milliseconds since midnight January 1, 1970 GMT. |
| public void invalidate() | Invalidates this session and unbinds any objects bound to it. |
| public void removeAttribute(String name) | Removes the object bound with the specified name from this session. |
| public void setAttribute(String name, Object value) | Binds an object to this session, using the name specified. |
| public void setMaxInactiveInterval(int interval) | Specifies the time, in seconds, between client requests before the servlet container will invalidate this session. |
9.2. Example
This is an example of session handling in jsp. Follow the steps given in Demo section for creating a project in EclipseIDE. The technologies used are the same.
Create a project “SessionApplication” with a jsp file SessionHandling.jsp”
Listing 11:SessionHandling.jsp
<%@ page language="java" contentType="text/html; charset=ISO-8859-1"
pageEncoding="ISO-8859-1"%>
<!DOCTYPE html PUBLIC "-//W3C//DTD HTML 4.01 Transitional//EN" "http://www.w3.org/TR/html4/loose.dtd">
<%@ page import="java.io.*,java.util.*" %>
<%
// creation time of session
Date create = new Date(session.getCreationTime());
Integer visitCount = new Integer(0);
String key = new String("visitCount");
// for new visitor
if (session.isNew()){
session.setAttribute(key, visitCount);
}
visitCount = (Integer)session.getAttribute(key);
visitCount = visitCount + 1;
session.setAttribute(key, visitCount);
%>
<html>
<head>
<title>Session Tracking</title>
</head>
<body>
<h1>Session Tracking</h1>
<table border="1">
<tr>
<th>Session Information</th>
<th>Value</th>
</tr>
<tr>
<td>id</td>
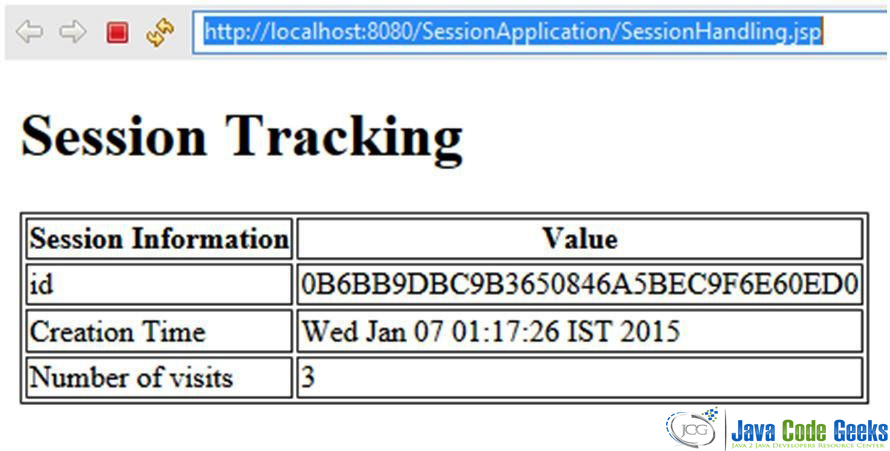
<td><% out.print(session.getId()); %></td>
</tr>
<tr>
<td>Creation Time</td>
<td><% out.print(create); %></td>
</tr>
<tr>
<td>Number of visits</td>
<td><% out.print(visitCount); %></td>
</tr>
</table>
</body>
</html>
Figure 29: Output showing session information – visit1:

Figure 30: Output showing session information – visit2:
Figure 31: Output showing session information – visit3:
10. JavaBean
JavaBeans are Java classes written in Java for developing dynamic content. It separates business logic from presentation logic.
Presentation code and business logic can be managed separately. JavaBeans also ensure communication between them.
10.1. JavaBean Properties
JavaBean property is a named attribute which can be of any datatype. These properties can be are accessed through the below given methods:
- setPropertyName(): A write-only attribute will have only a setPropertyName() method.
- getPropertyName(): A read-only attribute will have getPropertyName() method.
10.2. useBean Tag
<jsp:useBean> syntax is:
<jsp:useBean attributes>
      <!--  content -->
</jsp:useBean>
The attributes are given below:
10.3. Attributes of Tag
10.3.1. id
This represents the variable name assigned to the id attribute of and is used to locatean existing bean instance.
10.3.2. scope
This attribute represents the scope in which the bean instance has to be located. The scopes are listed below, here the default is page scope:
- page scope
- request scope
- session scope
- application scope
10.3.3. class
It is the class name for creating a bean instance, but the class should not be an abstract class.
10.3.4. beanName
It takes a qualified class name or expression.
10.3.5. type
It takes a qualified class name or interface.
10.4. Example
This is an example of bean handling in jsp which includes code snippets for beans creation and access.
10.4.1. Beans Creation
Listing 12: EmployeeClass.java
Here, EmployeeClass shows the creation of Beans with some properties for employee name and work points.
import java.io.Serializable;

public class EmployeeClass implements Serializable
{
   private int points = 0;
   private String name = null;

   public EmployeeClass() {
   }
   public String getName(){
      return name;
   }
   public int getPoints(){
      return points;
   }
   public void setName(String firstName){
      this.name = name;
   }
   public void setPoints(Integer points){
      this.points = points;
   }
}
10.4.2. Accessing Beans
action is used to access get methods and action is used to access set methods. These can be used with action.
Listing 13: BeansApplication.jsp
An example featuring how JavaBeans properties is accessed.
<html>
<head>
<title>Employee Work Report</title>
</head>
<body>

<!-- setProperty -->
<!-- name attribute under setProperty references the id of beans in useBean action -->
<jsp:useBean id="emp" class="com.new.EmployeeClass">
   <jsp:setProperty name="emp" property="name" value="Mahendra"/>
   <jsp:setProperty name="emp" property="points" value="50"/>
</jsp:useBean>

<!-- getProperty -->
<!-- name attribute under getProperty references the id of beans in useBean action -->
<p>Name of the Employee:
<jsp:getProperty name="emp" property="name"/>
</p>
<p>Work Performance Points:
<jsp:getProperty name="emp" property="points"/>
</p>

</body>
</html>
Listing 13: Output showing beans implementation
Name of the Employee: Mahendra
Work Performance Points: 50
11. Request and Response Objects
11.1. Request
A Web page is requested by a web browser to send information to web server. This header information includes the following:
| Accept | Accept-Charset |
| Accept-Encoding | Accept-Language |
| Authorization | Connection |
| Content-Length | Cookie |
| Host | User-Agent |
11.2. HttpServletRequest
It is an instance of javax.servlet.http.HttpServletRequest object. These methods are available with HttpServletRequest object and are used to get HTTP header information in a JSP program; some of them are given below with description:
| Method | Description |
| Cookie[] getCookies() | Returns an array containing all of the Cookie objects the client sent with this request.
|
| Enumeration getHeaderNames() | Returns an enumeration of all the header names this request contains.
|
| Enumeration getParameterNames() | Returns Enumeration of String objects containing the names of the parameters contained in this request.
|
| Object getAttribute(String name) | Returns the value of the named attribute as an Object, or null if no attribute of the given name exists.
|
| String getCharacterEncoding() | Returns the name of the character encoding used in the body of this request.
|
| String getMethod() | Returns the name of the HTTP method with which this request was made, for example, GET, POST, or PUT.
|
| String getPathInfo() | Returns any extra path information associated with the URL the client sent when it made this request.
|
| String getQueryString() | Returns the query string that is contained in the request URL after the path.
|
| String getRemoteAddr() | Returns the Internet Protocol (IP) address of the client that sent the request.
|
| String getRequestedSessionId() | Returns the session ID specified by the client. |
11.3. HttpServletResponse
It is an instance of javax.servlet.http.HttpServletResponse object. These methods are available with HttpServletResponse object and are used to set HTTP response header in a servlet program.
| Method | Description |
| boolean containsHeader(String name) | Encodes the specified URL by including the session ID in it, or, if encoding is not needed, returns the URL unchanged.
|
| boolean containsHeader(String name) | Returns a boolean indicating whether the named response header has already been set.
|
| void addCookie(Cookie cookie) | Adds the specified cookie to the response.
|
| void addHeader(String name, String value) | Adds a response header with the given name and value.
|
| void setContentLength(int len) | Sets the length of the content body in the response In HTTP servlets, this method sets the HTTP Content-Length header.
|
| void setContentType(String type) | Sets the content type of the response being sent to the client, if the response has not been committed yet.
|
| void setHeader(String name, String value) | Sets a response header with the given name and value.
|
| void setLocale(Locale loc) | Sets the locale of the response, if the response has not been committed yet.
|
| void setIntHeader(String name, int value) | Sets a response header with the given name and integer value.
|
12. References
12.1. Website
12.2. Book
- Head First Servlets and JSP: Passing the Sun Certified Web Component Developer Exam, by Bryan Basham, Kathy Sierra , Bert Bates
- Jdbc, Servlets, And Jsp Black Book, New Edition Paperback – 2008, Santosh Kumar
13. Summary
Java Server Pages (JSP) is used for creating dynamic web pages. Through this guide you can easily learn the concepts related to JSP. The project codes are developed under EclipseIDE, so you will get an idea about some of its amazing user-friendly features as well.
14. Download
This was a tutorial on JavaServer Pages (JSP).
You can download the full source code of this tutorial here: jsp_tutorial

I want to jsf,spring with Hibernate Integration tutorials…
Thanks for all of ur effort and time spending to make this good tutorial to understand in a easy way rather than messing up like any other site. Thank you for making my day.
Hi, great Tutorial! But you`ve a little Error in the EmployeeClass set Name Method:
public void setName(String firstName){
this.name = name;
}
Wait a minute. Isn’t servlet and jsp complementary?
I mean, servlet as a controller and jsps as view?
If i put my logic in a jsp i cannot reuse it in another place, correct?
Eduardo is correct. Frankly, you showcased the ways one should NOT use JSP.
I wish I could say otherwise, but this is plain bad. Please consider redoing or deleting as it does more harm than good.
It is very easy and useful tutorial. Thanks for your effort for making it easy to understand.