Introduction
Git is popular distributed version control system created by Linus Torvalds, creator of Linux OS. So, as you might have guessed it is first used for version controlling the Linux Kernel code.
Its widely used in most of open source and closed source software development. Thanks to Github popularity and its own feature sets.
Most of software open source projects foundation such as Eclipse Foundation recently moved its projects SVN and CVS repositories to Git. You can read more about here and here.
This is basic tutorial targeted at fellow beginners to git version control system. It shows very basic git workflow to get started with git.
Installation
For Windows and Mac OS
For this, go ahead to git-scm downloads site then go ahead to download executable files specific to your Operating System. Click on downloaded installer file to install git on your machine.
For Debian based OS- Ubuntu/Mint
Execute following commands in terminal window, it installs git using PPA (personal package archive):
sudo add-apt-repository ppa:git-core/ppa
sudo apt-get update
sudo apt-get install git
Now, you have installed the git, you can check for proper installation using git –version:

Note : For this tutorial, i will be using terminal for demonstration of all git commands. So, if you are on Windows OS, make use of bash command prompt that shipped with git installation and on Mac or Linux use normal terminal.
As now, we have git executable available from command prompt/terminal to execute the git commands.
Git executable has following basic format:
git <command> <switch-options/command-options> <sub-command> <more-sub-command-options>
Doing Git global user configuration
Command to be used : git config
First step after installation, is to do user configurations that is to setup the name and email id so, that git can identify while you making commit, that basically adds ownership of each commit.
Execute the following commands:
git config --global user.name <your-name>
git config --global user.email <your-email>
Creating Git repository
Command to be used : git init
For tracking files using git, first you need to create git repository first. Lets create hello-git directory and initialize the git repository in it.
mkdir hello-git
cd hello-git
git init
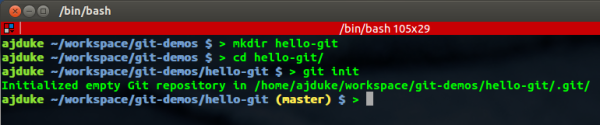
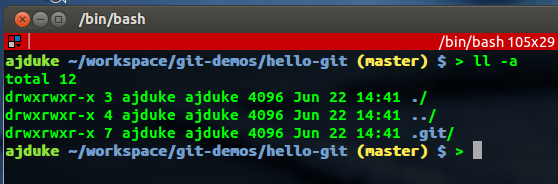
After initializing you will see the message that Initialized git repository as shown in above screenshot and if you checked out the ‘hello-git’ directory , you will notice ‘.git’ directory is created. This is the directory where git operates.
Creating files and adding it to git
Commands to be used : git add, git commit, git status
Now, lets add few files to our newly created git project.

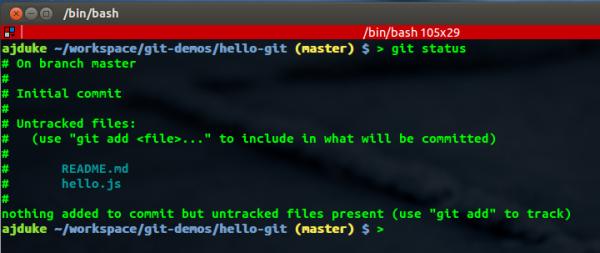
I have added the hello.js and README.md files to project directory, Now lets see what git tells us about status of our project directory.
git status– this command lets you see whats the status of files in a git project directory.
Git File states
As we are discussing from start that git tracks changes for git intialized directory. So, when working with git, filles goes to few states which explained as follows:
Untracked Files: This are kind of files which are newly added to directroy and it is not tracked by git for version control
Tracked Files : This are the files which are aleady committed to git but not staged or added to Index area
Staged / Index Files :These are the files which are to be added to next commit.
Modified / Unstaged files : These are files which are modifed but not staged
As you can see it says our two files are Untracked, meaning that we haven’t told git to track our files. For telling this, we going to use git add command.
git add – It adds untracked or unstaged files to Staging/ Index area of git.
Adding specific files :
git add <file-1> <file-2>

Adding all files in directory and sub-directories :
git add .
or
git add --all
For our case, i am going to add all files:
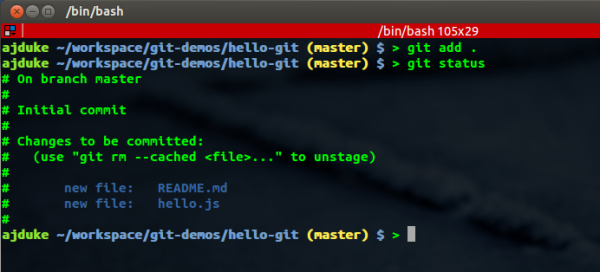
As you can see that, files are added to staging area. Now, we need to commit our files to that is to add to git repository, for this we use git commit.
git commit : In simple terms, this command does two thing first it adds files to git repository and makes the commit log based on commit message you provided.
git commit -m “<your message>”
For our case:
git commit -m "Initial commit for project, added hello.js and README.md"
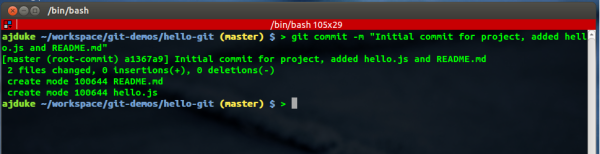
Now, after doing this you will see that your changes are committed to git repository.
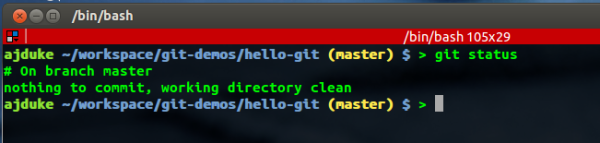
Now, if you do git status , you will see no changes to commit, that means our working directory changes are recorded by git:
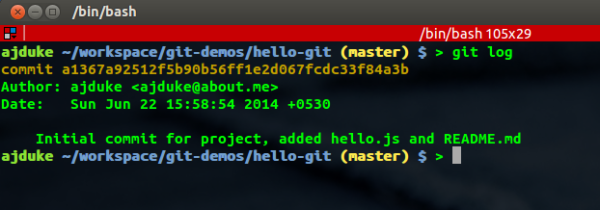
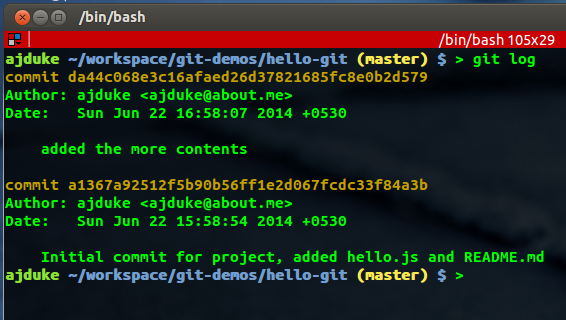
git log : This let you see your older commits, in this you can see commit hash , name of author, date to which commit has been made and commit message.
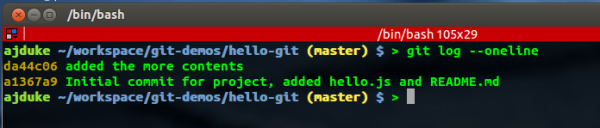
To see more compact commit messages, use oneline switch on log command shown as follows:
Doing more changes to files
Commands to be used : git diff, git add and git commit
Lets do more changes to files in repository and learn more git commands. Now, lets add few lines to hello.js and README.md, Open this files in the your favorite editor and add few lines to it. I have added few lines to files you can see those as follows:


Now, if you do git status:
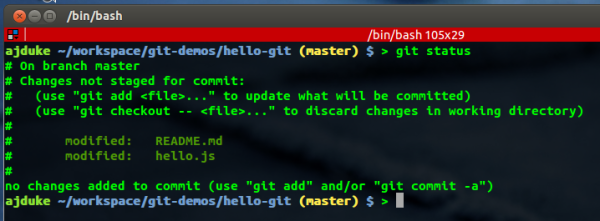
You can see the files are tracked but not staged for commit, as compared previous un-tracked files. Now, in middle changing files, you might want to see what is been changes since last staged.
git diff : It shows you code diff’s between what you have changed in working directory since your last commit for each files in directory.
git diff <options> <file-name>
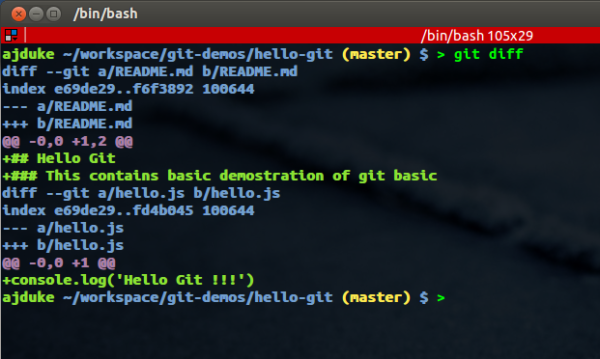
If you just do git diff, without specifying the file-name you diff of all files:
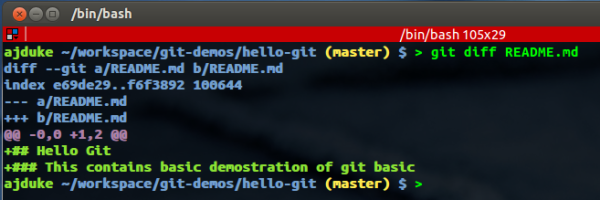
While if you specified file-name as follows, it shows diff of only that particular file:
You can see the lines in light green color, which are started with +, indicates that these lines are added since last commit.
Lets add files to staging area using git add command:
git add .
Now, if do diff of repository, you will not see the anything because, by default diff command shows the diff’s between unstaged files.
To see diff’s of files that has been staged, you have to do the following:
git diff --cached

Now, lets commit the files:
git commit -m “added the more contents”

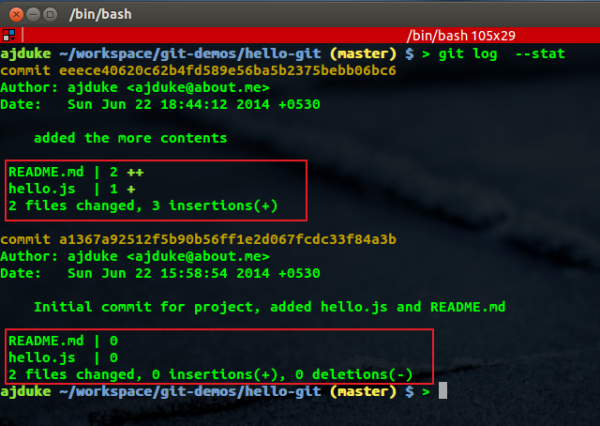
and now if you do git log, you see our two commits as shown as follows:
To get more information use –stat, which gives more information about which files are changed. Look at following image:
I Hope this tutorial helped you to at-least understand basics of Git. Git has lot of cool features you might need it later as you get advanced. For that, be sure to check out this blog again for more tutorials on same.
| Reference: | Using Git- Part -I : Basics from our JCG partner Abhijeet Sutar at the ajduke’s blog blog. |

Great start of a series. I’ve been using Git for a while, but it’s been “Oh well, how do I do this… or mmmm how do I do that?” You learn as you need to do something.
This is a clear, logical intro to Git and I enjoyed it.
One of the things I’ve had problems with is reverting code to previous commits (let’s say several commits previous). Can a future article talk about that, with some concrete examples?
Nice post.
Like the way git has been introduced for beginners.