This is the second article in the “Continuous Delivery” series. We’ll continue where we left in Introduction to concepts and tools. The goal of this article is to set up a Jenkins server locally through automated and repeatable process with all the artifacts stored in the GIT repository. This will require tools like VirtualBox and Vagrant. It will also require registration to Docker. Unlike the previous article that provided only general information, in this one we’ll have to get our hands dirty and follow the examples.
What do we need in order to have a Jenkins server up and running locally? We need a virtual machine or available server, operating system installed and configured, Jenkins installed and configured. Since everything we do needs to be reliable and repeatable, we’ll also need a Version Control System. Examples in this article will use GitHub as VCS.
Following software is required by examples in this article: VirtualBox, Vagrant, Docker, GitHub account and GIT client (we’re using TortoiseGIT but any other should do). Please consult above mentioned sites for installation instructions.
All the code from this article can be found in the TechnologyConversationsCD GitHub repository.
Vagrant: Virtual Machine with Operating System
![]()
We’ll create an VirtualBox machine. The process itself will be done with Vagrant.
Vagrant is a tool for building environments. Even though it can be used to build complete environment, we’ll use it only to create virtual machine with Ubuntu server. The process is very simple. Create a file called Vagrantfile. Contents of that file should be:
VAGRANTFILE_API_VERSION = "2"

Vagrant.configure(VAGRANTFILE_API_VERSION) do |config|
  config.vm.box = "hashicorp/precise64"
end
Full source code can be found in the Vagrantfile.
The key line is the one starting with config.*. It specifies which server we’d like to install. Easiest is to use one of the already created boxes from the Vagrant Cloud Service. For the purpose of this article, I choose a standard Ubuntu 12.04 LTS 64-bit box called “hashicorp/precise64″.
Next, we should bring up the virtual machine. To do that, following should be executed from the command prompt while in the same directory where Vagrantfile is located:
$ vagrant up
It takes some time to download the box when run from the first time. Once done, creating virtual machines will be almost instantaneous. From now on we can login to our new Ubuntu virtual machine. Default IP is 127.0.0.1:2222 with username and password vagrant/vagrant. Fire up your favorite SSH client (Putty is always a good choice) and play around with your new server.
Once done we’ll proceed with the setup of Docker.
Docker: Jenkins server
![]()
Docker is an open-source engine that automates the deployment of any application as a lightweight, portable, self-sufficient container that will run virtually anywhere.
Let’s create an Ubuntu container with Jenkins. To do that we’ll have to create Dockerfile with following content:
FROM ubuntu:12.04
MAINTAINER Viktor Farcic, "viktor@farcic.com"

RUN echo deb http://archive.ubuntu.com/ubuntu precise universe >> /etc/apt/sources.list
RUN apt-get update && apt-get clean
RUN apt-get install -q -y openjdk-7-jre-headless && apt-get clean
ADD http://mirrors.jenkins-ci.org/war/1.560/jenkins.war /opt/jenkins.war
RUN ln -sf /jenkins /root/.jenkins

ENTRYPOINT ["java", "-jar", "/opt/jenkins.war"]
EXPOSE 8080
VOLUME ["/jenkins"]
CMD [""]
Full source code can be found in the Dockerfile.
Docker uses its own Domain-Specific Language (DSL) that is pretty straight forward. I’ll go briefly through instructions used in the above file. For detailed information, please consult the Docker documentation.
- FROM: The FROM instruction sets the Base Image for subsequent instructions. In our case, base image is the Ubuntu that can be found in Docker public repository. We’ll build on top of this base and setup a Jenkins server.
- MAINTAINER: Name and email of the author. Purpose is purely informational.
- RUN: The RUN instruction will execute any command in a new layer on top of the current image and commit the results. It has several forms. The one we’re using is simply executing shell commands as they are written.
- ADD: The ADD instruction will copy new files and add them to the container’s filesystem.
- ENTRYPOINT: An ENTRYPOINT helps you to configure a container that you can run as an executable. That is, when you specify an ENTRYPOINT, then the whole container runs as if it was just that executable. In our case, we’re telling Docker to run Jenkins WAR file.
- EXPOSE: The EXPOSE instructions inform Docker that the container will listen on the specified network ports at runtime. Since Jenkins is using port 8080, we need to expose it to processes running outside the container.
Next step is to push the file we just created to our GitHub repo and configure Docker to build the container every time we change contents of that file. The rest of the article assumes that the reader is registered with Docker.
Go to your Docker profile, select “Authorized Services” followed with “Go to application”. By clicking “+ Add” > “Add trusted (source) build” we can add connection from Docker to our GitHub repo. Please follow the instructions on the screen for the rest of steps.
Build of our new container can be followed from the build status Docker page. Once done (Active status), newly create container is ready for use. I named my container repo vfarcic/cd_jenkins. It is set to be publicly available so that anyone can reuse it. The rest of the article will use that Docker container. If you followed the instructions and created your own, please change vfarcic/cd_jenkins to the name you used.
At this moment we have a virtual machine created with VirtualBox and Vagrant. That VM has only Ubuntu OS installed. On the other hand, we created a docker container with Jenkins server. That container can be used on almost any machine where we need it. It can be a physical server, virtual machine, laptop, etc.
Virtual Machine with the Jenkins server
Next step is to use Ubuntu VM and Jenkins together. In order to do that we should go back to our Vagrantfile and specify that we want our container to be set and run every time we start the VM. Vagrant supports different provisioners.
Provisioners in Vagrant allow you to automatically install software, alter configurations, and more on the machine as part of the vagrant up process. Most basic provisioner are Shell scripts. For simple projects, they work fine. However, Shell scripts become cumbersome very quickly. For that purpose Vagrant supports Ansible, CFEngine, Chef, Puppet, Salt and Docker. As you probably guessed, we’ll proceed using Docker. I encourage you to explore the rest as well.
Modified Vagrantfile looks like following:
VAGRANTFILE_API_VERSION = "2"

Vagrant.configure(VAGRANTFILE_API_VERSION) do |config|
  config.vm.box = "hashicorp/precise64"
  config.vm.provision "docker" do |d|
    d.run "vfarcic/cd_jenkins",
      args: "-d -p 0.0.0.0:49153:8080"
  end
  config.vm.network :forwarded_port, host: 4567, guest: 49153
end
We added two new instructions. First one is provision. It tells Vagrant to use docker provisioner, run the container that we just created (vfarcic/cd_jenkins) and supply it with -p argument specifying that all container communication on the Jenkins port 8080 should be redirected to 46153.
Now we have Jenkins up and running on the port 46153. To make that port visible outside the Vagrant, we need to forward that port again using the network instruction.
To apply changes we just made to the already running VM, run following:
vagrant reload --provision
With reload we’re restaring the virtual machine. Provision tells vagrant to enable provisioning (in this case with Docker). Prior to execution of Docker instructions, Vagrant will install Docker if it does not exist (as it’s the case with our Ubuntu server).
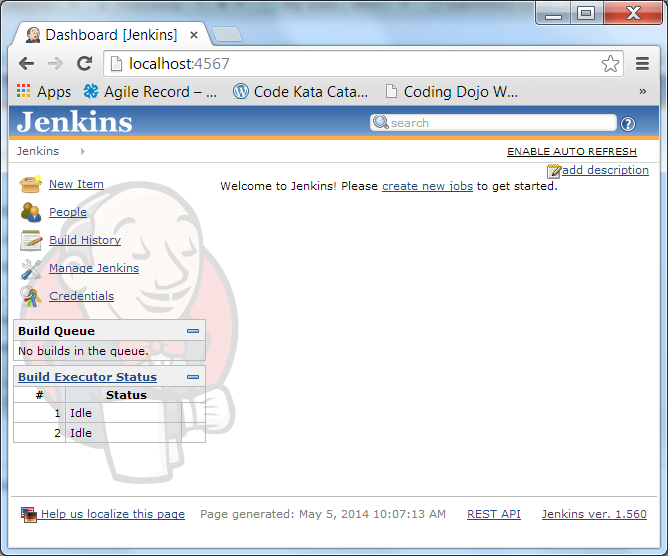
This is the big moment! Open http://localhost:4567 in your favorite browser and start using the newly created Jenkins server.
Summary
Even though the whole process might look complicated at the first glance, with a bit of practice it is very easy and intuitive. As the result, we have a virtual machine that can be easily created, destroyed, multiplied, distributed, etc (see Vagrant documentation for more info). That virtual machine comes with Docker container running Jenkins. Docker does not depend on Vagrant and the same container can be put on any other machine. It is a common practice to use Vagrant as a tool to create development machines used locally. Once we’re done with the machine it can be suspended (and later resumed) or destroyed (and later recreated). In some cases Vagrant is used in production environment as well. However, it is more optimal to use only Docker without the overhead that VM has. One server can run multiple Docker containers without the need for separate VMs with separate operating systems.
We stored two small files in our GitHub repository (Vagrantfile and Dockerfile). With them we can recreate exactly the same process as many times as needed. More importantly, having editable text files will allow us to easily build on top of this article and extend our solution.
Next articles will start the journey of the CI flow. We’ll pull the code from our repository, run static code analysis, build it, run different kinds of tests, etc. It will be a fun ride and Docker will be one of our key tools.
Until the next article is published, I encourage you to explore Vagrant and Docker in more details.
What about Travis and other solutions?
In the previous article I promised that we’ll work with both Jenkins and Travis and yet I did not even mention the latter. That’s because we’ll use Travis cloud server that is already set and all it requires is registration. The goal of this series is to show how to set Continuous Integration (and later on Continuous Deployment and Delivery) servers and flows. Depending on your needs, you might want to set it up by yourself (like we just did with Jenkins) or to use an already set cloud solution. We’ll continue using Jenkins as an example of the locally set server and Travis as one of the many cloud based solutions. That does not mean that there is no cloud based Jenkins solution nor that Travis cannot be installed locally. We’ll explore those options as well.
Since the previous article was published, I received suggestions for several alternative cloud based CI/CD solutions. Starting from the next article, I’ll increase our stack to few other cloud based solutions besides Travis.
| Reference: | Continuous Delivery: CI Tools Setup from our JCG partner Viktor Farcic at the Technology conversations blog. |
