Cloud based development tools are continuing to improve thanks to the power of new browser technologies and cloud services such as github and Amazon Web Services. The full deployment life-cycle can now be based entirely in the cloud by using various SaaS and PaaS offerings. As each service offered is provided by a different entity the challenge is to integrated those services together to form a seamless continuous development process.
By choosing carefully, it should be possible to create an effective and efficient combination of services that allows smooth movement from code base, through version control, testing and to deployment on to production.
Following on from my previous article in which I reviewed seven cloud based IDEs from the perspective of Java web application development, I now take one of these services through its paces. The IDE by codenvy.com promises a no-fuss set-up for a large range of technologies such as Java and Spring. It integrates with GitHub code repository and a selection of PaaS including Amazon Web Services.
Development Environment
Setting up a development environment is a 1-2-3 step process. As can be seen from the screen shot below you can easily choose the technology or framework in which you wish to develop your application and the Paas Service as its target deployment.
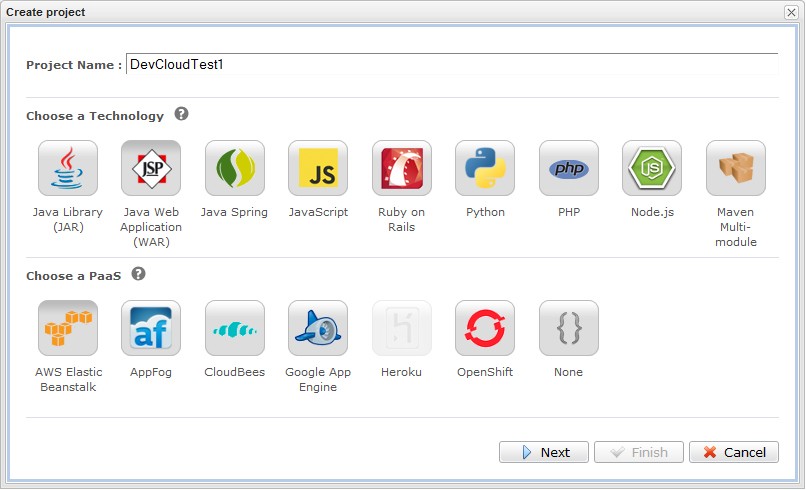
Choosing the Java Web Application technology option and the AWS Elastic Beanstalk PaaS deployment target a default workspace was created with java source directories, a webapp directory and a web.xml file already created.

A simple hello world type web application is automatically created. I decided to use this application to test run the development and deployment process before developing any code. The example web application created by default should be sufficient for such a test. I started by connecting the source code in the newly created codenvy.com workspace to a newly created Github repository.
Source control
Github is well know as a reliable cloud based source code control system. Choosing it as a source control was a no-brainer for Codenvy.
To connect Github you must first create a new repository (if not using an existing one). It is necessary to generate SSH keys in Codenvy which you then configure in Github.
Once this is done the workspace is ready to synchronise with the code repository at Github. The repository must first be pulled from Github before any changes are made to the source code. Then for each file or directory that you wish to add or update to the code repository you firstly add it to the index and commit it, then to send it to Github you must do a remote push.
It mimics the desktop process and smoothly fits in with the development cycle. Once you are happy that you code is nice and safely tucked away in the repository it can be deployed onto the web server.
Deployment
I choose to use AWS Elastic Beanstalk solution for the deployment target.
Amazon offers a bewildering range of services (about 25) and understanding how they all fit together is no small task. Each service exposes an area of functionality. Elastic Beanstalk is a collection of six services that comprise of EC2 (an instance of Linux and Tomcat 7), S3 (Storage), SNS (Notifications), CloudWatch (Health monitoring), Load Balancing and Auto Scaling.
I have been using AWS for about a year and I run a t1.micro instance of linux and Tomcat 7 on EC2 so I was familiar with these services.
Set up of a target environment can be done from within codenvy but I preferred to set it up partially via the AWS console. I set up an S3 instance and generated some access keys. With these in hand I went back to Codenvy and selected Create Application from the Elastic Beanstalk menu option and followed the instructions on their website. It took sometime for the environment to be created (about 4 minutes), but once created I returned to the AWS console to check the instance that was created and the enviroment. All had been created and were running without problems.
With the environment set up I was ready to deploy the application. Again it was a simple process, I created a new version and hit the deploy button.
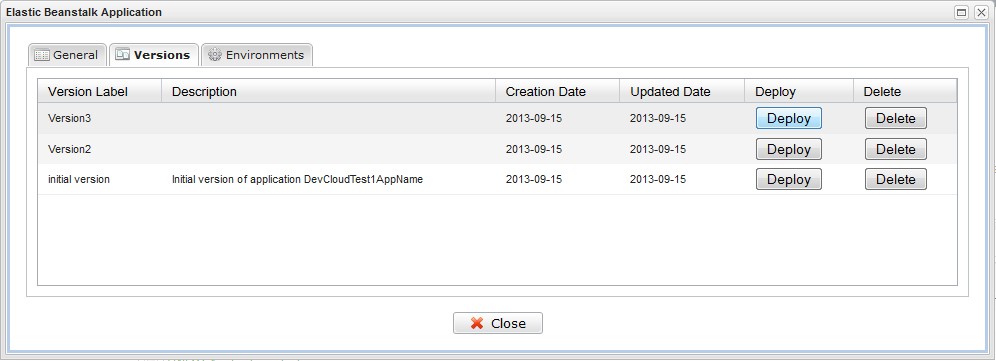
The application was deployed and I could access it via the myapp.elasicbeanstalk.com.
Conclusions
Overall it was a simple enough process of setting up and testing each part of the deployment pipeline. The integration is smooth and the different providers are seamlessly made part of codenvy.com’s IDE. The combination of Github, AWS and codenvy makes it clear that a fairly sophisticated developemnt process of coding, building, versioning and deploying can be achived with codenvy’s IDE and the integrated cloud services from Github and Amazon.
