Android: Navigation drawer with account picker – Google Drive SDK
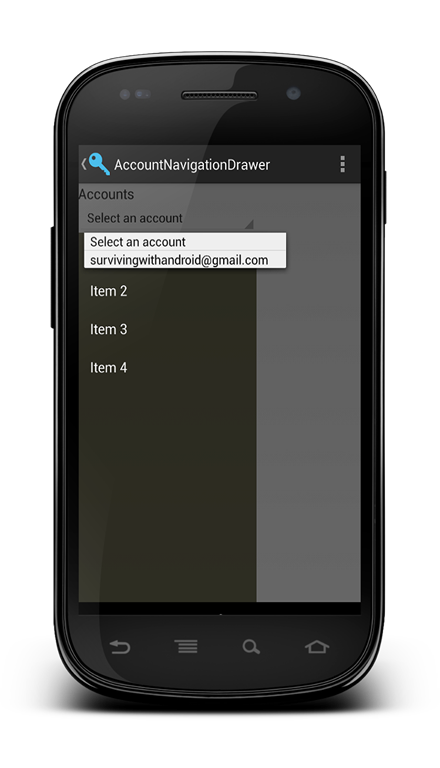
This post describes how to create a navigation drawer with an account picker. Navigation drawer is a new UI pattern introduced in the last I/O. To do it I will use the new Google Service API with Drive SDK mixing them in order to achieve this goal. There are a lot of docs explaining how to create a navigation drawer, but what I want to explain here is how to add an account picker to it. If you look at Google Drive App you will notice that you can choose your account directly from the left drawer instead of picking it from the settings. In this post I will show how we can get the folder in our Google drive account selecting it from the left navigation drawer.
Set up the navigation drawer layout
I won’t give into the details how to use navigation drawer because there are already too many docs talking about it, so this post assumes you are already familiar with this pattern. If you want to know more you can give a look at “Navigation Drawer”. Let’s setup our layout first, we need:
- A spinner to select our account
- The navigation drawer items
As we know already the drawer must be the first element in our layout so we have
<android.support.v4.widget.DrawerLayout
   xmlns:android="http://schemas.android.com/apk/res/android"
   android:id="@+id/drawer_layout"
   android:layout_width="match_parent"
   android:layout_height="match_parent">

  <FrameLayout  android:id="@+id/content_frame"
                android:layout_width="match_parent"
                android:layout_height="match_parent"/>

  <LinearLayout
                android:layout_height="match_parent"
                android:orientation="vertical"
                android:id="@+id/menu"
                android:layout_gravity="start"
                android:layout_width="240dp">

   <TextView    android:layout_width="wrap_content"
                android:layout_height="wrap_content"
                android:text="Accounts"
                style="?android:attr/textAppearanceMedium"
   />

   <Spinner
       android:id="@+id/spinnerAccount"
       android:layout_width="wrap_content"
       android:layout_height="wrap_content"
       android:layout_alignParentLeft="true"
       android:layout_alignParentTop="true"
       android:layout_gravity="start"
   />

    <ListView
       android:id="@+id/left_drawer"
       android:layout_height="match_parent"
       android:choiceMode="singleChoice"
       android:divider="@android:color/transparent"
       android:dividerHeight="0dp"
       android:background="#AA111000"
       android:layout_gravity="start"
       android:layout_width="match_parent"
       />
  </LinearLayout>

</android.support.v4.widget.DrawerLayout>
At line 7 we introduce a FrameLayout in order to handle the UI content dynamically. Instead of using the ListView directly after the FrameLayout (as in the official doc), we introduce a linear layout (line 12) to hold the spinner (line 25) and the menu items.
Populate the spinner with accounts
The next step is populating the spinner with the active account configured on the smartphone. To it, we can use the AccountManager and get the list of the accounts, in this way:
AccountManager accMgr = AccountManager.get(this);

Account[] accountList = accMgr.getAccounts();
final String[] accountNames = new String[accountList.length + 1];
int i=1;
accountNames[0] = getResources().getString(R.string.infospinner);

for (Account account : accountList) {
    String name = account.name;
    accountNames[i++] = name;
}
Once we have our account list, we have simply to define a new adapter so that the spinner can be populated.
ArrayAdapter<String> adp = new ArrayAdapter<String>(this, android.R.layout.simple_spinner_item, accountNames);
spinner.setAdapter(adp);
User account selection
We have to handle the user account selection so that we can set up the right process to require the authorization if needed and set up Drive API correctly. Then we have:
@Override
public void onItemSelected(AdapterView<?> parent, View view,
        int position, long id) {
    System.out.println("Pos ["+position+"]");
    if (position == 0)
        return ;

    String currentAccount = accountNames[position];
    credential = GoogleAccountCredential.usingOAuth2(MainActivity.this, DriveScopes.DRIVE);
    credential.setSelectedAccountName(currentAccount);
    service = getDriveService(credential);
    AsyncAuth auth = new AsyncAuth();
    auth.execute("");
}
....
});
At line 8 we select the account chosen. Then we save the credential info chosen (line 9) by the user and start the async process to retrieve the user folder (line 12,13).
Authorization and Google Drive Access
Now we want to access to the Google Drive data and retrieve all the folder in the root directory. We know that to do it we have to be authenticated and authorized and this process is made by two different steps:
- Choose the account
- Authorize the account
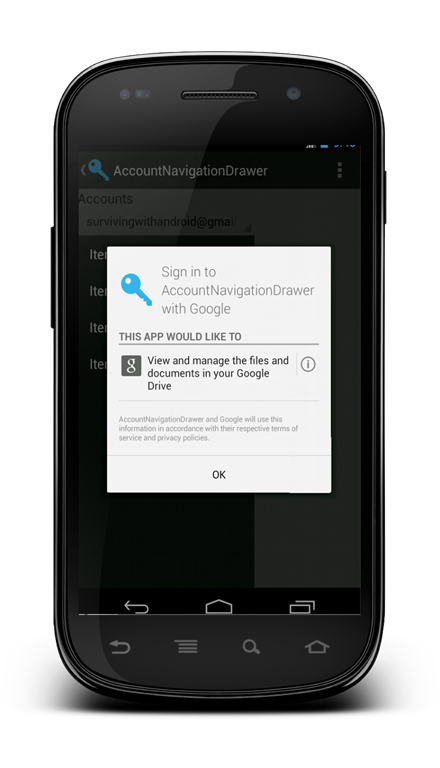
The first step is already done when we select our account using the spinner (see above), so we have to focus on the second step (the authorization). The first thing we have to do is trying to access to the drive data so that we can know if we are already authorized or we need an authorization. The process to access to the remote drive data uses an HTTP connection so we can’t handle it in our main thread, so that we have to create an async process using AsyncTask.
private class AsyncAuth extends AsyncTask<String, Void, List<File>> {

    @Override
    protected List<File>  doInBackground(String... params) {
        List<File> fileList = new ArrayList<File>();
        try {
            Files.List request = service.files().list().setQ("mimeType = '" + MIME_FOLDER + "'");

            FileList files = request.execute();
            fileList = files.getItems();

        }
        catch(UserRecoverableAuthIOException e) {
               startActivityForResult(e.getIntent(), REQUEST_AUTHORIZATION);
        } catch (IOException e1) {
            e1.printStackTrace();
        }

        return fileList;
    }

}
As we can see, we simply try to retrieve user folder (line 7-10) and we catch UserRecoverableAuthIOException (line 13) to get informed if we need to be authorized. If we have to be authorized then we start a new Activity (line 14) asking the authorization request to the user.
Now we have to handle the authorization request result so we implement onActivityResult in our main activity in this way:
@Override
protected void onActivityResult(int requestCode, int resultCode, Intent data) {
     switch (requestCode) {
        case REQUEST_AUTHORIZATION:
            System.out.println("Auth request");
          if (resultCode == Activity.RESULT_OK) {
              AsyncAuth auth = new AsyncAuth();
              auth.execute("");
          }

     }
}
At line 6 if we have a positive result (RESULT_OK) then we start again the async process to retrieve user folders.
Beautify the code
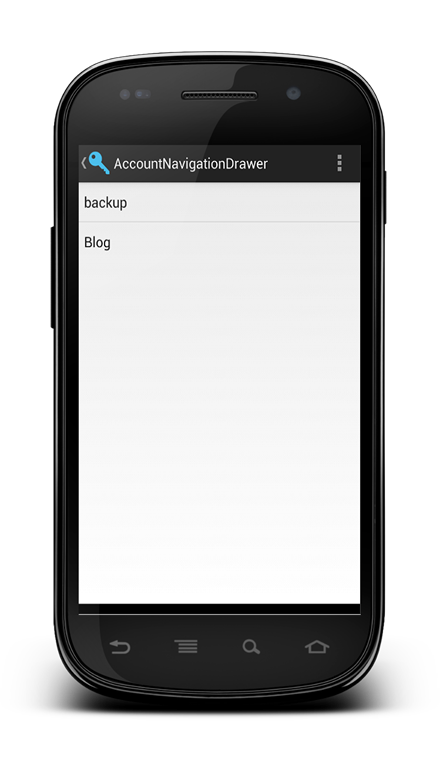
By now we haven’t still used the FrameLayout, so it is time to use it. As we said at the beginning this frame is used to display some content in the UI. We can change this content dynamically using Fragments. We want to show a “wait” info while we are accessing to the user drive account and then the folder retrieved. To do it we need simply two simple Fragment:
- WaitFragment that shows the wait symbol while we access to the drive
- ListFragment that shows the folder list
I won’t go into the details because they’re very simply I want to underline how to change the content in the FrameLayout. If we come back to our AsyncAuth we can notice it is implemented just the doBackgroud method. We have two other methods to exploit in this way:
@Override
protected void onPreExecute() {
    WaitFragment wf = new WaitFragment();

    FragmentManager manager = MainActivity.this.getFragmentManager();
    FragmentTransaction trans = manager.beginTransaction();
    trans.replace(R.id.content_frame, wf);
    trans.commit();
}
This fragment is shown at the beginning informing the user to wait, and the second:
@Override
protected void onPostExecute(List<File> result) {
    FragmentManager manager = MainActivity.this.getFragmentManager();
    FragmentTransaction trans = manager.beginTransaction();

    ListFragment lf = new ListFragment();
    List<String> itemList = new ArrayList<String>();
    for (File f : result) {
        itemList.add(f.getTitle());
    }
    lf.setItemList(itemList);

    trans.replace(R.id.content_frame, lf);
    trans.commit();

}
At line we simply populate the listview adapter with the folder names.
Source code availabe soon.


Thanks for the great example!
Hi,
Thank you for writing this post.I am getting error at line 09
FileList files = request.execute(); what could be the possible reason.?
Hey Thanks for this tutorial which comes with google auth but i am confuse for account manager which class i have to import.
it is giving me error.