Add a sliding menu with animation to an Activity
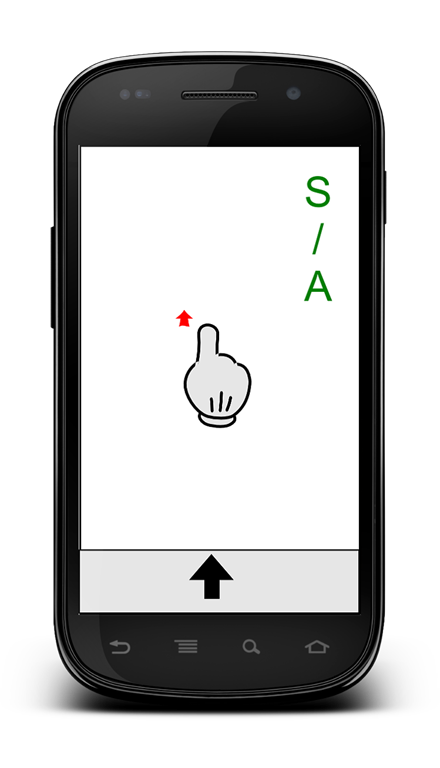
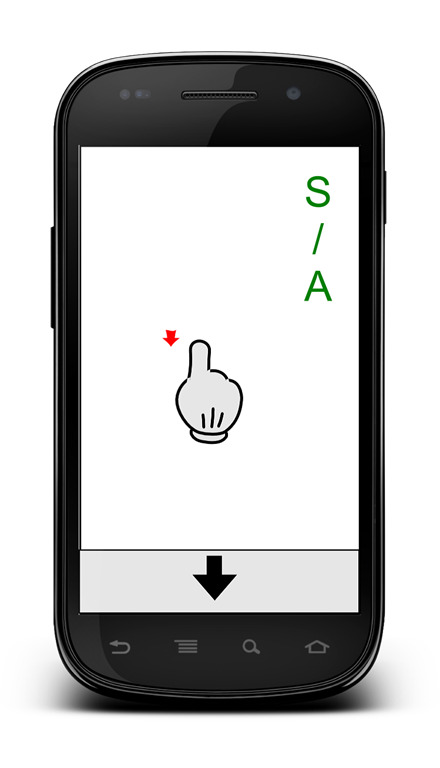
I was playing around with animation, layers and so on and i have coded this simple sliding menu. The idea is very simple when user touches the screen and moves up his finger the app shows a menu, when user touches the screen and moves down his finger this menu disappear. As you can see the idea is very simple but it can be useful when we want to add some menu to our applications.
The first step is creating our sliding layer that will contain our menu. To keep things simple i will just show a TextView but you can modify the code to show your menu. Let’s suppose that activity_main.xml is the xml layout of our Activity, so we have:
<RelativeLayout xmlns:android="http://schemas.android.com/apk/res/android"
    xmlns:tools="http://schemas.android.com/tools"
    android:layout_width="match_parent"
    android:layout_height="match_parent"
    android:background="@color/green">

    <LinearLayout
    android:id="@+id/slider"
    android:layout_width="match_parent"
    android:layout_height="60dp"
    android:layout_alignParentBottom="true"
    android:layout_alignParentLeft="false"
    android:layout_alignParentTop="false"
    android:layout_centerInParent="true"
    android:background="@color/gray"
    android:content="@+id/content"
    android:gravity="bottom|center_horizontal"
    android:orientation="vertical" >

    <TextView android:id="@id/content"
              android:layout_width="match_parent"
              android:layout_height="wrap_content"
              android:text="Surviving with android"/>

   </LinearLayout>
</RelativeLayout>
This is the base layer that will be moved up and down following user finger direction. If you want to add a menu replace the TextView with your menu (maybe with Buttons and so on). Now let’s look at the Activity that has to manage this menu. At the start up this layer should be invisible so we have to add:
@Override
 public void onCreate(Bundle savedInstanceState) {
     super.onCreate(savedInstanceState);
     setContentView(R.layout.activity_main);

     ll = (LinearLayout) findViewById(R.id.slider);
     ll.setVisibility(View.GONE);
      ....
}
We simply set the layout visibility to View.GONE. Now we have to track the user finger movements to react to this movements. To do it we need simply override the method public boolean onTouchEvent(MotionEvent event) If we want to have more information on how to handle touchscreen events give a look here. To know if the user is moving his finger up or down we simply have to store the Y position when user touch the screen for the first time ( MotionEvent.ACTION_DOWN event) and compare its value to the Y position when user move up his finger ( MotionEvent.ACTION_UP event) . So we have:
@Override
public boolean onTouchEvent(MotionEvent event) {
    switch (event.getAction()) {
        case MotionEvent.ACTION_DOWN : {
            startY = event.getY();
            break ;
        }
        case MotionEvent.ACTION_UP: {
            float endY = event.getY();

            if (endY < startY) {
                System.out.println("Move UP");
                ll.setVisibility(View.VISIBLE);

            }
            else {
                ll.setVisibility(View.GONE);
            }
        }

    }
    return true;
}
In this way we have created a simple ON/OFF menu that gets visible when user moves up his finger and gets invisibile when user moves down his finger. We could add some control for example a threshold that triggers the menu.
Add some animation
To make this menu more attractive and make the layer moving up or down we can add some animation. To do it under the directory res add a directory called anim (if not present). We want to create two animations one that shows the layout moving up and the other one moving it down. We create two files one called anim_up.xml with this content:
<?xml version="1.0" encoding="utf-8"?>
<set xmlns:android="http://schemas.android.com/apk/res/android">
    <translate android:fromYDelta="100%"
                android:toYDelta="40%"
                android:duration="400"/>

</set>
and a another one called anim_down.xml :
<?xml version="1.0" encoding="utf-8"?>
<set xmlns:android="http://schemas.android.com/apk/res/android">
    <translate android:fromYDelta="0%"
                android:toYDelta="100%"
                android:duration="400"/>

</set>
Now we have simply load this animation in our Activity and start them as user move finger up and down. So the code of our Activity looks like this:
private Animation animUp;
private Animation animDown;

@Override
public void onCreate(Bundle savedInstanceState) {
    super.onCreate(savedInstanceState);
    setContentView(R.layout.activity_main);

    ll = (LinearLayout) findViewById(R.id.slider);
    ll.setVisibility(View.GONE);

    animUp = AnimationUtils.loadAnimation(this, R.anim.anim_up);
    animDown = AnimationUtils.loadAnimation(this, R.anim.anim_down);
}

@Override
public boolean onTouchEvent(MotionEvent event) {
    switch (event.getAction()) {
    case MotionEvent.ACTION_DOWN : {
        startY = event.getY();
        break ;
    }
    case MotionEvent.ACTION_UP: {
        float endY = event.getY();

        if (endY < startY) {
            System.out.println("Move UP");
            ll.setVisibility(View.VISIBLE);
            ll.startAnimation(animUp);
        }
        else {

            ll.startAnimation(animDown);
            ll.setVisibility(View.GONE);
        }
    }

    }
    return true;
}


