This post will be the final chapter of my series on object detection since we have explored the possibility of detecting various objects within camera frames, tracing the journey from Java-based applications to our ultimate goal that implements a mobile app on android devices.
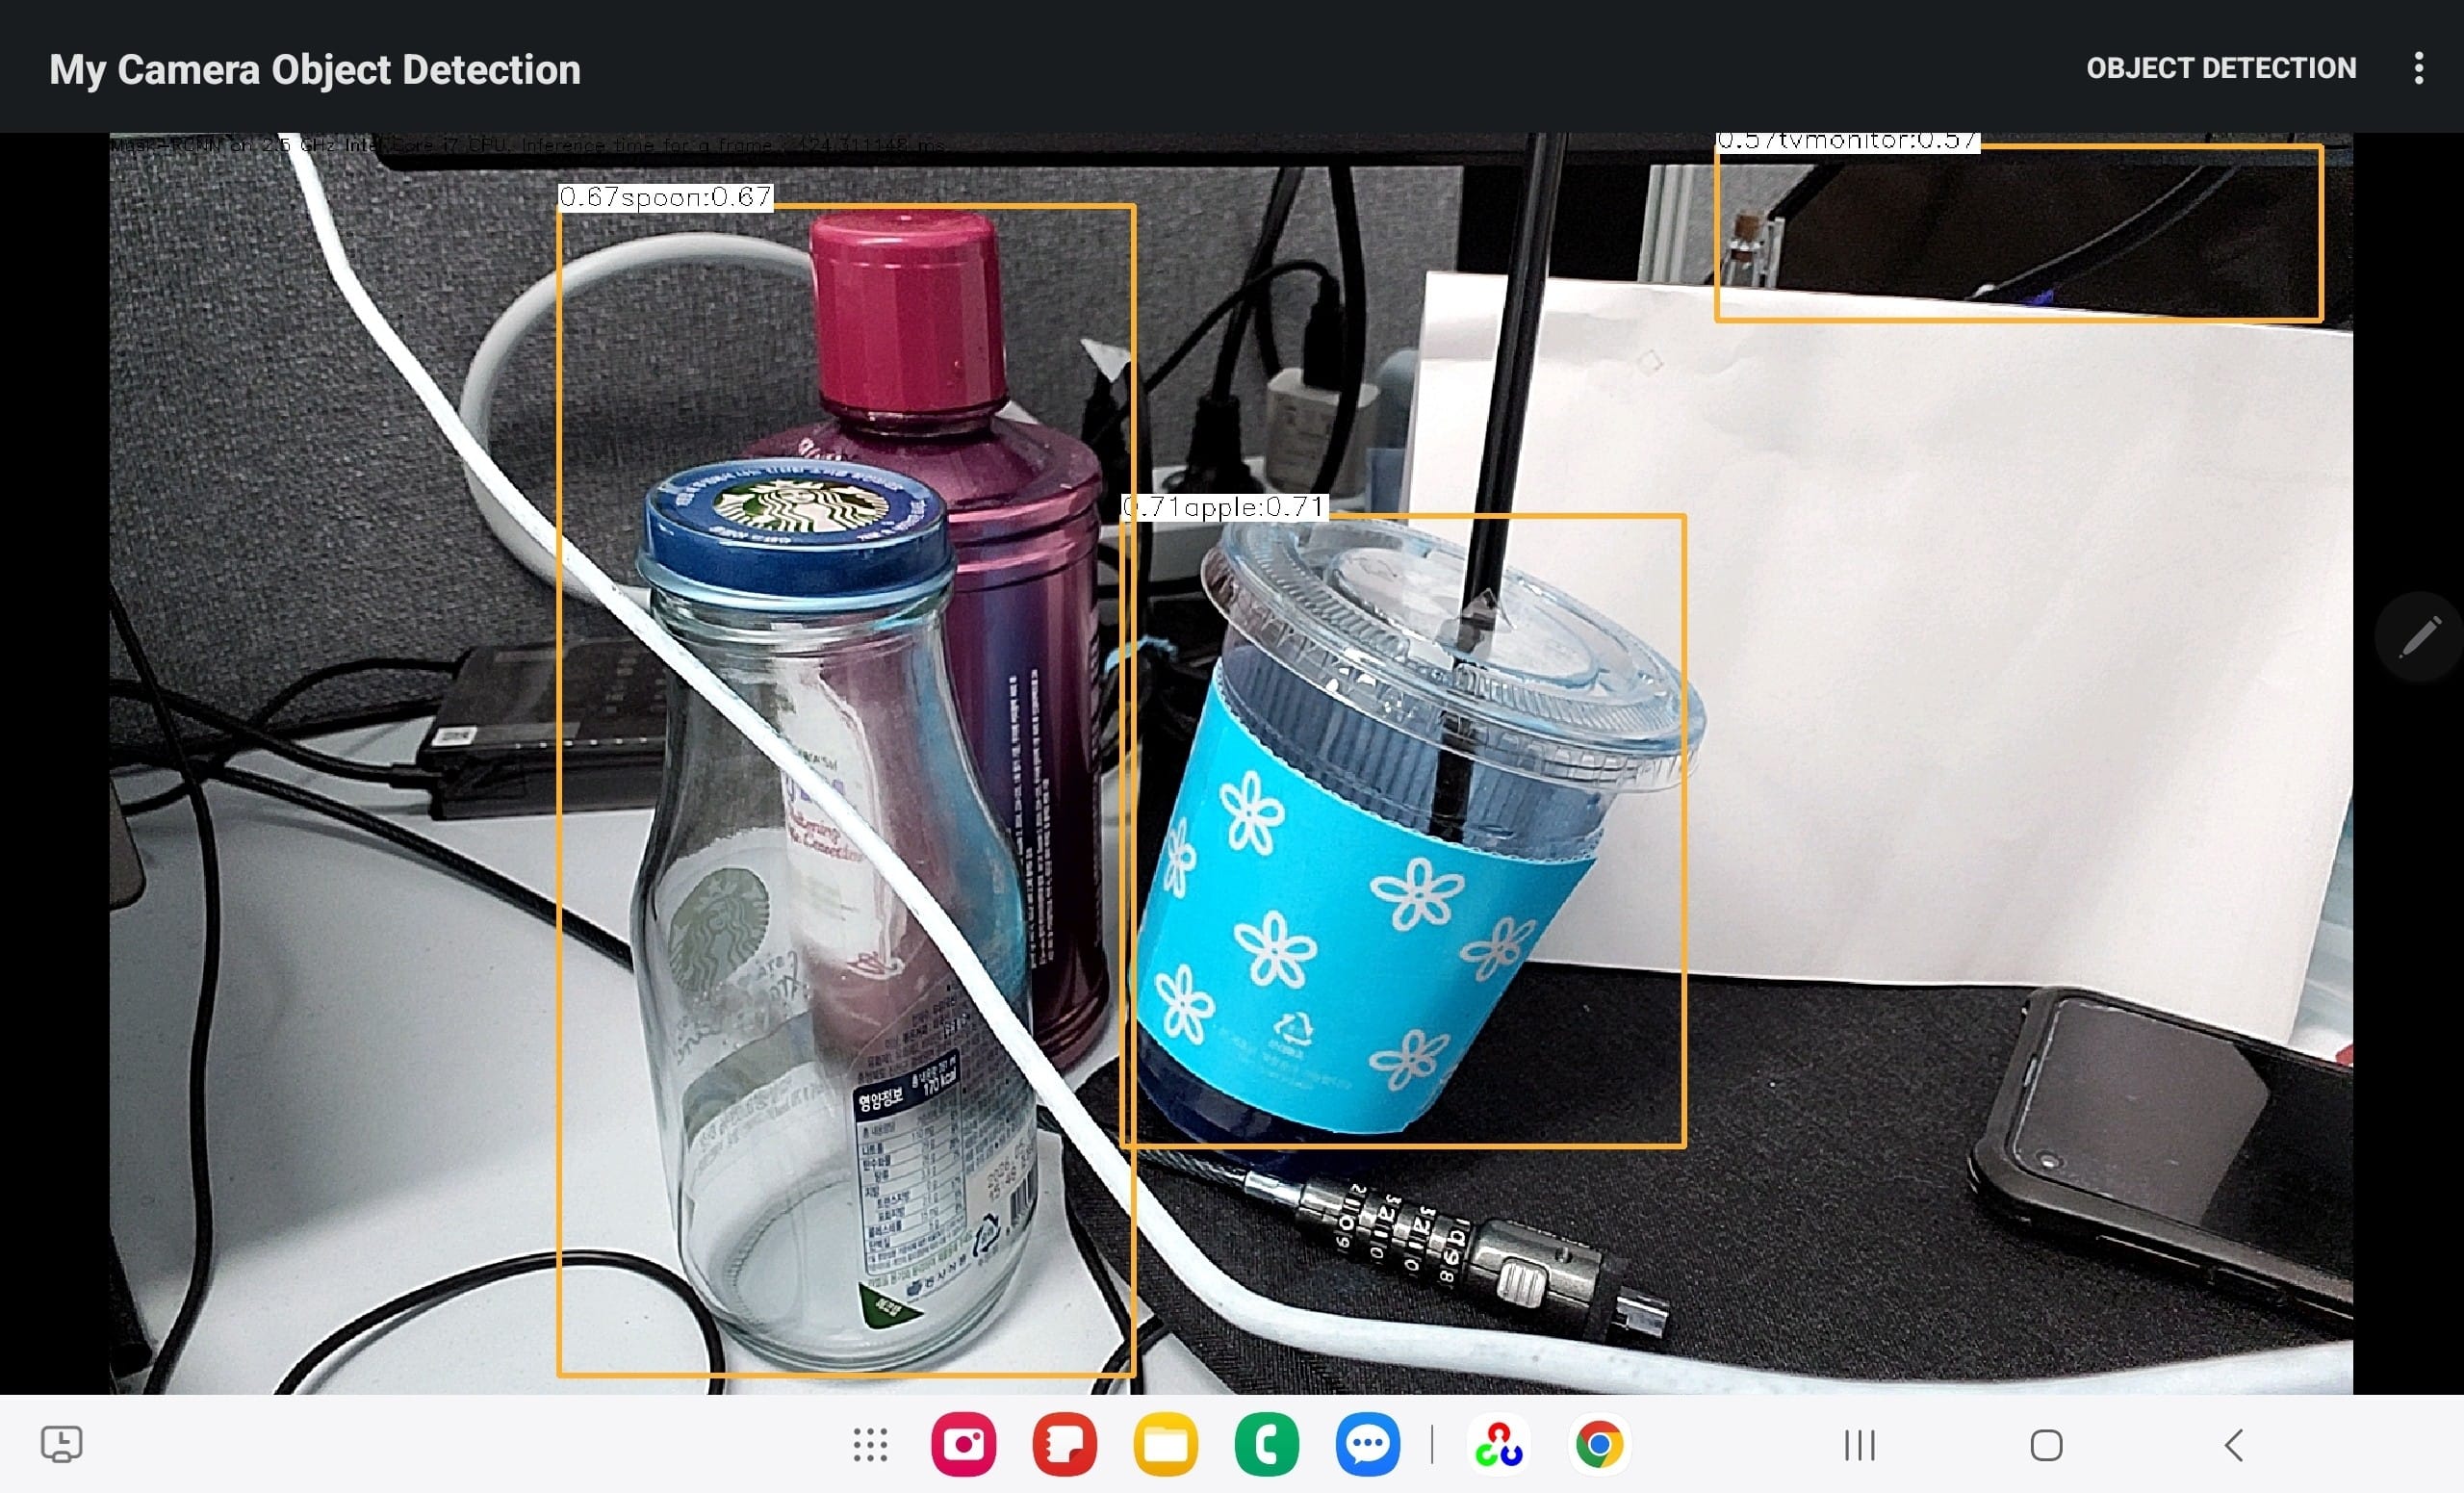
Table Of Contents
1. Introduction
You have some insight what an object detector looks like and explored various detection models and those usage So far, I will focus on object detection specifically on the real Android mobile device.
Then, we will discuss how to adapt our existing object detector with minimal changes—rather than starting from scratch on Android system. For more context, you may refer to my previous articles on References part.
2. Objectives
My goal is to conduct a series of experiments to detect objects on mobile with various object detection models—such as Mask R-CNN, the YOLO series, and other state-of-the-art models—on actual mobile devices. When it comes to mobile development, we can consider the two major ecosystems: Android and iOS, I selected Android because it natively supports Java, our preferred language, allowing us to build a seamless environment..
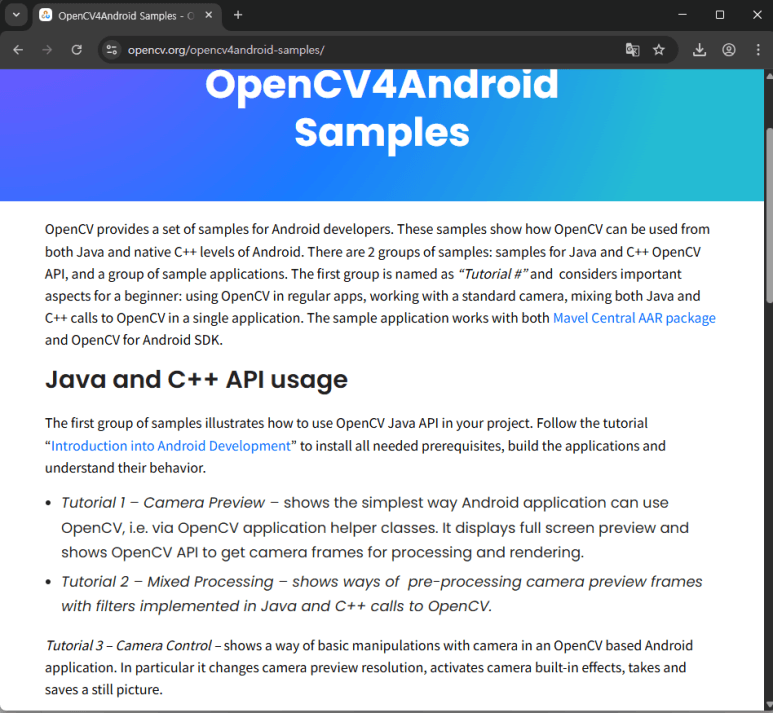
The ultimate objective is to implement a standalone object detector using OpenCV Android. When I first began this project, OpenCV samples did not include a mobile-ready object detector. However, recent versions of OpenCV now provide samples integrated with MobileNet. Therefore, I have decided to use these official samples as a baseline for comparison with other models.
3. Android Development Setup
Before implementation of the android app, you must first configure your Android development environment if you haven’t already. Developing an Android app means it is a procedure to building an executable for the Android OS, while Google provides the base OS, various manufacturers—such as Samsung, Xiaomi, and Vivo—adapt it for their devices with specific drivers for components like Bluetooth, Wi-Fi, and GPS. To build apps for this ecosystem, you can download the necessary SDK from the Google Developers site.
There are several software languages available for Android development in which Kotlin is a popular choice, and its syntax is quite similar to Java, making it easy to learn for those with a Java background. (In my view, Kotlin’s rise was partly influenced by the long-standing legal disputes between Google and Oracle). While C/C++ and Python are also options, they can be more challenging to implement than Java or Kotlin. As emphasized throughout this series, I will be using Android Java. Not only is it my preferred language, but sticking with pure Java ensures consistency across all the articles we have covered so far.
3.1. Development Tools Setup
In this section, I will introduce the essential development tools and SDK required to build and run our object detection application on Android.
1. JDK (Java Development Kit)
Java Development Kit (JDK) is an essential tool as the foundation of Android Java and it is impossible to develop Android applications without it, so downloading and installing the JDK should be your first priority. Although Google now promotes Kotlin as the primary development language but Java still remains a fundamental pillar of the Android ecosystem.
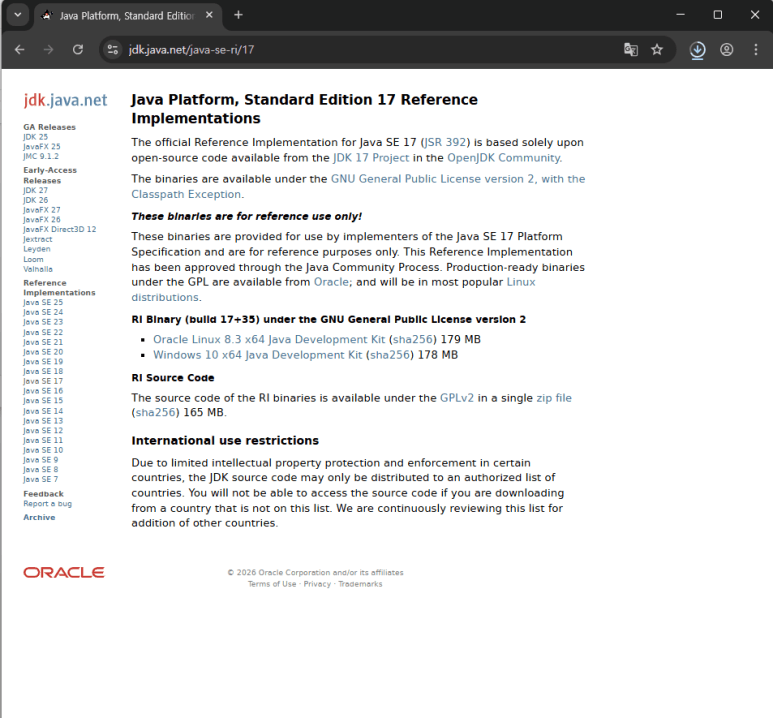
For this project, I recommend using OpenJDK. You can download the compressed binaries from the official OpenJDK site. I will be using JDK 17 or higher to ensure compatibility with the latest Android build tools and libraries.
2. Android Studio
Android Studio is the free, standard IDE from Google, offering an intuitive and user-friendly GUI. While Eclipse was the primary tool when I first started, Android Studio has now become the undisputed mainstream choice for developers worldwide, providing a much more robust environment for building modern apps.
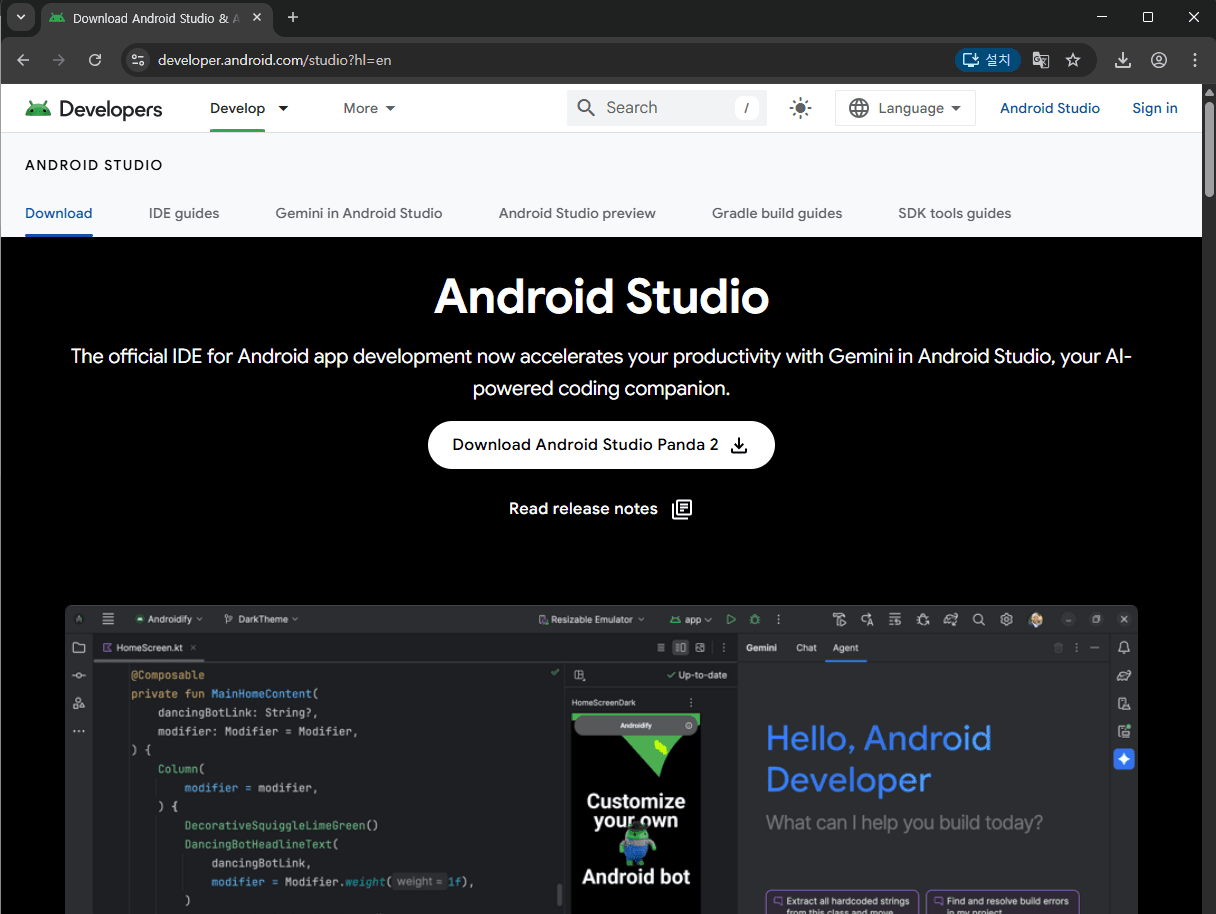
Another major benefit of developing with Android Studio is its seamless integration with the Android SDK. It bundles essential components, such as platform tools and build tools, directly within the IDE. This integrated approach allows us to save significant time and effort when setting up the development environment, letting us focus more on building the app itself.
3. Gradle
Building an Android application is a complex process that culminates in the creation of an APK (Android Package) file. This requires a robust build tool to manage everything from code compilation to final integration. While there are three major build tools available—Ant, Maven, and Gradle—I prefer using Gradle. It is the modern standard for Android development, offering the flexibility and power needed to streamline the entire build pipeline.
The Build Process with Gradle
By choosing Gradle as our build tool, we can efficiently manage the complex process of creating an Android app. The typical workflow consists of the following key stages:
- Code Compilation: Converting Java or Kotlin source code into bytecode.
- Resource Integration: Compiling and packaging app resources, such as images and XML layout files.
- Dependency Management: Linking external libraries and frameworks (like OpenCV) as required.
- Code Optimization & Obfuscation: Improving app performance and protecting the source code using tools like R8 or ProGuard.
- Signing & Archiving: Digitally signing the application for security and packaging it into the final APK (or AAB) file for distribution.
Why We Use Gradle
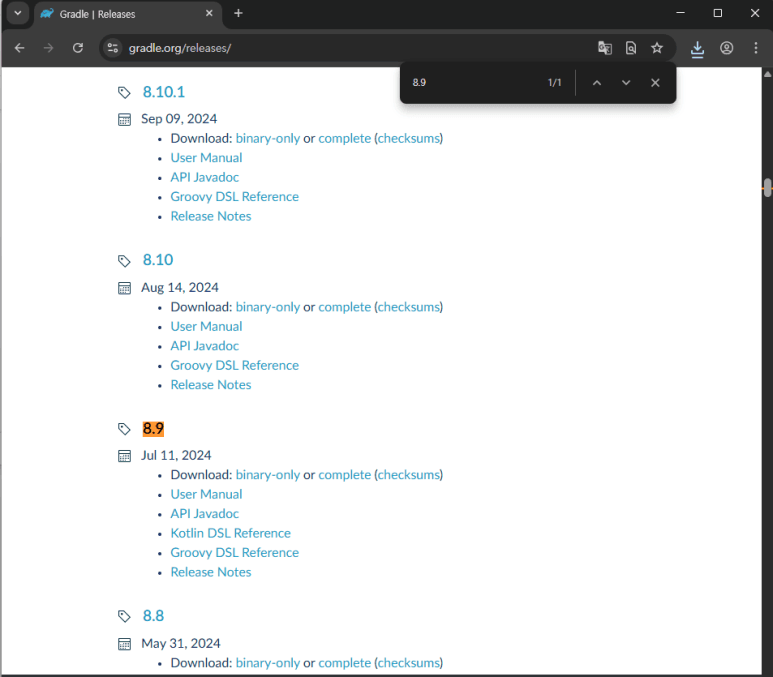
As developers, it is technically possible to perform each of these complex steps manually. However, doing so is far more complicated and error-prone than using a dedicated build tool. Utilizing a standardized build process through a tool like Gradle is not just natural—it is essential for efficiency and consistency. For this project, we will be using Gradle version 8.9, the latest stable release at this time.
4. OpenCV Android SDK
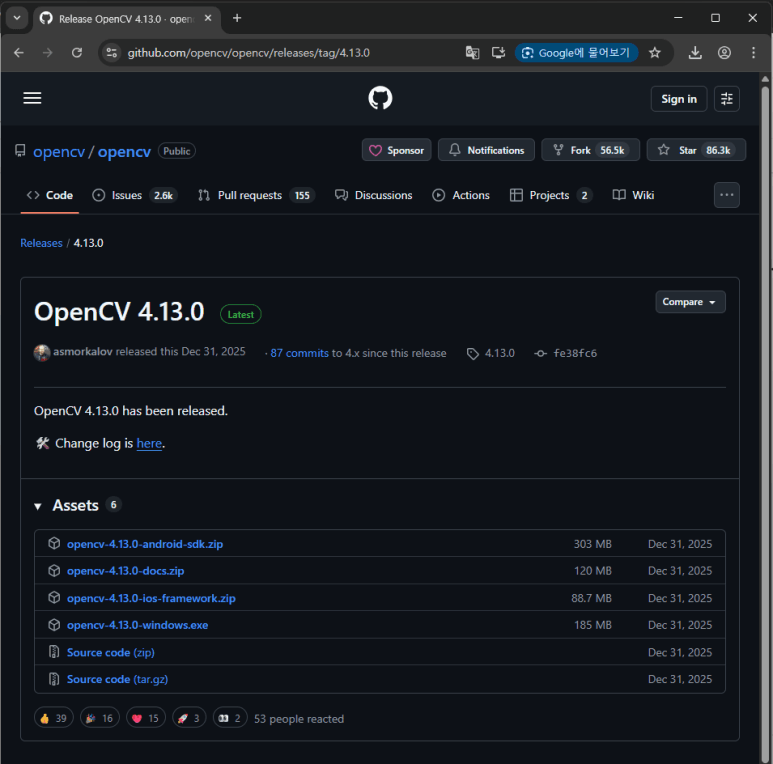
We are building our object detector on the OpenCV library. The OpenCV Android SDK offers not only the core libraries but also various practical samples to jump-start your development. Ensure you download the latest version to take full advantage of current features and optimizations.
5. About Android Mobile Device
While you can use the emulator provided by the Android SDK (which can be downloaded and configured via Android Studio), I believe it is not sufficient for this project so I have decided to use a physical device for optimal performance and testing —specifically, a Galaxy Tab S8. Or It is possible to use your own Android phone or any other tablet for development.
Specifications of Galaxy Tab S8 (Reference Device):
| Category | Specification |
| Model | Samsung Galaxy Tab S8 (Standard) |
| OS | Android 12 (Upgradable to 14+) |
| Processor (AP) | Qualcomm Snapdragon 8 Gen 1 |
| Memory (RAM) | 8 GB / 12 GB |
| Storage | 128 GB / 256 GB (microSD up to 1TB) |
| Display | 11-inch LTPS TFT (2560 x 1600), 120Hz |
| GPU | Adreno 730 |
| NPU | 7th Gen Qualcomm AI Engine |
Please note that I assume your device is relatively modern. It is practically impossible to build an app that runs flawlessly on every version of Android ever released by providing the table below lists the specifications of my tablet. These are not necessarily the minimum requirements, but rather a reference for a high-performance setup. You should be able to follow the development process as long as your device is not outdated.
4. Build OpenCV Samples
This section, I will describe how to build OpenCV samples since you’ve downloaded all tools and SDK completely from previous section.
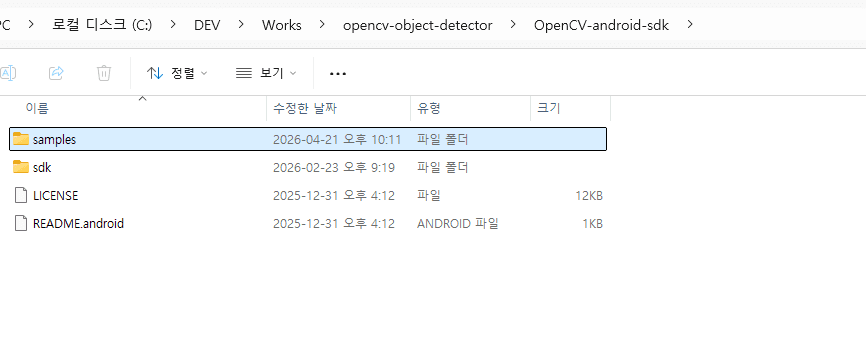
4.1. Extracting the OpenCV SDK
After downloading opencv-version-android-sdk.zip, extract its contents to a folder of your choice. Once extracted, you will see a directory structure similar to the one shown below:
sdk: It contains the Android library projects, Java helper classes, and native JNI libraries (.so files) required for your app.samples: This directory provides various sample applications that demonstrate OpenCV’s capabilities, such as camera handling, image manipulation, and—most importantly for us—object detection.
The included samples are excellent resources for understanding how OpenCV code integrates and functions within the Android environment. By exploring these examples, you can gain practical insights into implementing computer vision features in a mobile context.
4.2. OpenCV Sample Configuration
Now that we have downloaded the OpenCV SDK and explored its contents, we are ready to begin Android mobile development. Before diving into our custom implementation, let’s look at how to build and run the provided samples using Android Studio. Testing these official examples ensures that your environment is correctly configured and gives you a functional baseline to work from.
1. Launching Android Studio
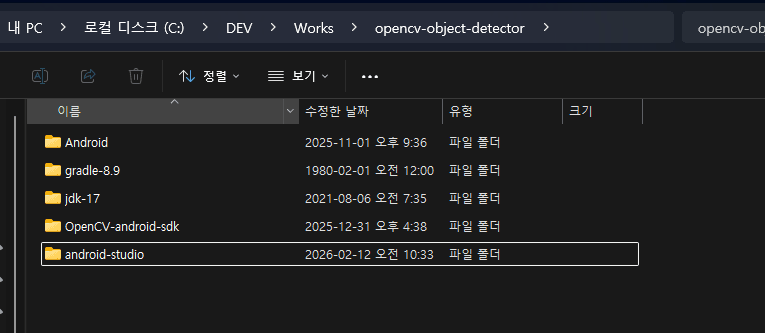
If you have followed the setup steps described above, you can now launch the IDE. Navigate to the installation directory and locate the 64-bit executable file, studio64.exe or studio.bat in the bin folder.
For example, based on our setup, the path should look like this:
~\android-studio\bin\studio64.exe
~\android-studio\bin\studio.bat
Double-click this file to start Android Studio and begin the project configuration.
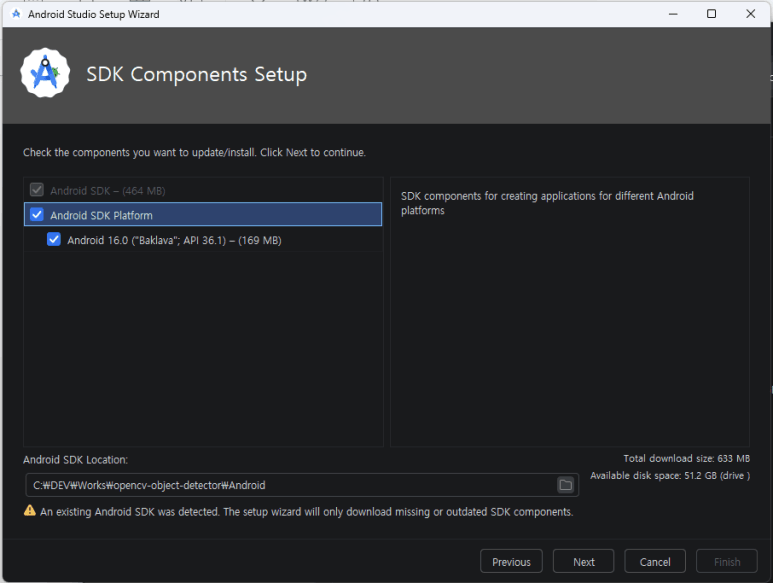
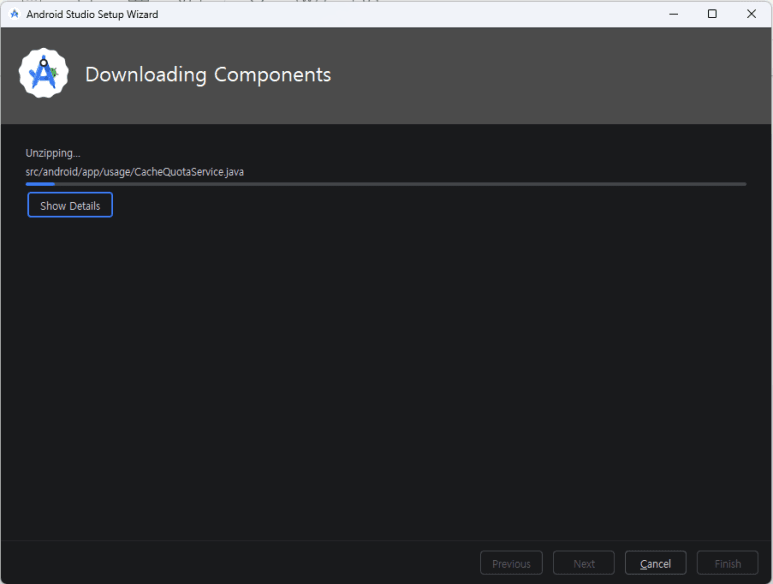
2. SDK Components Setup
When you launch Android Studio for the first time, you will encounter a window titled “SDK Components Setup.” Fortunately, Android Studio automates the entire process—handling the download, configuration, and setup of the SDK and its components for us, as shown in the following screenshots:
3. Development Toolchain
We call the process of building software for a different architecture or OS ‘cross-compilation.’ Since Android relies on the Linux kernel, its applications inherently run within a Linux-based environment. To bridge the gap between our Windows development machines and the Android environment, we utilize a ‘Toolchain’.
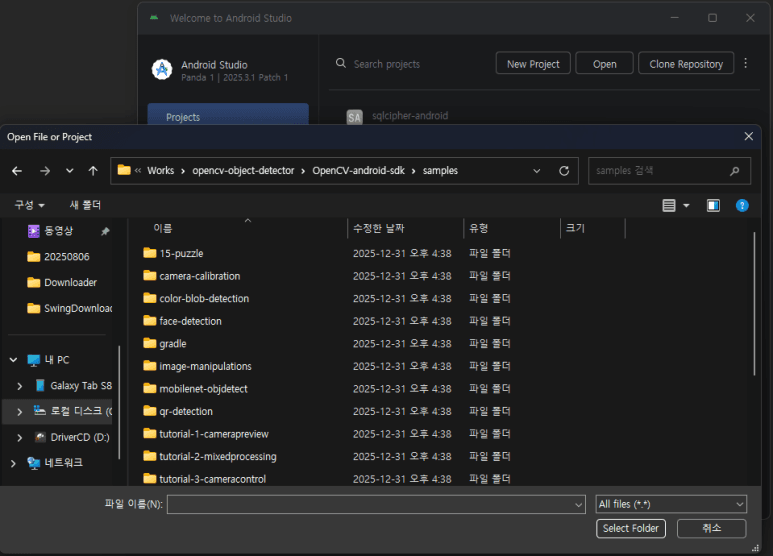
4. OpenCV Sample Folder
Once the setup process described in the previous chapter is complete, the project selection window will appear then, In the window shown below, navigate to and select the samples folder within the extracted OpenCV SDK :
4.3. Android Studio Configuration
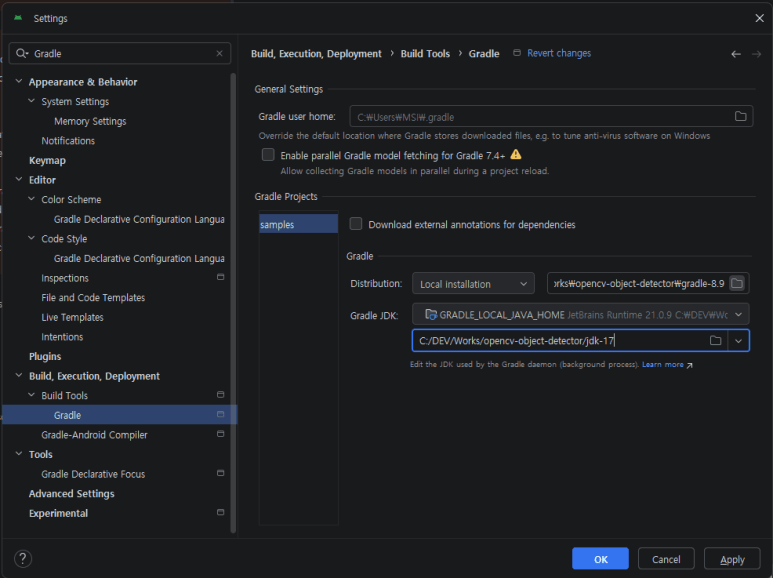
Set the JDK and Gradle versions we downloaded in the previous sections is first thing to do, before building. Setting these manually ensures that our build environment is consistent and stable.
Follow these steps to complete the configuration:
- Crucially, verify that the Gradle JDK is set to version 17. This ensures compatibility between the build tool and your Java source code.
- Navigate to: Settings > Build, Execution, Deployment > Build Tools > Gradle
- In the “Build process” or “Gradle projects” section, look for the Gradle distribution options.
- Choose “Specified location” (or local installation) from the drop-down menu and enter the path where you extracted the Gradle 8.9 binaries.
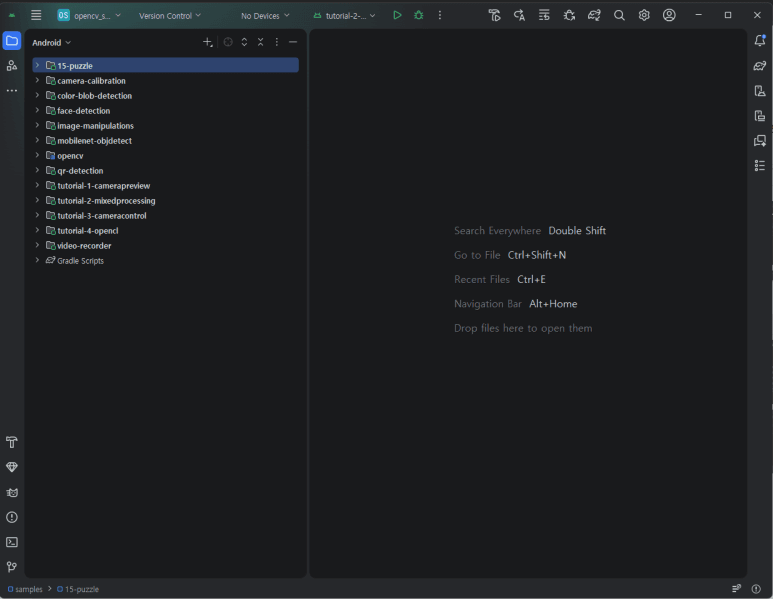
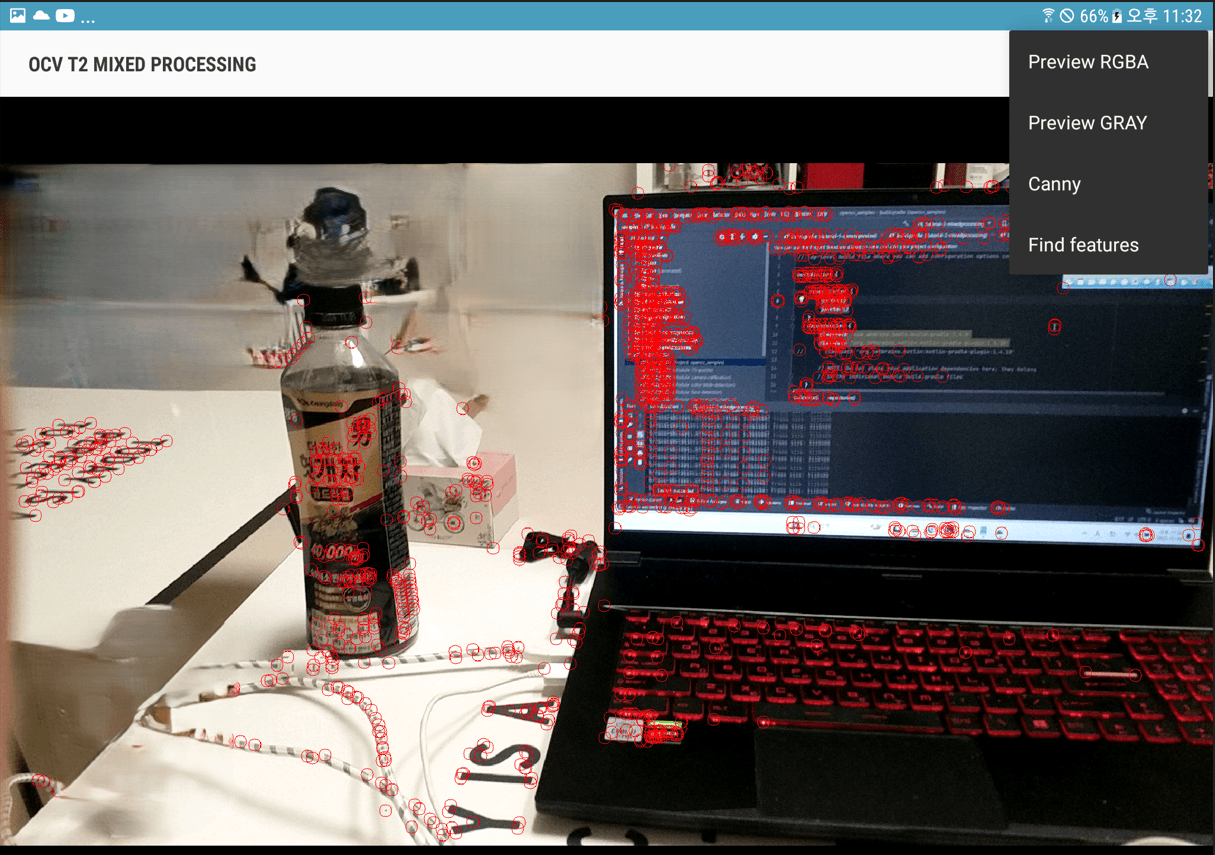
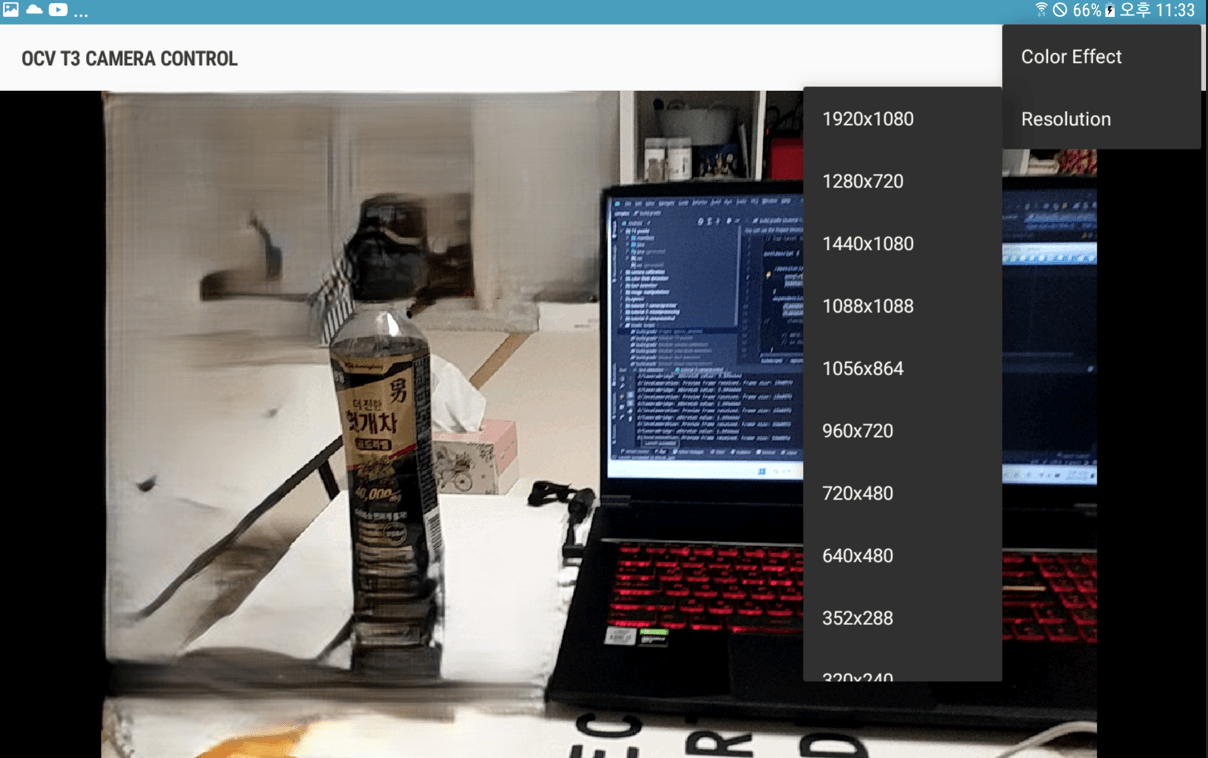
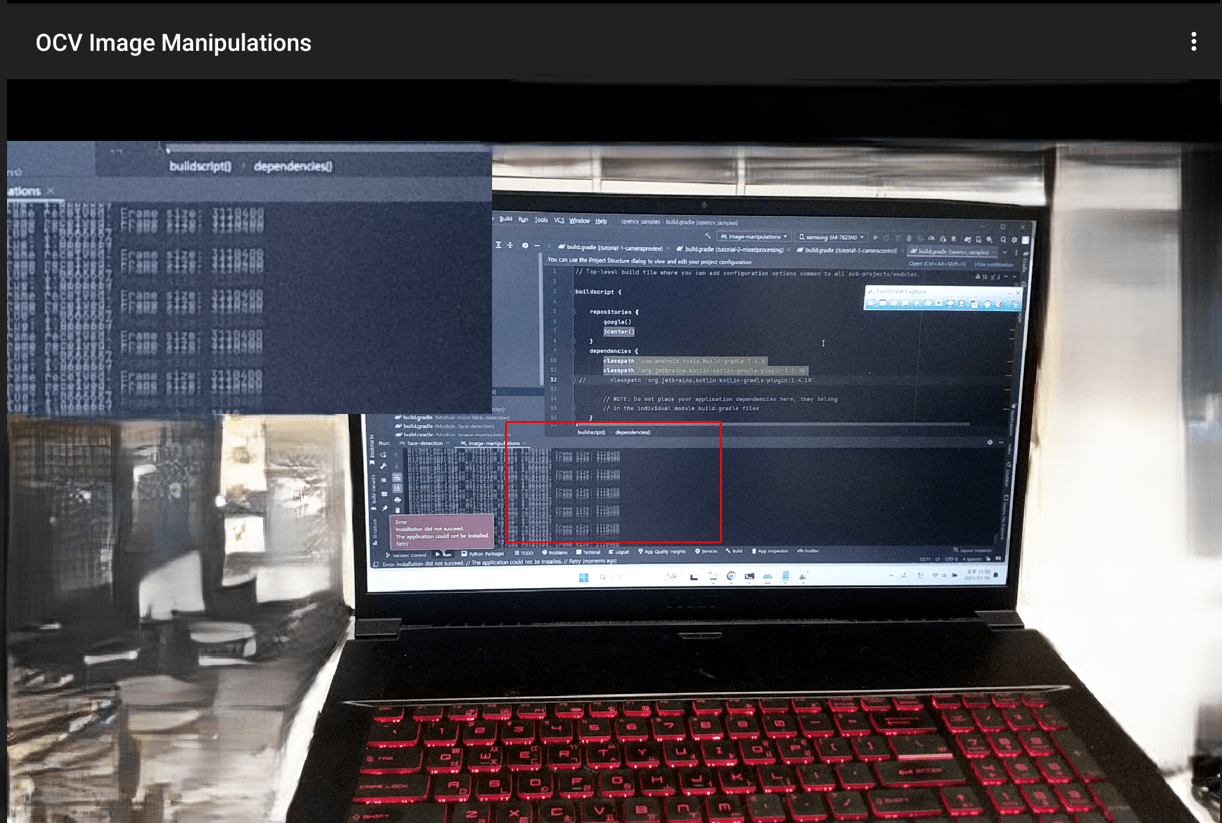
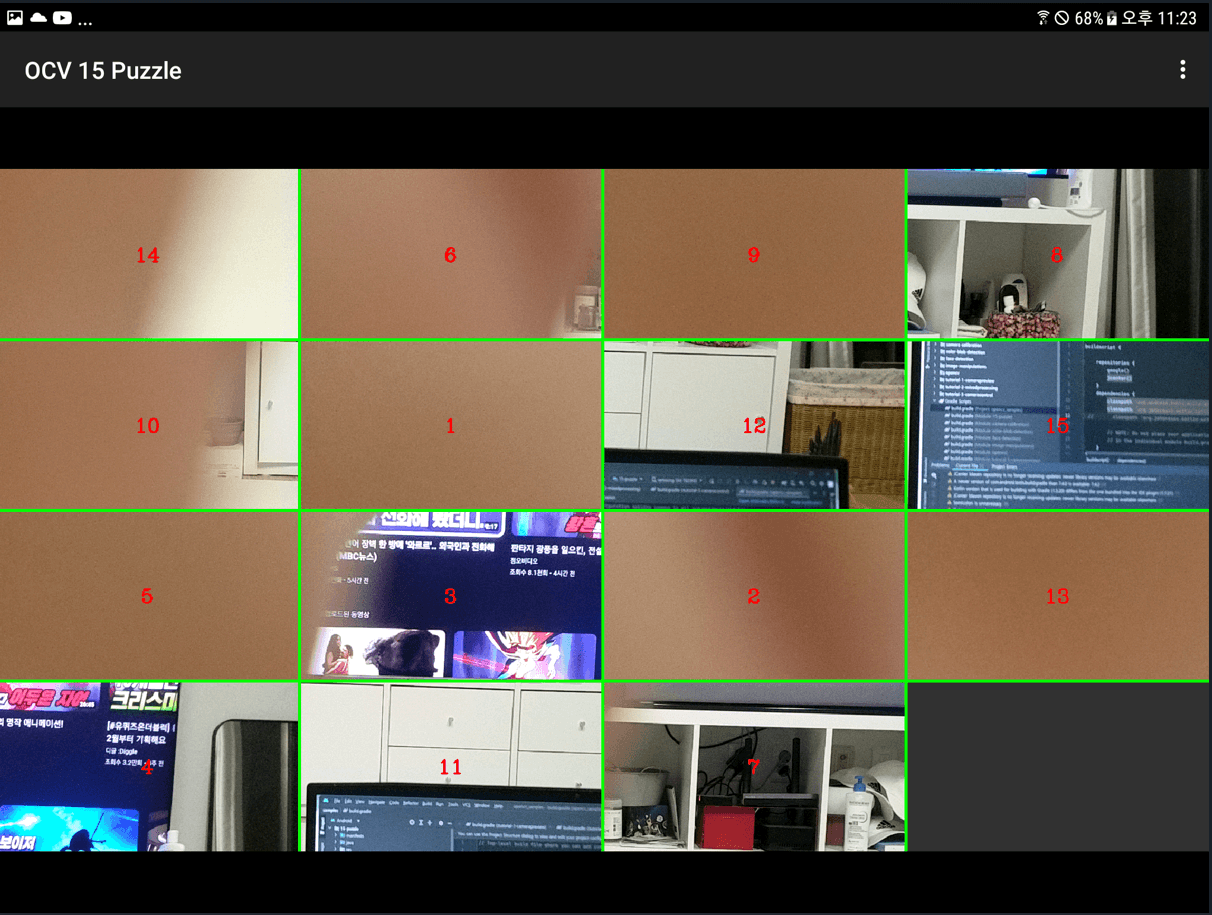
1. Exploring Sample Projects
With the configuration complete, you will now see a wide array of samples and examples —from basic camera preview to complex image processing filters — populated within the Android Studio project explorer that tells us these projects now “active,” meaning the IDE has recognized the Gradle files and linked the necessary OpenCV libraries.
On the official OpenCV site, there are available samples with description in which you can use these as a valuable reference throughout the development process:
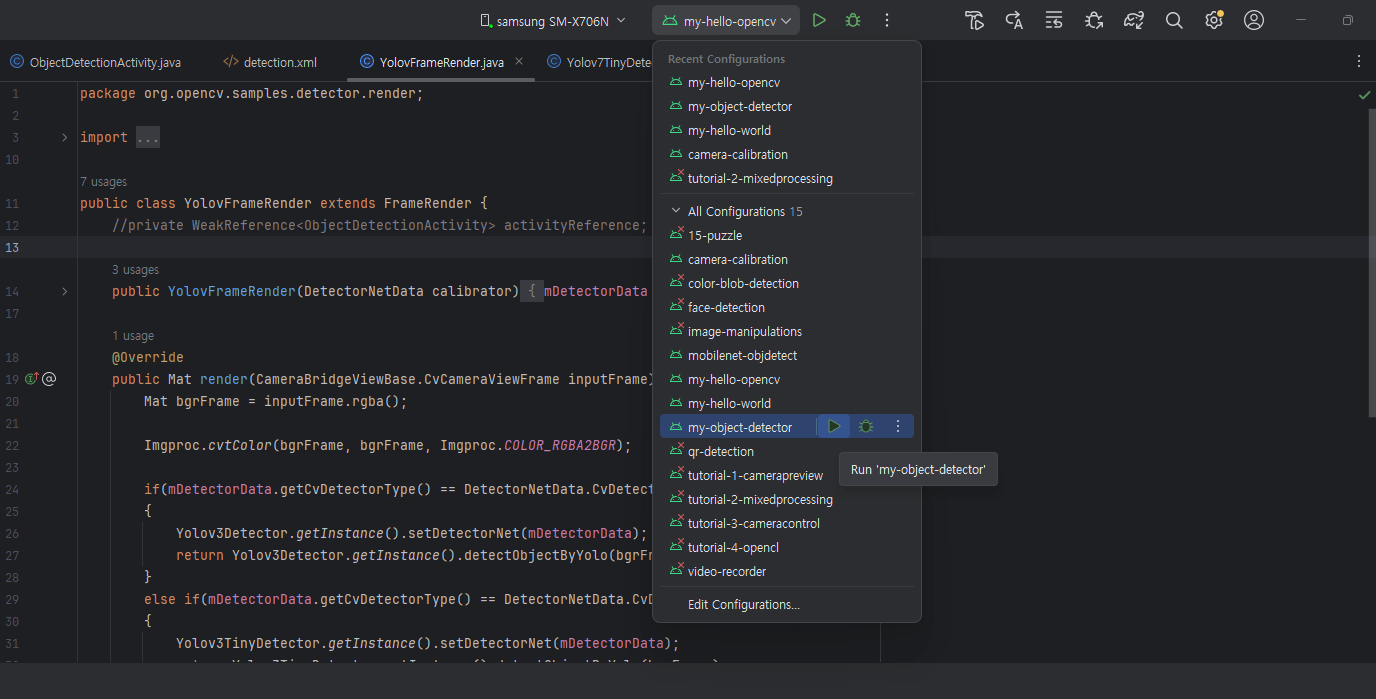
2. Running Samples
You can build all these sample sources at a time by build, compile all sources at the menu of the android studio then, you simply select and run each of those samples with run button on the studio.
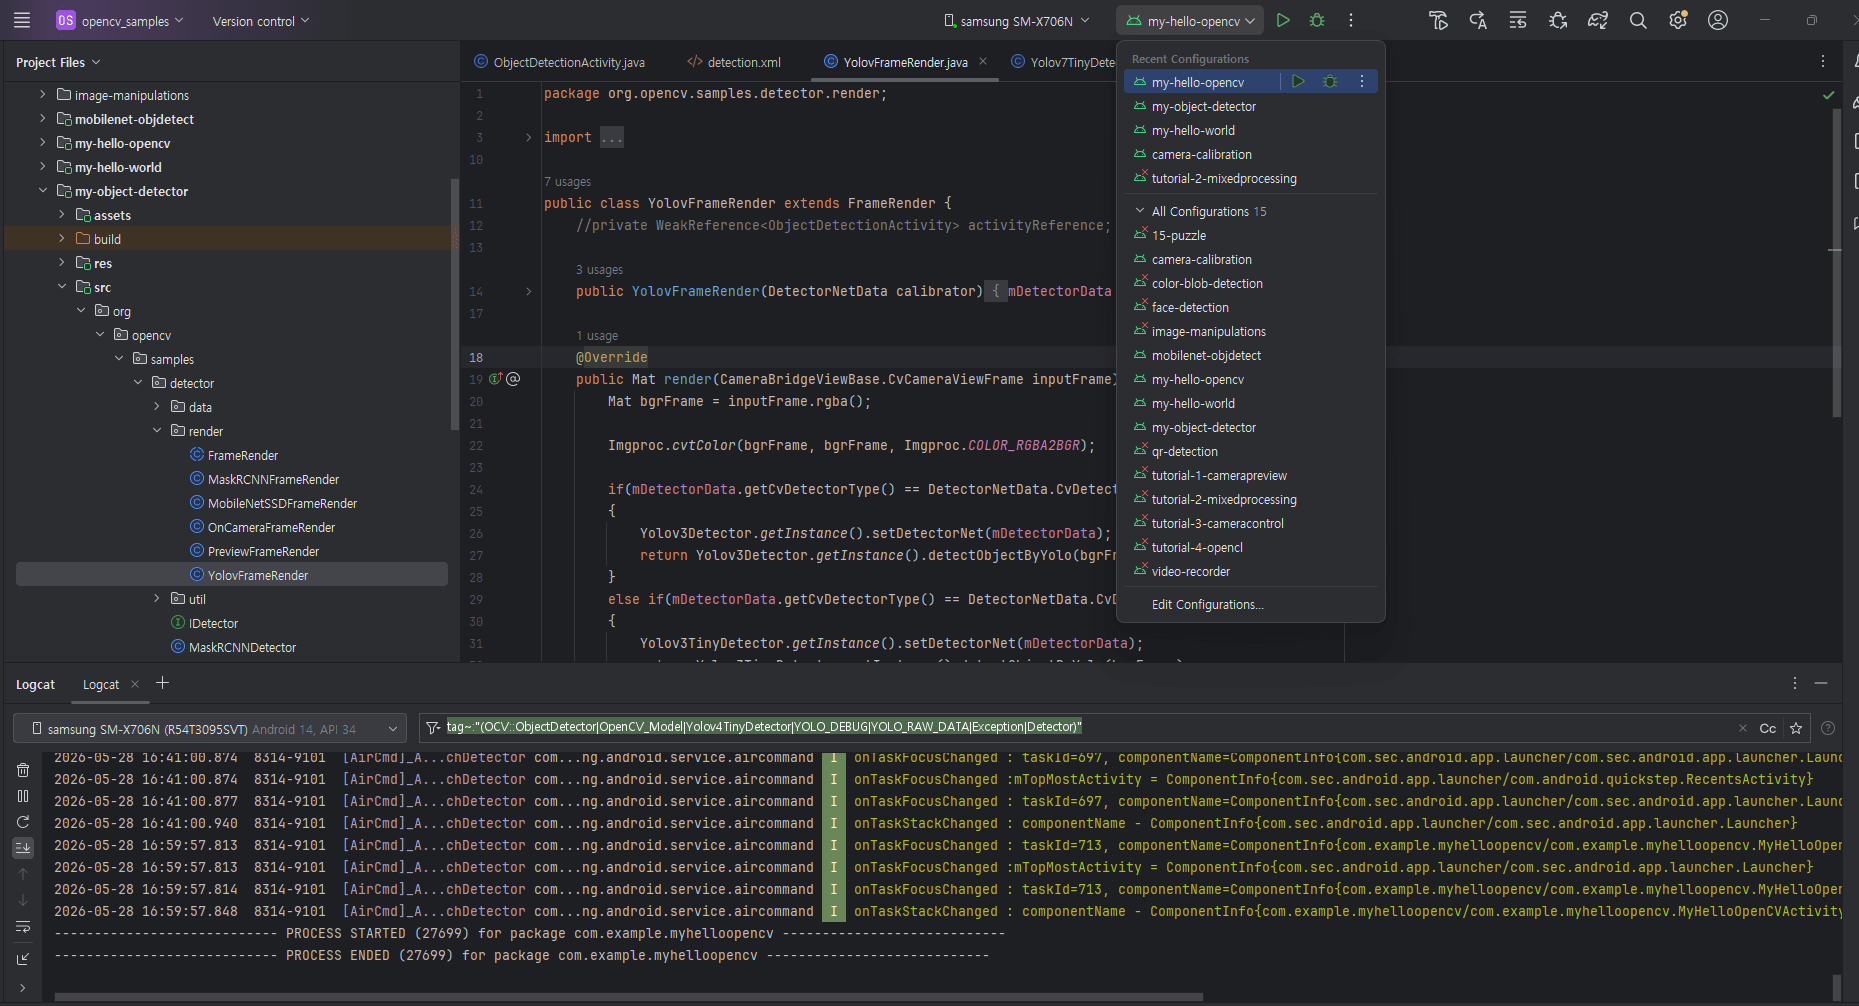
Those samples cover a wide range of functionalities, from basic camera access to advanced image processing techniques. Referring to them will help you understand the standard patterns for handling frame data and optimizing performance on mobile devices.
5. OpenCV Inference Models
Basically, Mask-RCNN or Yolo v3 model we’ve been developing through the windows system is not suitable choice on the android system so I have to investigate some proper models on mobile system because I intent to build such circumstance that figure differences among the current models used so far and proper models as an aspect of accuracy or performance.
5.1. Object Inference Model Overview
We newly choose MobileNet-SSD v3, Yolo v3 tiny and Yolo v7 tiny as a mobile model downloaded from internet without any modification or training it following table is description of each models :
| Model Name | Description | Focus Area |
| Mask R-CNN / YOLOv3 | High accuracy models used in our Windows environment. | Accuracy & Precision |
| MobileNet-SSD v3 | Google’s efficient CNN architecture designed for mobile vision. | Efficiency & Low Power |
| YOLOv3-tiny | A simplified, faster version of YOLOv3 with fewer layers. | Speed & Latency |
| YOLOv7-tiny | An optimized version of the YOLOv7 series for edge devices. | Balanced Speed/Accuracy |
1. Model Download
I am certain that you already have the Mask R-CNN and YOLOv3 models from the previous article. The table below lists the filenames and details for the remaining models. You can find these by searching the internet.
For the experimental purposes of this article, you are also free to download any related model files or use your own custom-trained models instead.
| File Name | Location |
| frozen_inference_graph_ssd.pb ssd_mobilenet_v3_large_coco_2020_01_14.pbtxt | 1. github.com/opencv/opencv/wiki/tensorflow-object-detection-api |
| yolov3-tiny.weights | 1. github.com/pjreddie/darknet/issues/2483 2. pjreddie.com/media/files/yolov3-tiny.weights |
| yolov7-tiny.weights | 1.github.com/WongKinYiu/yolov7/releases/tag/v0.1 |
2. Inference Parameters
The OpenCV library provides the blobFromImage() method, which is essential for preprocessing images or video frames into “blobs” that our object detection app can process. To ensure accurate results, this method requires specific inference parameters—such as scale factor, size, and mean subtraction—which vary significantly depending on the architecture of the model being used.
The following table details the specific configurations for the blobFromImage() method when using MobileNet-SSD, YOLO, and Mask R-CNN models:
| Model Name | Size | Scale Factor | Mean Value |
| MobileNet-SSD | (512, 512) | 1.0 / 127.5 | Scalar(127.5, 127.5, 127.5) |
| YOLO v3 / v7 Tiny | (416, 416) | 1.0 / 255.0 | Scalar(0, 0, 0) |
| Mask R-CNN | (800, 800) | 1.0 | Scalar(0, 0, 0) |
3. Performance Uncertainty
At this stage, I am not entirely certain whether the heavier models, like Mask R-CNN and YOLOv3, will function properly on a mobile device. Similarly, the actual performance of the more lightweight options, such as MobileNet-SSD and the Tiny YOLO variants, remains to be seen in a real-world Android environment.
This uncertainty is exactly why we are conducting these tests—to determine which models are truly viable for mobile object detection.
6. Android Overview
The Activity class is the fundamental component used to develop an Android application before we proceed, it is essential to understand some basic Android GUI concepts. Every Android app operates by inheriting from a child class of the Activity class.
This class follows six main lifecycle stages, which define how the GUI components are internally created, initialized, and eventually destroyed.
For example, rotating your device from landscape to portrait mode changes the screen orientation naturally, but it triggers the Android system to destroy and recreate the activity behind the scenes.
This means Android completely shuts down the current instance of your activity and starts a fresh one to accommodate the new screen dimensions. Understanding this behavior is crucial because it dictates how we manage data and resources—such as our camera feed and object detection models—preventing unnecessary loss or reloads during a rotation.
6.1. Activity Lifecycle Stages
Generally speaking, the Android app lifecycle consists of six main stages.
1. onCreate()
Initial Setup: Called when the activity is first created. This is where you perform the basic application startup logic that should occur only once.
UI Binding: Responsible for connecting XML layout resources to the Activity and handling class instantiation.
Interaction Status: At this stage, the activity is not yet able to interact with the user.
2. onStart()
- Visibility: Invoked as the activity becomes visible to the user, preparing it to enter the foreground.
- App Restart: This method is also called when the app is being restarted after having been stopped.
- Interaction Status: Although the UI is visible at this stage, the activity is not yet able to interact with the user.
3. onResume()
- Active Status: Called when the activity starts interacting with the user. At this stage, the app is in the foreground and fully active.
- Foreground Entry: This method is invoked once the activity moves to the foreground.
- Interaction Status: The activity is now completely able to interact with the user.
4. onPause()
- System Transition: Triggered when the system is about to resume a previous activity or start a new one.
- Partial Obstruction: This method is called when another activity partially covers the current activity (e.g., a semi-transparent dialog or a multi-window mode).
- Resource Management: It is primarily used to pause ongoing actions that should not continue in the background, such as animations, video playback, or camera previews.
5. onStop()
- Visibility: Executed when the activity is no longer visible to the user.
- User Interaction: This method is called when the activity has disappeared from view, typically because another activity has taken over the full screen or the user has navigated back to the home screen.
- Resource Management: Any resources that are not needed while the user is not seeing the app should be released at this stage to save system memory and power.
6. onDestroy()
- Final Call: This is the final call received before the activity is destroyed.
- Destruction Scenarios: It can occur either because the activity is finishing (e.g., the user presses the ‘Back’ button or
finish()is called) or because the system is temporarily destroying the instance to recover valuable memory space. - Termination: This method is invoked when the activity is being permanently removed or killed by either the system or the user.
6.2. About AndroidManifest
The following table summarizes the essential features and components defined within the AndroidManifest.xml file:
| Feature | Description | Core Components |
| Component Declaration | Registers the four essential building blocks of the Android system. | Activity: UI screens. Service: Background tasks. Receiver: System signals (e.g., Boot, Battery). Provider: Data sharing. |
| Permission Management | Defines explicit permissions required to access sensitive device data or features. | Permissions: INTERNET, CAMERA, ACCESS_FINE_LOCATION, etc. |
| Basic Information Setup | Configures the app’s identity and visual presence on the system and Play Store. | Package Name: Unique App ID. Icon & Label: Home screen visuals. Theme: Global design style. |
| Hardware/Software Requirements | Specifies the minimum conditions necessary for the app to be installed and run correctly. | SDK Versions: Min/Target compatibility. Uses-feature: e.g., <uses-feature android:name="android.hardware.location.gps" /> prevents installation on devices without GPS. |
1. Intent-filter
The following definitions are included within the intent-filter element:
- File Association: Ensures our app is automatically executed when a user opens a specific file type, such as
.pdfor.docfiles.”
<activity android:name=".FileViewerActivity">
    <intent-filter>
        <action android:name="android.intent.action.VIEW" />
        <category android:name="android.intent.category.DEFAULT" />
        <data android:mimeType="application/pdf" />
    </intent-filter>
</activity>
- Launcher: Designates which screen should be the initial entry point (the first screen to start) among multiple activities.
<activity
	android:name=".MyHelloWorldActivity"
	android:exported="true">
	<intent-filter>
		<action android:name="android.intent.action.MAIN" />
		<category android:name="android.intent.category.LAUNCHER" />
	</intent-filter>
</activity>
6.3. Activity Lifecycle in Practice
As a result, an app continuously iterates through these stages—from creation to destruction—driven by the lifecycle events. We can categorize the order of these method calls based on common user actions, as shown in the table below:
| User action | Lifecycle Methods Called (In Order) |
| Launch the app | onCreate() → onStart() → onResume() |
| Press the Home button | onPause() → onStop() |
| Return to the app (from Home) | onRestart() → onStart() → onResume() |
| Press the Back button | onPause() → onStop() → onDestroy() |
| Screen Rotation (Orientation Change) | onPause() → onStop() → onDestroy() → onCreate() → onStart() → onResume() |
| Dialog/Popup appears (partially covers) | onPause() |
In the following sections, we will build a simple application using Android Java, integrating it with the OpenCV Android SDK.
If you are already experienced with Android programming and familiar with its core concepts, you may choose to skip these introductory sections and proceed directly to the implementation details. However, for those new to the platform, these steps will provide a necessary foundation for the object detection tasks ahead.
7. Hello World App
This article is not intended for absolute beginners. I assume you already have a fundamental understanding of what an Android app is and are familiar with running tests on the Android SDK emulator. However, it is still essential to understand how to set up a basic “Hello World” project within the context of our specialized environment.
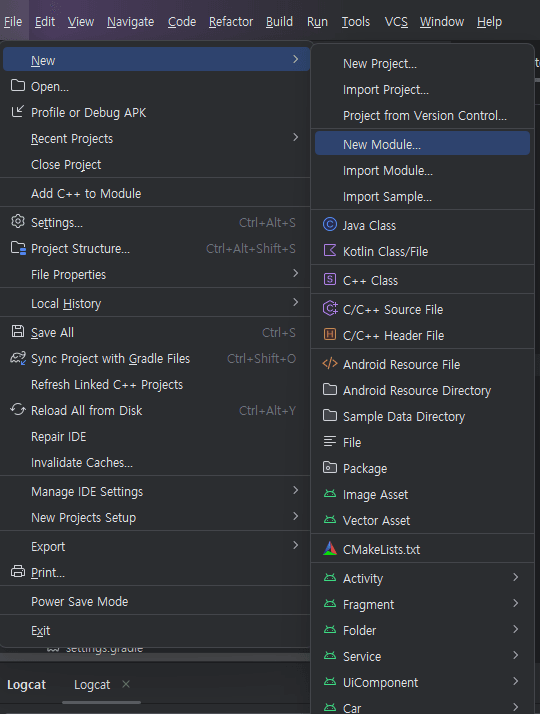
Rather than starting from a blank template, we will work with a simple “Hello World” example found within the OpenCV samples folder. To get started, you will need to create a new module for the application:
Path: File > New > New Module
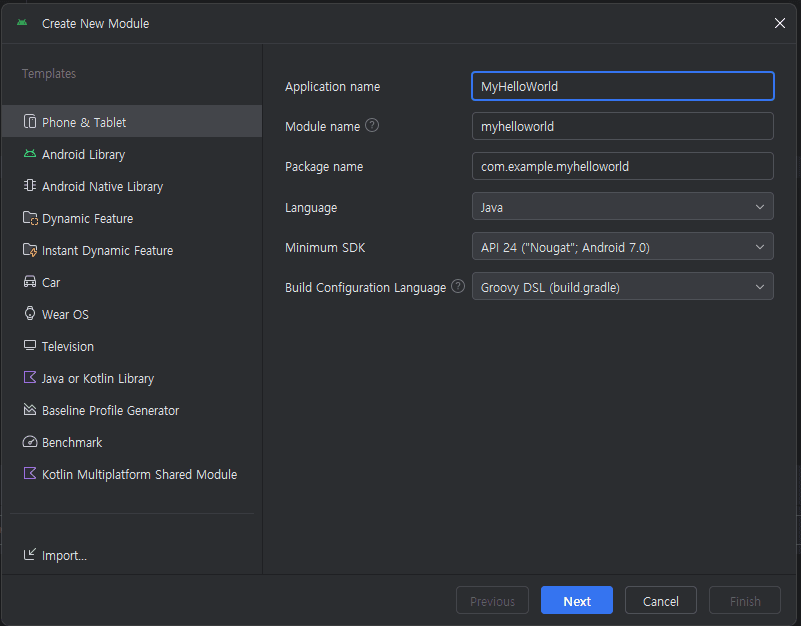
1. Configuring the New Module
Next, you need to fill in the attributes in the New Module setup dialog as follows. These settings ensure that your new module is correctly initialized within your project structure:
| Application Name | My Hello World |
| Module name | myhelloworld |
| Package name | com.example.myhelloworld |
| Language | Java |
| Minimum SDK | API 26 |
| Build Configuration Language | Groovy DSL (build.gradle) |
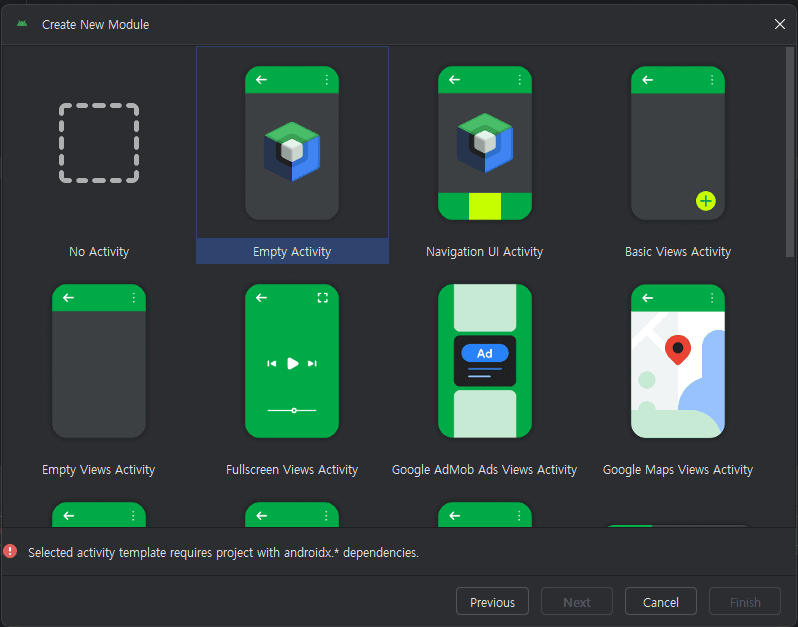
2. Activity Template
Android Studio provides multiple activity styles, each offering different pre-configured features. For this project, we will focus on a simple activity creation process.
However, you should select “No Activity” from the template list. This is a critical step because the latest activity templates provided by Android Studio are based on AndroidX, which often features library versions and structures that do not match the older OpenCV sample configurations. By starting with “No Activity,” we can manually set up the component to ensure full compatibility with the OpenCV Android SDK.
7.1. Hello World Layouts
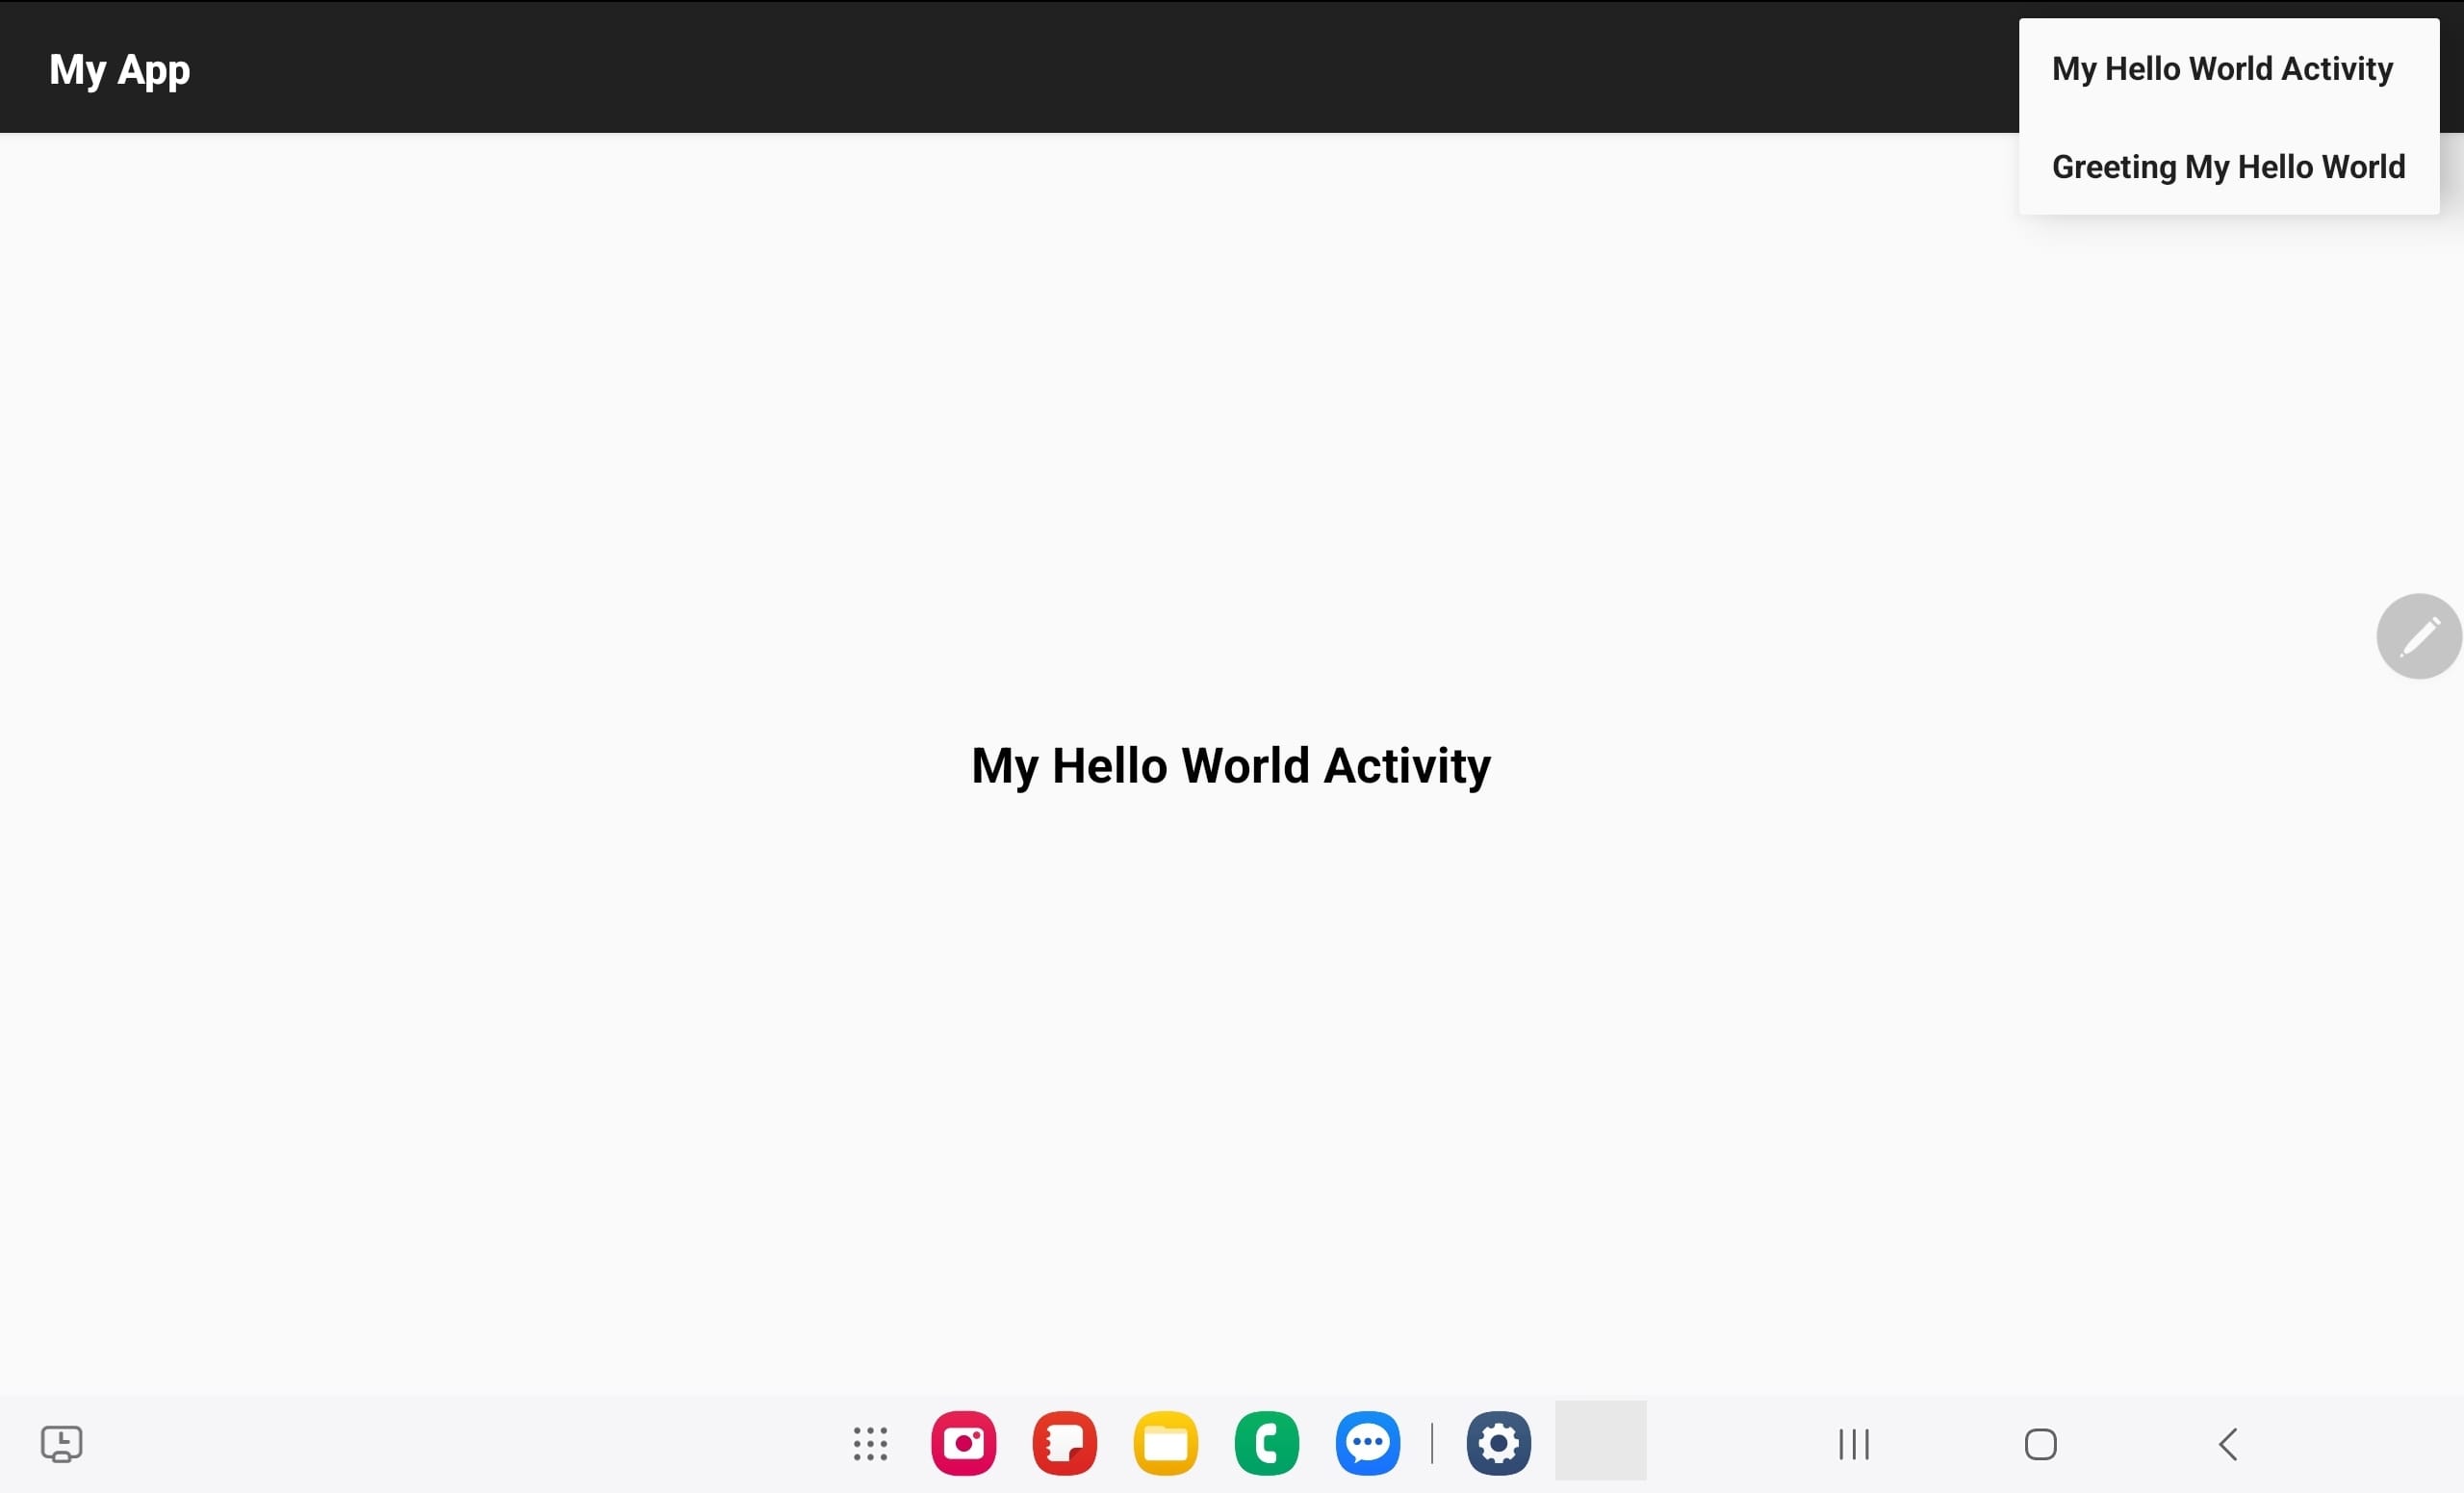
Now that the new app module, myhelloworld, has been created, we need to add the functional source code. We will implement an Option Menu that allows users to interact with the app. When a user selects an item from the menu, the text on the screen will update instantly to reflect their choice.
1. Defining the User Interface
The application screen will consist of a simple layout (typically a TextView) that serves as the primary display for our app’s status and the results of user actions.
2. Adding the Option Menu
The Option Menu is a key GUI component in Android. We will override two essential methods in our Activity class:
onCreateOptionsMenu(): To inflate the menu resource and display it in the app bar.onOptionsItemSelected(): To handle the logic that changes the screen text based on which menu item the user clicks.
3. Expected Behavior
This exercise demonstrates the basic flow of an Android app:
- The app initializes (Lifecycle:
onCreate). - The user interacts with the GUI (Option Menu).
- The app responds by updating the UI components in real-time.
To implement the app, we need an activity and related resources the table as describe as follows:
| File Name | Resource Type | Description |
| MyHelloWorldActivity.java | Activity (Java) | Main Logic: Handles lifecycle events and the logic for updating the UI based on menu interactions. |
| AndroidManifest.xml | Manifest (XML) | Registration: Declares the activity to the Android system so it can be recognized and launched. |
| activity_main.xml | Layout (XML) | UI Structure: Defines the placement of the TextView and other visual elements. |
| option_menu.xml | Menu (XML) | Interaction Points: Defines the individual items and icons available in the Option Menu. |
4. Common Resource Folders
In Android development, all non-code assets— such as images, layouts, and menus—are stored in the res (resource) folder. The primary goal of this folder is to optimize resources for various screen sizes, languages, and device settings automatically. Instead of writing code to handle different environments, you provide alternative resources in specifically named folders, and the Android system selects the most appropriate one at runtime.
Below are the standard folder names used within the res directory and their descriptions:
| Folder Name | Description | Files |
drawable | Contains bitmaps (PNG, JPEG), vector graphics, or XML-defined shapes and states. | ic_launcher.png, button_background.xml |
layout | Defines the visual structure of the user interface (UI) for different screen orientations or sizes. | activity_main.xml, list_item.xml |
menu | Defines the structure and items for options menus, context menus, or popup menus. | main_menu.xml |
values | Stores XML files for strings, colors, integers, and dimensions to support localization and theming. | strings.xml, colors.xml, styles.xml |
mipmap | Specifically used for application launcher icons to ensure they look sharp across different pixel densities. | ic_launcher_round.png |
raw | For assets like video or audio clips that should be saved in their raw form without XML compilation. | sample_video.mp4, custom_font.ttf |
7.2. Creating Menu
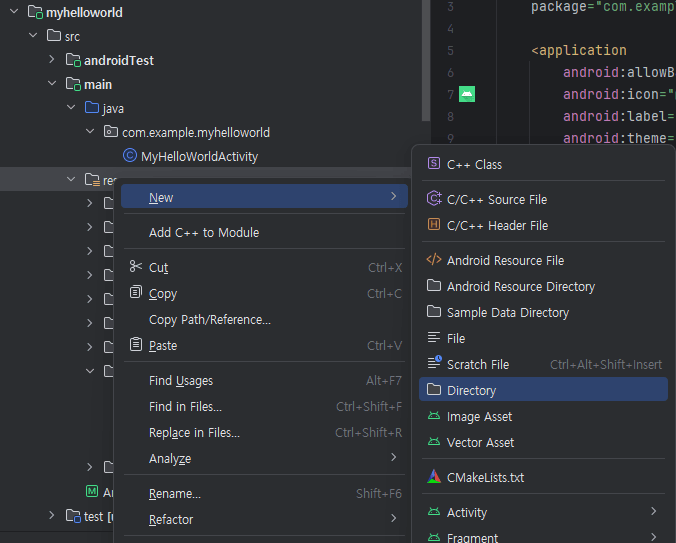
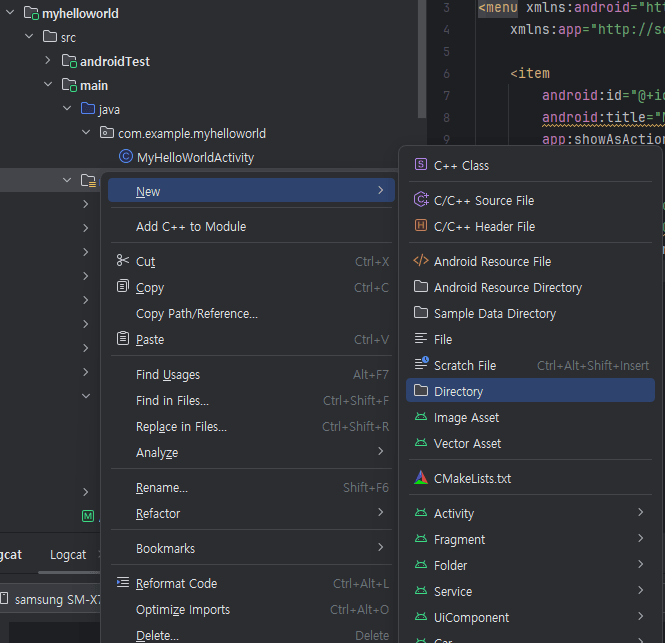
Since we started with a “No Activity” template, the project structure is currently empty. Android Studio has not generated any default resource files for us. To implement our Option Menu, we must first manually create the appropriate directory within the res folder.
Step-by-Step Guide:
- Locate the Resource Folder: In the Project window, find and right-click on the
resfolder. - Create Directory: Select
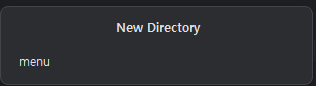
New>Directory. - Naming: Type
menuas the directory name and press Enter.
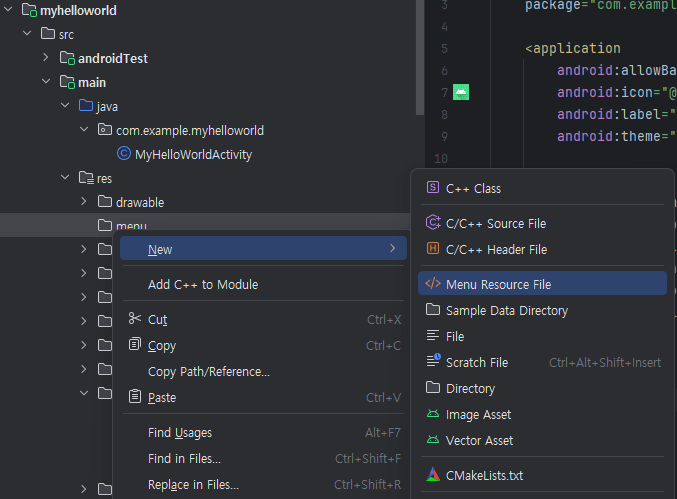
1. Generating Menu Resource
Now that the menu directory is ready, you can create the actual XML file that will define your menu items.
Step-by-Step Guide:
- Select the Directory: Right-click on the newly created
menufolder. - Create New File: Select
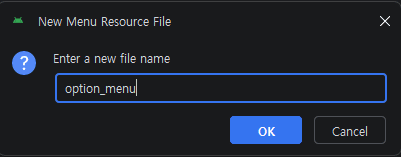
New>Menu Resource File. - Naming: In the File name field, type
option_menu. - Completion: Click OK.
Once finished, you will see the option_menu.xml file appear inside the res/menu/ directory.
2. Menu on Palette View
Now, instead of writing raw XML, you can utilize the Palette View in Android Studio to visually design your menu. This drag-and-drop interface is highly efficient for quickly prototyping the user interface.
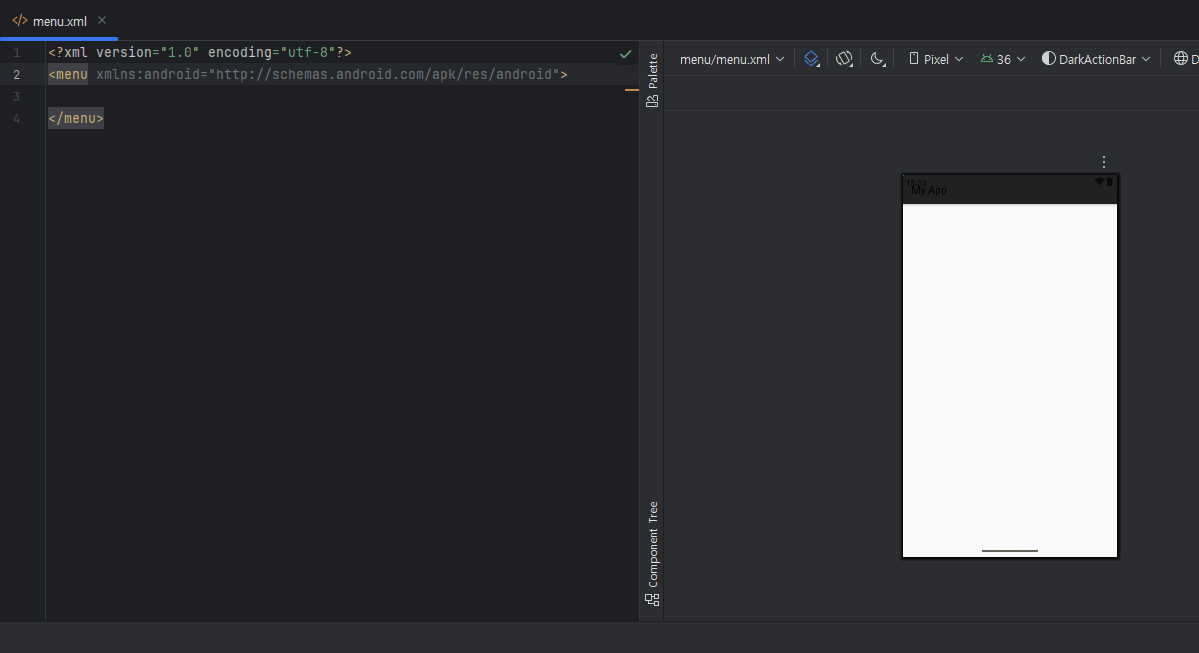
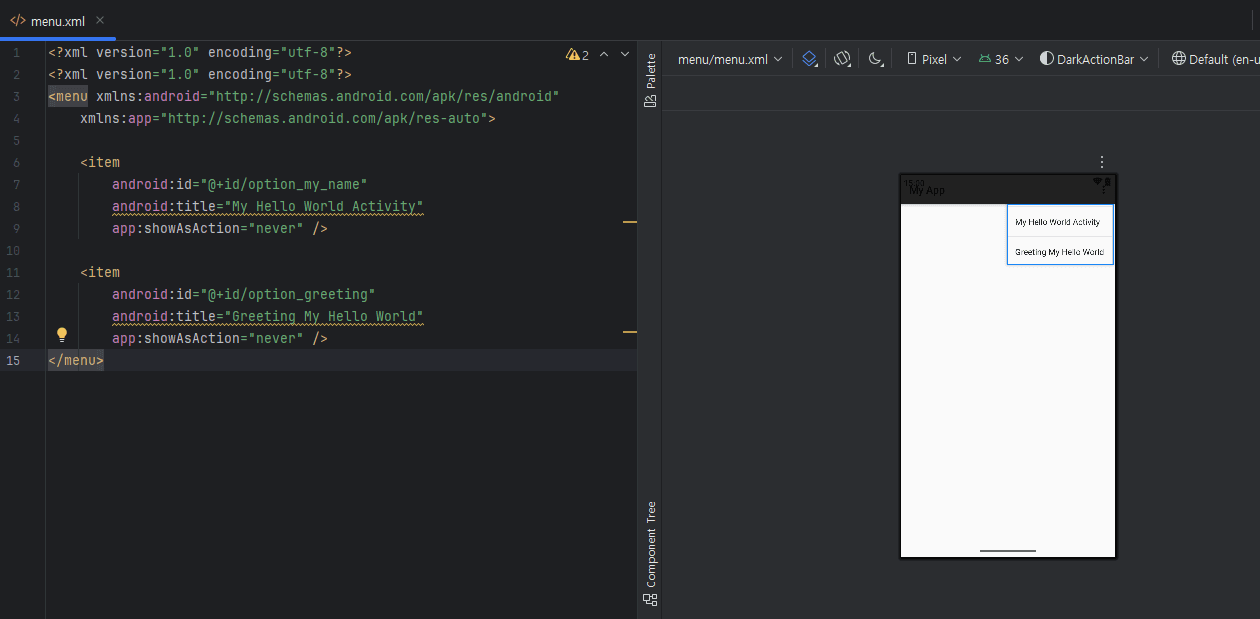
The visual actions you performed in the Palette are translated into the following XML structure. Each tag represents a specific option in your menu.
<?xml version="1.0" encoding="utf-8"?>
<menu xmlns:android="http://schemas.android.com/apk/res/android"
    xmlns:app="http://schemas.android.com/apk/res-auto">

    <item
        android:id="@+id/option_my_name"
        android:title="My Hello World Activity"
        app:showAsAction="never" />

    <item
        android:id="@+id/option_greeting"
        android:title="Greeting My Hello World"
        app:showAsAction="never" />
</menu>
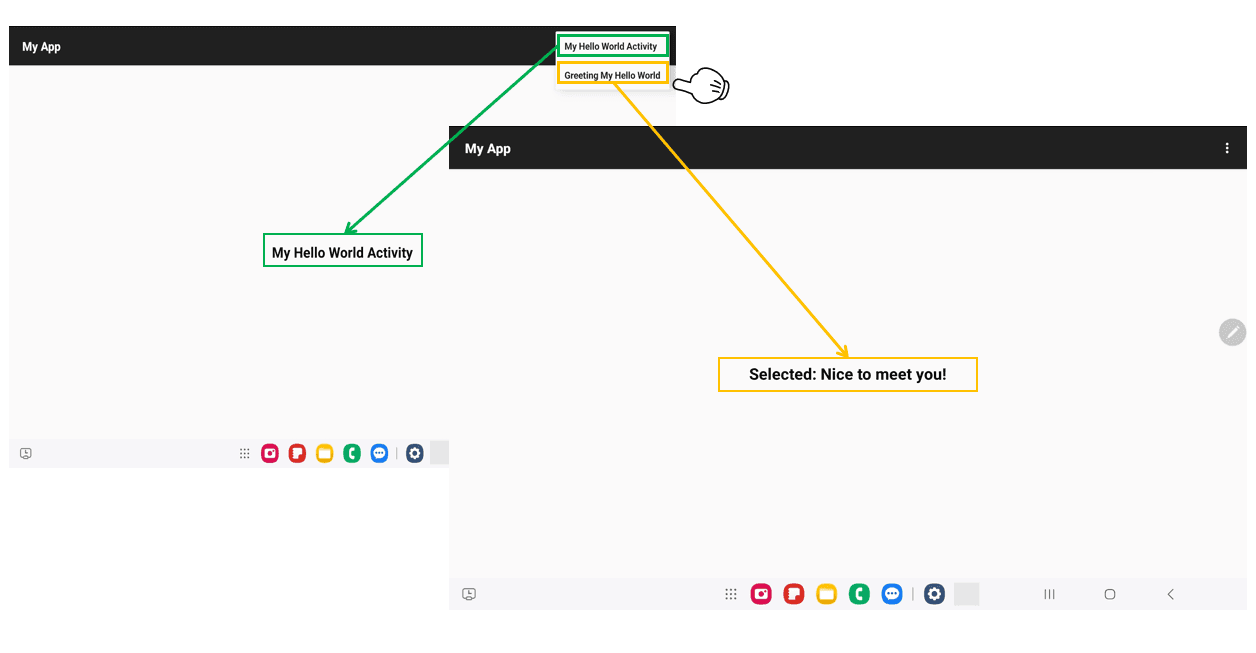
3. Menu Layout
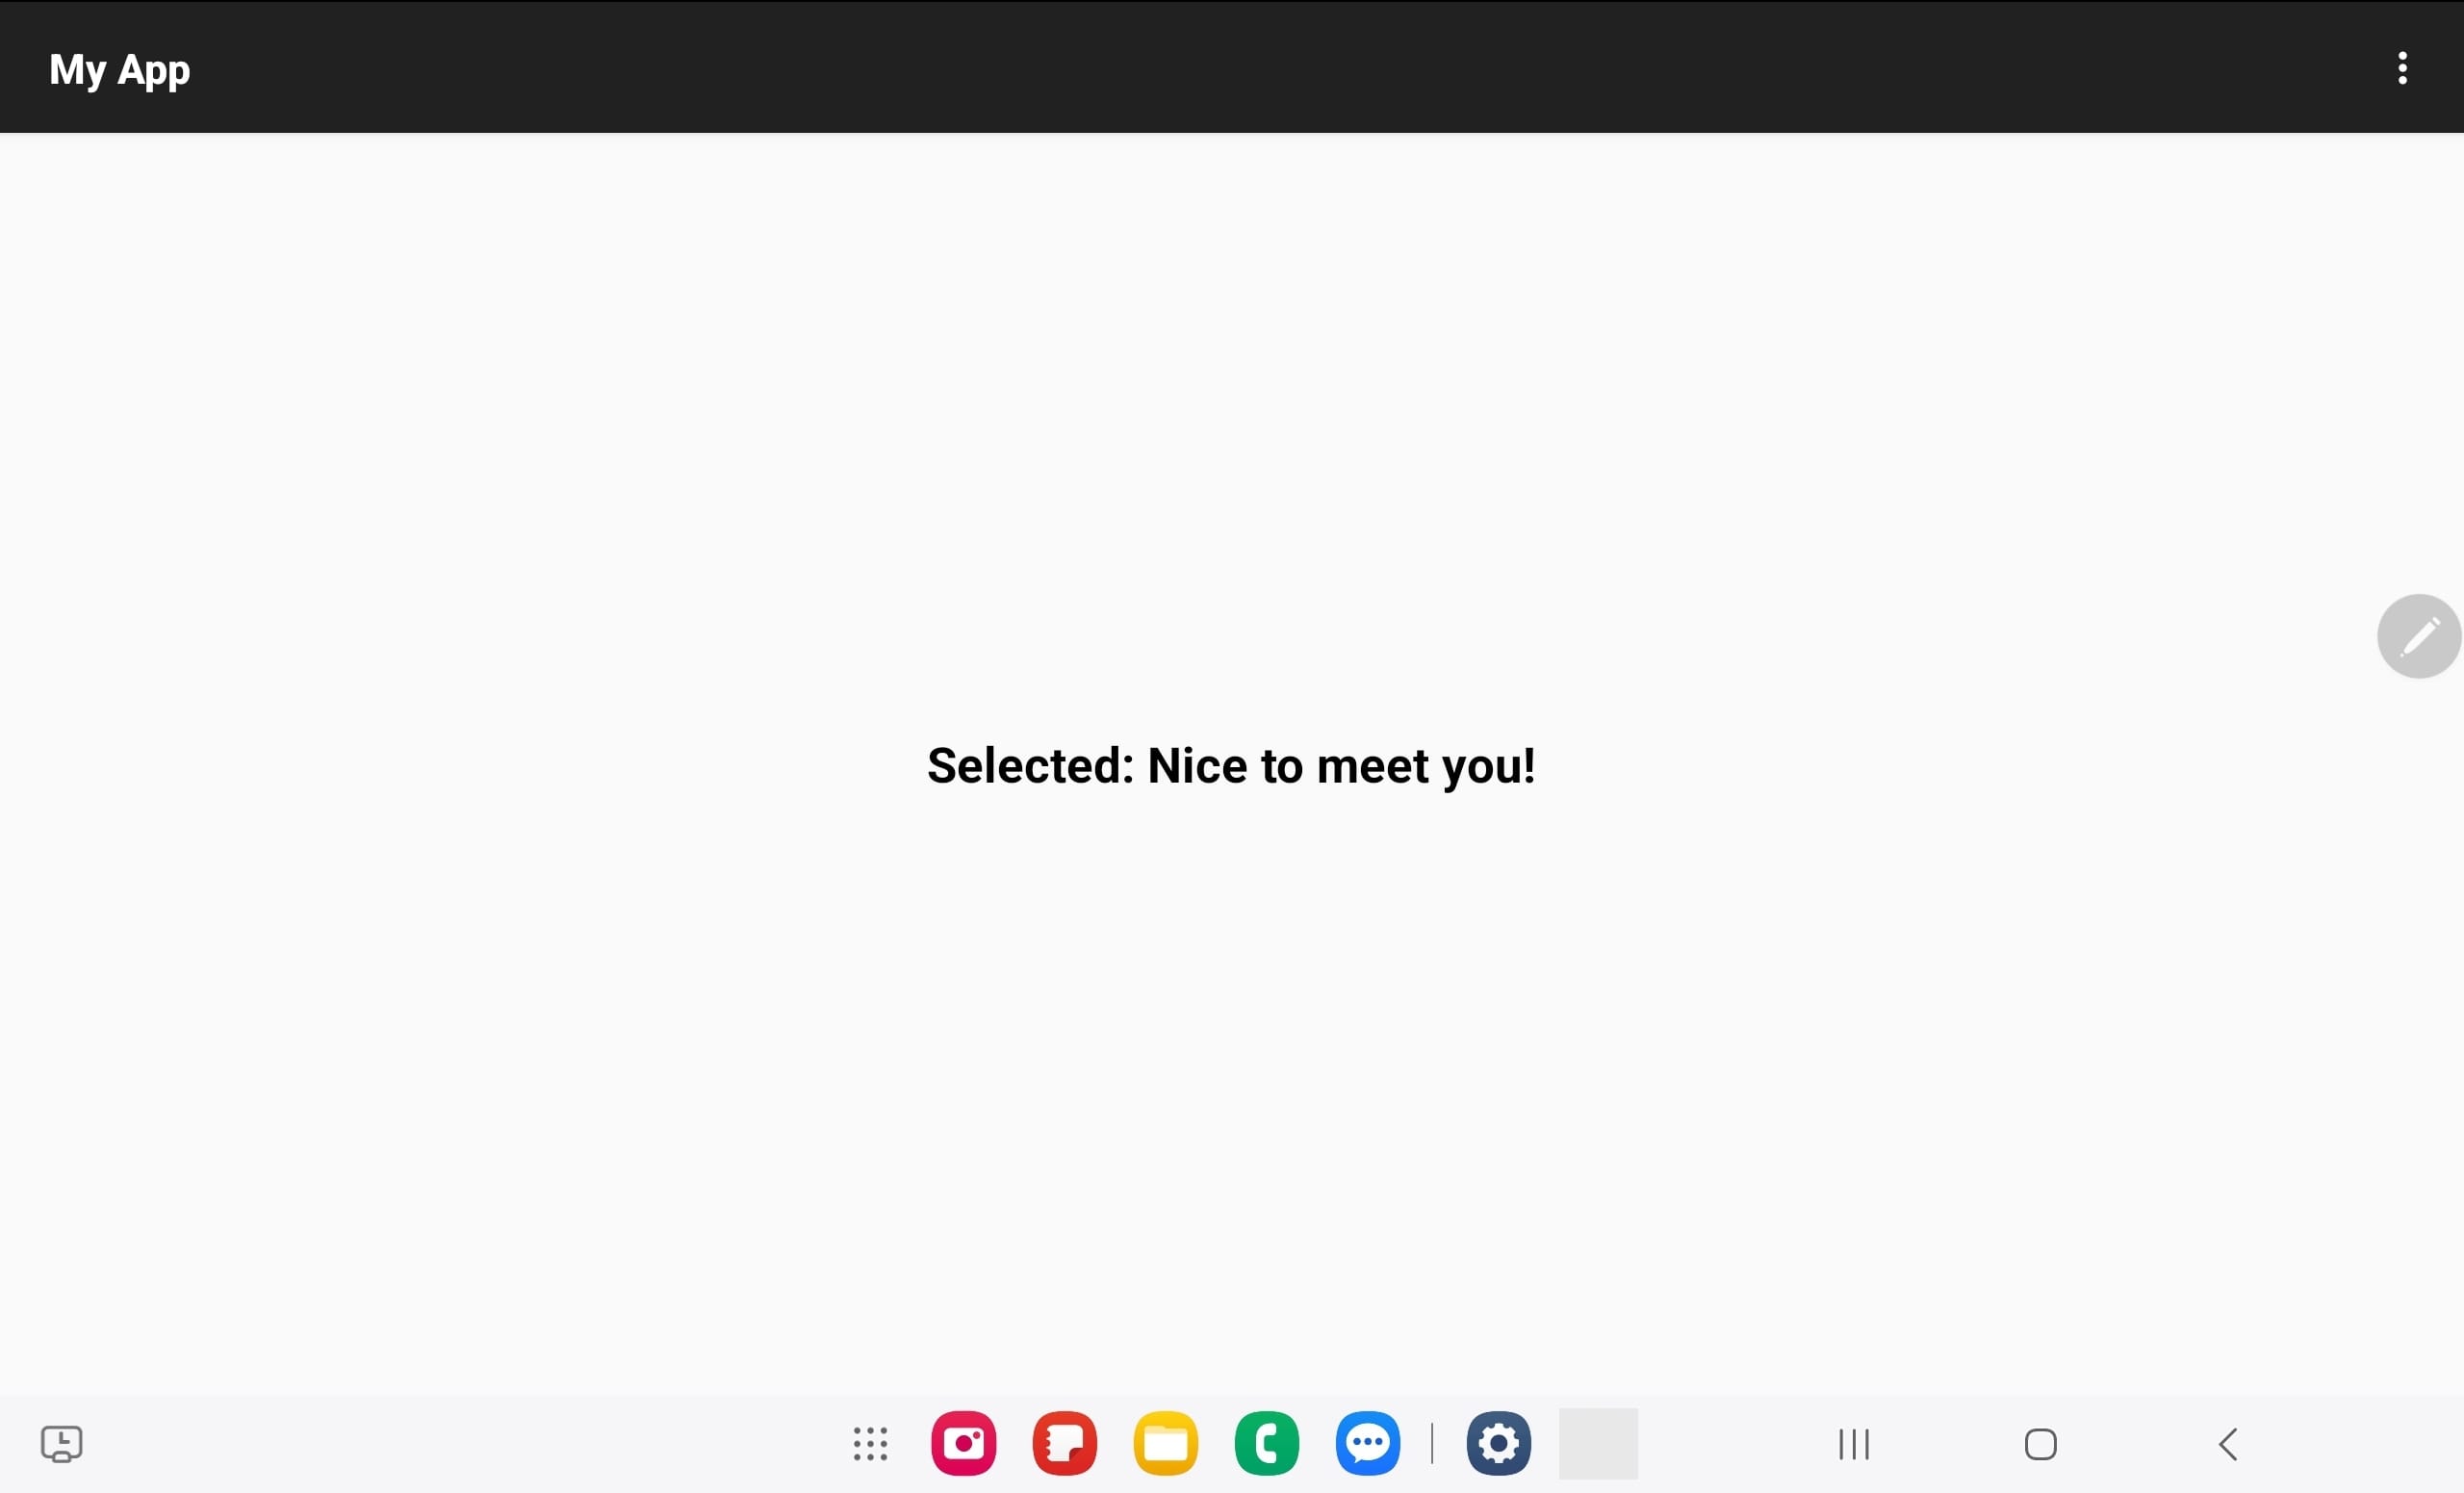
This means you have created both the ‘My Hello World Activity’ and the ‘Greeting My Hello World’ messages, allowing the screen text to change dynamically whenever a user selects an option from the menu. The final result is as follows:
Once the option menu is created, you need a layout to which the menu will be attached before the main activity is finalized. The next step is to create the main layout. In Android Studio,
select New > Layout Resource File to generate the layout file for your activity.
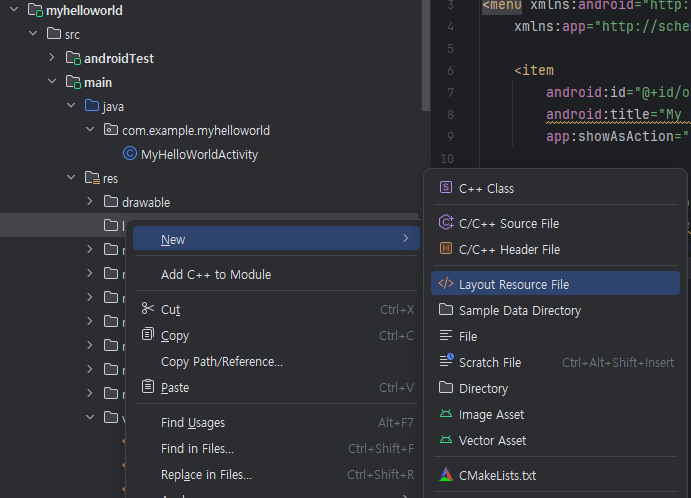
In the New Layout Resource File dialog, enter activity_main.xml as the file name and set RelativeLayout as the root element. RelativeLayout is one of the standard layout managers provided by Google; for more detailed information, you can refer to Google’s official Android Developer documentation.
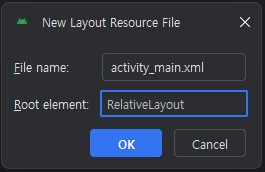
Click OK to create the empty layout. You can then find the activity_main.xml file under the res/layout folder, initialized with the RelativeLayout as its root element.
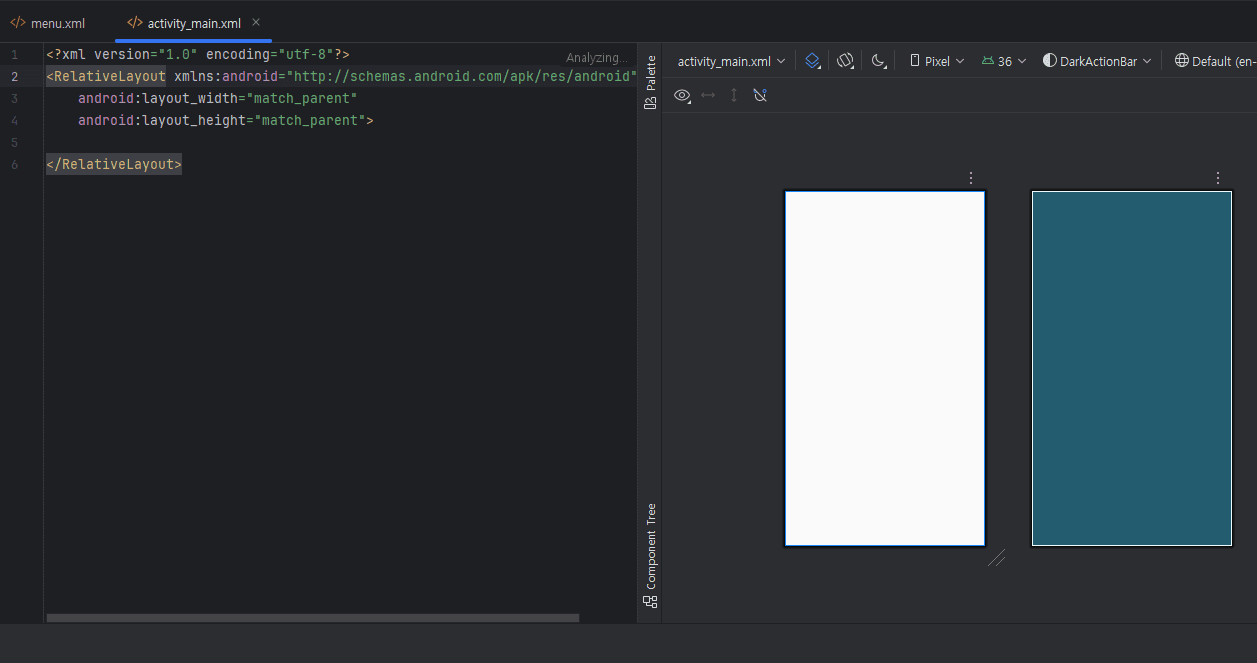
We need a TextView to display the text that changes based on the user’s selection. The TextView’s content can be updated via a listener or logic that responds to component actions. You can find more details regarding the various attributes of this class on Google’s official Android Developer site.
<TextView
	android:id="@+id/statusTextView"
	android:layout_width="wrap_content"
	android:layout_height="wrap_content"
	android:layout_centerInParent="true"
	android:text="My Hello World Activity"
	android:textSize="24sp"
	android:textColor="#000000" />
At this point, we have an app where the on-screen text changes based on user menu selections, utilizing option_menu.xml and activity_main.xml. Finally, we need to define and manage our activities by configuring the AndroidManifest.xml, which serves as the formal specification of the app.
4. AndroidManifest
The Android system automatically recognizes the AndroidManifest.xml file, reads its contents, and executes the appropriate activity to launch the application. The following source code demonstrates how this specification is structured:
<?xml version="1.0" encoding="utf-8"?>
<manifest xmlns:android="http://schemas.android.com/apk/res/android"
    package="com.example.myhelloworld">

    <application
        android:allowBackup="true"
        android:icon="@drawable/icon"
        android:label="My App"
        android:theme="@style/Theme.AppCompat.Light.DarkActionBar">

        <activity
            android:name=".MyHelloWorldActivity"
            android:exported="true">
            <intent-filter>
                <action android:name="android.intent.action.MAIN" />
                <category android:name="android.intent.category.LAUNCHER" />
            </intent-filter>
        </activity>

    </application>
</manifest>
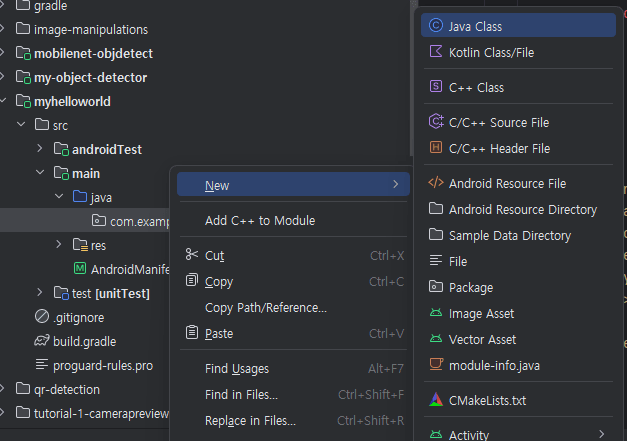
7. MyHelloWorldActivity
Now, let’s implement the logic for the Activity to handle user interactions and bridge the resources and layouts we have created. To begin, select New > Java Class from the menu and name the class ‘MyHelloWorldActivity’.
The complete source code for ‘MyHelloWorldActivity’ is provided below, demonstrating how to integrate the layout, handle menu selections, and update the UI dynamically:
package com.example.myhelloworld;

import android.os.Bundle;
import android.support.v7.app.AppCompatActivity;
import android.view.Menu;
import android.view.MenuInflater;
import android.view.MenuItem;
import android.widget.TextView;

public class MyHelloWorldActivity extends AppCompatActivity {

    // Declare a TextView variable to handle dynamic text updates.
    private TextView statusTextView;

    @Override
    protected void onCreate(Bundle savedInstanceState) {
        super.onCreate(savedInstanceState);

        // Link the activity_main.xml layout to this Activity.
        setContentView(R.layout.activity_main);

        // Initialize the TextView by linking it to its corresponding ID defined in the XML.
        statusTextView = (TextView) findViewById(R.id.statusTextView);
    }

    @Override
    public boolean onCreateOptionsMenu(Menu menu) {
        MenuInflater inflater = getMenuInflater();
        inflater.inflate(R.menu.option_menu, menu);
        return true;
    }

    @Override
    public boolean onOptionsItemSelected(MenuItem item) {
        int id = item.getItemId();

        if (id == R.id.option_my_name) {
            statusTextView.setText("Selected: My name is OpenCV!");
            return true;
        }

        if (id == R.id.option_greeting) {
            statusTextView.setText("Selected: Nice to meet you!");
            return true;
        }

        return super.onOptionsItemSelected(item);
    }
}
In the source code, two key methods handle the user interface setup: onCreate(), which initializes the main activity, and onCreateOptionsMenu(), which populates the GUI with the options menu.
The setContentView() method is called within onCreate() to inflate and display the activity_main.xml layout file.
@Override
protected void onCreate(Bundle savedInstanceState) {
	super.onCreate(savedInstanceState);
	// Link the activity_main.xml layout to this Activity.
	setContentView(R.layout.activity_main);
	// Initialize the TextView by linking it to its corresponding ID defined in the XML.
	statusTextView = (TextView) findViewById(R.id.statusTextView);
}
Inside onCreateOptionsMenu(), we populate the menu by calling the inflate() method of the MenuInflater, which links the option_menu.xml resource to the Activity’s menu bar
@Override
public boolean onCreateOptionsMenu(Menu menu) {
	MenuInflater inflater = getMenuInflater();
	inflater.inflate(R.menu.option_menu, menu);
	return true;
}
In the onOptionsItemSelected() method, we define the logic to update the text on the screen whenever a user selects an item from the options menu.
@Override
public boolean onOptionsItemSelected(MenuItem item) {
	int id = item.getItemId();

	if (id == R.id.option_my_name) {
		// Display the string when the user selects 'option_my_name'
		statusTextView.setText("Selected: My name is OpenCV!");
		return true;
	}

	if (id == R.id.option_greeting) {
		// Display the string when the user selects 'option_greeting'
		statusTextView.setText("Selected: Nice to meet you!");
		return true;
	}

	return super.onOptionsItemSelected(item);
}
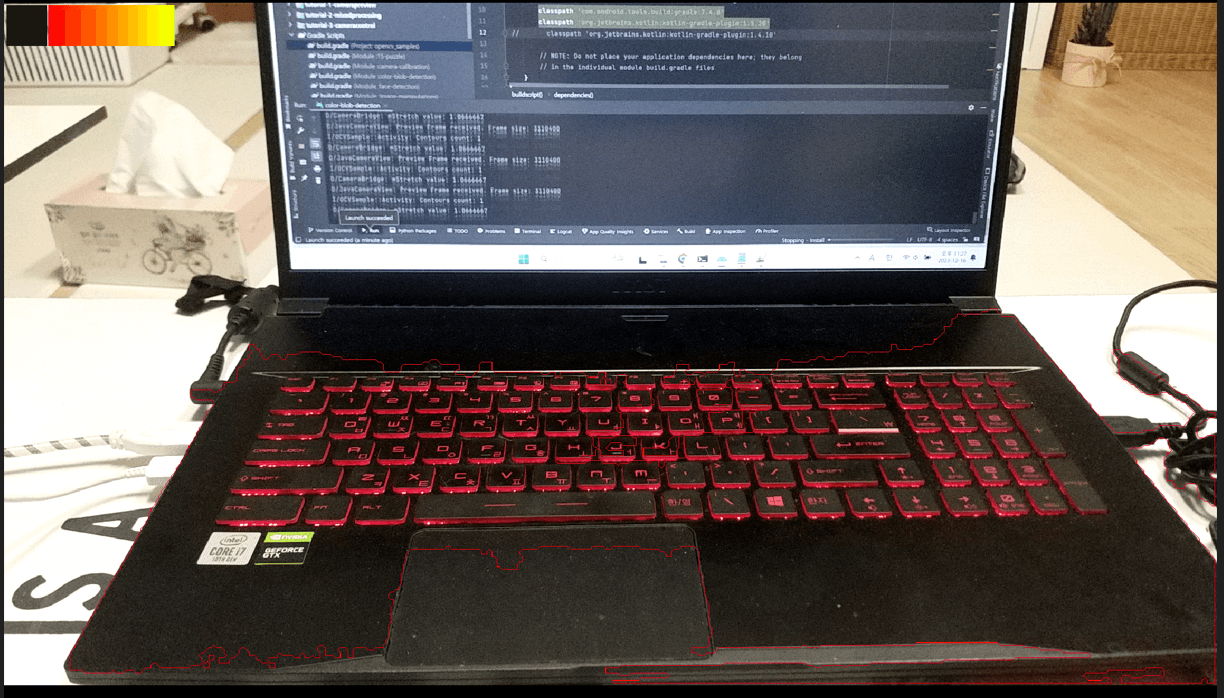
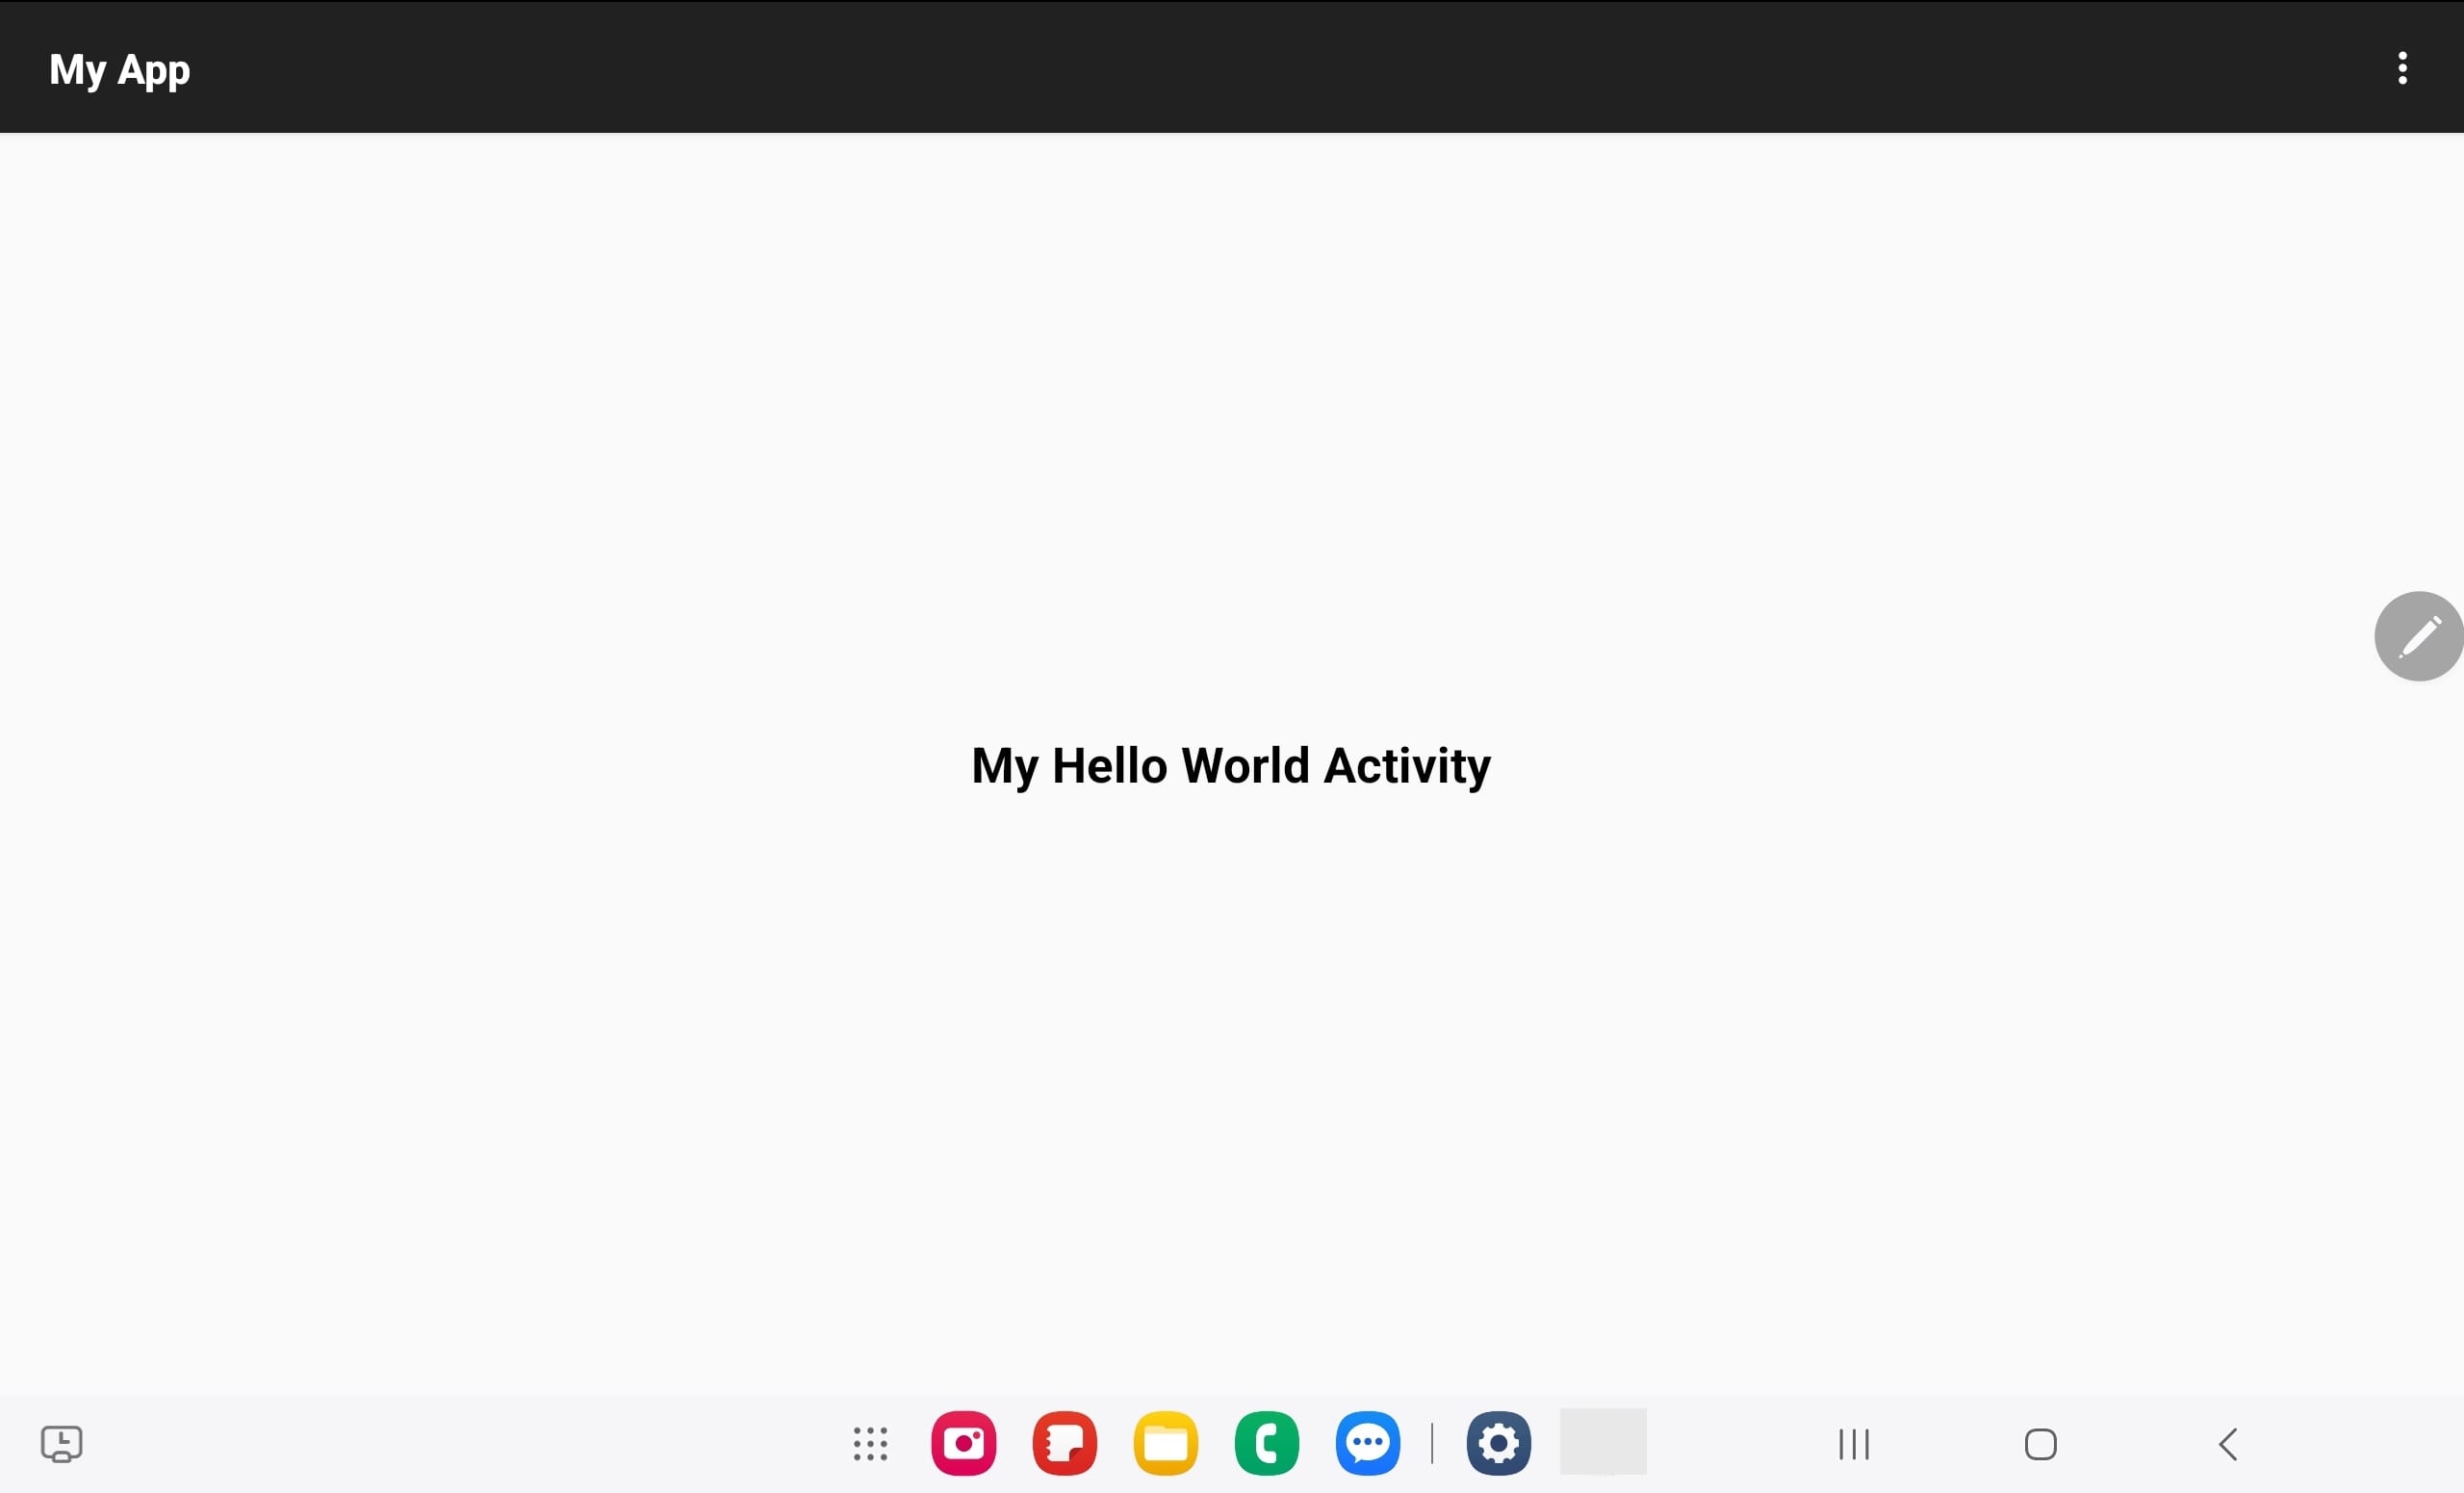
Using Android Studio, you can build and launch your ‘Hello World’ app directly on a physical device. Once running, your results should match the interface shown in the following image:
So far, we have explored the fundamental relationship between Activities and GUI components in Android. In the next section, we will build upon this foundation to create our own custom OpenCV samples, integrating computer vision capabilities into our mobile environment.
8. Hello OpenCV App
In the previous section, we built a simple ‘Hello World’ app. However, developing an application for object detection using the OpenCV library requires a more specialized approach.
Utilizing OpenCV as a vision library allows us to manipulate and manage image sources via camera functions. The goal of this section is to create a simple camera application where you can process live image sources using OpenCV methods and callbacks. Before we begin processing frames, our application must first obtain the necessary Camera Permissions by declaring them in the AndroidManifest.xml file.
8.1. Components and Resources
While the development process follows a similar workflow to the ‘Hello World’ app, we will introduce several new classes and resources specific to OpenCV integration. The following list outlines the Project components and resources we are about to implement:
| Category | File Name | Description |
| Source code(Java) | MyHelloOpenCVActivity.java | The primary Activity class that manages OpenCV initialization and updates the UI with specific messages based on the user’s menu selections. |
| Manifest File | AndroidManifest.xml | The essential configuration file that defines app components and declares the required hardware permissions, such as Camera access. |
| Layout File | activity_main.xml | The XML definition of the user interface, acting as the container for both the camera view and UI elements. |
| Menu File | option_menu.xml | Defines the interactive menu items that allow the user to trigger different OpenCV processing modes or messages. |
| String Resource File | string.xml | A centralized resource file for managing all text constants, ensuring clean separation between logic and UI content. |
8.2. Hello OpenCV Layout
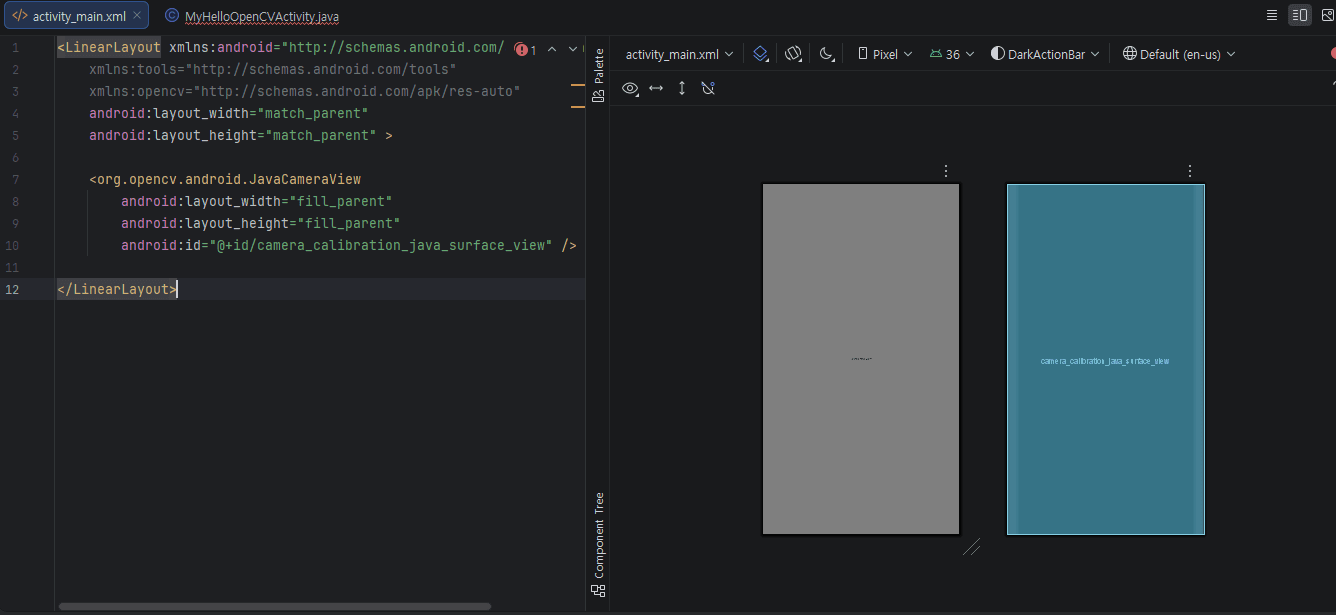
In our layout, we use a LinearLayout as the root container. The focal point of this layout is the JavaCameraView class, which is provided by the OpenCV Android SDK. As the name suggests, JavaCameraView is a specialized view that inherits from android.view.SurfaceView, designed specifically to handle real-time camera frames efficiently.
<LinearLayout xmlns:android="http://schemas.android.com/apk/res/android"
    xmlns:tools="http://schemas.android.com/tools"
    xmlns:opencv="http://schemas.android.com/apk/res-auto"
    android:layout_width="match_parent"
    android:layout_height="match_parent" >

    <org.opencv.android.JavaCameraView
        android:layout_width="fill_parent"
        android:layout_height="fill_parent"
        android:id="@+id/camera_java_surface_view" />

</LinearLayout>
You can visualize the GUI design and layout structure directly within the Palette and Design views of the Android Studio Layout Editor.
1. Menu Layout
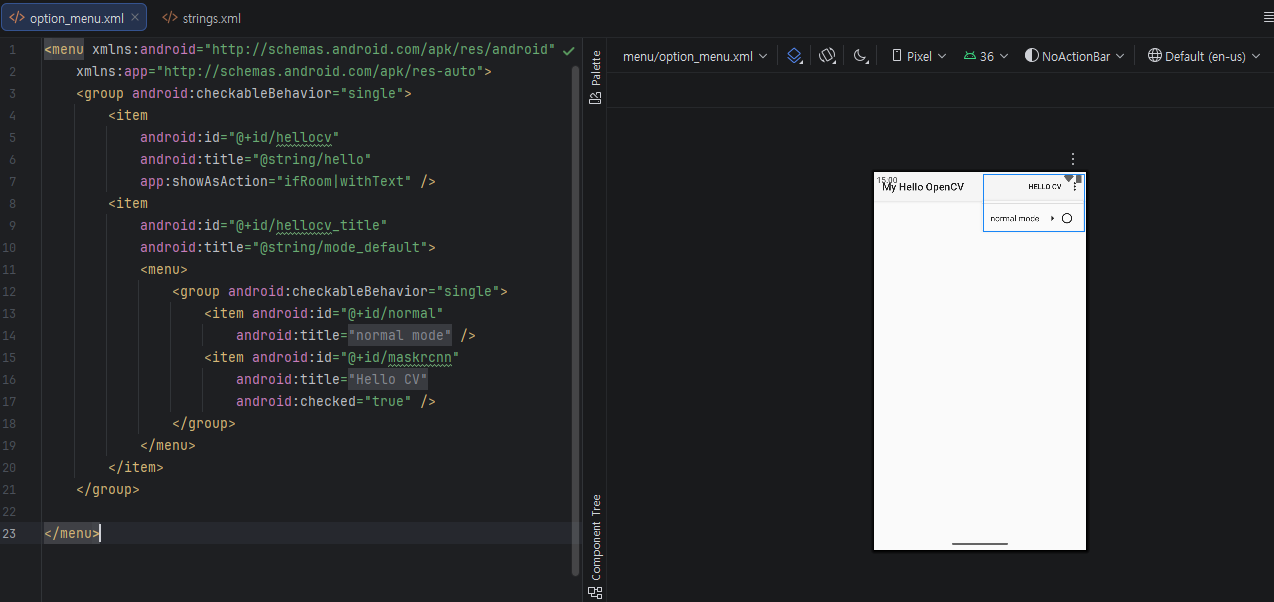
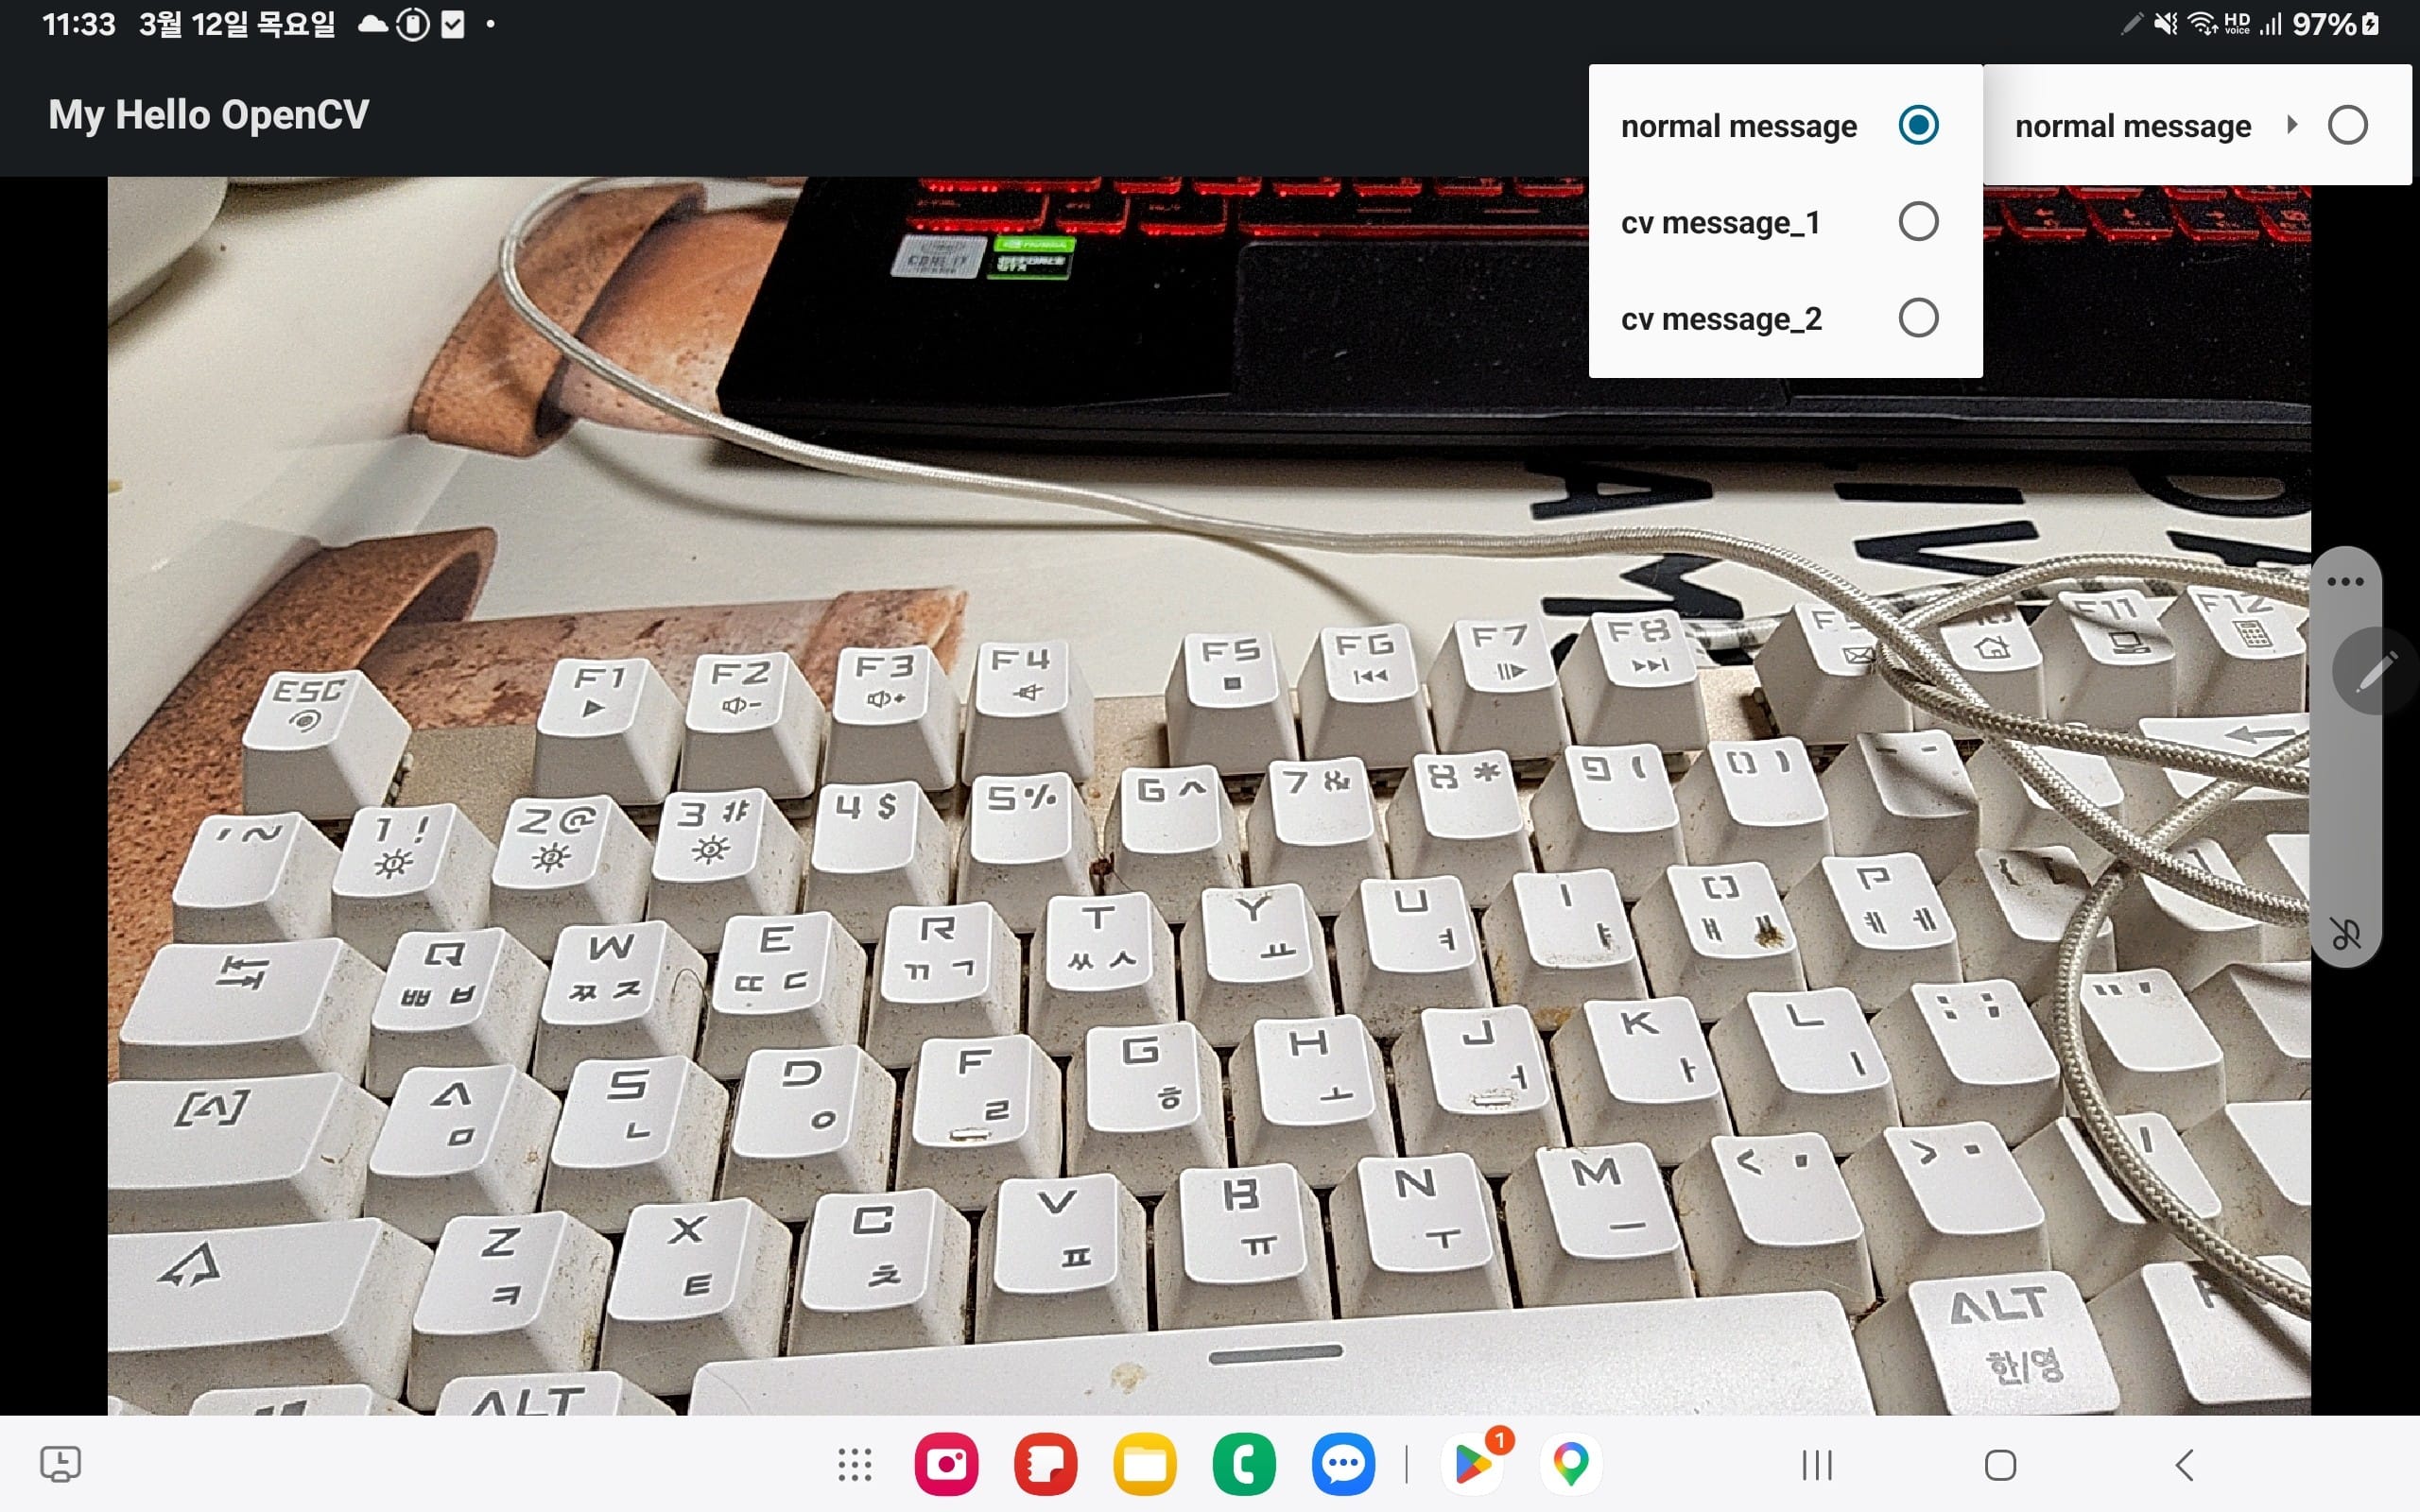
The menu structure in this section is more advanced than our previous example. We utilize the element with the android:checkableBehavior=”single” attribute, ensuring that the user can only select one option at a time—similar to a radio button interaction.
<menu xmlns:android="http://schemas.android.com/apk/res/android"
    xmlns:app="http://schemas.android.com/apk/res-auto">
    <group android:checkableBehavior="single">
        <item
            android:id="@+id/hellocv"
            android:showAsAction="ifRoom|withText"
            android:title="@string/cv_message" />
        <item
            android:id="@+id/hellocv_title"
            android:title="@string/normal">
            <menu>
                <group android:checkableBehavior="single">
                    <item android:id="@+id/normal_message"
                        android:title="@string/normal"
                        android:checked="true" />
                    <item android:id="@+id/cv_message1"
                        android:title="@string/cv_message1"/>
                    <item android:id="@+id/cv_message2"
                        android:title="@string/cv_message2" />
                </group>
            </menu>
        </item>
    </group>

</menu>
2. String Resource
Starting with ‘@’ symbol is a special identifier called “Resource Reference” that you can access a string from the other resource or file by the id and this time, string.xml file.
In the strings.xml file, you define string resources associated with unique IDs. These IDs serve as references that allow the system to dynamically substitute the appropriate text based on varying conditions, such as the device’s language settings or specific app states.
<resources>
    <string name="app_name">My Hello OpenCV</string>
    <string name="title_hellocv">Welcome to the OpenCV World</string>
    <string name="mode_default">normal mode</string>
    <string name="normal">normal message</string>
    <string name="cv_message1">cv message_1</string>
    <string name="cv_message2">cv message_2</string>
    <string name="message1">Welcome to the OpenCV World</string>
    <string name="message2">Hello from the OpenCV World</string>
    <string name="message3">Greetings from the OpenCV World</string>
</resources>
3. Android Manifest
The AndroidManifest.xml file defines the entry point of the application. By placing the <intent-filter> element within the declaration for MyHelloOpenCVActivity, we designate this class as the main activity that launches when the user opens the app.
<?xml version="1.0" encoding="utf-8"?>
<manifest xmlns:android="http://schemas.android.com/apk/res/android"
    package="com.example.myhelloopencv">

    <application
        android:allowBackup="true"
        android:icon="@drawable/icon"
        android:label="My App">

        <activity
            android:name="MyHelloOpenCVActivity"
            android:exported="true">
            <intent-filter>
                <action android:name="android.intent.action.MAIN" />
                <category android:name="android.intent.category.LAUNCHER" />
            </intent-filter>
        </activity>

    </application>

    <uses-permission android:name="android.permission.CAMERA"/>

    <uses-feature android:name="android.hardware.camera" android:required="false"/>
    <uses-feature android:name="android.hardware.camera.autofocus" android:required="false"/>
    <uses-feature android:name="android.hardware.camera.front" android:required="false"/>
    <uses-feature android:name="android.hardware.camera.front.autofocus" android:required="false"/>
    <uses-permission android:name="android.permission.WRITE_EXTERNAL_STORAGE" />

</manifest>
It is crucial to define the <uses-permission> element carefully, as it informs the Android system and the user which protected features the app needs to access. By specifying a permission name—such as android.permission.WRITE_EXTERNAL_STORAGE—the application explicitly requests the necessary rights to perform sensitive operations, like saving files to the device’s storage
<uses-permission android:name="android.permission.WRITE_EXTERNAL_STORAGE" />
<uses-permission android:name="android.permission.CAMERA"/>
    <uses-feature android:name="android.hardware.camera" android:required="false"/>
    <uses-feature android:name="android.hardware.camera.autofocus" android:required="false"/>
    <uses-feature android:name="android.hardware.camera.front" android:required="false"/>
    <uses-feature android:name="android.hardware.camera.front.autofocus" android:required="false"/>
While we use the <uses-permission> element to request authorization from the Android system to access sensitive data or hardware, we can further refine our app’s requirements using the <uses-feature> element. In this project, we explicitly request permissions for both Camera and External Storage. By declaring these, we ensure the app has the necessary environment to capture and process images while also being able to save or load data as needed.
8.3. MyHelloOpenCVActivity
The main class, MyHelloOpenCVActivity, extends CameraActivity. Note that CameraActivity itself is a specialized class provided by the OpenCV Android SDK, which inherits from the standard Android Activity class to provide built-in management for camera lifecycle and permissions.
package com.example.myhelloopencv;
import android.os.Bundle;
import android.util.Log;
import android.view.Menu;
import android.view.MenuItem;
import android.view.SurfaceView;
import android.view.WindowManager;
import android.widget.Toast;
import org.opencv.android.CameraActivity;
import org.opencv.android.CameraBridgeViewBase;
import org.opencv.android.OpenCVLoader;
import org.opencv.core.Mat;
import org.opencv.core.Point;
import org.opencv.core.Scalar;
import org.opencv.imgproc.Imgproc;
import java.util.Collections;
import java.util.List;
public class MyHelloOpenCVActivity extends CameraActivity implements CameraBridgeViewBase.CvCameraViewListener2 {
private static final String TAG = "CVSample::Activity";
private CameraBridgeViewBase mOpenCvCameraView;
private static String mLabelMessage ;
private static double mCenterX, mCenterY;
public MyHelloOpenCVActivity() {
Log.i(TAG, "Instantiated new " + this.getClass());
}
@Override
protected void onCreate(Bundle savedInstanceState) {
Log.i(TAG, "called onCreate");
super.onCreate(savedInstanceState);
//! [ocv_loader_init]
if (OpenCVLoader.initLocal()) {
Log.i(TAG, "OpenCV loaded successfully");
} else {
Log.e(TAG, "OpenCV initialization failed!");
(Toast.makeText(this, "OpenCV initialization failed!", Toast.LENGTH_LONG)).show();
return;
}
//! [ocv_loader_init]
//! [keep_screen]
getWindow().addFlags(WindowManager.LayoutParams.FLAG_KEEP_SCREEN_ON);
//! [keep_screen]
setContentView(R.layout.activity_main);
mOpenCvCameraView = (CameraBridgeViewBase) findViewById(R.id.camera_hellocv_java_surface_view);
mOpenCvCameraView.setVisibility(SurfaceView.VISIBLE);
mOpenCvCameraView.setCvCameraViewListener(this);
}
@Override
public void onPause()
{
super.onPause();
if (mOpenCvCameraView != null)
mOpenCvCameraView.disableView();
}
@Override
public void onResume()
{
super.onResume();
if (mOpenCvCameraView != null)
mOpenCvCameraView.enableView();
}
@Override
public void onDestroy() {
super.onDestroy();
if (mOpenCvCameraView != null)
mOpenCvCameraView.disableView();
}
@Override
protected List<? extends CameraBridgeViewBase> getCameraViewList() {
return Collections.singletonList(mOpenCvCameraView);
}
@Override
public boolean onCreateOptionsMenu(Menu menu) {
super.onCreateOptionsMenu(menu);
getMenuInflater().inflate(R.menu.option_menu, menu);
return true;
}
@Override
public boolean onOptionsItemSelected(MenuItem item) {
boolean retBool;
int id = item.getItemId();
if(id == R.id.normal_message)
{
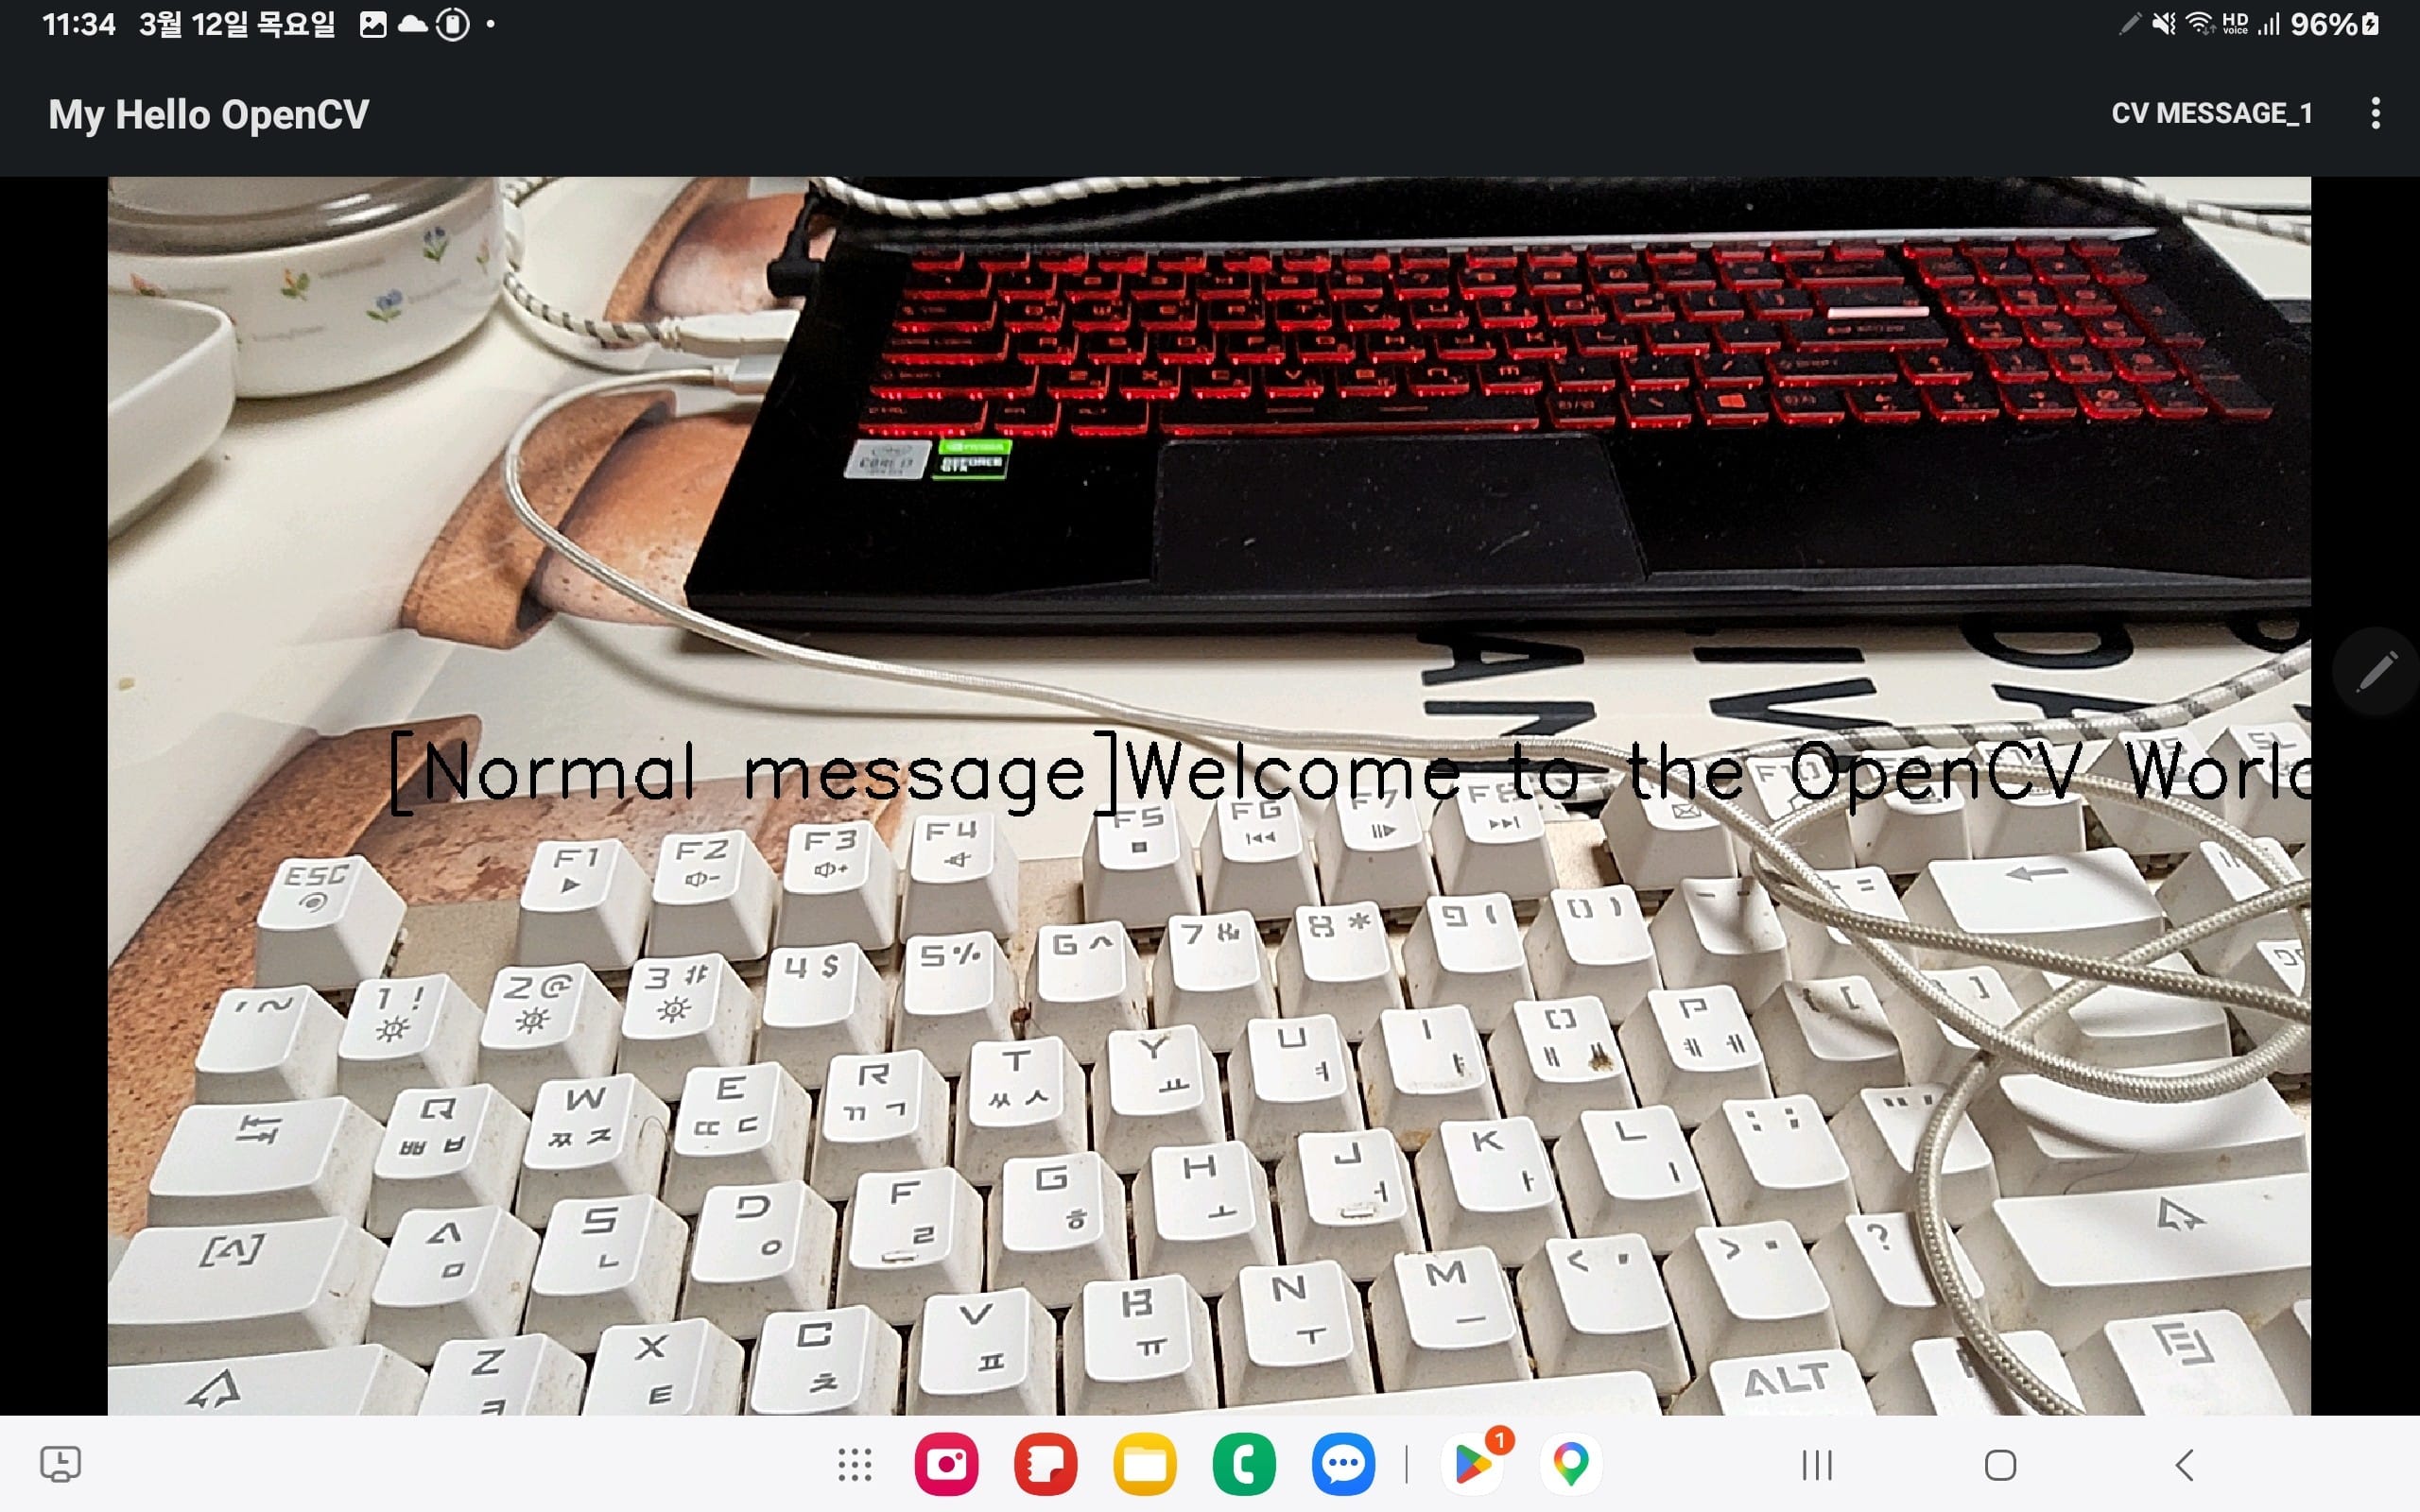
mLabelMessage = "[Normal message]" + getString(R.string.message1);
item.setChecked(true);
retBool = true;
}
else if(id == R.id.cv_message1)
{
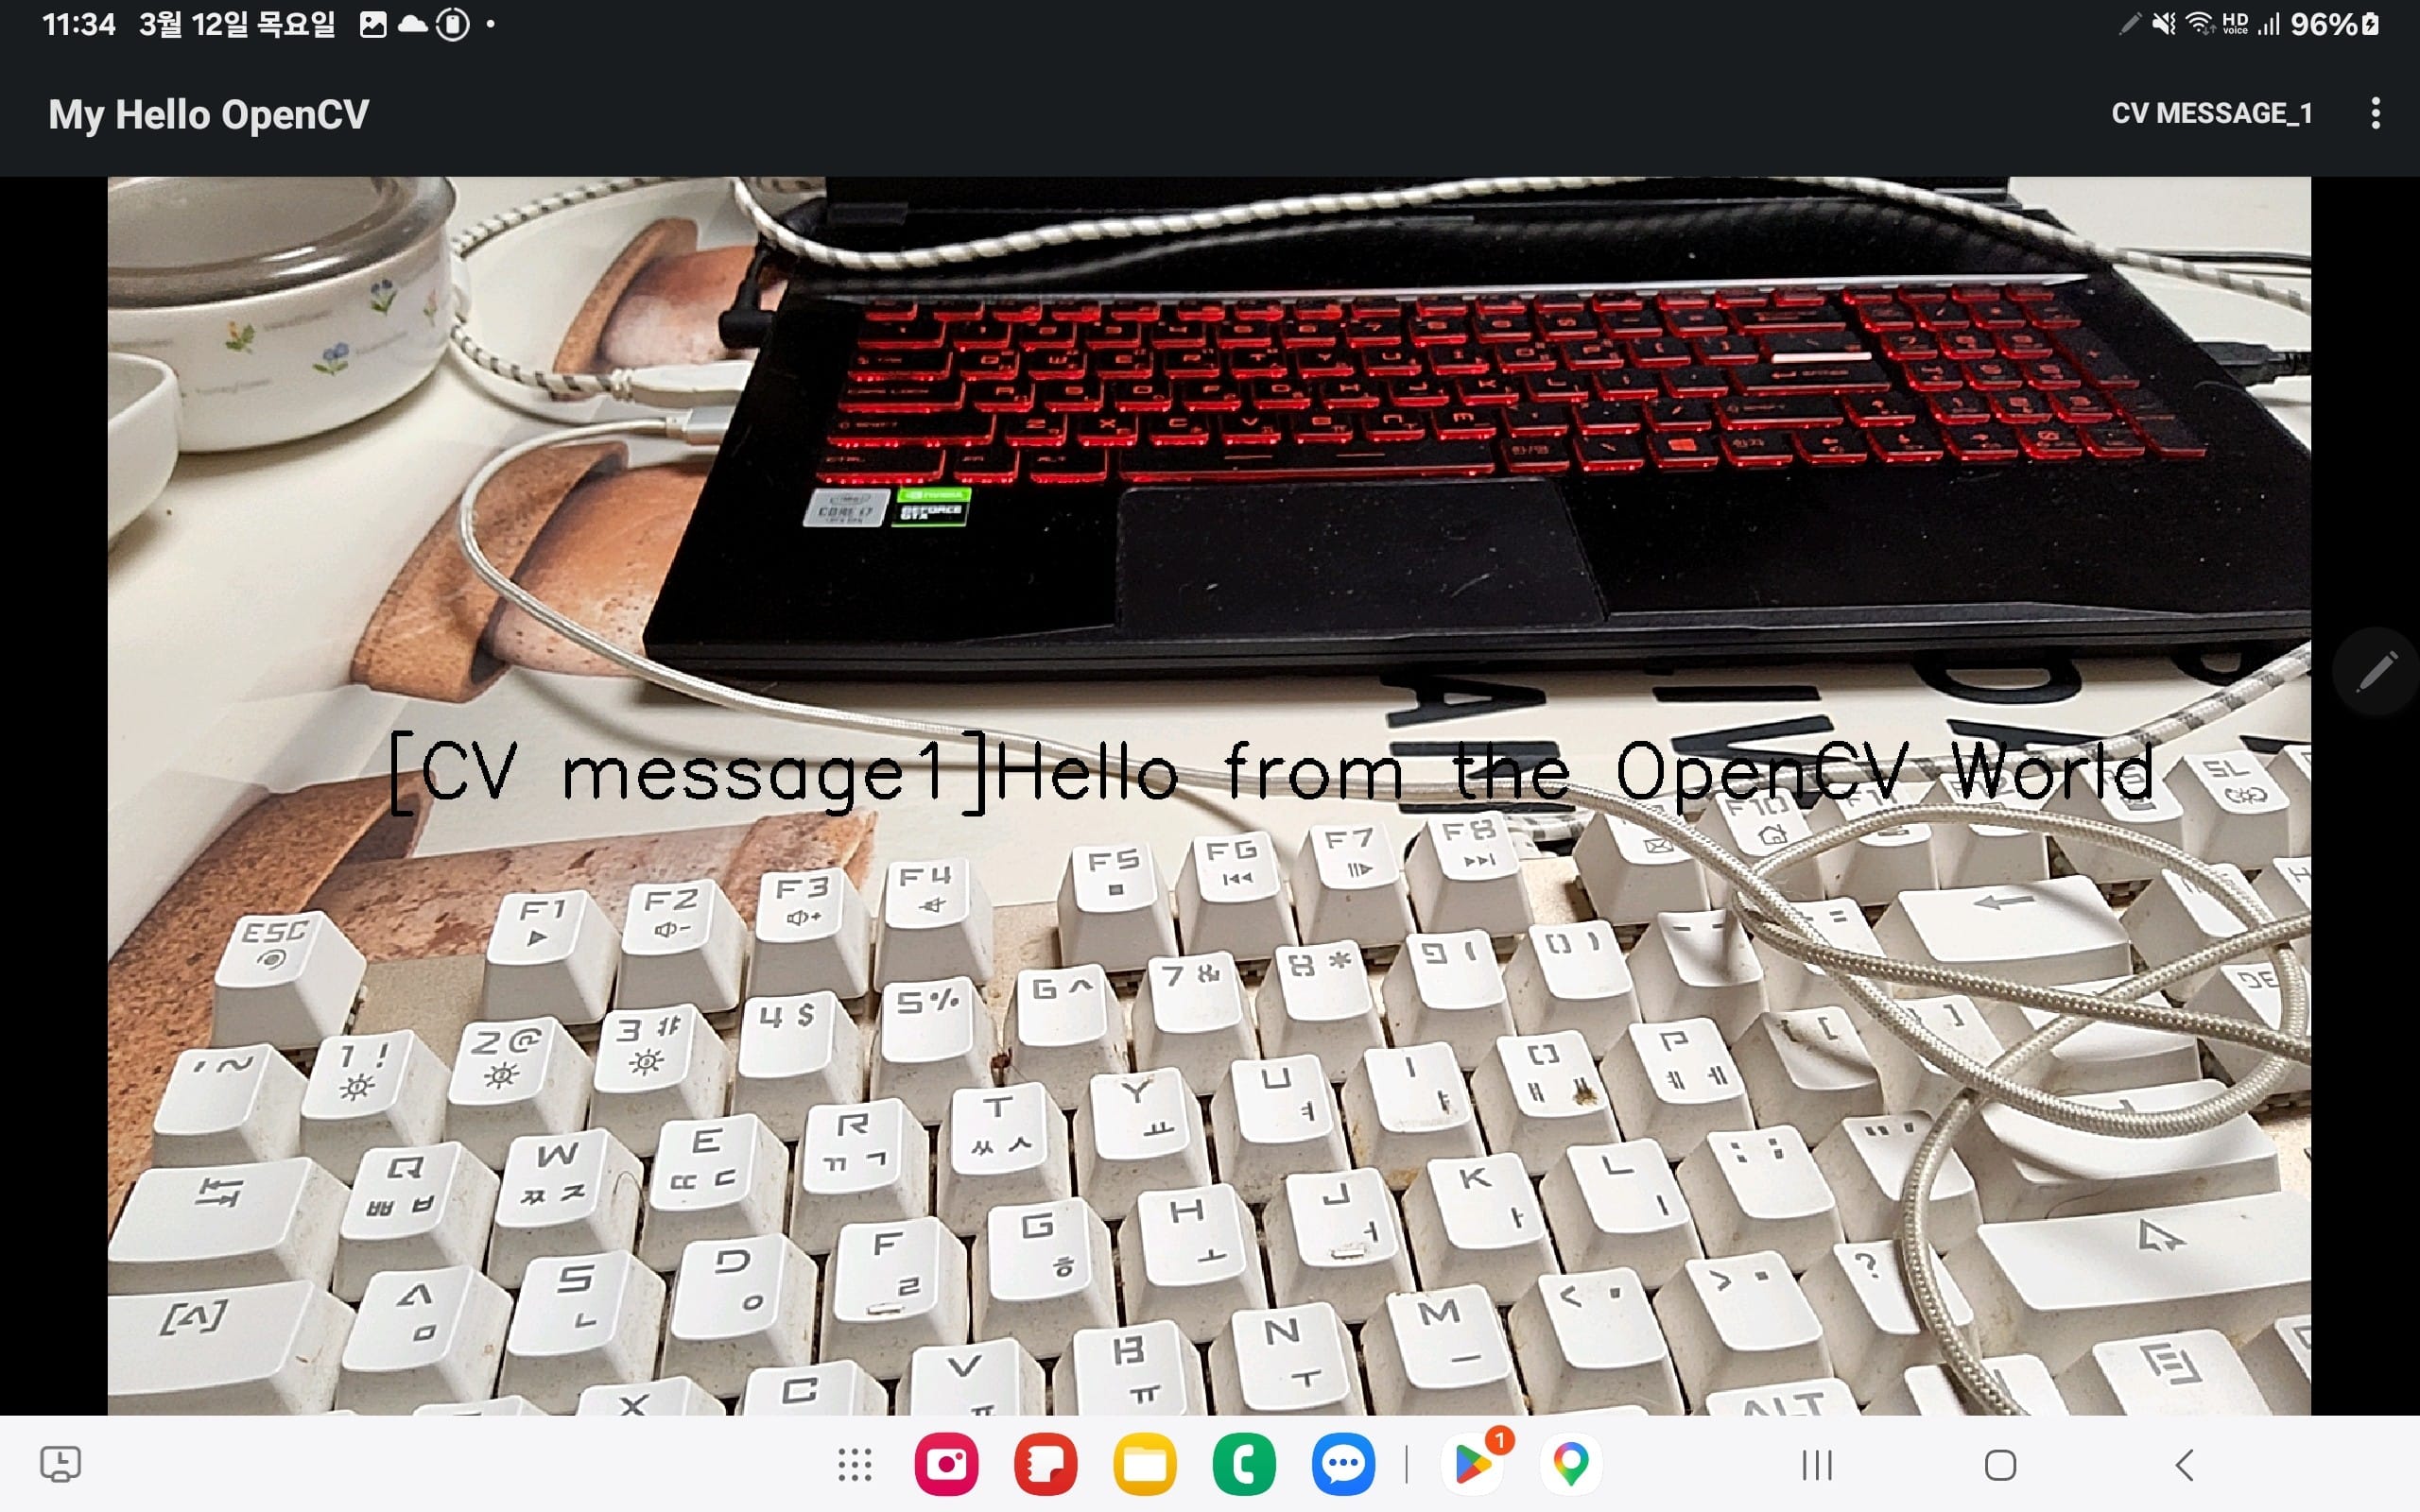
mLabelMessage = "[CV message1]" + getResources().getString(R.string.message2);
item.setChecked(true);
retBool = true;
}
else if(id == R.id.cv_message2)
{
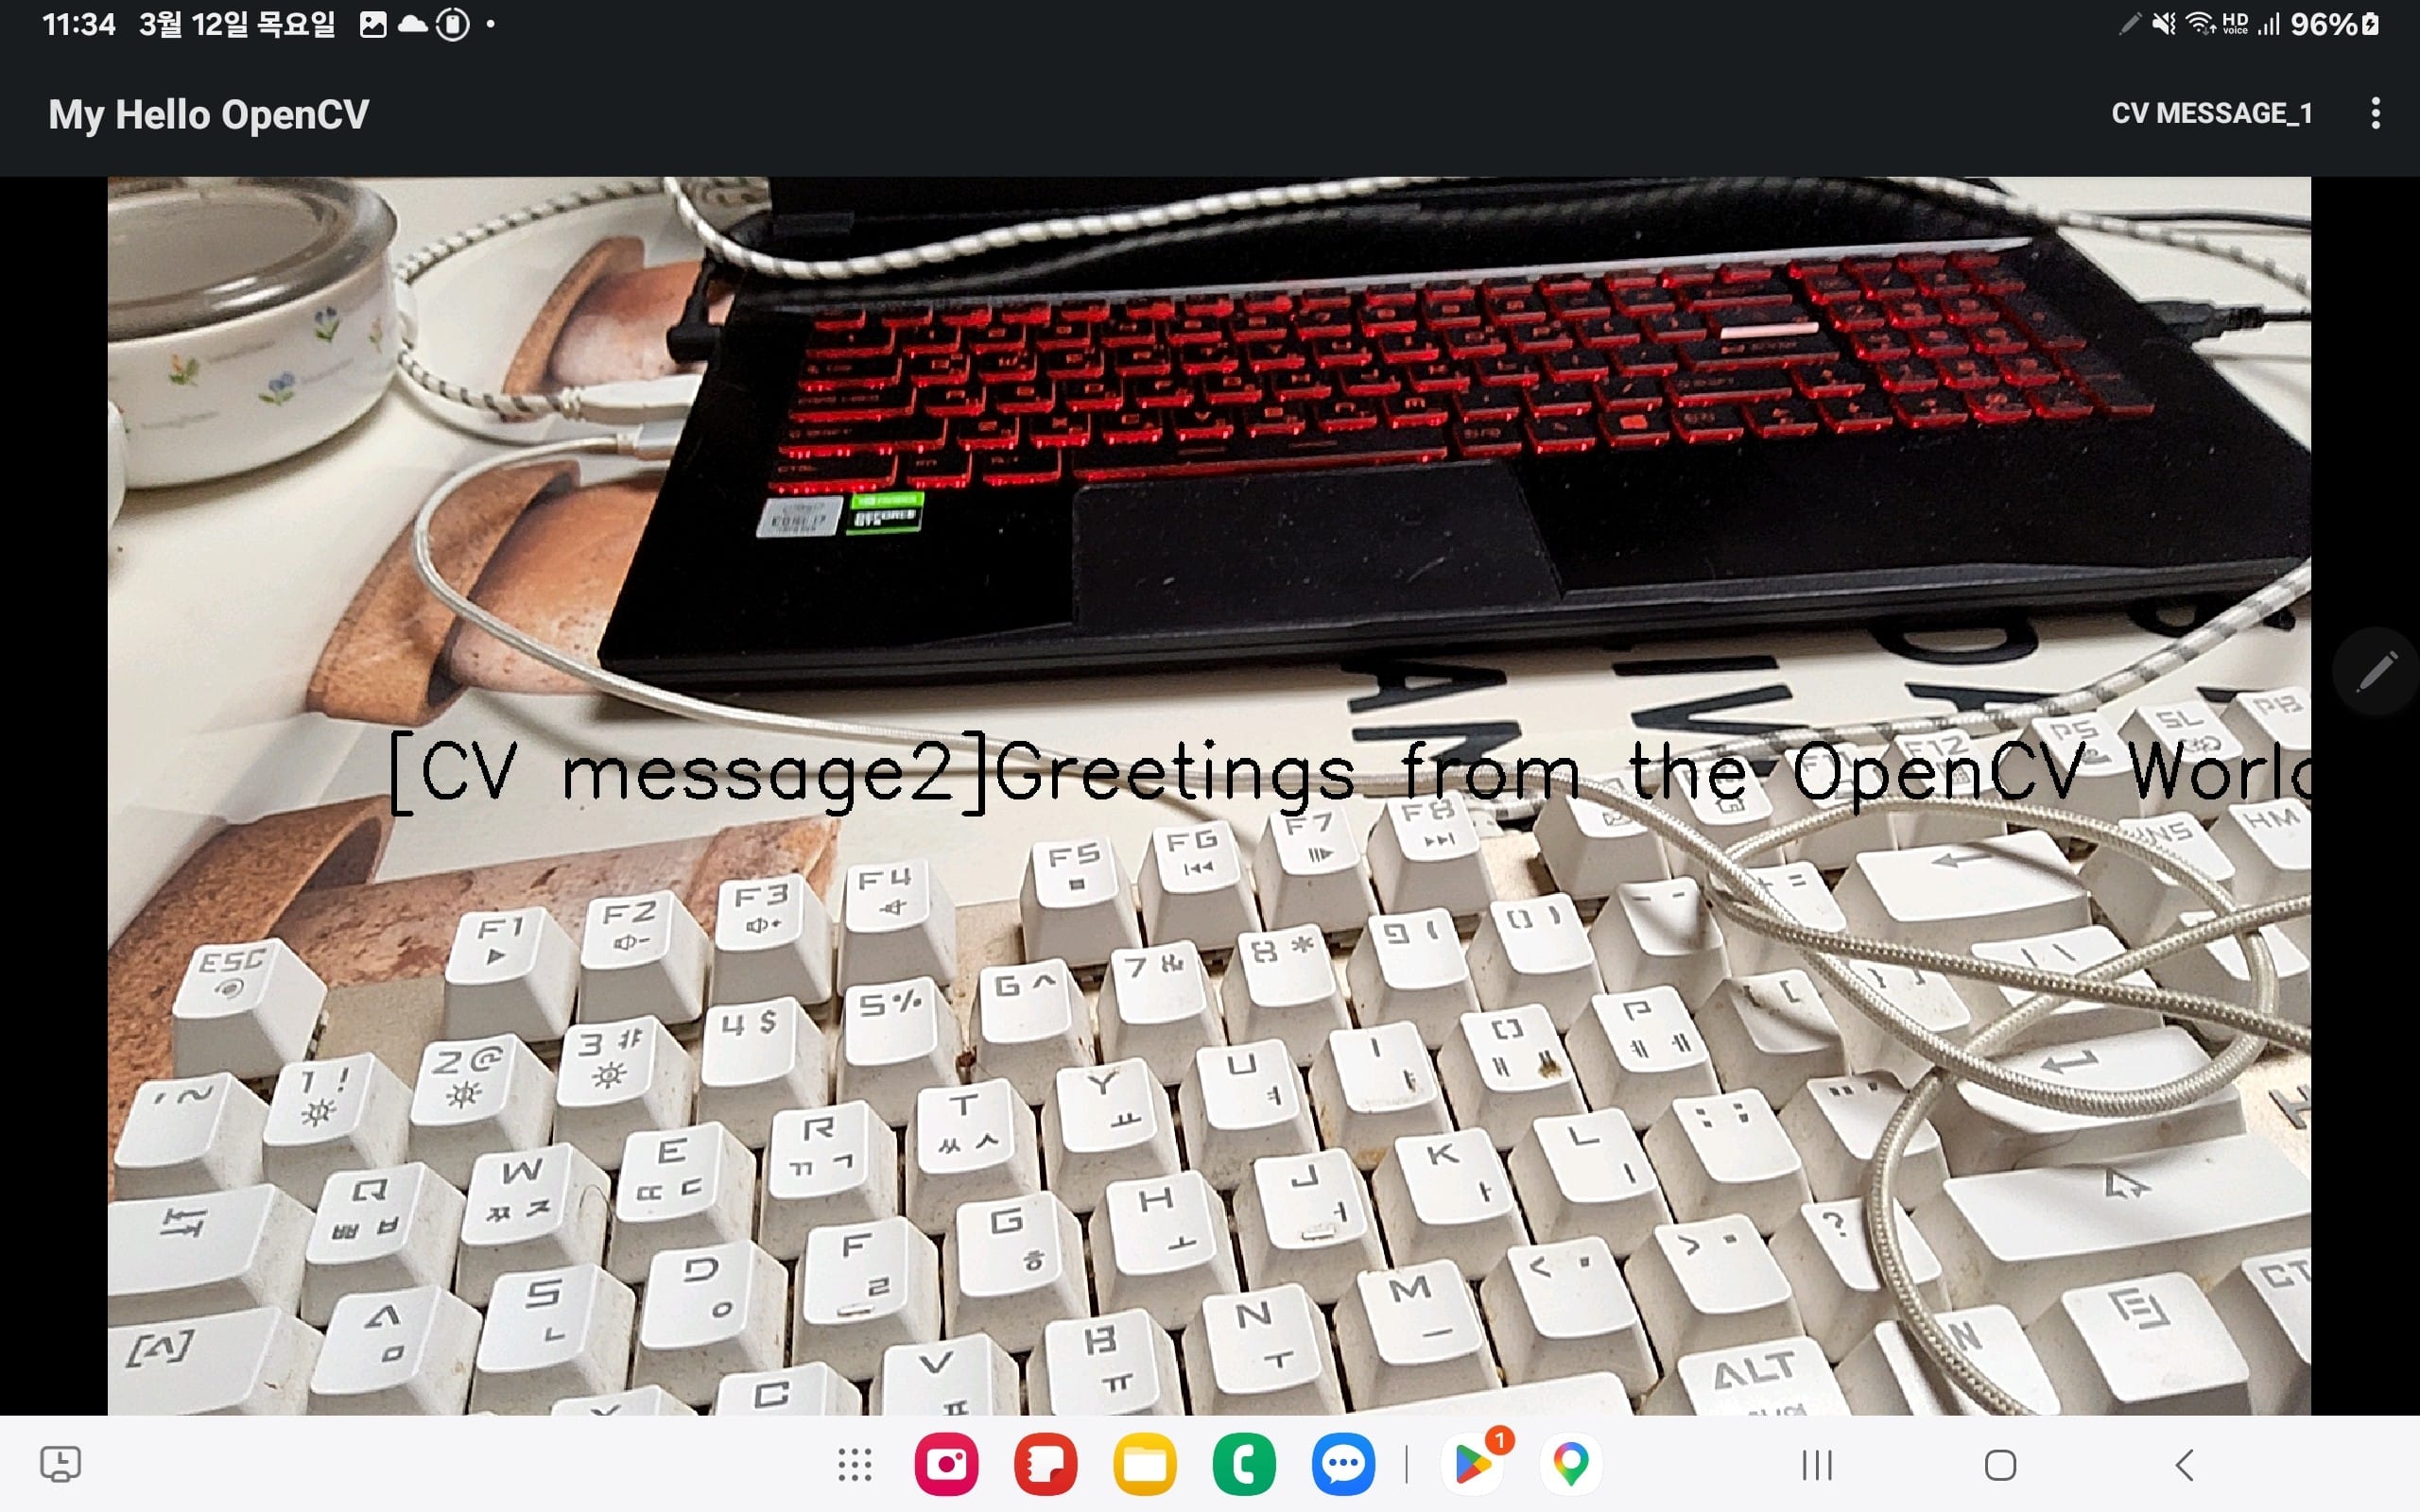
mLabelMessage = "[CV message2]" + getResources().getString(R.string.message3);
item.setChecked(true);
retBool = true;
}
else
{
retBool = super.onOptionsItemSelected(item);
}
return retBool;
}
@Override
public void onCameraViewStarted(int width, int height) {
mCenterX = (double) width /2;
mCenterY = (double) height /2;
}
@Override
public void onCameraViewStopped() {
}
@Override
public Mat onCameraFrame(CameraBridgeViewBase.CvCameraViewFrame inputFrame) {
Mat matFrame = inputFrame.rgba();
if(mLabelMessage != null)
{
Imgproc.putText(matFrame, mLabelMessage, new Point(mCenterX/4, mCenterY), Imgproc.FONT_HERSHEY_SIMPLEX, 2.2, new Scalar(0, 0, 0), 4);
return matFrame;
}
else
return inputFrame.rgba();
}
}
The core of our implementation focuses on the CameraBridgeViewBase.CvCameraViewListener2 interface. To handle the camera feed and process image data, we must implement the following three mandatory methods:
public interface CvCameraViewListener2 {
	public void onCameraViewStarted(int width, int height);
	public void onCameraViewStopped();
	public Mat onCameraFrame(CvCameraViewFrame inputFrame);
};
The naming convention of these methods is quite intuitive. For instance, onCameraViewStarted is triggered as soon as the camera function is activated. Conversely, when the camera is deactivated or the activity is destroyed, onCameraViewStopped is invoked to handle the shutdown. Finally, onCameraFrame is called continuously, frame-by-frame, during the camera’s active state. This entire lifecycle procedure is managed within the MyHelloOpenCVActivity class.
- Define the CameraBridgeViewBase Class.
- Attach the View during the
onCreate()call. - Activate the Listener via
setCvCameraViewListener().
public class MyHelloOpenCVActivity extends CameraActivity implements CameraBridgeViewBase.CvCameraViewListener2 {

    private CameraBridgeViewBase mOpenCvCameraView;

    ...

    @Override
    protected void onCreate(Bundle savedInstanceState) {
        super.onCreate(savedInstanceState);

        ...
        mOpenCvCameraView = (CameraBridgeViewBase) findViewById(R.id.camera_hellocv_java_surface_view);

        mOpenCvCameraView.setVisibility(SurfaceView.VISIBLE);

        mOpenCvCameraView.setCvCameraViewListener(this);
    }
The instance of CameraBridgeViewBase must be strictly managed in synchronization with the lifecycle of MyHelloOpenCVActivity. Since the camera is a shared hardware resource, failing to pause or release it correctly when the activity moves to the background can lead to memory leaks, app crashes, or the inability for other applications to access the camera.
private CameraBridgeViewBase mOpenCvCameraView;

...


@Override
protected void onCreate(Bundle savedInstanceState) {
	super.onCreate(savedInstanceState);

	...
	mOpenCvCameraView = (CameraBridgeViewBase) findViewById(R.id.camera_hellocv_java_surface_view);
}

@Override
public void onPause()
{
	super.onPause();
	if (mOpenCvCameraView != null)
		mOpenCvCameraView.disableView();
}

@Override
public void onResume()
{
	super.onResume();
	if (mOpenCvCameraView != null)
		mOpenCvCameraView.enableView();
}

@Override
public void onDestroy() {
	super.onDestroy();
	if (mOpenCvCameraView != null)
		mOpenCvCameraView.disableView();
}
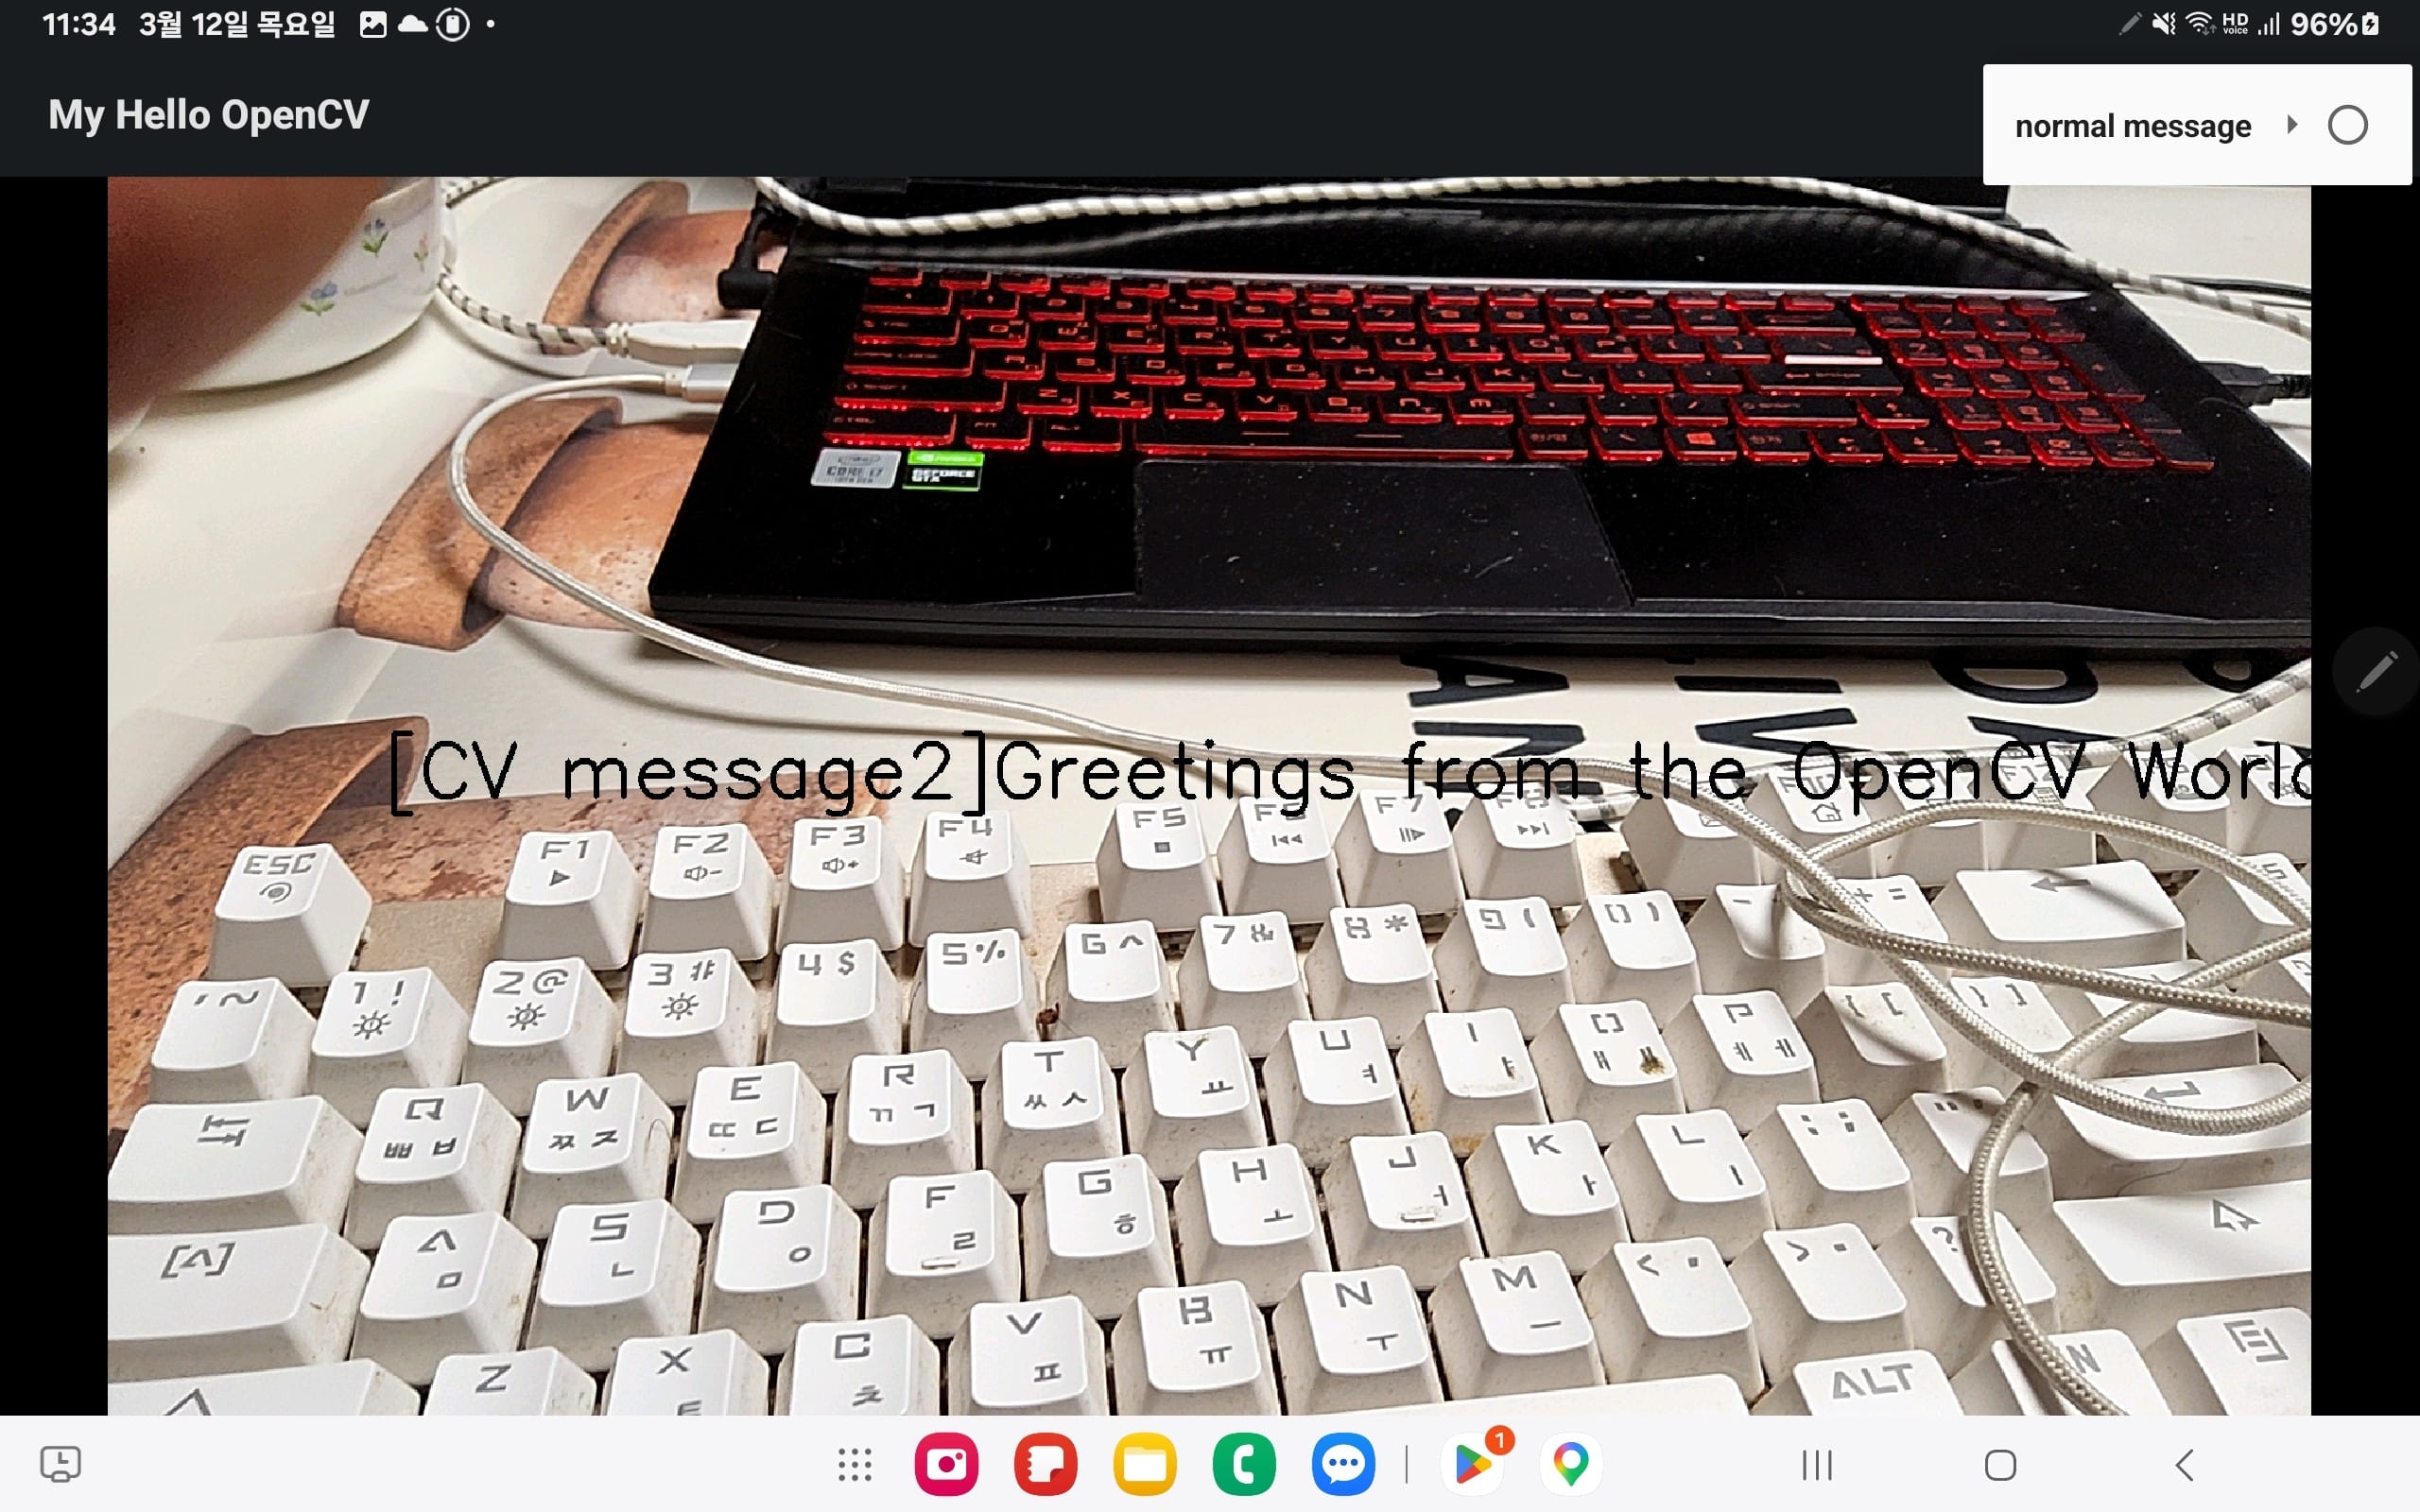
8.4. Results
As the final result of our ‘Hello World’ OpenCV implementation, the GUI demonstrates a key distinction in how data is rendered. While the previous section focused on updating a standard TextView based on user selection, this final stage utilizes OpenCV to draw messages directly onto the camera frames. By manipulating the image matrix, the application overlays real-time information onto the video stream, showcasing the fundamental power of computer vision GUI processing.
In the next section, we will explore the various samples provided within the OpenCV Android SDK. Our goal is to identify a suitable reference project that can serve as a robust foundation or a functional substitute for our object inference application.
9. Object Detector App
Since we have already mastered building and deploying the OpenCV SDK samples onto Android devices, we can now evaluate which sample provides the best architecture for our Object Inference App. To ensure a seamless user experience, we have defined two key functional requirements:
- Model Selection via Dynamic Menu: The application must feature a fixed menu with a drop-down list, allowing users to switch between different inference models (e.g., YOLO, Mask R-CNN, or MobileNet) on the fly.
- Instantaneous Inference: Object detection must trigger immediately upon model selection, ensuring that the
onCameraFramelogic begins processing the live feed using the newly loaded weights without requiring an app restart.
9.1. Camera Calibration Overview
The basic is done—how to build and run a simple app and a simple OpenCV app. It means we are now ready to make an app for object detection on a real Android device.
But at some point, we doubt that we must start from scratch—designing and building sources, layouts, and resources. This would spend too much time focusing on supplementary parts that are not even part of object detection.
Therefore, we are going to follow the simple way: building our app by customizing the samples provided by OpenCV that are already proven in practice. These are the conditions that meet our requirements:
- Display bounding boxes when objects are detected.
- Select any model from the menu.
- Load a model into memory.
- Render frame by frame if the camera is ready.
- Recognize objects in the image source of the frame.
1. Class Diagram and Workflow
Our object detection diagram will be similar to the camera-calibration class diagram. In the case of camera calibration, the steps are:
- Render an image source frame-by-frame when the camera is ready.
- Run calibration on that image source continuously at the same time.
Based on this logic, we expect the calibration sample to cover our required functionalities:
- Renders the image source when the camera is available.
- Allows the user to select a model from the available options.
- Triggers different behaviors depending on the selected option.
- Detects objects in the image source using the selected inference model.
9.2 My Object Detecor
Our object detector, named my-object-detector, is designed to detect objects by separating them from the background and labeling the upper part of each detected object. This implementation is based on the source code of the camera-calibration sample.
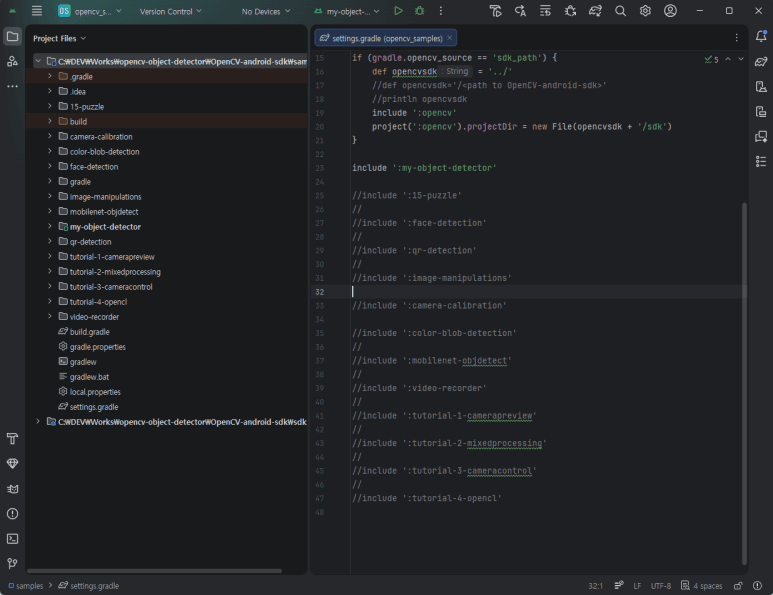
1. Initial Version Setup
To begin, we need to isolate our project within the OpenCV SDK environment. Navigate to the samples folder: C:\DEV\Works\opencv-object-detector\OpenCV-android-sdk\samples
In Android Studio, open the settings.gradle file from the Project Files view. To focus exclusively on our app, disable all other sample projects by commenting out their include tags and add our project as follows:
rootProject.name = 'opencv_samples'
gradle.ext {
    // possible options: 'maven_central', 'maven_local', 'sdk_path'
    opencv_source = 'sdk_path'
}

if (gradle.opencv_source == 'maven_local') {
    gradle.ext {
        opencv_maven_path = '<path_to_maven_repo>'
    }
}

if (gradle.opencv_source == 'sdk_path') {
    def opencvsdk = '../'
    //def opencvsdk='/<path to OpenCV-android-sdk>'
    //println opencvsdk
    include ':opencv'
    project(':opencv').projectDir = new File(opencvsdk + '/sdk')
}
include ':my-object-detector'
//include ':15-puzzle'
//include ':face-detection'
//include ':qr-detection'
//include ':image-manipulations'
//include ':camera-calibration'
//include ':color-blob-detection'
//include ':mobilenet-objdetect'
//include ':video-recorder'
//include ':tutorial-1-camerapreview'
//include ':tutorial-2-mixedprocessing'
//include ':tutorial-3-cameracontrol'
//include ':tutorial-4-opencl'
2. Project Copy & Strategy Pattern
Next, copy the camera-calibration project to create my-object-detector.
Our custom object detector implements the Strategy Pattern. This helps the object detection via OnCameraFrameRender, which is implemented by the FrameRender abstract class.
public class OnCameraFrameRender {
    private final FrameRender mFrameRender;
    public OnCameraFrameRender(FrameRender frameRender) {
        mFrameRender = frameRender;
    }
    public Mat render(CvCameraViewFrame inputFrame) {
        return mFrameRender.render(inputFrame);
    }
}
3. Executing the Strategy
The system calls the render method of the concrete strategy class, passing the CvCameraViewFrame provided by OpenCV as the camera input.
For example, we can implement a Yolov3FrameRender class. Inside its render method, it utilizes a Yolov3Detector class to perform object inference using the CvCameraViewFrame object received from the camera input.
public Mat render(CameraBridgeViewBase.CvCameraViewFrame inputFrame) {
	Mat bgrFrame = inputFrame.rgba();

	Imgproc.cvtColor(bgrFrame, bgrFrame, Imgproc.COLOR_RGBA2BGR);
	Yolov3Detector.getInstance().setDetectorNet(mDetectorData);

	return Yolov3Detector.getInstance().detectObjectByYolov3(bgrFrame);
}
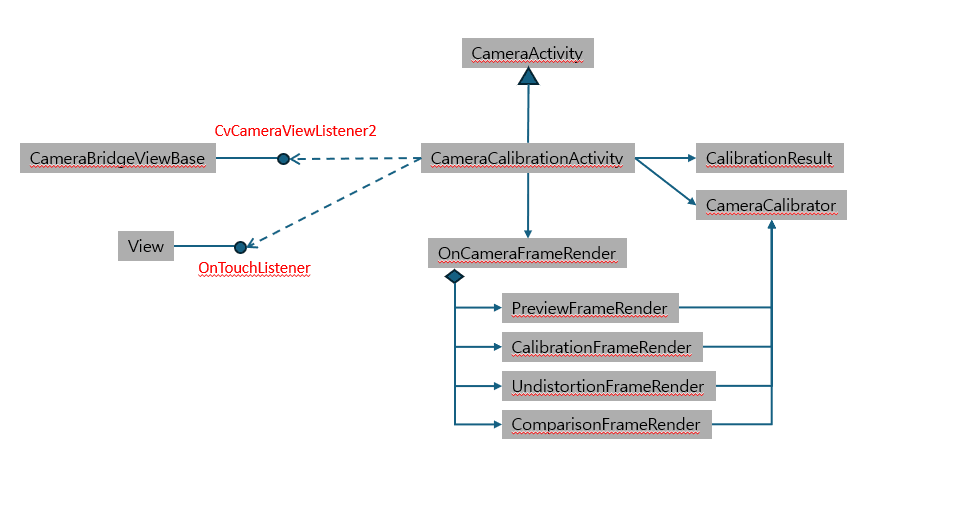
4. Class Diagram
Inspired by the calibration app, this class diagram illustrates the architecture of our mobile detector. The system invokes the appropriate object inference model by calling specific renderers based on user options. Each renderer then executes the inference model in memory and draws bounding boxes directly onto the main activity screen.

My concept of the Object Detector is as follows:
ObjectDetectionActivityextendsCameraActivityand manages the user interaction GUI.- The application instantiates the render classes, which stand ready within
OnCameraFrameRender. - This render loop receives
DetectorNetDatavia its constructor, which in turn initializes and saves the detector classes usingDnnModelRepository. - Whenever the
FrameRenderclass invokesrender(), the system seamlessly matches the user’s selected model with the proper detector class to execute object detection.
5. ObjectDetectionActivity
ObjectDetectionActivity serves as our main activity, handling user interactions and ultimately rendering the bounding boxes predicted by the object inference model. Consequently, the skeleton of this class must implement the CvCameraViewListener2 interface, as shown below:
public class ObjectDetectionActivity extends CameraActivity implements CvCameraViewListener2 {
    @Override
    public void onCreate(Bundle savedInstanceState) {

    }

    @Override
    public void onPause()
    {
    }

    @Override
    public void onResume()
    {
    }

    @Override
    protected List<? extends CameraBridgeViewBase> getCameraViewList() {
        return Collections.singletonList(mOpenCvCameraView);
    }

    public void onDestroy() {

    }

    @Override
    public boolean onCreateOptionsMenu(Menu menu) {
        return true;
    }

    @Override
    public boolean onPrepareOptionsMenu (Menu menu) {
        return true;
    }

    @Override
    public boolean onOptionsItemSelected(MenuItem item) {

        return true;
    }

    @Override
    public void onCameraViewStarted(int width, int height) {
    }

    @Override
    public void onCameraViewStopped() {
    }

    @Override
    public Mat onCameraFrame(CvCameraViewFrame inputFrame) {
    }

    @Override
    public boolean onTouch(View v, MotionEvent event) {
        return false;
    }
}
Our ObjectDetectionActivity class must implement the three methods of the CvCameraViewListener2 interface. These methods are triggered by callbacks from the CameraActivity class after it has internally handled essential pre-processing tasks, such as:
Converting Image Sources: Transforming the raw camera feed into a CvCameraViewFrame object for OpenCV processing.
- Requesting Permissions: Ensuring the app has the necessary camera access.
- Preparing Camera Conditions: Setting up the hardware, resolution, and focus.
public interface CvCameraViewListener2 {
	/**
	 * This method is invoked when camera preview has started. After this method is invoked
	 * the frames will start to be delivered to client via the onCameraFrame() callback.
	 * @param width -  the width of the frames that will be delivered
	 * @param height - the height of the frames that will be delivered
	 */
	public void onCameraViewStarted(int width, int height);

	/**
	 * This method is invoked when camera preview has been stopped for some reason.
	 * No frames will be delivered via onCameraFrame() callback after this method is called.
	 */
	public void onCameraViewStopped();

	/**
	 * This method is invoked when delivery of the frame needs to be done.
	 * The returned values - is a modified frame which needs to be displayed on the screen.
	 * TODO: pass the parameters specifying the format of the frame (BPP, YUV or RGB and etc)
	 */
	public Mat onCameraFrame(CvCameraViewFrame inputFrame);
};
9.3. Object Detection Process
The object detection workflow in our application follows a structured sequence to ensure real-time performance:
Result Rendering: The detected objects (bounding boxes and labels) are rendered on the screen.app, the CameraBridgeViewBase class of OpenCV can do for us by just calling enableView().
- Camera Activation: The camera view must be active as soon as the app starts.
- Model Selection: The user chooses a specific object detection model from the menu
- Memory Loading: The selected model is loaded into memory to prepare for inference.
- Real-time Inference: Object inference is executed frame-by-frame using the loaded model.
To ensure the camera activates automatically whenever the app runs, we utilize the CameraBridgeViewBase class from the OpenCV SDK. By simply calling enableView(), the class handles the underlying camera connection and start-up process for us.
@Override
public void onResume()
{
	super.onResume();
	if (mOpenCvCameraView != null) {
		mOpenCvCameraView.enableView();
	}
}
When a user selects a specific object detection model from the menu, the application executes a two-step procedure to ensure the inference engine and the UI are perfectly synchronized:
1. Initializing the Inference Model
First, the application identifies the chosen model (e.g., YOLO, SSD, or MobileNet) and loads the corresponding network configuration and weight files into memory. This step initializes the Inference Engine (such as OpenCV’s dnn module).
2. Choosing the Right Renderer
Once the model is loaded, the application must switch to the appropriate Renderer that fits the model’s specific output format. Since different models return detection data (bounding boxes, confidence scores, etc.) in different structures, a dedicated renderer (e.g., Yolov3FrameRender) is required to correctly interpret and draw the results on the screen.
@Override
public boolean onOptionsItemSelected(MenuItem item) {
	boolean retBool = false;

	mObjDetectorNet.preDetectorProcess(this, DetectorNetData.CvDetectorType.METHOD_NORMAL);
	mOnCameraFrameRender = new OnCameraFrameRender(new PreviewFrameRender());
	int id = item.getItemId();
	if(id == R.id.normal)
	{
		... Do some normal work
		item.setChecked(true);
		retBool = true;
	}
	else if(id == R.id.maskrcnn)
	{
		... Do some rcnn model work
		item.setChecked(true);
		retBool = true;
	}
	else if(id == R.id.yolov3)
	{
		... Do some yolo model work
		item.setChecked(true);
		retBool = true;
	}
	else if(id == R.id.yolov3_tiny)
	{
		... Do some yolo model work

		item.setChecked(true);
		retBool = true;
	}
	else if(id == R.id.yolov7_tiny)
	{
		... Do some yolo model work

		item.setChecked(true);
		retBool = true;
	}
	else if(id == R.id.mobile_net)
	{
		... Do some mobile net model work

		item.setChecked(true);
		retBool = true;
	}
	else
	{
		retBool = super.onOptionsItemSelected(item);
	}
	return retBool;
}
Below is the mapping between each Render Class (Strategy) and its corresponding Model Files (Inference) as used in the selection process:
| Option (Menu) | Render Class (Strategy) | Model Files (Configuration / Weights) |
| Mask-RCNN | MaskRCNNDetector | mask_rcnn_inception_v2_coco_2018_01_28.pbtxt / frozen_inference_graph.pb |
| MobileNet-SSD v3 | MobileNetSSDDetector | ssd_mobilenet_v3_large_coco_2020_01_14.pbtxt / frozen_inference_graph_ssd.pb |
| Yolo v3 | Yolov3Detector | yolov3.cfg / yolov3.weights yolov3-tiny.weights |
| Yolo v7 tiny | Yolov7Detector | yolov7.cfg / yolov7-tiny.weights |
3. Loading the Model
Loading the model into memory is the most critical priority in our inference application. However, in the Android ecosystem, accessing the file system is restricted by the “Sandbox” security model. This means a user app is prohibited from directly accessing file paths without explicit permissions or proper context.
To load our model in the simplest yet safest way, we will package the model files within the assets folder. This folder is specifically designed for raw data and resources that need to be bundled with the application package (APK).
4. Why use the Assets folder?
- Access: We can use the
AssetManagerto read these files and copy them to the app’s internal cache directory, providing a valid file path for the OpenCVdnnmodule. - Security: Files in
assetsare private to the application and do not require external storage permissions. - Convenience: The model files (e.g.,
.cfg,.weights,.pb) are bundled together during the build process, ensuring they are always available when the app is installed.
9.4. The Role of DetectorNetData
The DetectorNetData class is responsible for managing the model files required for inference. It handles the transition from static assets to accessible runtime files:
- Reading from Assets: It accesses the raw model files (e.g., configurations and weights) stored within the application’s
assetsfolder. - Writing to Internal Storage: Since the OpenCV DNN module requires a filesystem path to load models,
DetectorNetDatawrites these files to a private directory that our detector app can safely access at runtime.
By utilizing this class, we ensure that the model files are securely extracted and ready for the inference engine without violating Android’s sandbox security policies.
public void preDetectorProcess(final Context ctx, final CvDetectorType detectorType) {
	setDetectorType(detectorType);

	if(detectorType == CvDetectorType.METHOD_MRCNN)
	{
		final String cfgFile = getMRcnnConfig(ctx);
		final String modelFile = getMRcnnModel(ctx);

		boolean isSetupCompleted = true;
		if(modelFile == null)
		{
			Log.i(TAG, "Config file path not found!!!!");
			isSetupCompleted = false;
		}

		if(cfgFile == null)
		{
			Log.i(TAG, "weightFile file path not found!!!!");
			isSetupCompleted = false;
		}

		if(isSetupCompleted)
		{
			DnnModelRepository.getInstance().unloadModel(detectorType.toString());
			setDnnNet(DnnModelRepository.getInstance().loadModel(detectorType, modelFile, cfgFile));
		}
	}
	else if(detectorType == CvDetectorType.METHOD_YOLOV3)
	{
		final String cfgFile = getYolov3Config(ctx);
		final String weightFile = getYolov3Weight(ctx);
		boolean isSetupCompleted = true;

		if(cfgFile == null)
		{
			Log.i(TAG, "Config file path not found!!!!");
			isSetupCompleted = false;
		}

		if(weightFile == null)
		{
			Log.i(TAG, "weightFile file path not found!!!!");
			isSetupCompleted = false;
		}

		if(isSetupCompleted)
		{
			DnnModelRepository.getInstance().unloadModel(detectorType.toString());
			setDnnNet(DnnModelRepository.getInstance().loadModel(detectorType, weightFile, cfgFile));
		}

	}
	else if(detectorType == CvDetectorType.METHOD_YOLOV3_TINY)
	{
		final String cfgFile = getYolov3TinyConfig(ctx);
		final String weightFile = getYolov3TinyWeight(ctx);
		boolean isSetupCompleted = true;

		if(cfgFile == null)
		{
			Log.i(TAG, "Config file path not found!!!!");
			isSetupCompleted = false;
		}

		if(weightFile == null)
		{
			Log.i(TAG, "weightFile file path not found!!!!");
			isSetupCompleted = false;
		}

		if(isSetupCompleted)
		{
			DnnModelRepository.getInstance().unloadModel(detectorType.toString());
			setDnnNet(DnnModelRepository.getInstance().loadModel(detectorType, weightFile, cfgFile));
		}

	}
	else if(detectorType == CvDetectorType.METHOD_YOLOV7_TINY)
	{
		final String cfgFile = getYolov7TinyConfig(ctx);
		final String weightFile = getYolov7TinyWeight(ctx);
		boolean isSetupCompleted = true;

		if(cfgFile == null)
		{
			Log.i(TAG, "Config file path not found!!!!");
			isSetupCompleted = false;
		}

		if(weightFile == null)
		{
			Log.i(TAG, "weightFile file path not found!!!!");
			isSetupCompleted = false;
		}

		if(isSetupCompleted)
		{
			DnnModelRepository.getInstance().unloadModel(detectorType.toString());
			setDnnNet(DnnModelRepository.getInstance().loadModel(detectorType, weightFile, cfgFile));
		}

	}
	else if(detectorType == CvDetectorType.METHOD_MOBNET)
	{
		final String cfgFile = getMBNetConfig(ctx);
		final String modelFile = getMBNetModel(ctx);

		boolean isSetupCompleted = true;
		if(modelFile == null)
		{
			Log.i(TAG, "Config file path not found!!!!");
			isSetupCompleted = false;
		}

		if(cfgFile == null)
		{
			Log.i(TAG, "weightFile file path not found!!!!");
			isSetupCompleted = false;
		}

		if(isSetupCompleted)
		{
			DnnModelRepository.getInstance().unloadModel(detectorType.toString());
			setDnnNet(DnnModelRepository.getInstance().loadModel(detectorType, modelFile, cfgFile));
		}
	}
	else if(detectorType == CvDetectorType.METHOD_NORMAL)
	{
		DnnModelRepository.getInstance().clearAll();
		return;
	}
	else if(detectorType == CvDetectorType.METHOD_UNKNWON)
	{
		DnnModelRepository.getInstance().clearAll();
		return;
	}

	if(dnnNet == null) return;

	setLabel(ctx, detectorType);
}
9.5. Managing Model Life Cycle
The DnnModelRepository class acts as a central hub for loading and unloading inference models. It relies on the following logic to ensure the model files are ready for the OpenCV DNN engine:
1. The getSafeModelAssetPath() Method
This is the core method that bridges the gap between the assets folder and the Android file system. Its execution flow is as follows:
- Check Existence: It first checks if the model files already exist in the app’s local sandbox storage.
- Conditional Copying: If the files are missing, it reads them from the
assetsfolder and copies them to the internal storage. - Target Storage (
getFilesDir()): It uses thegetFilesDir()method of theContextclass. This points to the app’s internal storage, which is:- Secure: Protected by the Android Sandbox.
- Permission-Free: Does not require
READ/WRITE_EXTERNAL_STORAGEpermissions.
- Path Return: Once the copy is verified, it returns the absolute path of the file, allowing the
Dnnmodule to load the model successfully.
private String getSafeModelAssetPath(Context context, String fileName) {
	// 1. File object that is saved to the internal storage(no need to gain security permission)
	File destFile = new File(context.getFilesDir(), fileName);

	// 2. It returns its path immediately, if the file is already copied.
	if (destFile.exists()) {
		Log.d("OpenCV_Model", "The model is already existed.[" + fileName + "]");
		return destFile.getAbsolutePath();
	}

	// 3. It starts to copy from assets directory to the internal storage.
	try (InputStream is = context.getAssets().open(fileName);
		 FileOutputStream os = new FileOutputStream(destFile)) {


		byte[] buffer = new byte[1024 * 16]; // 16KB Buffer
		int length;
		int size = 0;
		while ((length = is.read(buffer)) > 0) {
			os.write(buffer, 0, length);
			size += length;
		}

		Log.d("OpenCV_Model", String.format("Model size[%d] Path[%s] ", size, destFile.getAbsolutePath()));
		return destFile.getAbsolutePath();

	} catch (IOException e) {
		Log.e("OpenCV_Model", "2.Error while copying: " + e.getMessage());
		return null;
	}
}
9.6. DnnModelRepository
The DnnModelRepository is implemented as a Singleton class to ensure efficient memory management and centralized access to inference models. Instead of reloading heavy models repeatedly, it maintains and reuses Net objects throughout the application’s lifecycle.
1. Key Responsibility: Object Reuse
By storing the loaded Net objects in internal storage (memory), the repository avoids the overhead of reading from the disk every time a frame needs to be processed. This is crucial for maintaining a high FPS in our real-time object detection app.
2. Main Methods: The Lifecycle Controllers
Clears the reference from memory to prevent memory leaks, especially when switching between different models (e.g., switching from YOLO to Mask R-CNN).
loadModel()
- Uses
getSafeModelAssetPath()to ensure model files exist in the sandbox. - Reads the files and initializes the OpenCV
Netobject. - Stores the initialized
Netobject in a cache (e.g., aHashMapor a member variable) for immediate reuse.
unloadModel()
- Explicitly releases the resources held by the
Netobject. - Clears the reference from memory to prevent memory leaks, especially when switching between different models (e.g., switching from YOLO to Mask R-CNN).
3. Efficient Model Management via Map
In the loadModel() method, the Net object is created using the model files prepared in the sandbox. To optimize performance, these objects are stored in a Map<ModelType, Net>.
The Logic of the Map Object:
- Key: The specific model type selected by the user (e.g.,
YOLO_V3,SSD). - Value: The fully initialized OpenCV
Netobject.
4. Conditional Assignment:
When loadModel() is called, the repository follows this workflow:
- Check Key: It checks if the
Mapalready contains theNetobject for the requested model type. - Reuse: If it exists, the repository simply returns the existing object, avoiding expensive disk I/O and memory allocation.
- Create & Save: Only if the object does not exist (null), it creates a new
Netobject using the model files and saves it to theMapfor future use.
public Net loadModel(DetectorNetData.CvDetectorType modelType, String pbPath, String pbtxtPath) {
	String modelKey =modelType.toString();

	if(modelType == DetectorNetData.CvDetectorType.METHOD_MRCNN || modelType == DetectorNetData.CvDetectorType.METHOD_MOBNET)
	{
		if (!modelMap.containsKey(modelKey) || Objects.requireNonNull(modelMap.get(modelKey)).empty()) {
			Net net = Dnn.readNetFromTensorflow(pbPath, pbtxtPath);
			net.setPreferableBackend(Dnn.DNN_BACKEND_OPENCV);
			net.setPreferableTarget(Dnn.DNN_TARGET_CPU);
			modelMap.put(modelKey, net);
		}
		return modelMap.get(modelKey);
	}
	else if(modelType == DetectorNetData.CvDetectorType.METHOD_YOLOV3 ||
                modelType == DetectorNetData.CvDetectorType.METHOD_YOLOV3_TINY ||
                modelType == DetectorNetData.CvDetectorType.METHOD_YOLOV7_TINY)
	{
		if (!modelMap.containsKey(modelKey) || Objects.requireNonNull(modelMap.get(modelKey)).empty()) {
			Net net = Dnn.readNetFromDarknet(pbtxtPath, pbPath);
			net.setPreferableBackend(Dnn.DNN_BACKEND_OPENCV);
			net.setPreferableTarget(Dnn.DNN_TARGET_CPU);
			modelMap.put(modelKey, net);
		}
		return modelMap.get(modelKey);
	}

	return null;
}
5. Explicit Memory Release via Map Removal
Just as we store models for reuse, we must also provide a way to remove the Net objects from memory. By using the Model Type (Key), we can pinpoint and clear specific models from our internal Map.
The Unloading Process:
- Identify Key: The system identifies the model that is no longer needed (e.g., when a user deselects a model or closes the detection session).
- Remove from Map: The
Netobject is removed from theMapusing its key. - Resource Cleanup: Once removed from the
Map, the object becomes eligible for Garbage Collection. SinceNetobjects are native resources in OpenCV, explicitly callingnet.release()(if available in the specific SDK version) before removal further ensures that native memory is freed immediately.
public void unloadModel(String modelKey) {
	if (modelMap.containsKey(modelKey)) {
		Net net = modelMap.get(modelKey);
		if (net != null) {
			net = null; // de-referencing
		}
		modelMap.remove(modelKey);
		System.gc(); // hints (needs sometimes because of heavy native memory)
	}
}
6. GUI Layouts
Our object detection app is designed with a clean, functional interface that prioritizes the camera feed while providing easy access to model selection.
Key Components of the GUI:
- Main Camera View:
- The center of the screen is dominated by the
CameraBridgeViewBase. - This is where the real-time frame processing happens. Once the user selects a model, the bounding boxes and labels are rendered directly on top of this view.
- The center of the screen is dominated by the
- Top Action Bar / Menu:
- Located at the top of the screen, it contains the Model Selection Menu.
- When the user clicks the menu icon, a list of available models (YOLO v3, YOLO v7, SSD, Mask R-CNN) appears.
- Status Overlays (Optional):
- Information such as FPS (Frames Per Second) or the name of the currently active model is often displayed in the corner to provide real-time feedback on performance.
9.7. Interaction Flow
- Step 1: The user launches the app, and the camera activates automatically via
enableView(). - Step 2: The user taps the menu in the GUI.
- Step 3: Selecting a model triggers the
DnnModelRepository.loadModel()logic we discussed earlier. - Step 4: The UI immediately reflects the detection results as the new
FrameRenderstarts drawing on theonCameraFrame.
detection_xml.png 교체
The menu on the left was created using onCreateOptionsMenu(), and its selection logic is handled by the onOptionsItemSelected() callback.
@Override
public boolean onCreateOptionsMenu(Menu menu) {
	super.onCreateOptionsMenu(menu);
	getMenuInflater().inflate(R.menu.detection, menu);
	return true;
}
The menu items consist of ‘Normal Mode’ as the default, with ‘YOLO’, ‘Mask R-CNN’, and ‘YOLO Tiny’ available as alternative detection models.
9.8. Object Detection Options
The application provides a variety of operational modes via the options menu. By default, the app starts in Normal Mode, but users can switch to specialized inference models depending on their needs:
- Normal Mode (Default): Standard camera preview without object detection processing.
- YOLO: The standard YOLO model, offering high accuracy for object detection.
- Mask R-CNN: Advanced model that provides instance segmentation (detecting object shapes).
- YOLO Tiny: A lightweight version of YOLO optimized for higher frame rates (FPS) on mobile devices.
<?xml version="1.0" encoding="utf-8"?>
<menu xmlns:android="http://schemas.android.com/apk/res/android" >
    <group android:checkableBehavior="single">
        <item android:id="@+id/normal_mode"
              android:title="@string/normal_mode"
              android:showAsAction="ifRoom|withText" />
        <item
            android:id="@+id/detect_mode"
            android:title="@string/default_mode">
              <menu>
                  <group android:checkableBehavior="single">
                      <item android:id="@+id/normal"
                          android:title="@string/normal"
                          android:checked="true" />
                      <item android:id="@+id/maskrcnn"
                            android:title="@string/maskrcnn" />
                      <item android:id="@+id/yolov3"
                            android:title="@string/yolov3" />
                      <item android:id="@+id/yolov3_tiny"
                          android:title="@string/yolov3_tiny" />
                      <item android:id="@+id/yolov7_tiny"
                          android:title="@string/yolov7_tiny" />
                      <item android:id="@+id/mobile_net"
                          android:title="@string/mobile_net" />
                  </group>
              </menu>
        </item>
    </group>
</menu>
The layout menu will be displayed on the real android device as follows:
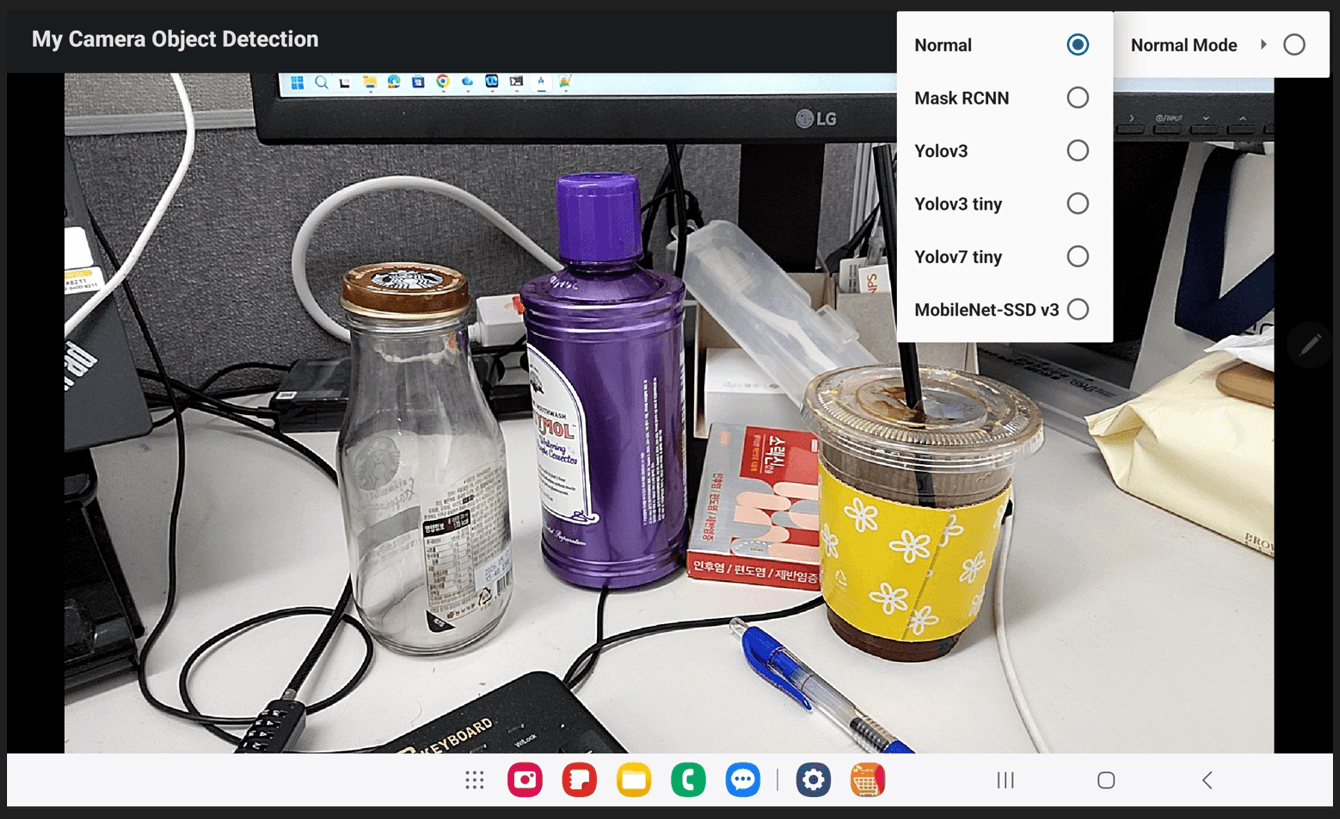
The menu layout is rendered on the physical Android device as shown below, providing a seamless interface for switching between detection modes.
@Override
public boolean onOptionsItemSelected(MenuItem item) {
	boolean retBool = false;

	int id = item.getItemId();

	if(id == R.id.normal)
	{
		Log.d(TAG, "Normal["+item.getTitle()+"]");
		mOnCameraFrameRender =
				new OnCameraFrameRender(new PreviewFrameRender());
		item.setChecked(true);
		retBool = true;
	}
	else if(id == R.id.maskrcnn)
	{
		Log.d(TAG, "Mask RCNN["+item.getTitle()+"]");
		mObjDetectorNet.preDetectorProcess(this, DetectorNetData.CvDetectorType.METHOD_MRCNN);
		MaskRCNNFrameRender maskRCNNFrameRender = new MaskRCNNFrameRender(mObjDetectorNet);
		mOnCameraFrameRender =
				new OnCameraFrameRender(maskRCNNFrameRender);

		item.setChecked(true);
		retBool = true;
	}
	else if(id == R.id.yolov3)
	{
		Log.d(TAG, "Yolov3["+item.getTitle()+"]");

		mObjDetectorNet.preDetectorProcess(this, DetectorNetData.CvDetectorType.METHOD_YOLOV3);
		YoloFrameRender yolov3FrameRender = new YoloFrameRender(mObjDetectorNet);
		mOnCameraFrameRender =
			new OnCameraFrameRender(yolov3FrameRender);

		item.setChecked(true);
		retBool = true;
	}
	else if(id == R.id.yolov3_tiny)
	{
		Log.d(TAG, "Yolov3_tiny["+item.getTitle()+"]");

		mObjDetectorNet.preDetectorProcess(this, DetectorNetData.CvDetectorType.METHOD_YOLOV3_TINY);
		YoloFrameRender yoloFrameRender = new YoloFrameRender(mObjDetectorNet);
		mOnCameraFrameRender =
				new OnCameraFrameRender(yoloFrameRender);

		item.setChecked(true);
		retBool = true;
	}
	else if(id == R.id.yolov7_tiny)
	{
		Log.d(TAG, "Yolov7_tiny["+item.getTitle()+"]");

		mObjDetectorNet.preDetectorProcess(this, DetectorNetData.CvDetectorType.METHOD_YOLOV7_TINY);
		YoloFrameRender yoloFrameRender = new YoloFrameRender(mObjDetectorNet);
		mOnCameraFrameRender =
				new OnCameraFrameRender(yoloFrameRender);

		item.setChecked(true);
		retBool = true;
	}
	else if(id == R.id.mobile_net)
	{
		Log.d(TAG, "MobileNet["+item.getTitle()+"]");

		mObjDetectorNet.preDetectorProcess(this, DetectorNetData.CvDetectorType.METHOD_MOBNET);
		MobileNetSSDFrameRender mobileNetSSDFrameRender = new MobileNetSSDFrameRender(mObjDetectorNet);
		mOnCameraFrameRender =
				new OnCameraFrameRender(mobileNetSSDFrameRender);

		item.setChecked(true);
		retBool = true;
	}
	else
	{
		mObjDetectorNet.preDetectorProcess(this, DetectorNetData.CvDetectorType.METHOD_NORMAL);
		mOnCameraFrameRender = new OnCameraFrameRender(new PreviewFrameRender());
		retBool = super.onOptionsItemSelected(item);
	}
	return retBool;
}
9.9. Final Results of Object Detector
Finally, we have successfully built our object detector, which runs inference properly whenever the user selects a detection option. With just a few minor modifications, you can easily test the latest object detection models on your own.
| Model Type | Output |
| Mask-RCNN | 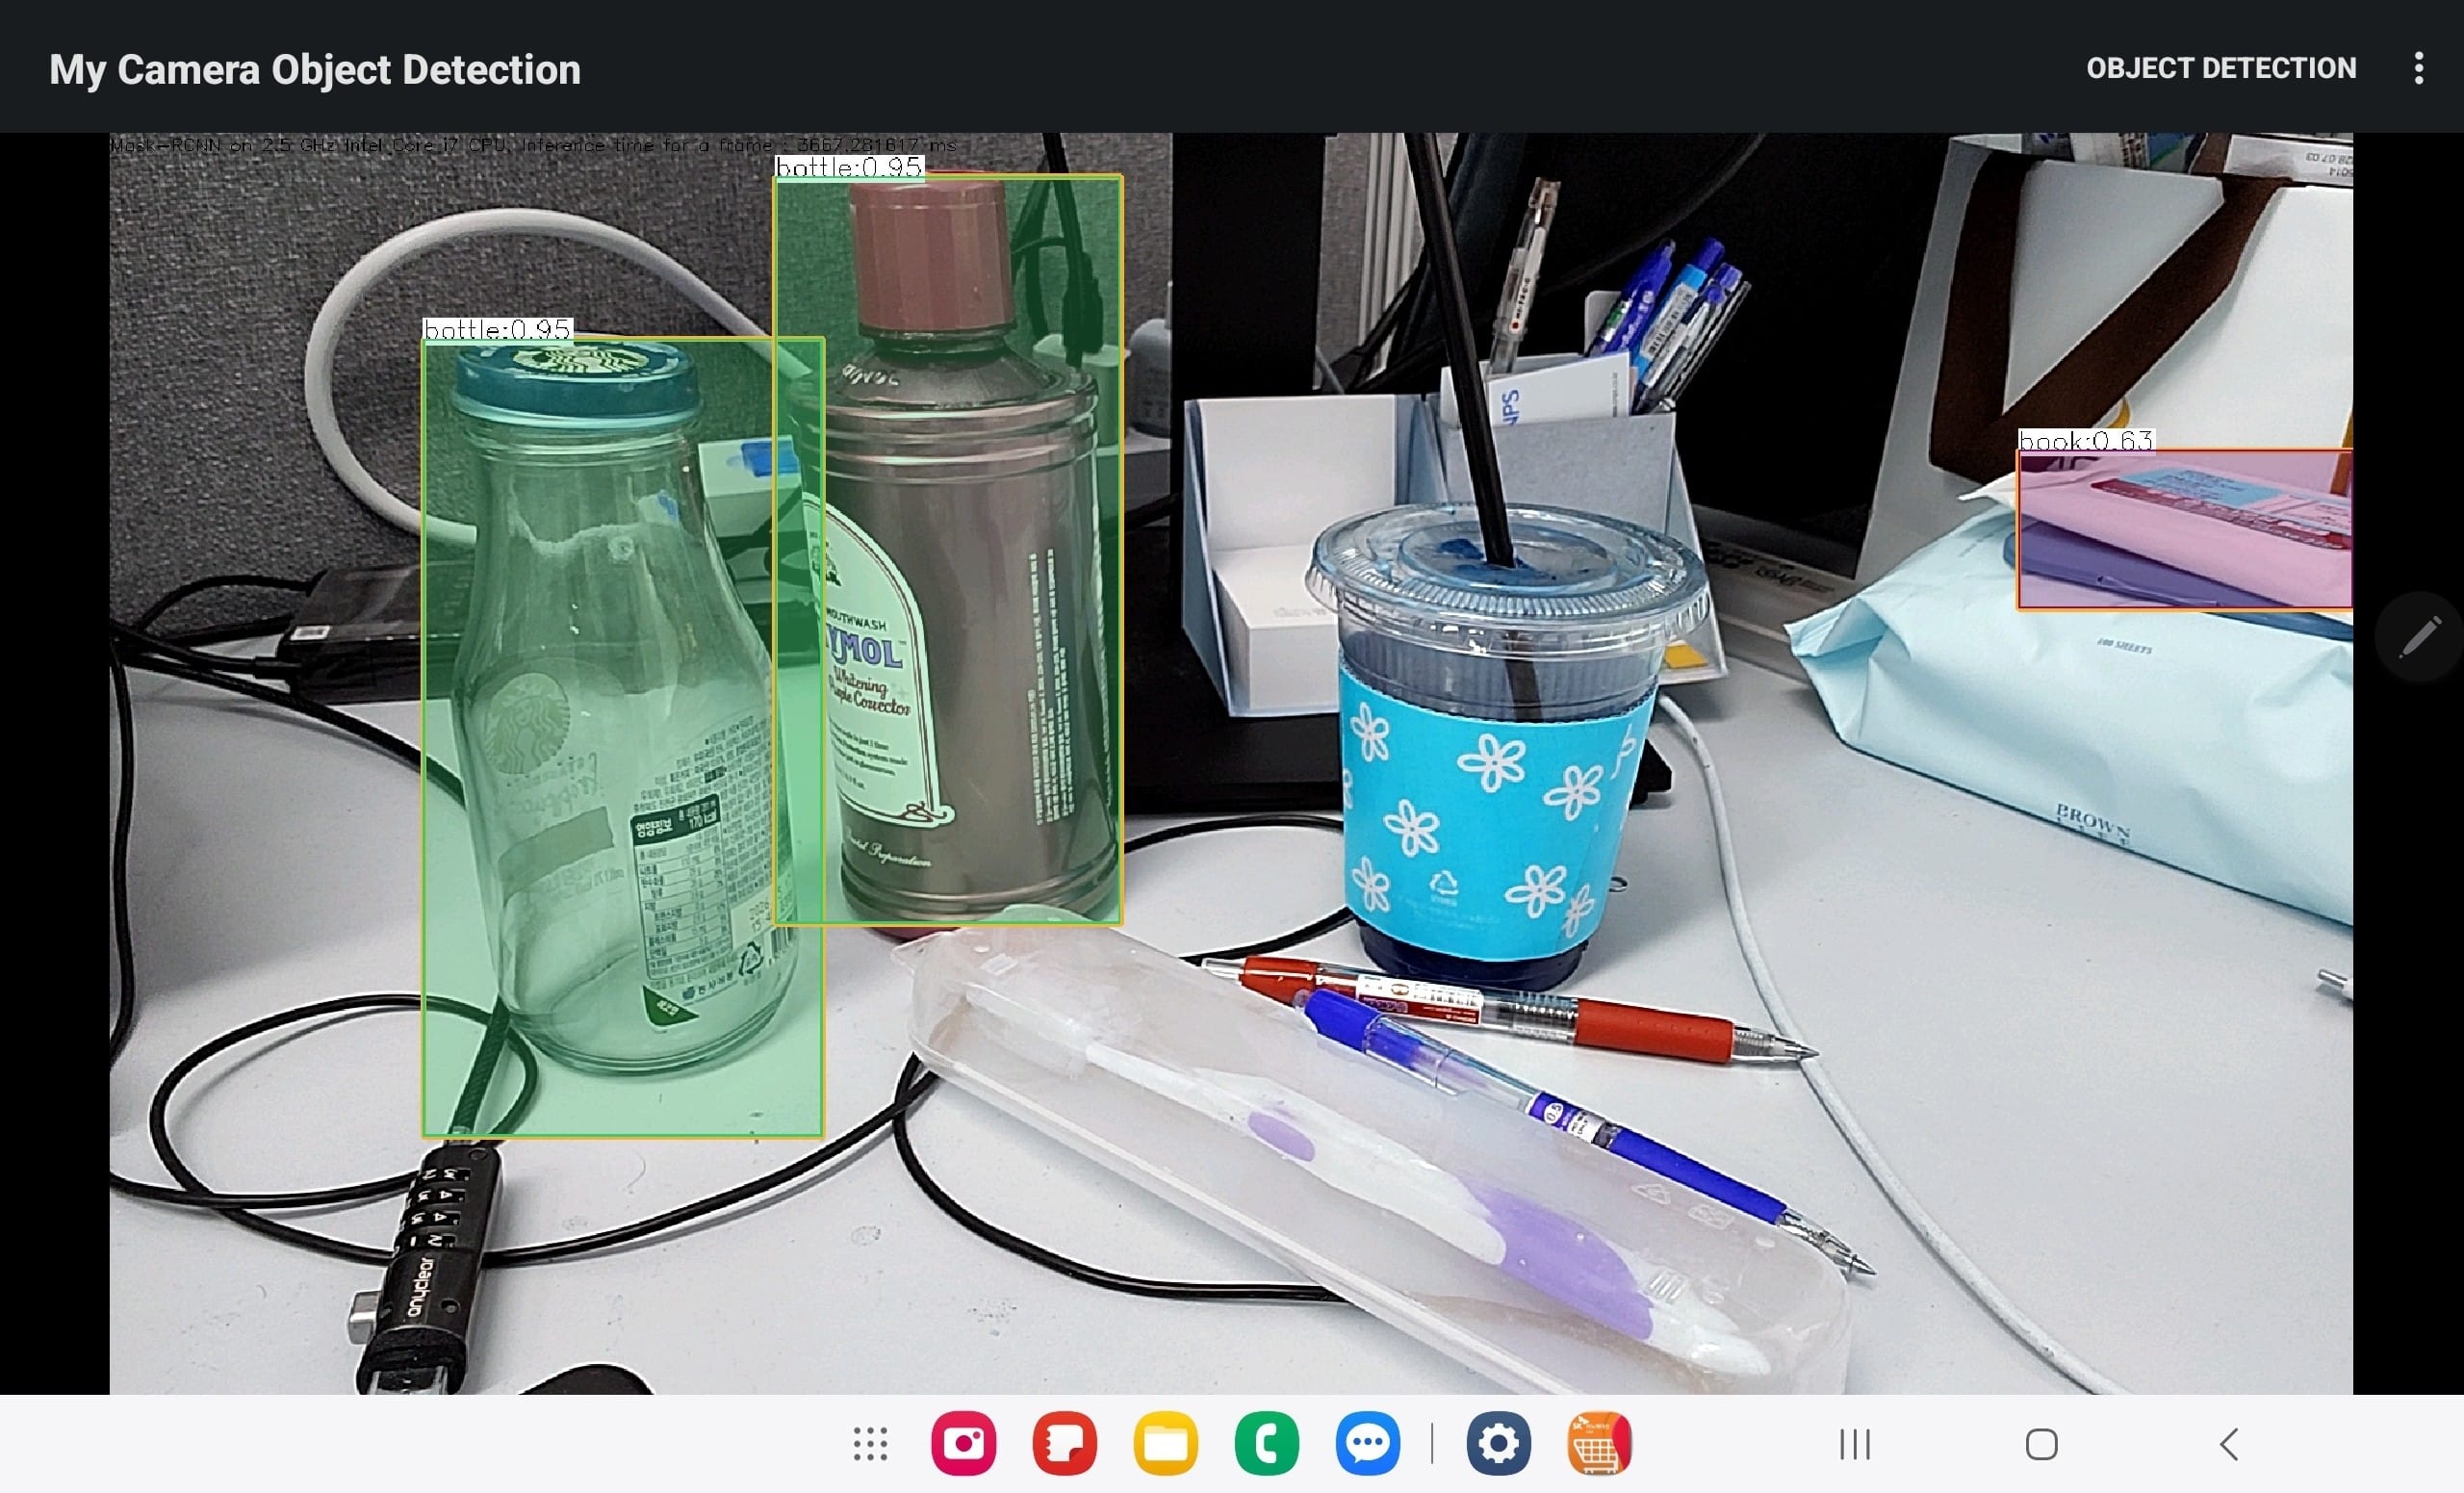 |
| MobileNet-SSD v3 | |
| Yolo v3 |  |
| Yolo v3 tiny | |
| Yolo v7 tiny |  |
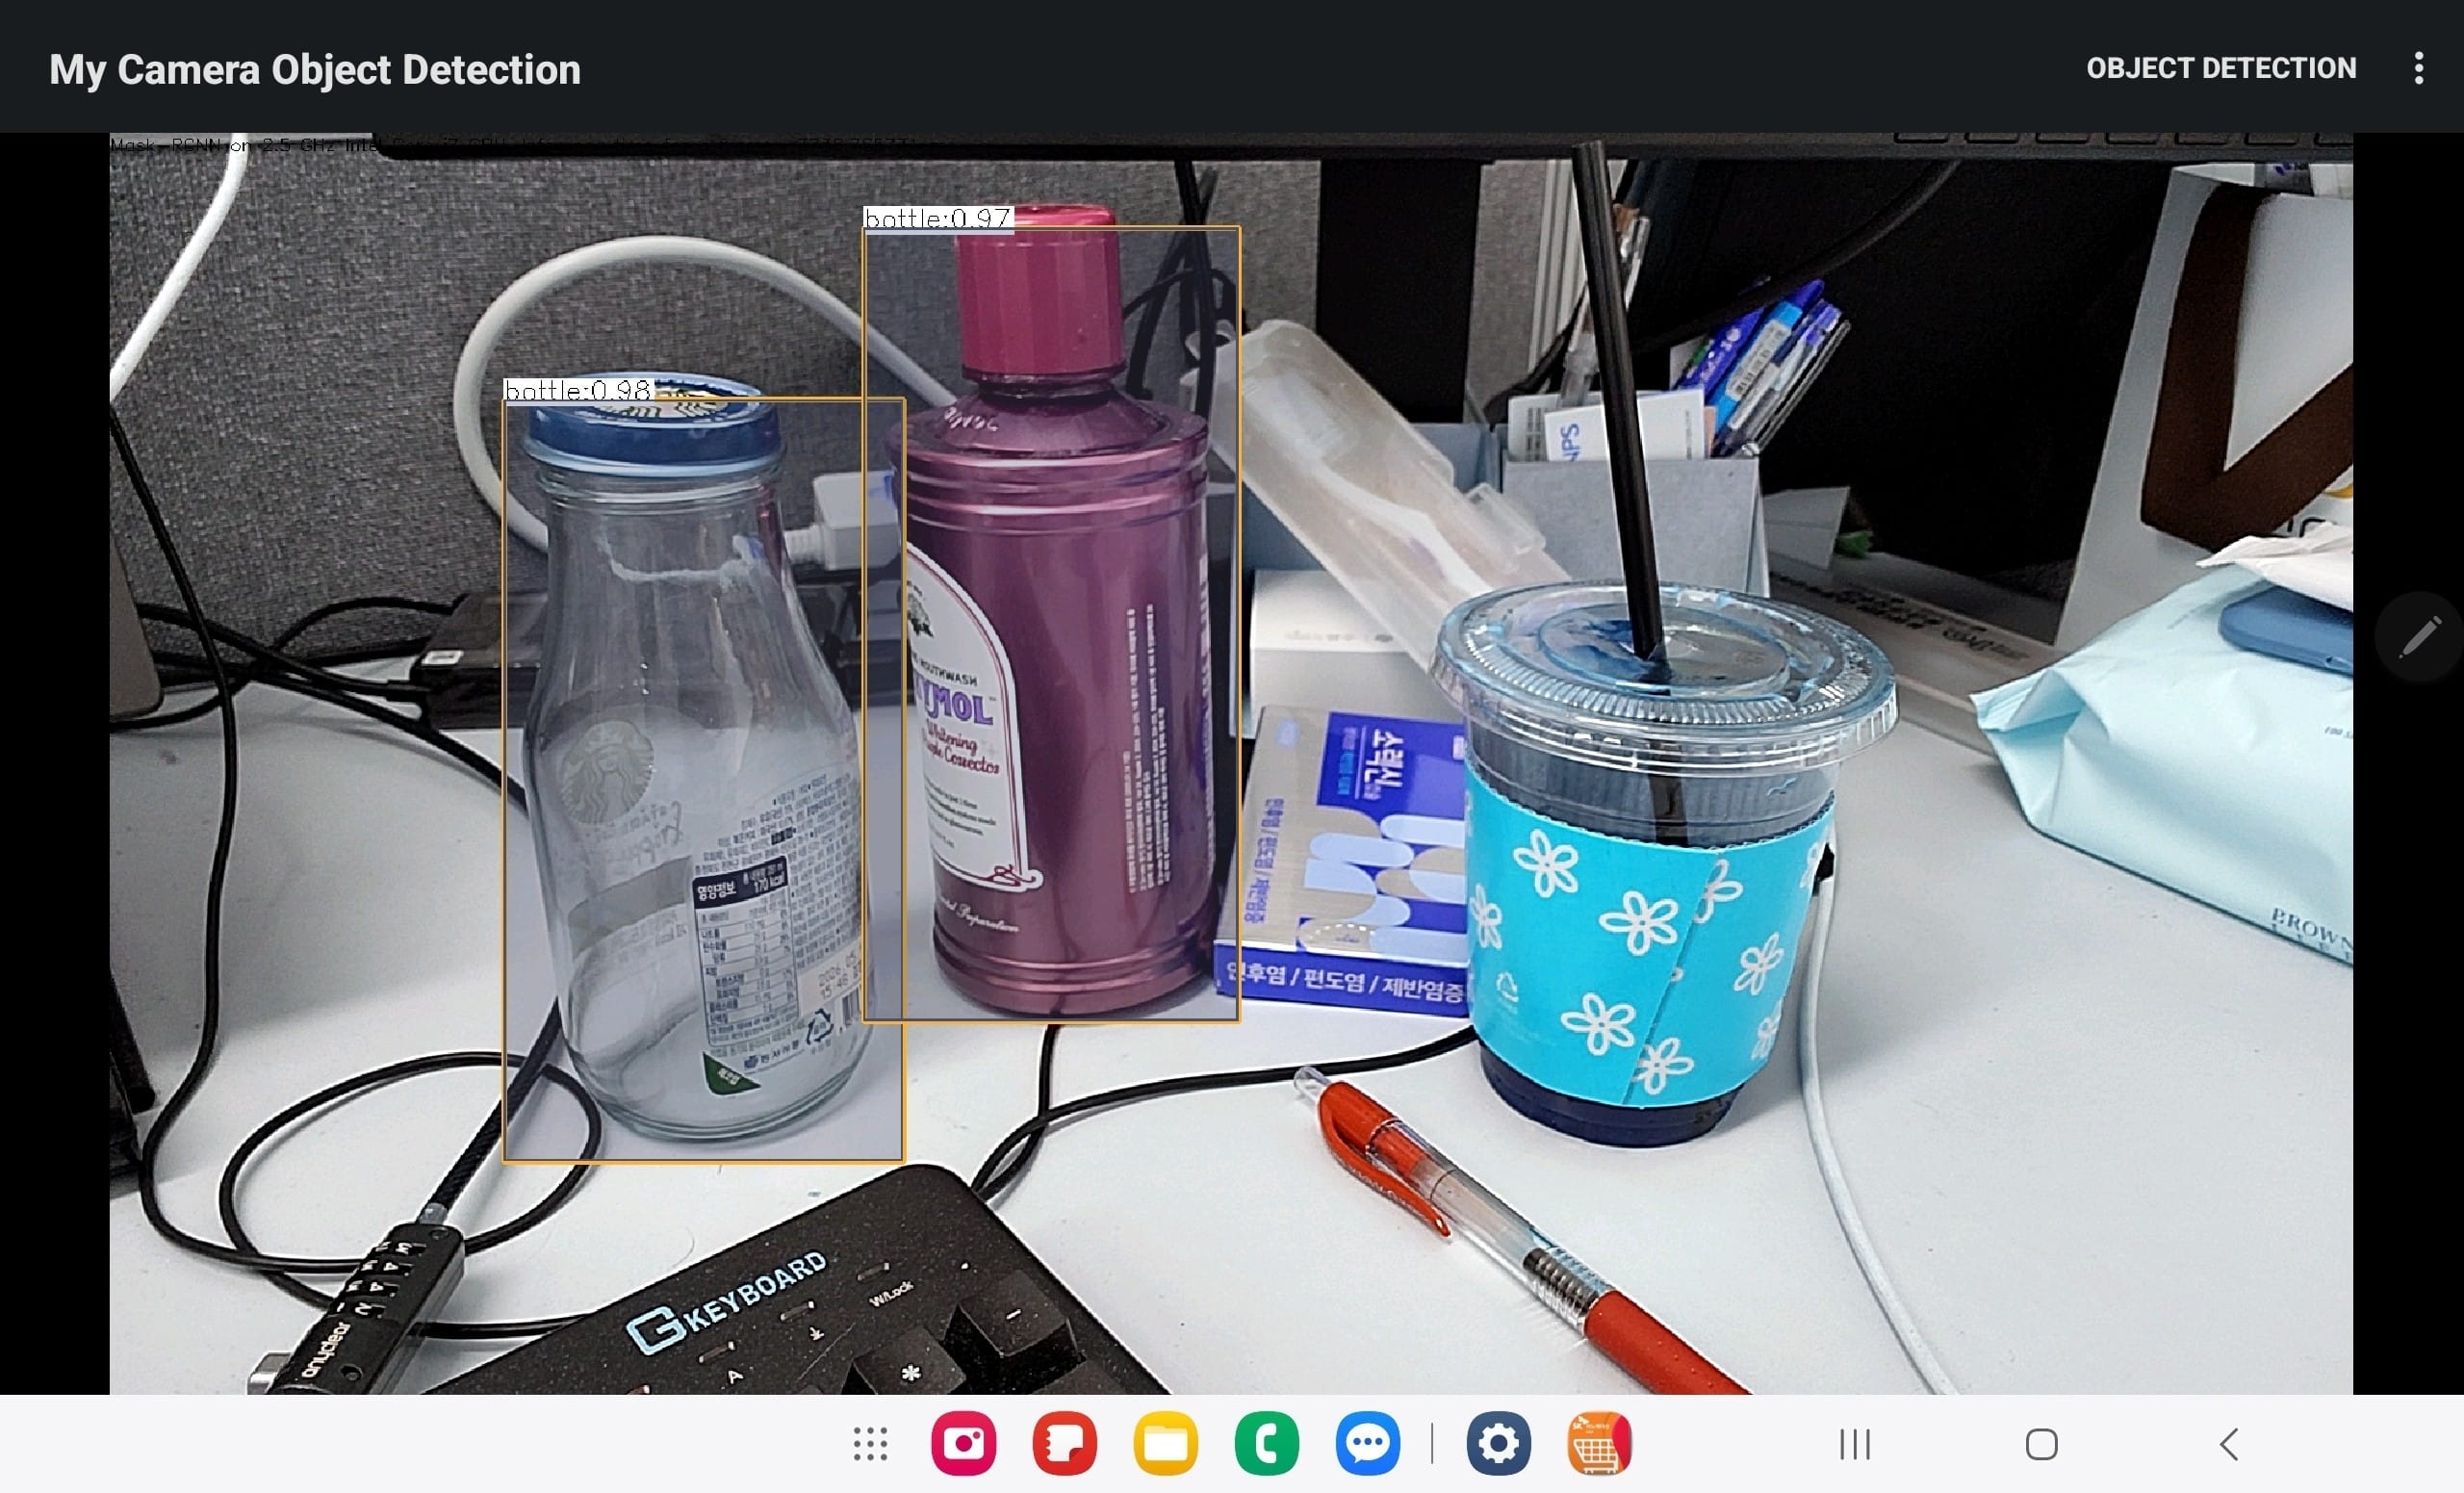
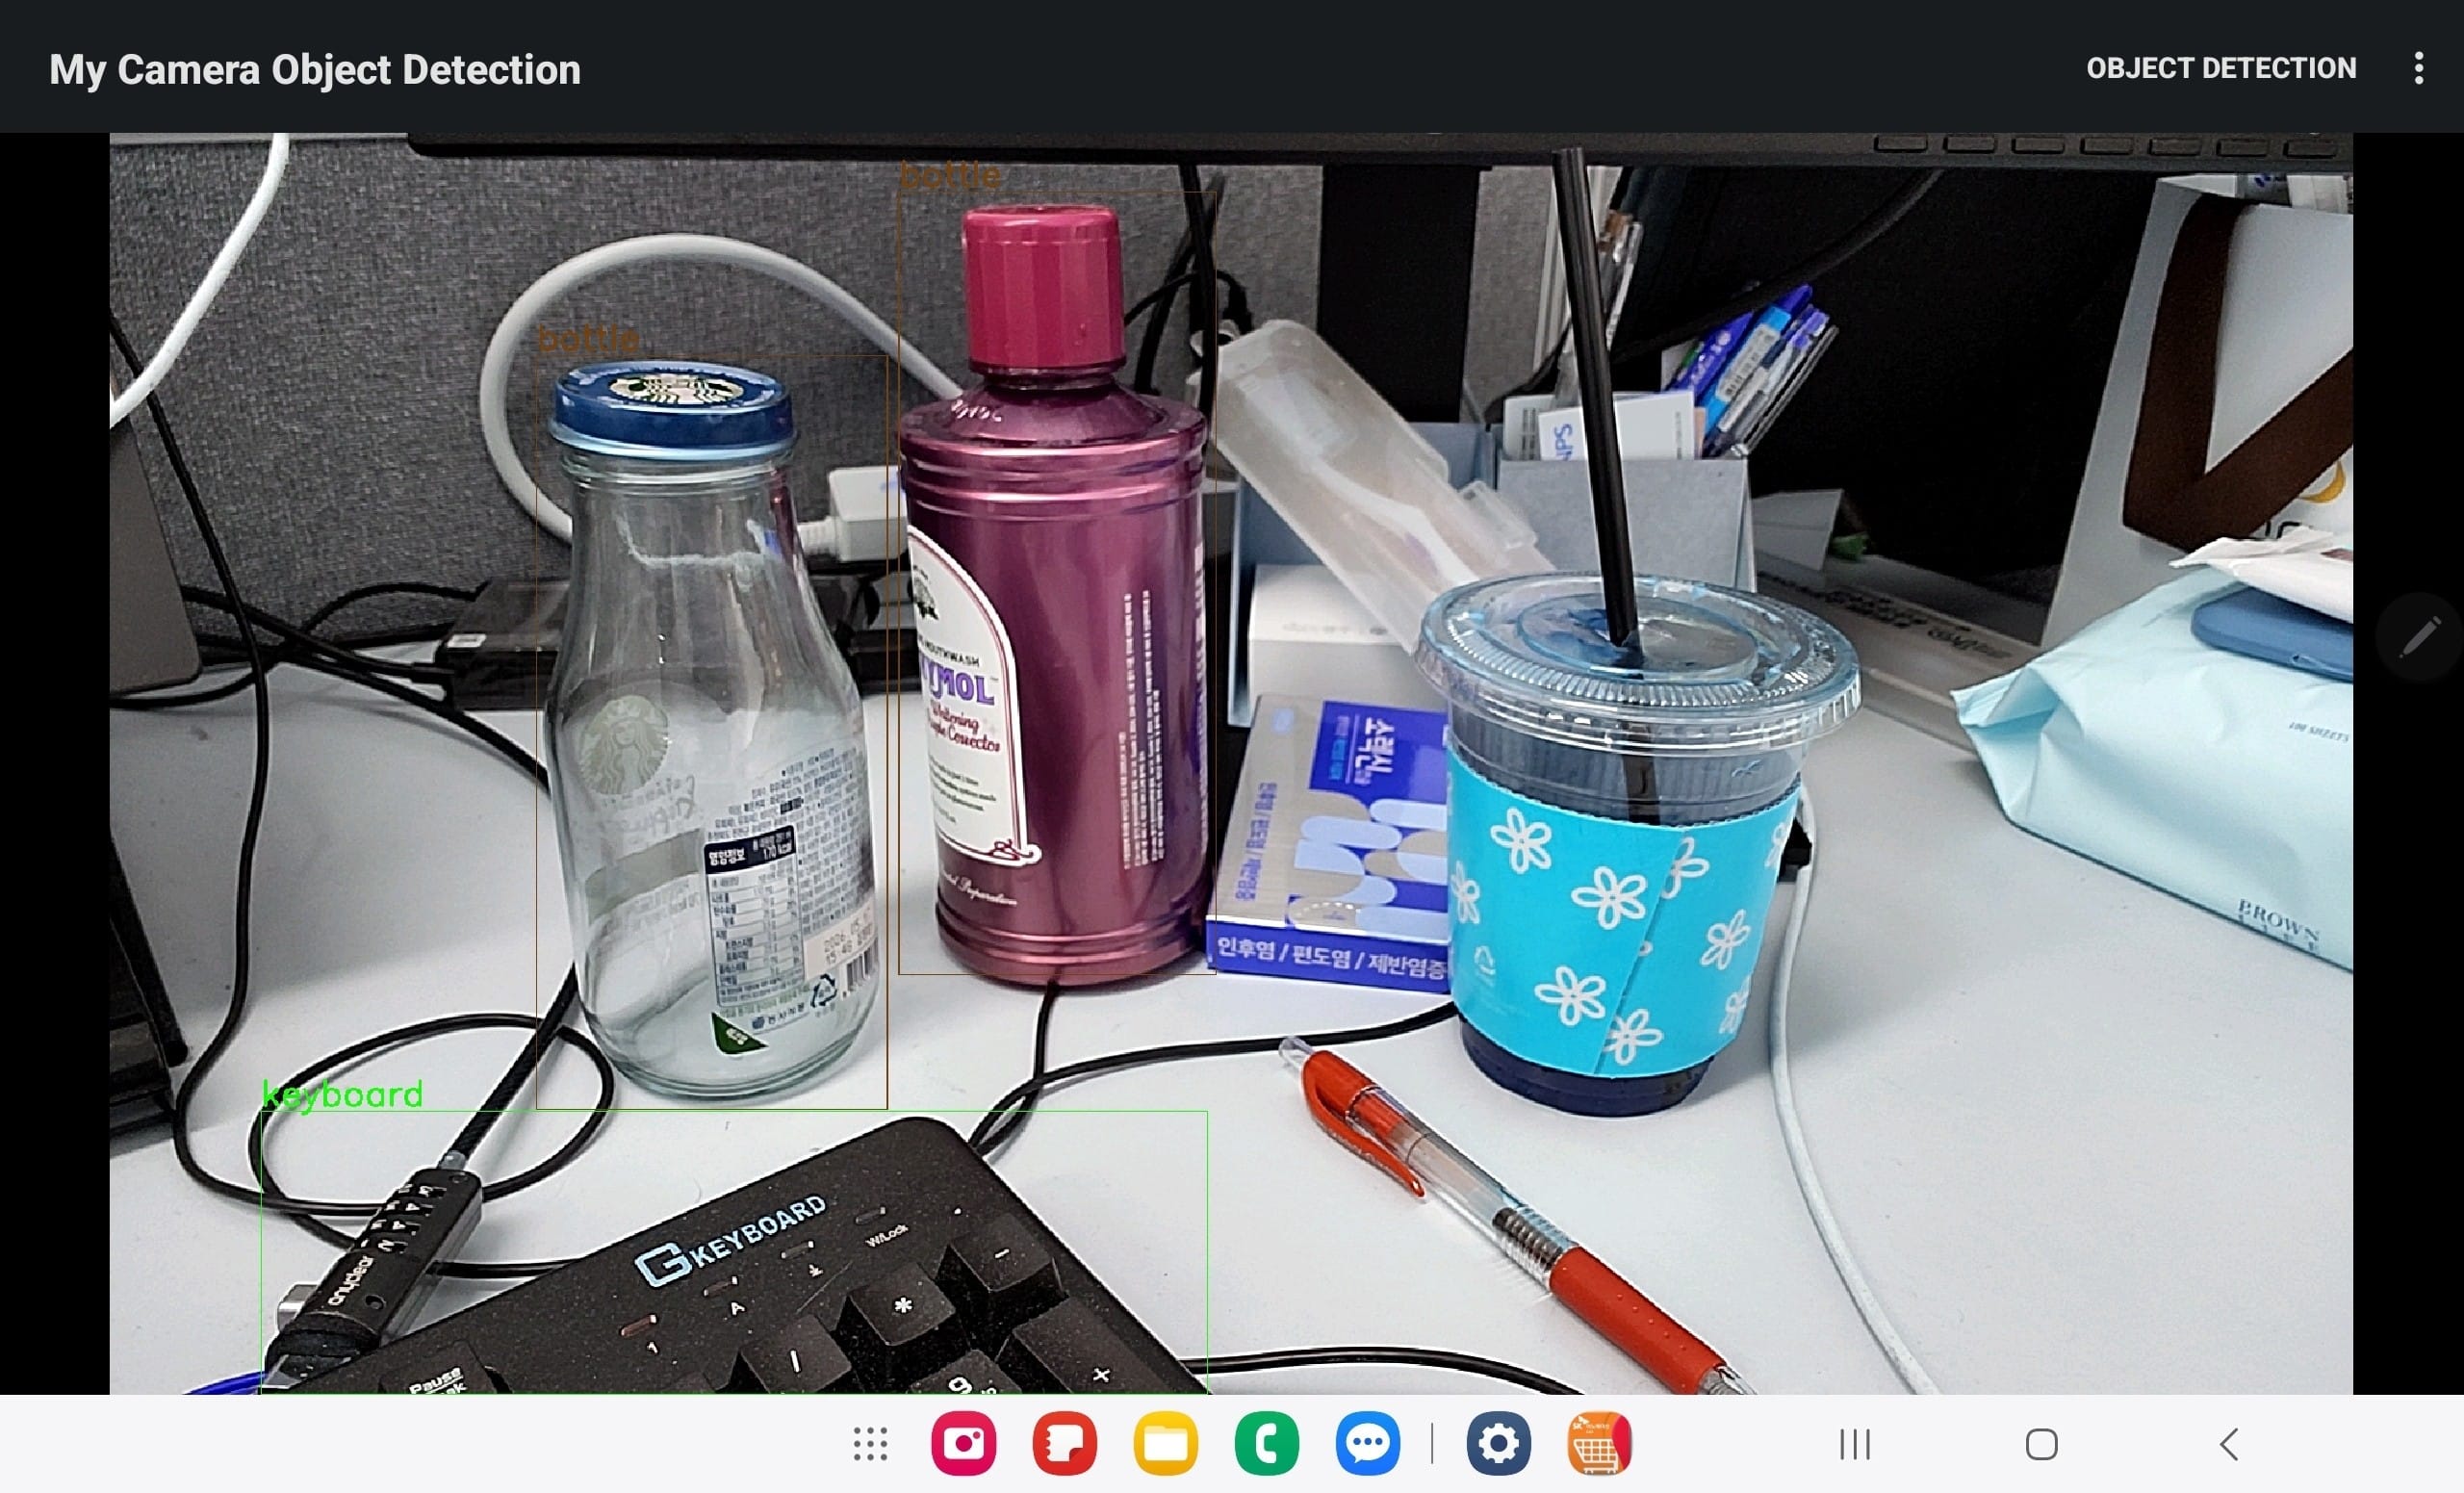

Mobile-optimized models run significantly faster than older alternatives, which are often too slow for practical use. Furthermore, model accuracy varies widely. While I question the value of unoptimized models that lack sufficient performance, our current object detector layout allows us to test new models in the near future with minimal effort.
10. Summary
In this series, we successfully developed a mobile application capable of real-time model switching and live object detection. You are now equipped to enhance this application by integrating custom-trained models or leveraging high-performance architectures to push the boundaries of your detection app.
11. References
- OpenCV Object Detection Java Swing Viewer
- OpenCV Java Object Detection
- OpenCV-Based Media Java Swing Viewer
12. Download Links
- JDK (Java Development Kit) : https://jdk.java.net/17/
- Android Studio : https://developer.android.com/studio?hl=en
- Gradle: https://gradle.org/releases
- OpenCV Android SDK : https://github.com/opencv/opencv/releases/tag/4.13.0
13. Download the source code
The source code for this post is available for download. Keep in mind that the Object Detector App requires specific models and resources to run properly. You can download these essential model files and assets in Section 14: Resources below.
You can download the app source code of this post here:
Hello World App
Hello OpenCV App
My Object Detector App
14. How to Download Models and Resources
Due to upload size limits, the required models and labels are not included directly in this section. Instead, you can find the appropriate download links back in Section 9.3: Object Detection Process. To run the Object Detector App successfully, simply download those necessary models and resources, then extract them directly into the assets folder within your source directory.
