1. Introduction
You can see various map services like google maps, bing map and more in your ordinary life. This post describes how we start to build a GIS map service server and a simple WMS(Web Map Service) client using java. I will make a GIS map service with Honolulu GIS data. I also implement a simple map client for that in java open source based technologies such as GeoServer and geotools. The target system is running on Windows OS but you can also use other operating system like LINUX or UNIX and so on with a little effort.
2. GIS
GIS, which stands for Geospatial Information System, is a system that provides data about the real world we live in. This real-world information allows us to view and analyze regional data directly on a map, enabling better decision-making. This type of data possesses absolute positioning (coordinates) and elevation, making it inherently valid as independent system information.
- Customers/Buildings: Locations of retail stores or apartment complexes
- Topography: Elevation and relief of mountains and valleys (Altitude)
- Hydrography: Locations of rivers, oceans, and lakes
- Roads: Line data for highways, national roads, and alleys
Ultimately, GIS map service renders complex geographic data into visual maps, transforming it into actionable information that users can easily verify and analyze with their own eyes.
3. Prerequisites
Our upcoming GIS map service will be implemented using Java. Consequently, several essential prerequisites are required. In this section, we will explore the necessary tools and environment setups needed to successfully build our map service.
3.1. JDK
The map service client will be built using Java Swing. To support this, OpenJDK 17 or higher is required; however, for the purpose of this post, we will be using OpenJDK 21.

After downloading the compressed file, we need to designate a directory to create our project, where we will extract the files into the following folder to ensure consistency in installation and environment configuration
C:\DEV\Works\MapService3.2. Maven
Downloading every single library used in this post one by one would be an overwhelming task for any developer. Therefore, we will define the required libraries in a Maven file, allowing them to be downloaded automatically to set up our development environment efficiently.
To ensure consistency in our development environment, we will extract the downloaded file into the following directory.
C:\DEV\Works\MapService3.3. Geotools
This is a famous open-source software that every GIS developer knows. It provides a vast array of libraries designed to make reading, writing, and rendering spatial data effortless. In the case of GeoTools, we will use the Maven repository to download it automatically. Using this library, we will build a simple GIS map service client.
3.4. GeoServer
This is an open-source map server. To provide map services, we need a system capable of delivering geographic data. Specifically, these map servers read raw GIS data to serve it directly to clients or render it into map images. Accordingly, since we will be using the standalone version of GeoServer, please download it from the following site.
To ensure consistency in our development environment, we will extract the downloaded file into the following directory.
C:\DEV\Works\MapService4. Selecting GIS Data for the Honolulu Region
To build a map service, GIS data is essential. However, since geographic data can contain sensitive information—such as military logistics or critical infrastructure—some countries heavily restrict its export or usage. Fortunately, there are several platforms that provide this data as open data. Specifically, we will be using the Honolulu dataset for our project.

For instance, if only a single road were to be drawn on the map, it would be difficult to determine whether that line represents a road, a river, or some other feature. Therefore, for someone familiar with Honolulu to actually recognize the region, multiple layers are necessary. To this end, we have selected several key datasets as follows.
| Data set | Description | |
| Building Footprint Centerpoints | Identifies locations of buildings on Oahu. | 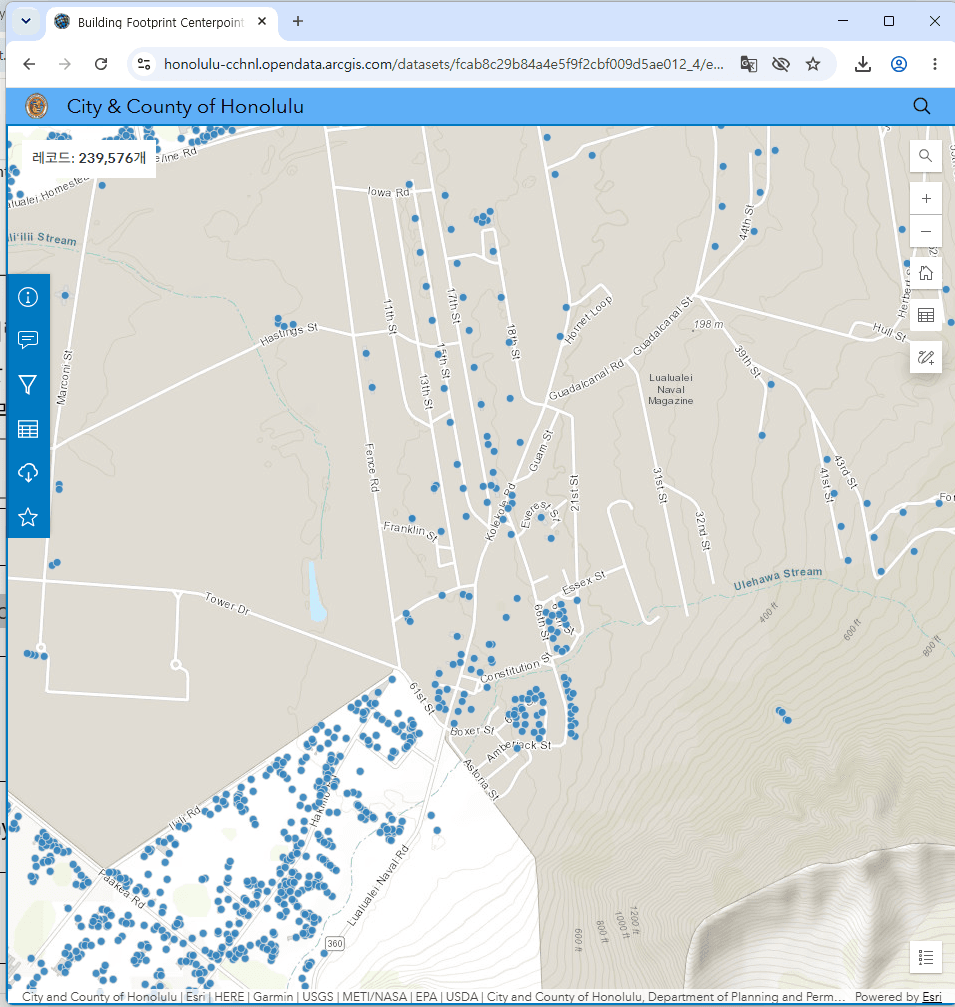 |
| Zoning | Zoning designation boundaries from the City and County of Honolulu Zoning Code. | 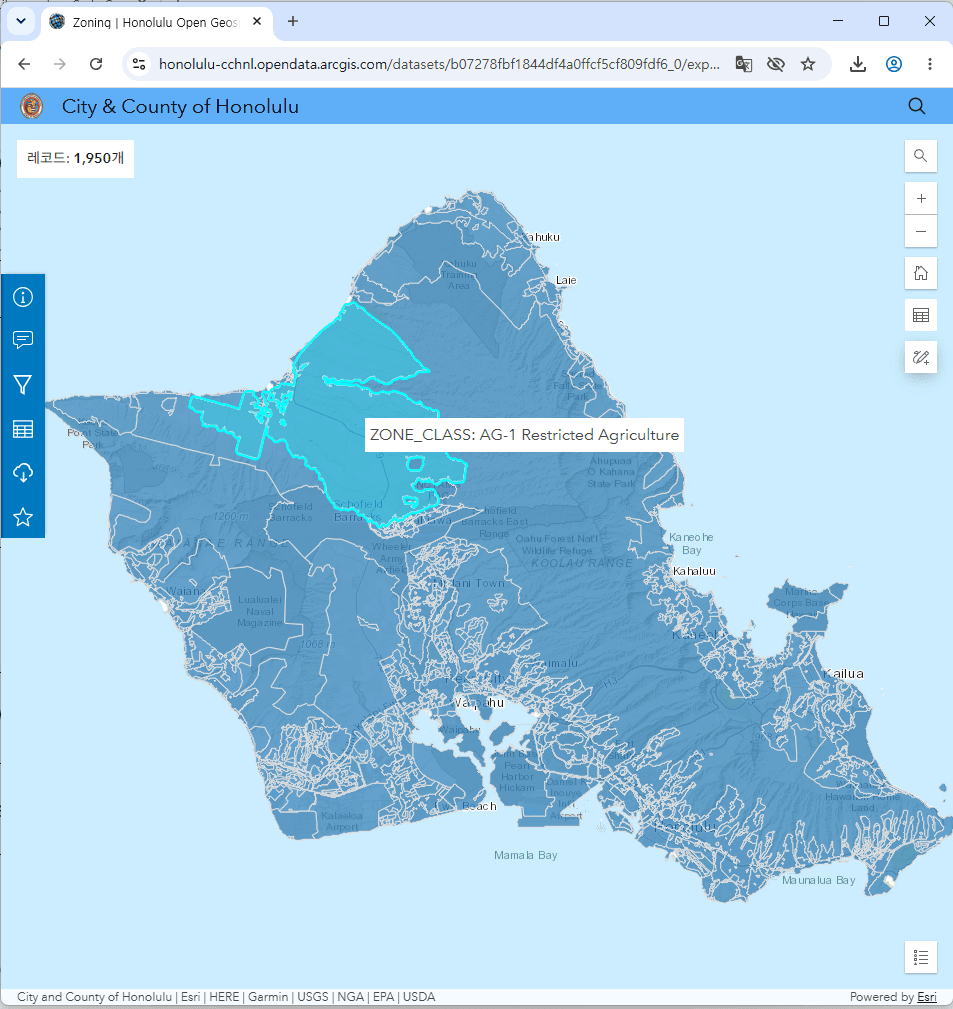 |
| Right of Way | The street Right of Ways that extend between parcels. | 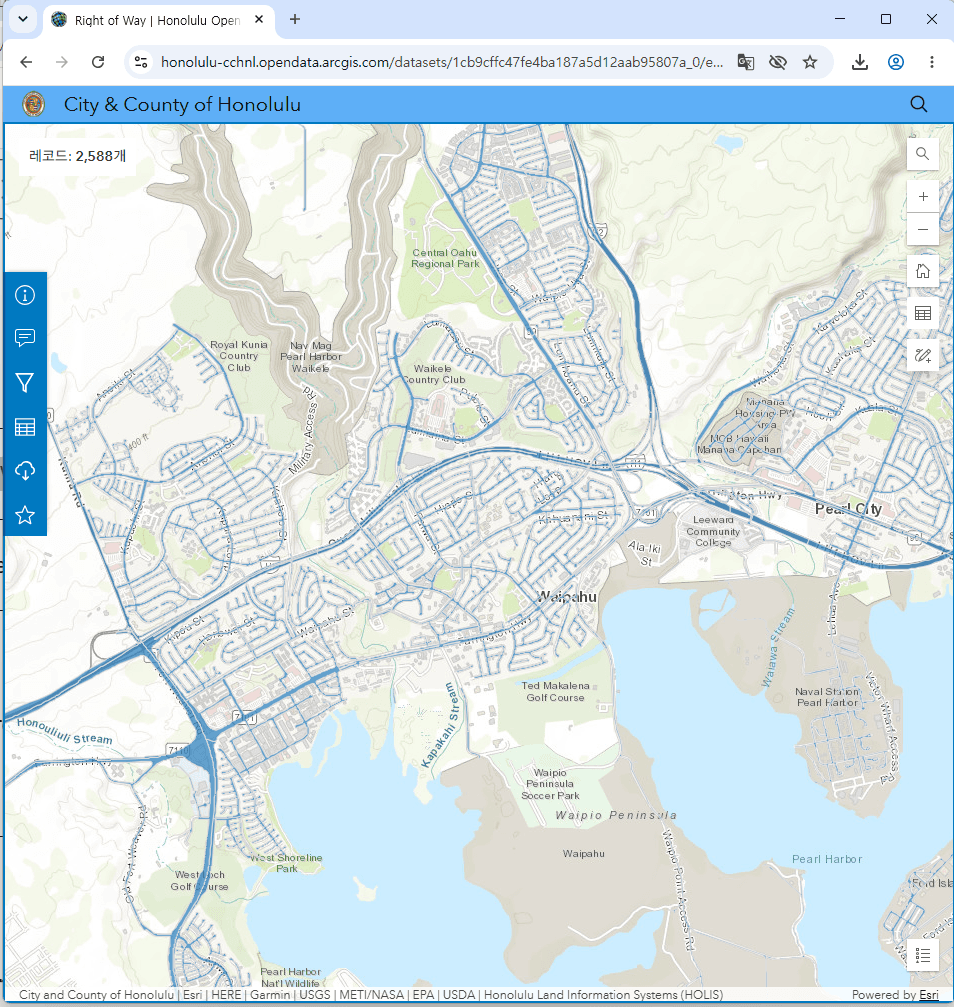 |
| Coastline | To reference the coastline for cartographic display. | 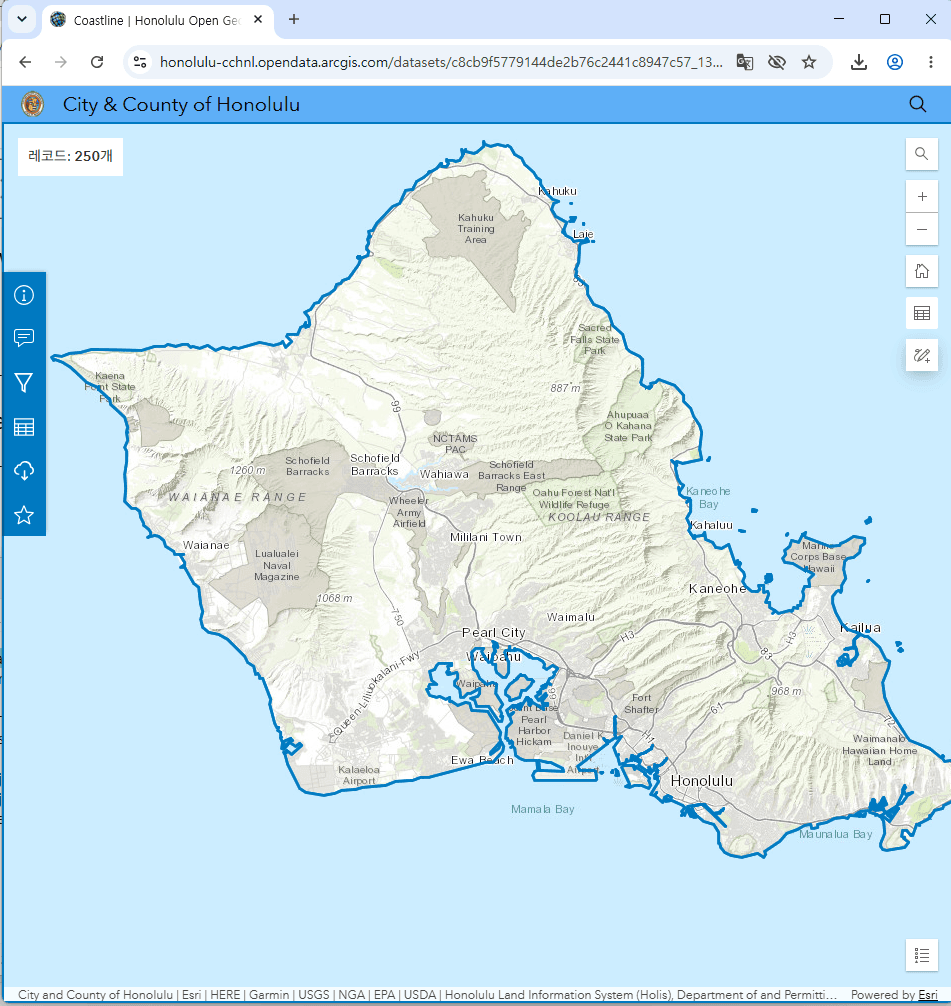 |
| Oahu Street Centerlines | To support common geographic and network analysis, routing and base mapping for City staff, Emergency Management, Homeland Security and Public Safety organizations | 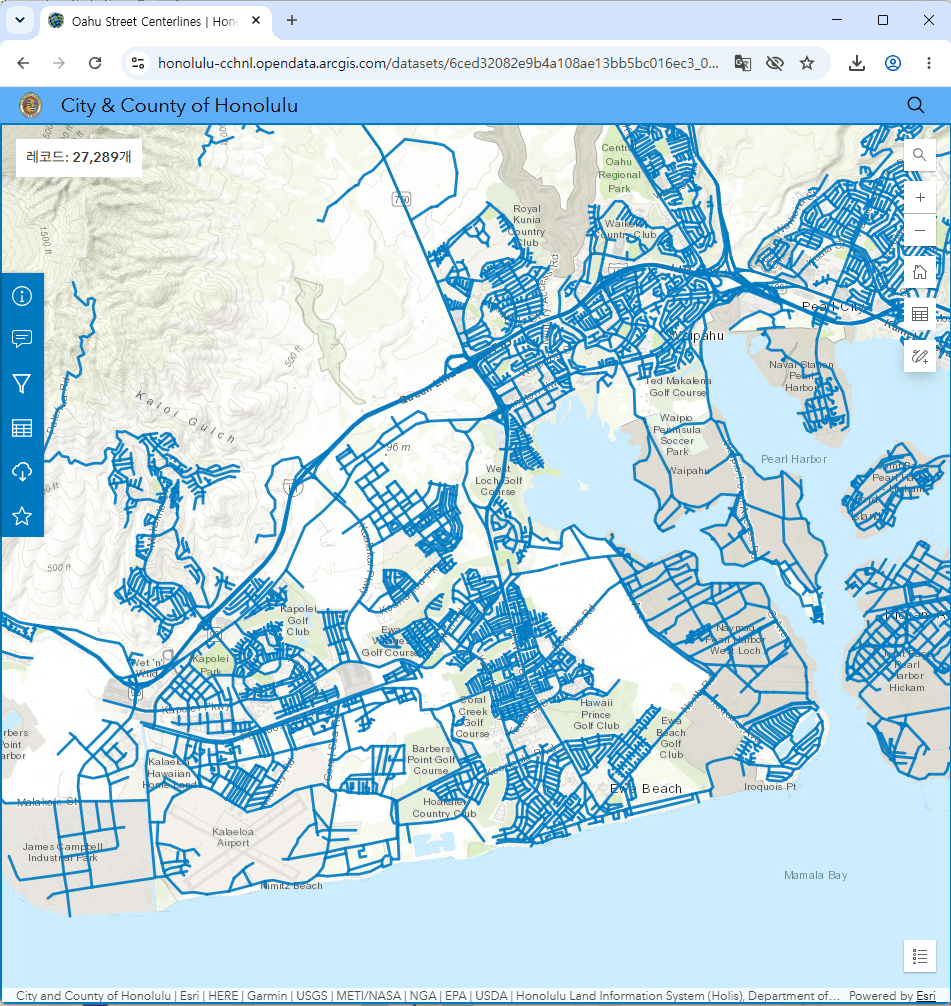 |
| Building Footprint | Building Footprint Centerpoints | 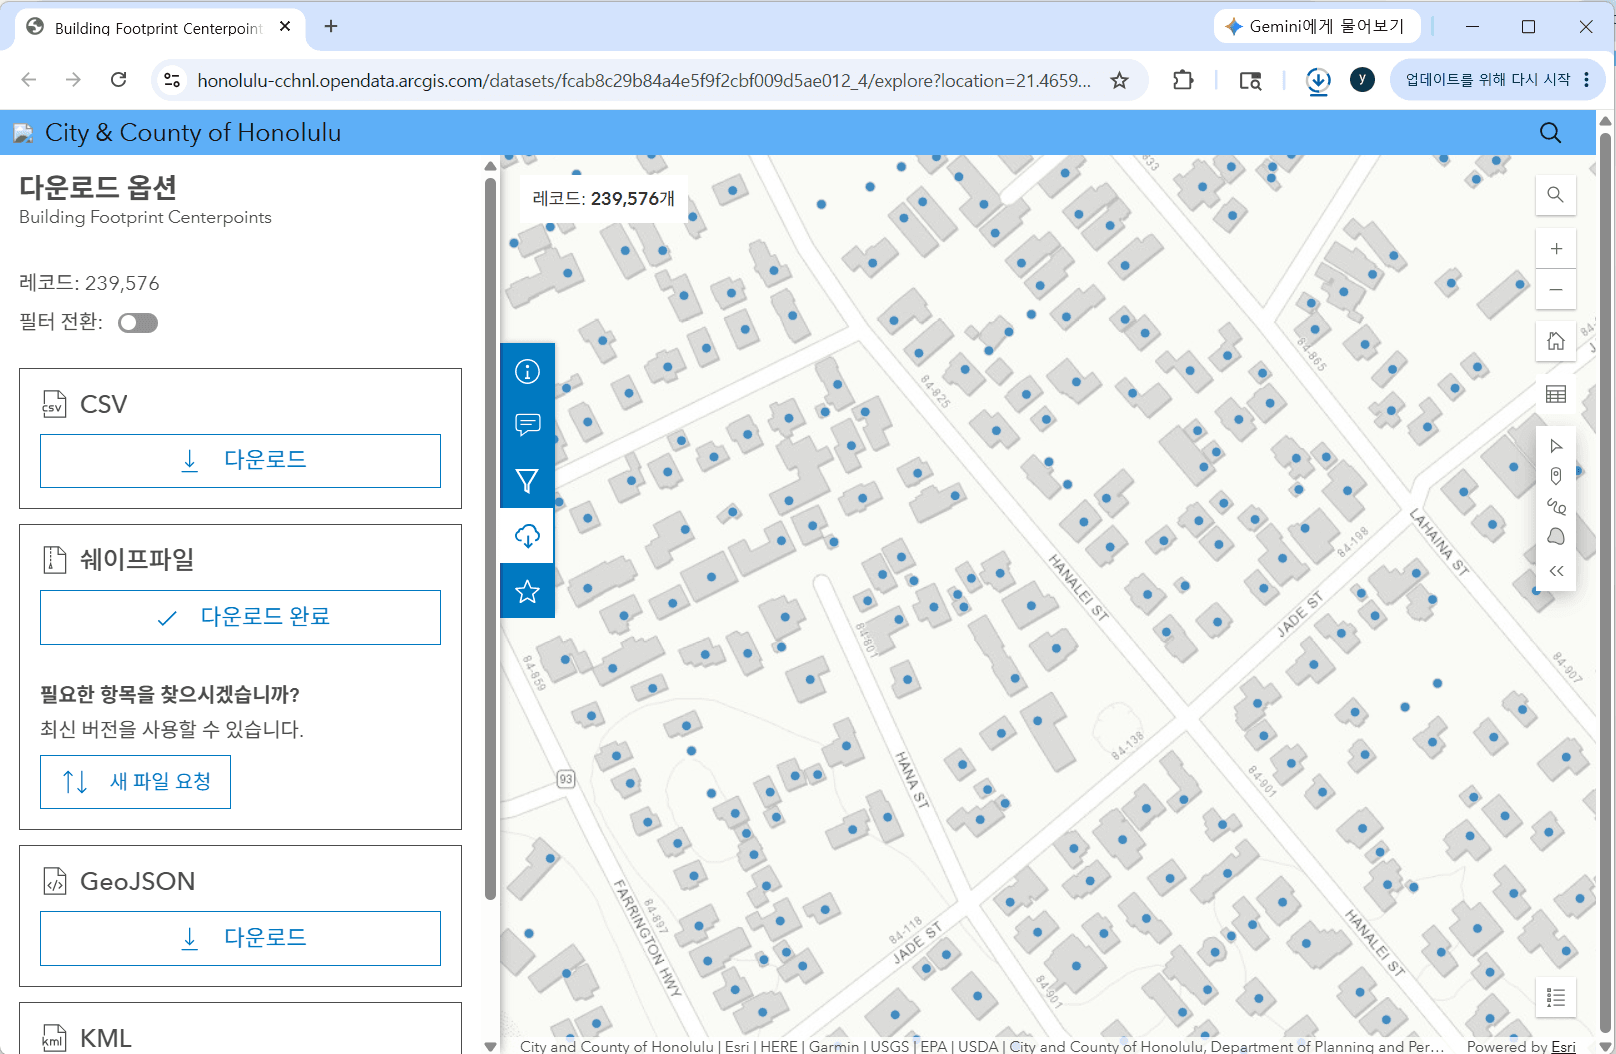 |
| Zoning Map Boundary | Zoning Map Boundary | 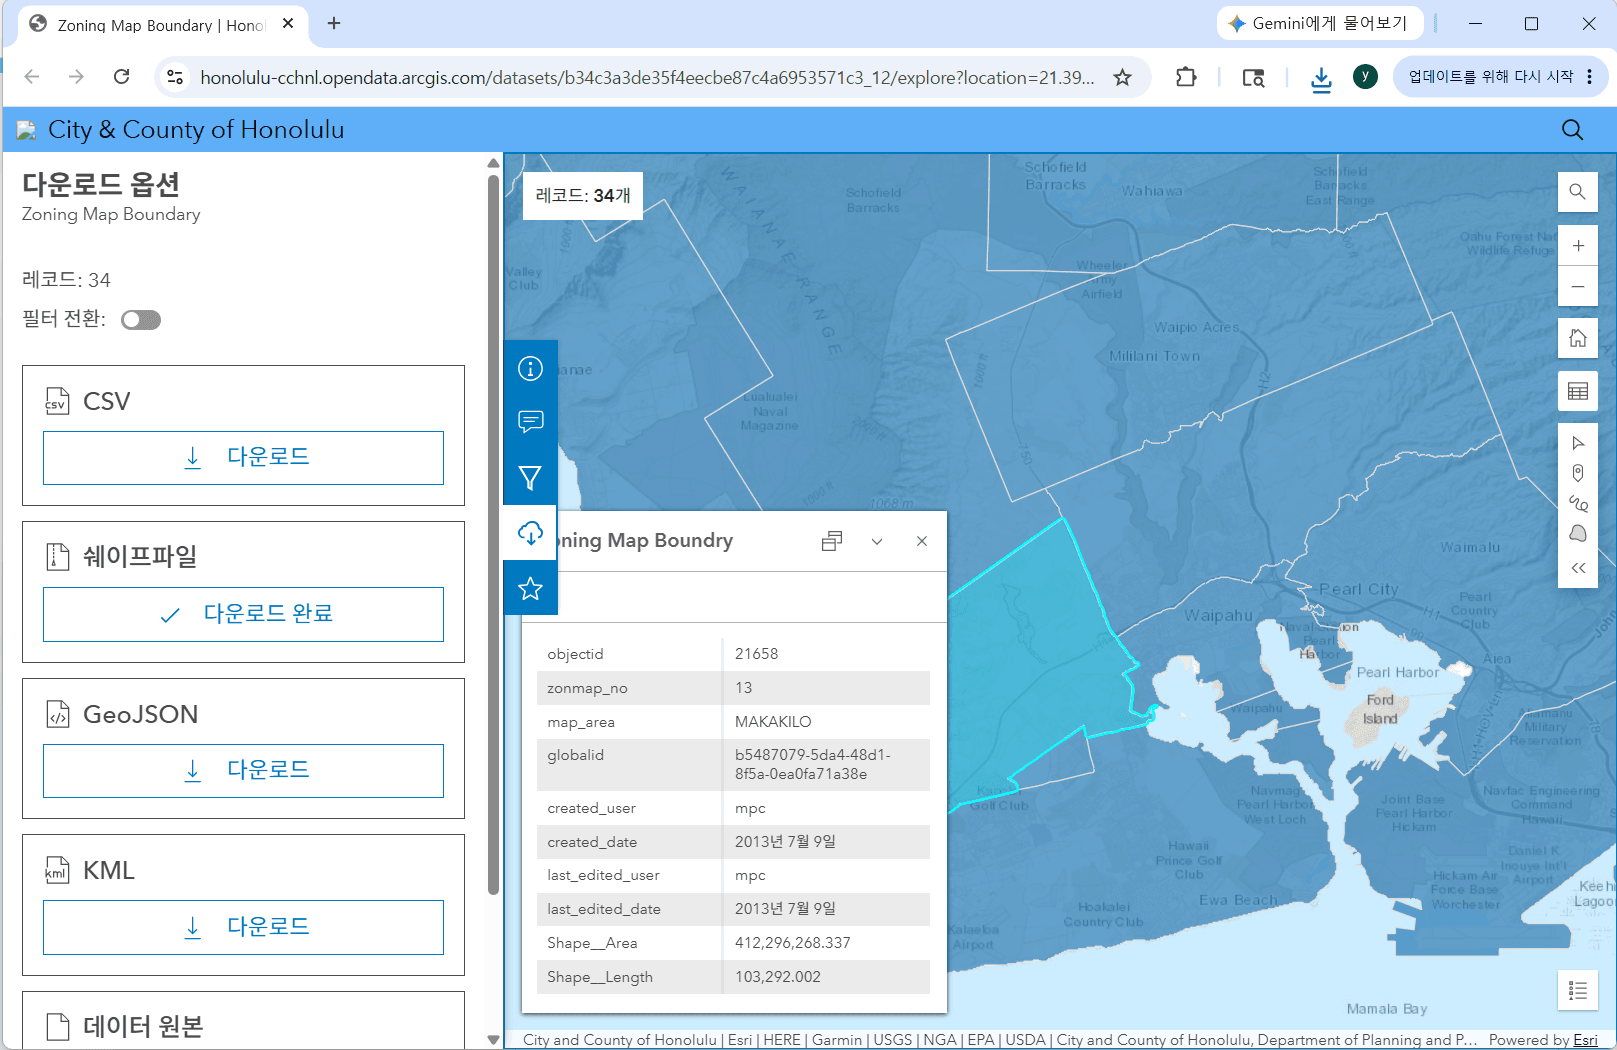 |
| All Parcels | All_Parcels of Honolulu | 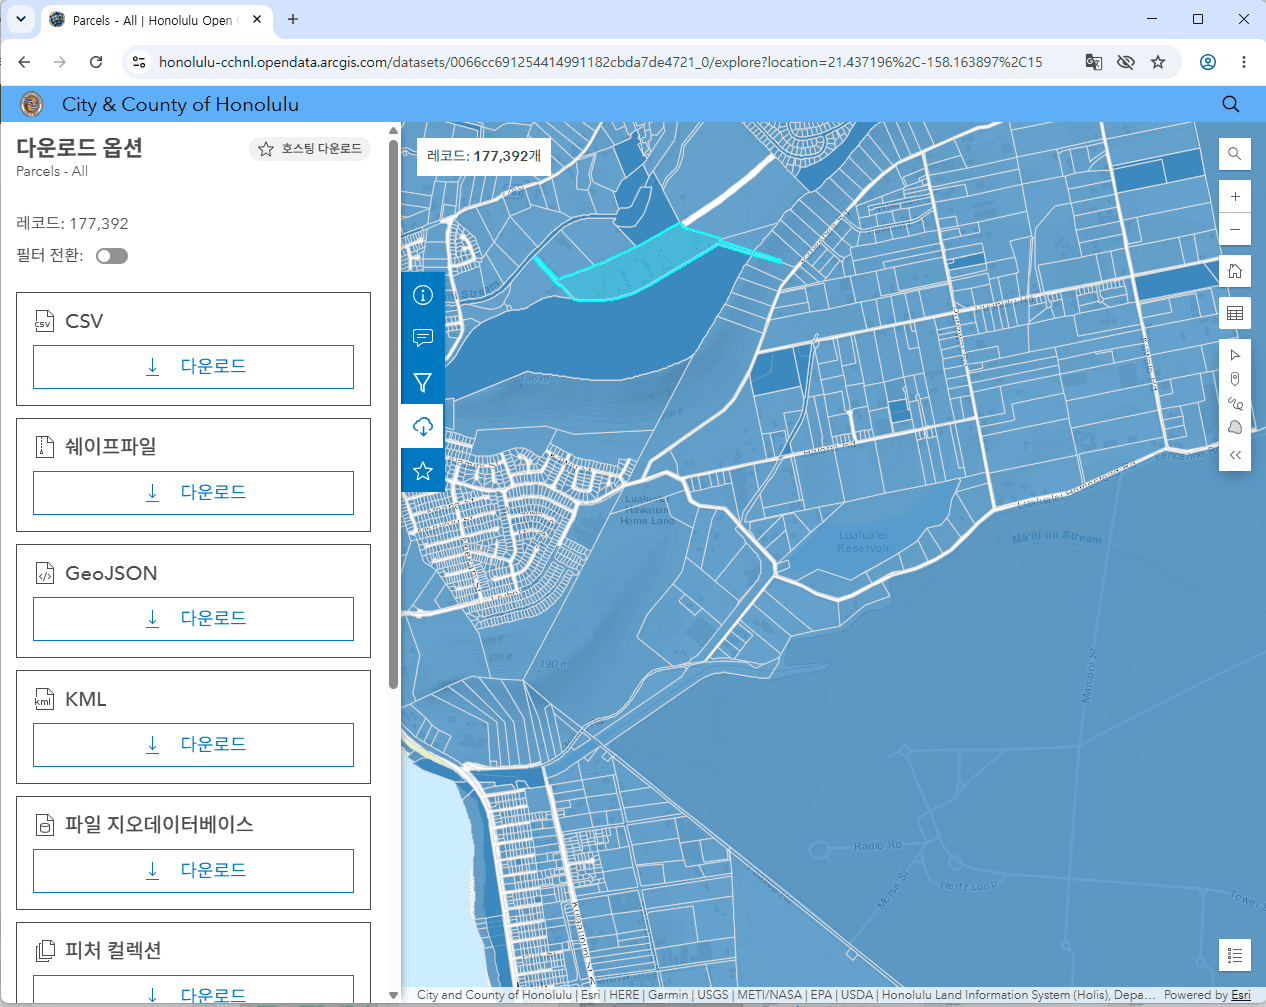 |
5. Download GIS Data
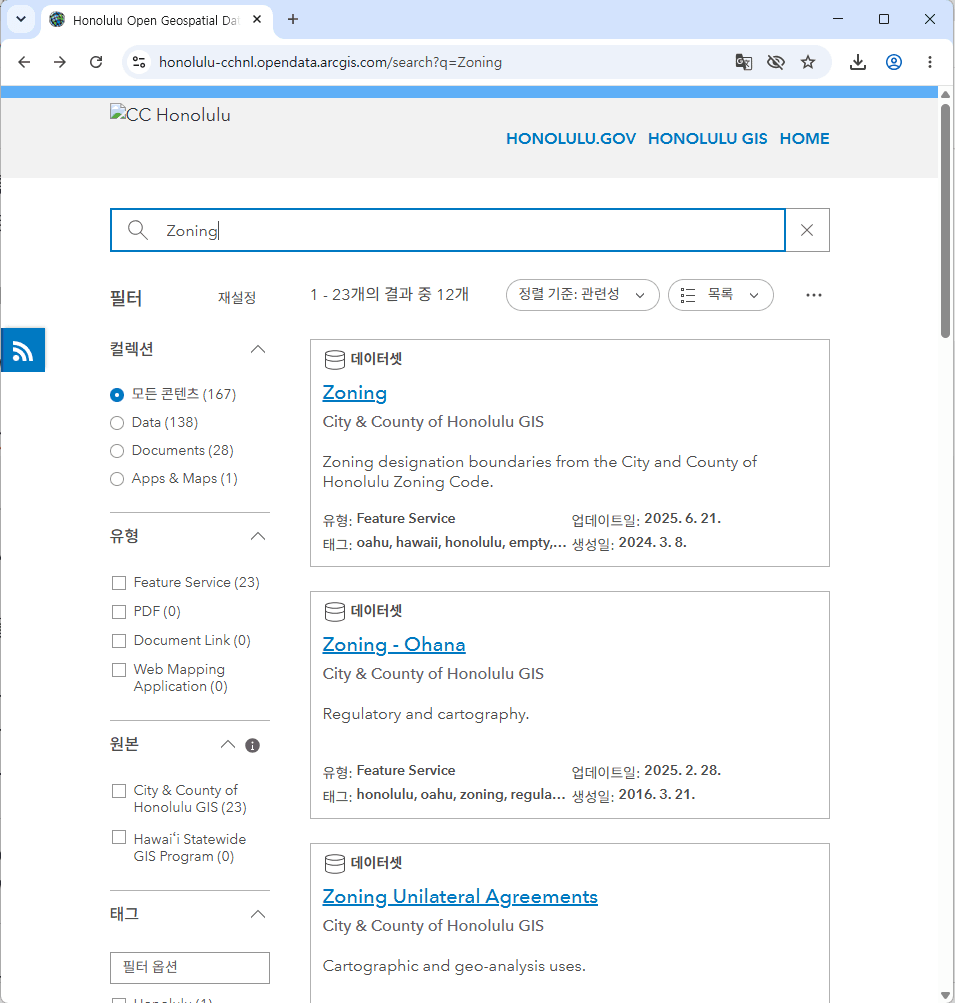
There are various standard formats used to store geographic data. For development convenience, we plan to build a file-based service. Therefore, we will download and utilize SHP (Shapefile) format data—a standardized file format capable of storing GIS data—in a compressed archive format. As previously outlined in the data selection section, we have already chosen the Honolulu GIS datasets for our map service. You can follow the sequential steps below to download the data, and this exact process applies to all datasets identified in the previous section.
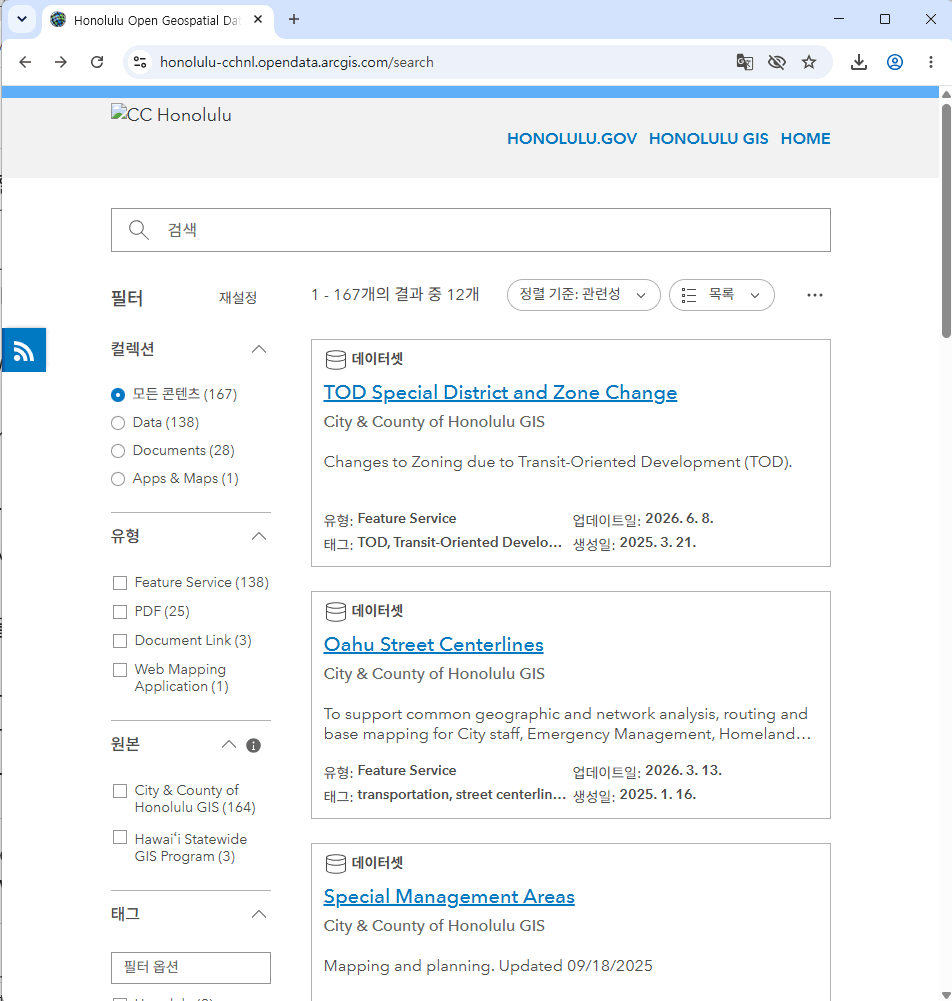
- Visit https://honolulu-cchnl.opendata.arcgis.com/search

- Use the keyword search; for example, type ‘Zoning’ to download Honolulu’s zoning data.

- Click the Download button for the SHP file

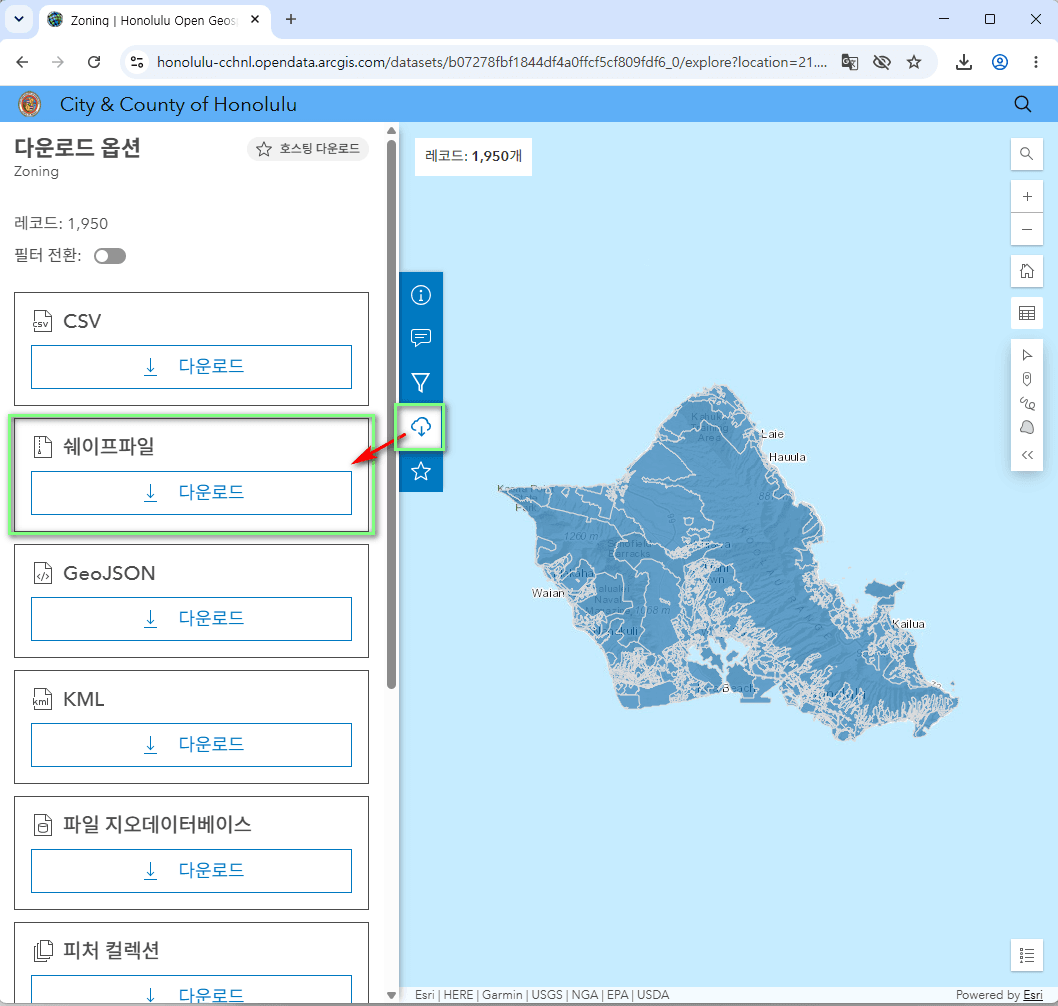
To maintain development environment consistency, we have extracted the downloaded archive files and stored the datasets inside the following folders.
C:\DEV\Works\MapService\data
6. GeoServer Configuration
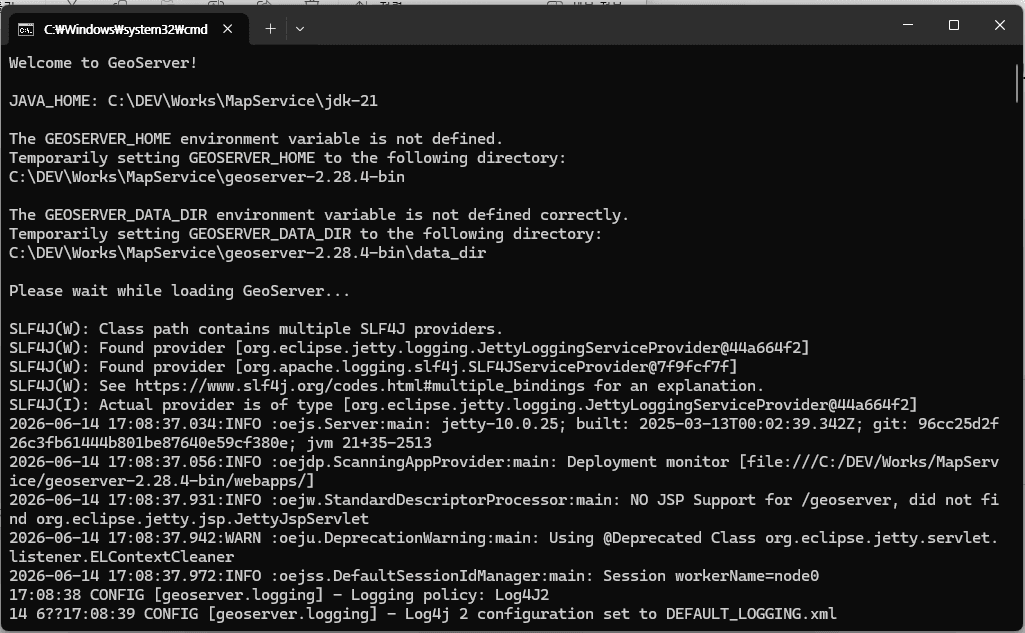
For GeoServer, we assume that the downloaded geoserver-2.28.4-bin.zip file has been extracted into the following directory, resulting in the folder geoserver-2.28.4-bin.
C:\DEV\Works\MapService\geoserver-2.28.4-binOnce inside that directory, navigate to the bin folder and open the startup.bat file. As long as the JAVA_HOME variable is properly configured inside this file, GeoServer will launch without any issues. The procedure for specifying the JAVA_HOME variable is as follows:
- Open your favorite text editor
- Open the
startup.batfile located in thegeoserver-2.28.4-bin\bin\directory. - Add the JAVA_HOME variable.
@echo off
SET JAVA_HOME=C:\DEV\Works\MapService\jdk-21
Next, let’s run the startup.bat file. If you see a screen like the one below, GeoServer has been launched successfully.
6.1. Logging into GeoServer
As verified in the startup section, our GeoServer instance is now running. Let’s make sure the GeoServer Web Interface is working properly. You can access GeoServer using the following URL:
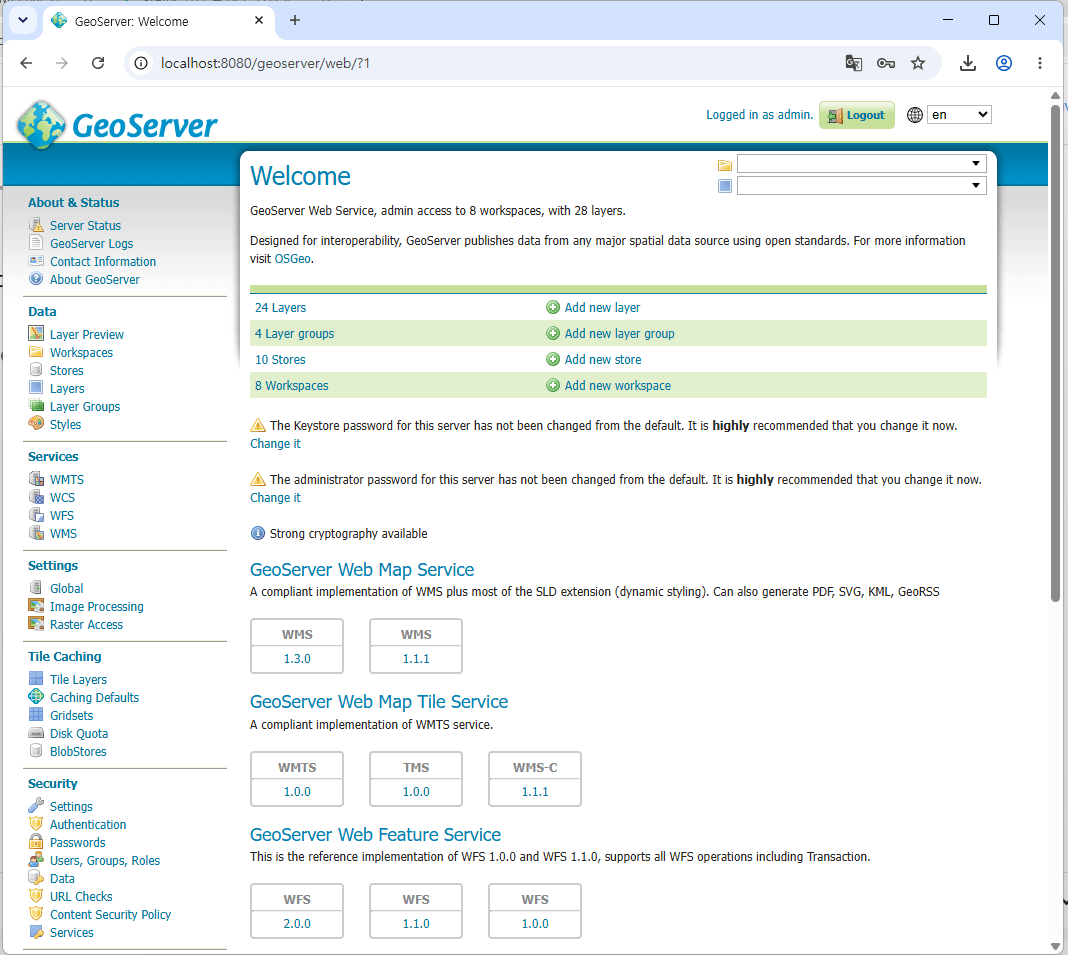
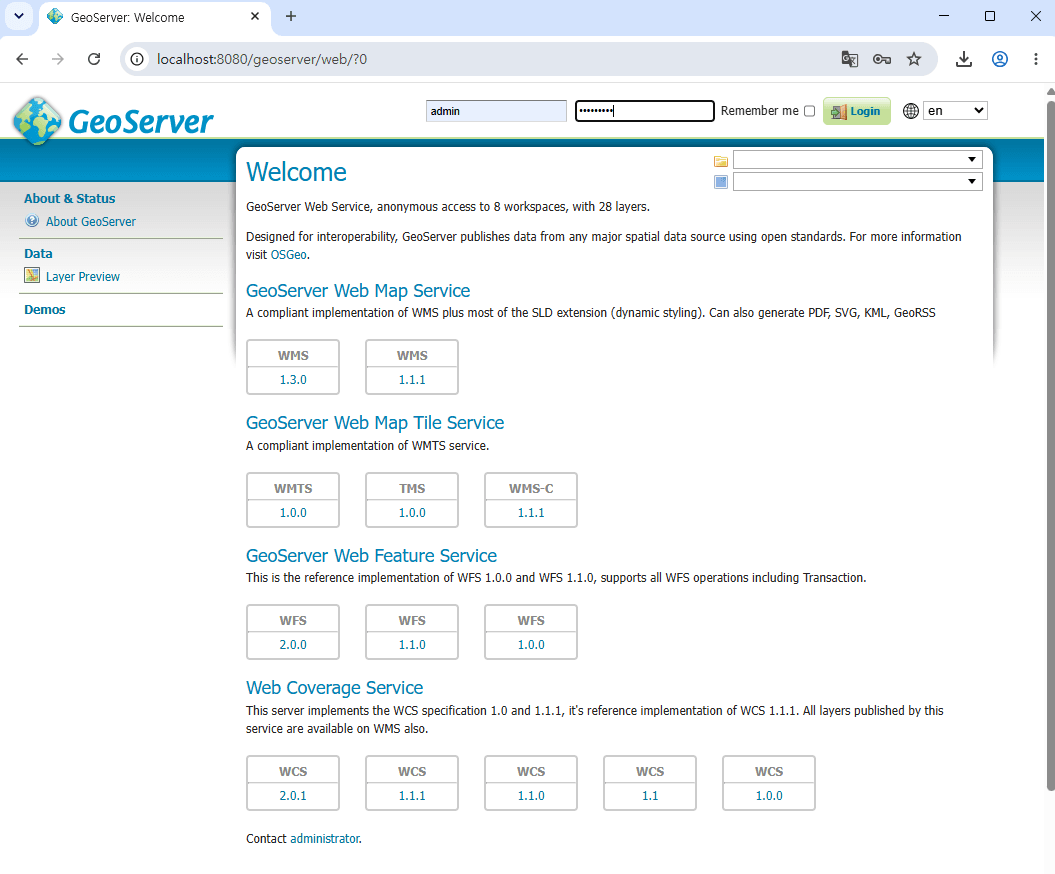
http://localhost:8080/geoserverWhen you access the URL, the GeoServer Web Interface screen will appear as shown below.
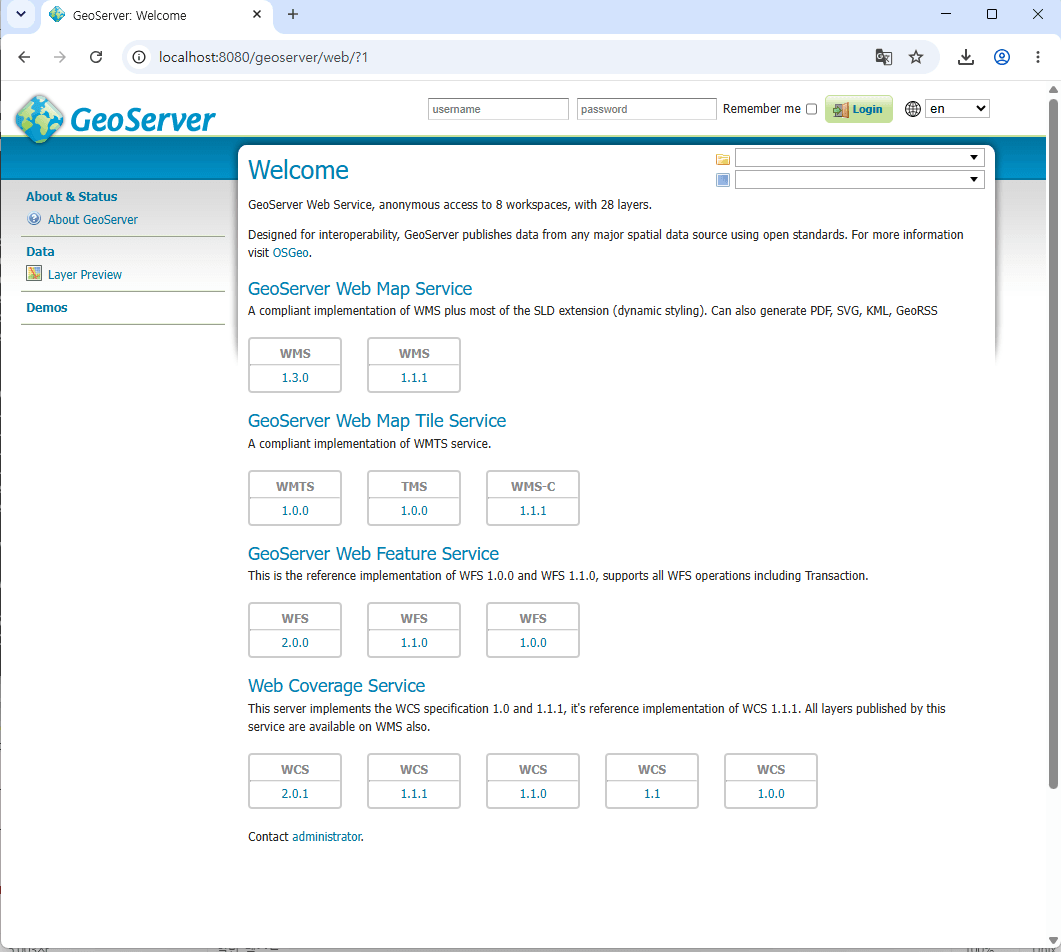
After installing GeoServer, the default username for the web interface is admin, and its default password is geoserver. Enter this username and password, then click the Login button to perform your initial login as the administrator. Once logged in, the GeoServer configuration dashboard will appear as shown below.
7. Loading Honolulu GIS Data
Now, let’s load the Honolulu data into GeoServer. This process is essential for instructing GeoServer to ingest raw GIS data—in our case, Shapefiles (SHP)—and transform it into an active, ready-to-use map service.
7.1. Loading Honolulu SHP Data
You can load the downloaded SHP files into GeoServer by following the procedures below.
⚠️ IMPORTANT: Prior to uploading the Shapefile, verify that the dataset—including all companion extensions (.shp, .shx, .dbf, .prj)—resides in a specific server directory. All associated files must share an identical base name to ingest properly.
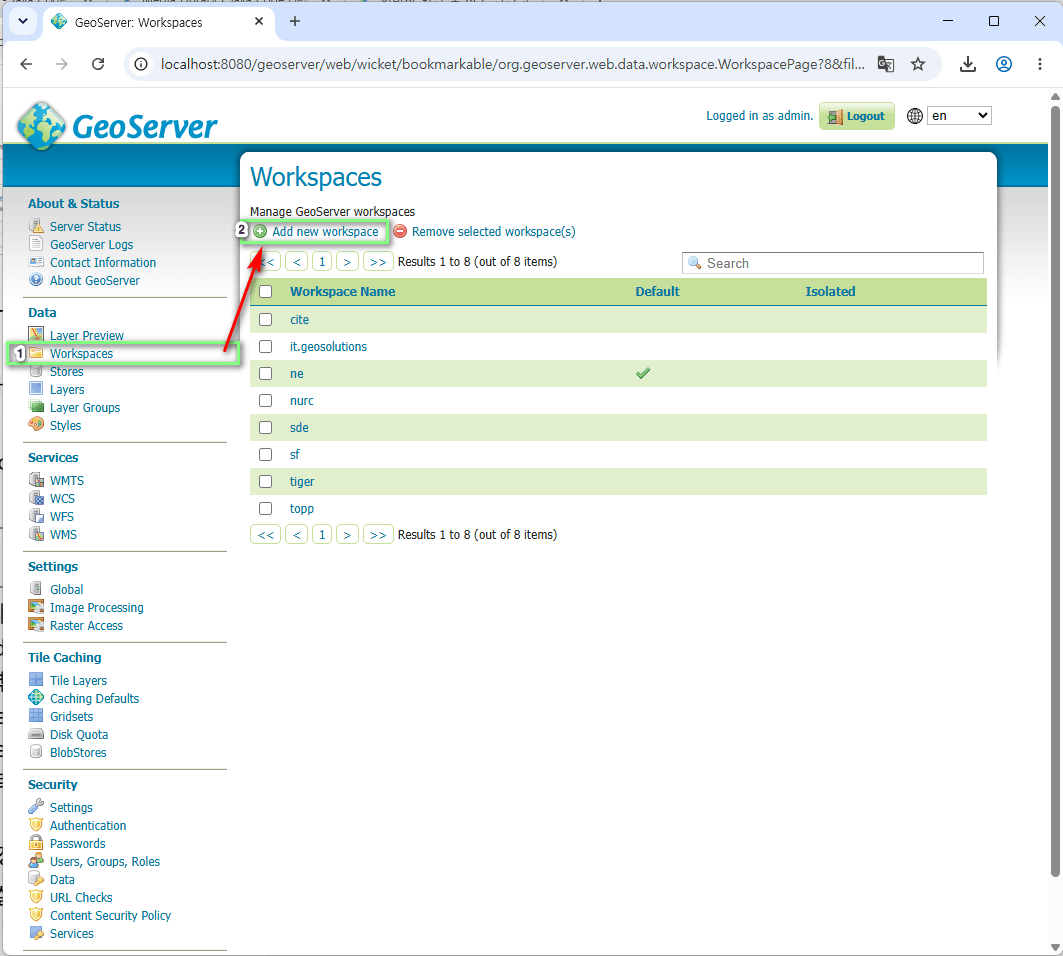
1. Workspace Creation
First, we need to create a Workspace. A workspace acts as the top-level container (or namespace) for managing all your GIS data. You can create one by following the steps below:
- Click on Workspaces under the Data section in the left-hand menu.
- Click the Add new workspace button located at the top.

- Enter the following information and click the Save button.
- Name: Honolulu
- Namespace URI: https://honolulu-cchnl.opendata.arcgis.com/

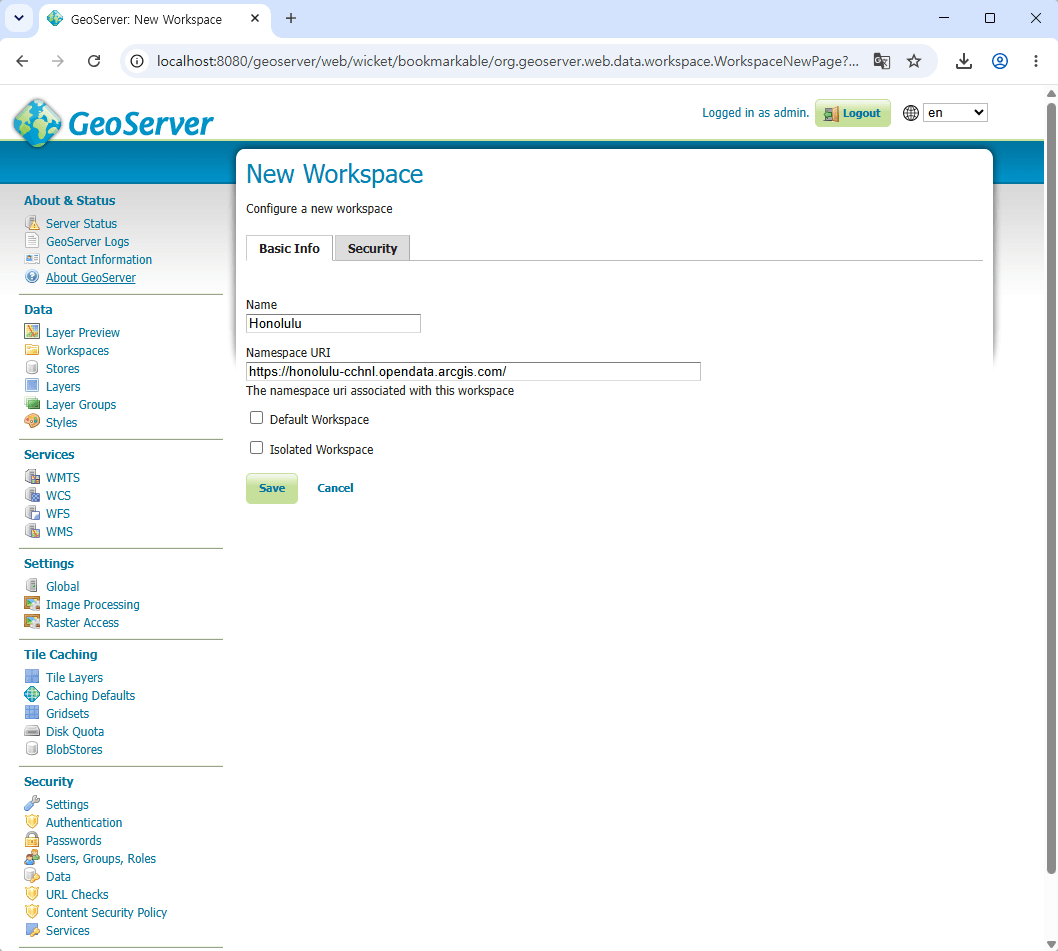
Note: The Namespace URI does not need to be a live, active website. It is simply used as a unique identifier for your workspace.
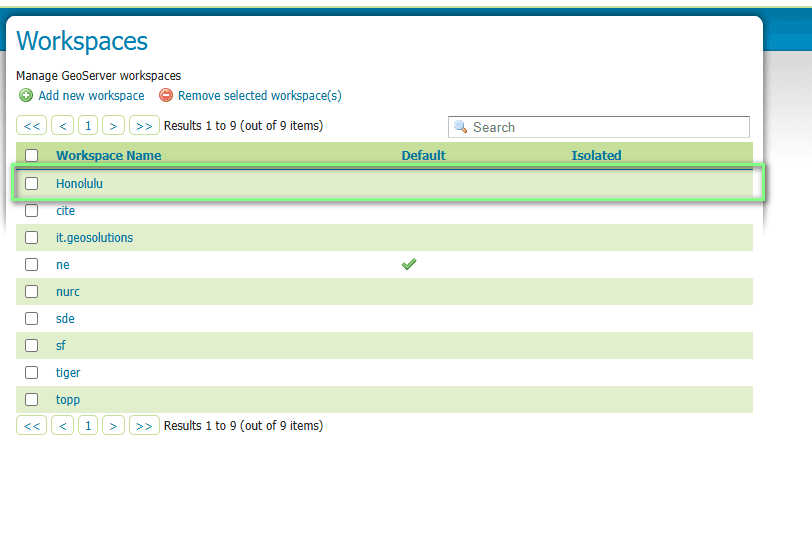
As shown below, you can verify that the “Honolulu” workspace has been successfully created.
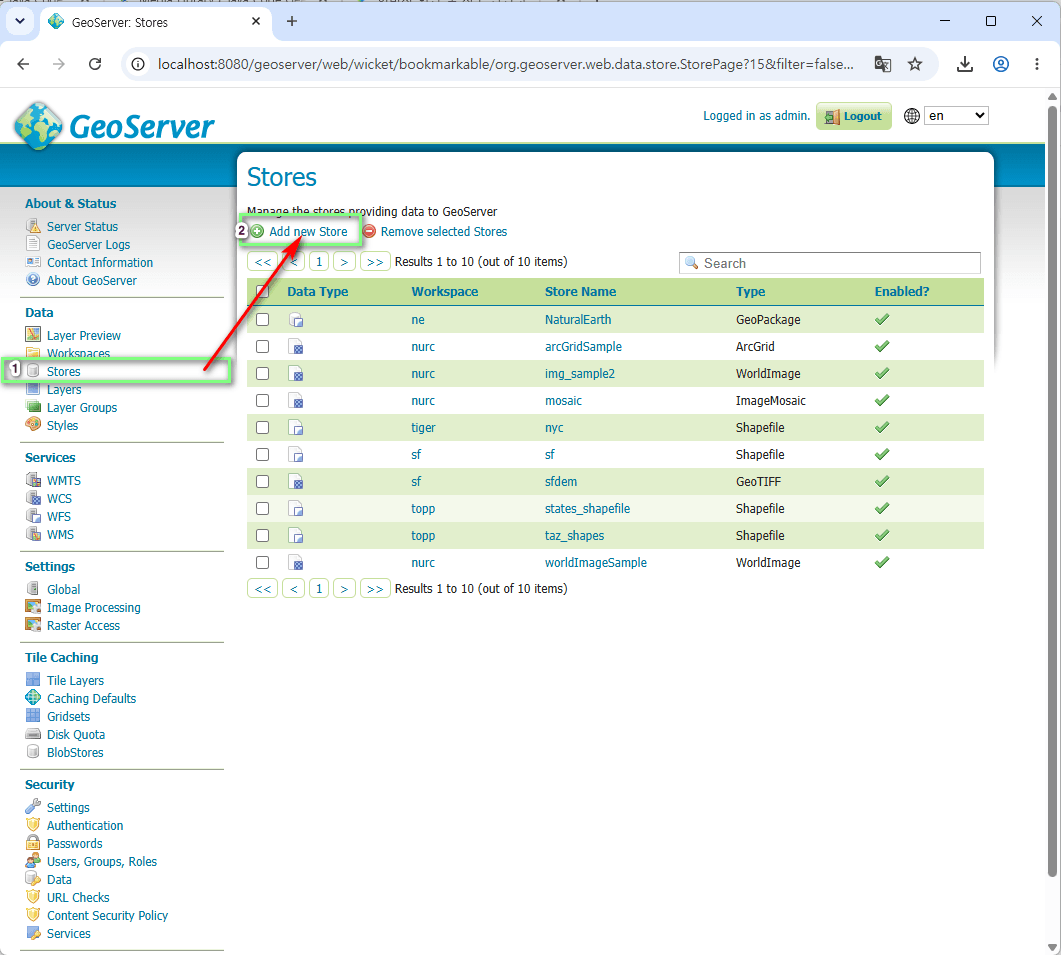
2. Data Store Configuration and Shapefile Registration
In this step, we will link the actual file path of the Shapefile on your local computer to GeoServer. The procedure described below applies to all data generated and saved in the “GIS Data Selection” section. Therefore, please repeat this process for every individual SHP file you have.
- Click on Stores under the Data section in the left-hand menu.
- Click the Add new Store button located at the top.

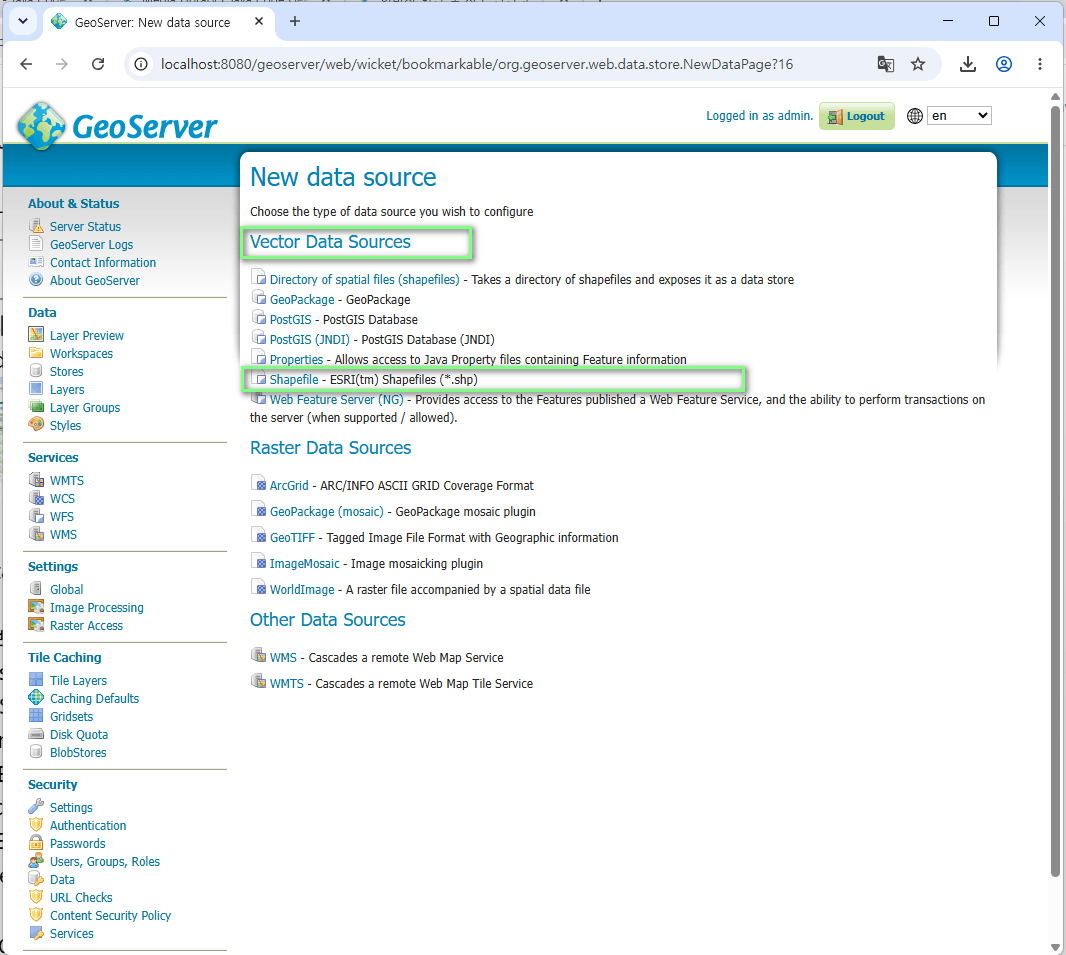
- Select Shapefile from the Vector Data Sources list.

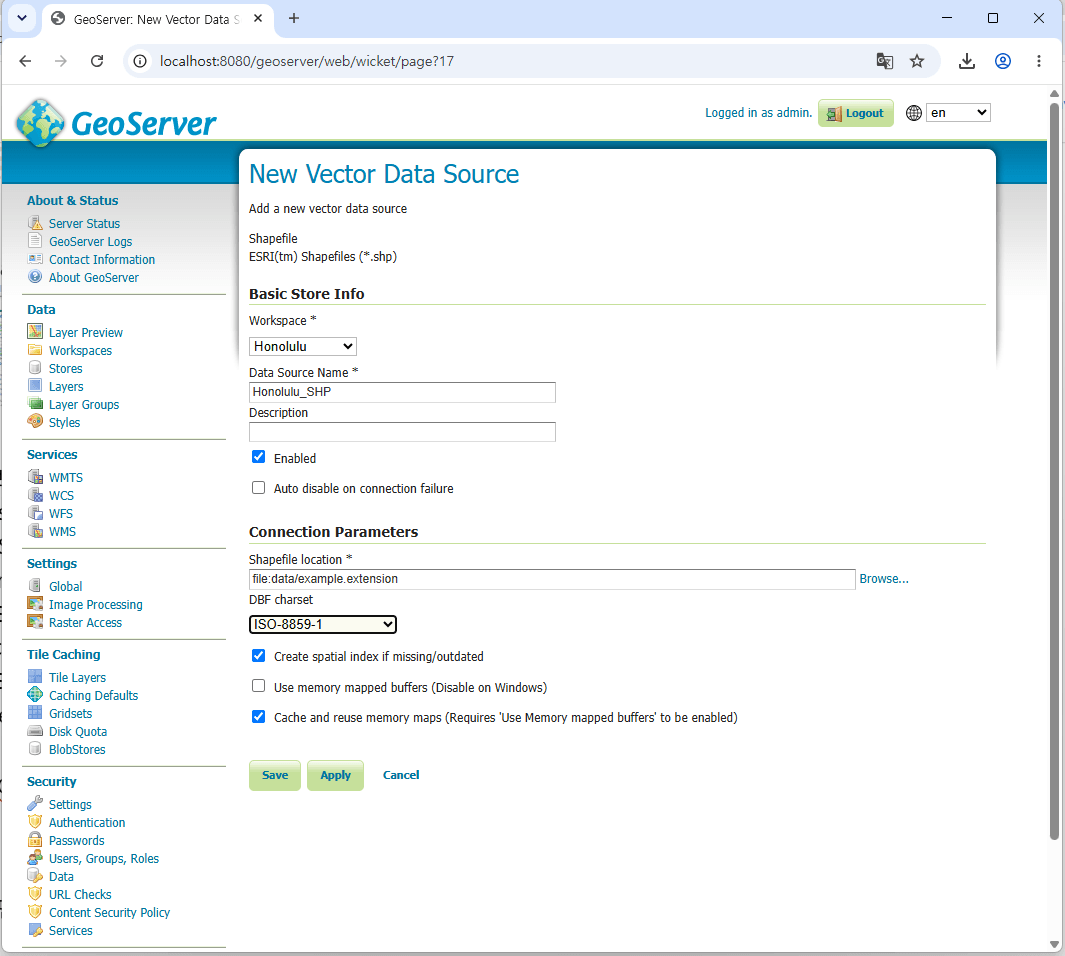
- Configure the Data Store information as follows:
- Workspace: Honolulu (Select the workspace you created in Step 1)
- Data Source Name: Building_Footprint_Centerpoints_SHP

- Configure the Connection Parameters (CRITICAL):
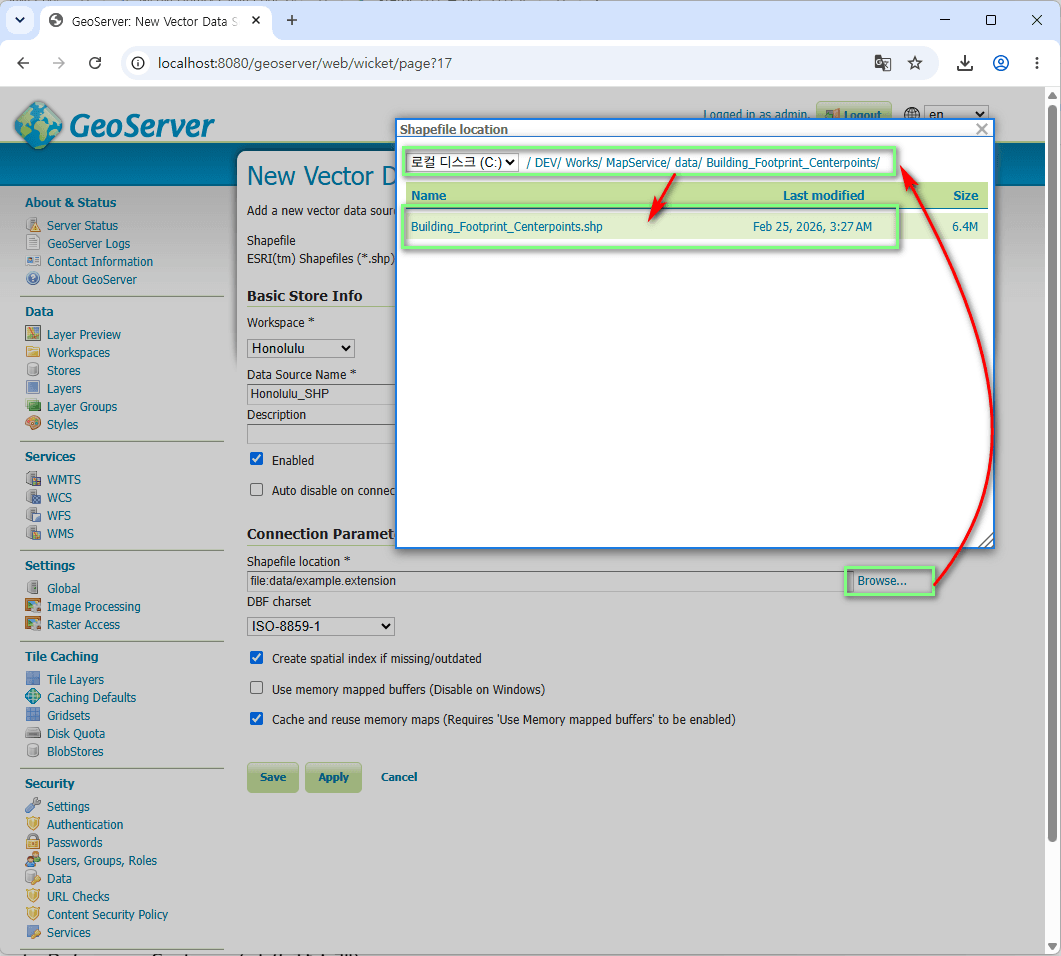
- URL: Click the Browse… button, navigate to the directory on your server where the SHP files are stored, and select the target .shp file.
- DBF charset: UTF-8.
- Click the Save button at the bottom.

3. Publishing a Layer and Configuring Spatial Reference
This is the final step to publish your map service to the web based on the saved data. First, you must verify that the data for our map service is successfully contained within the “Honolulu” workspace from Step 2, as shown below.
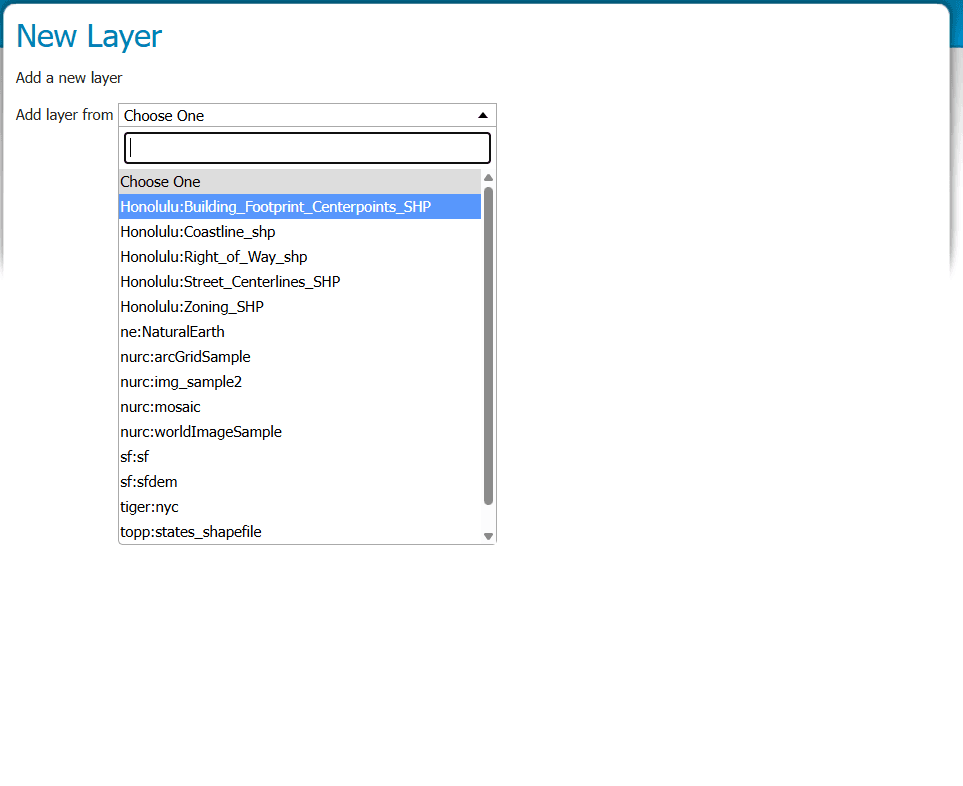
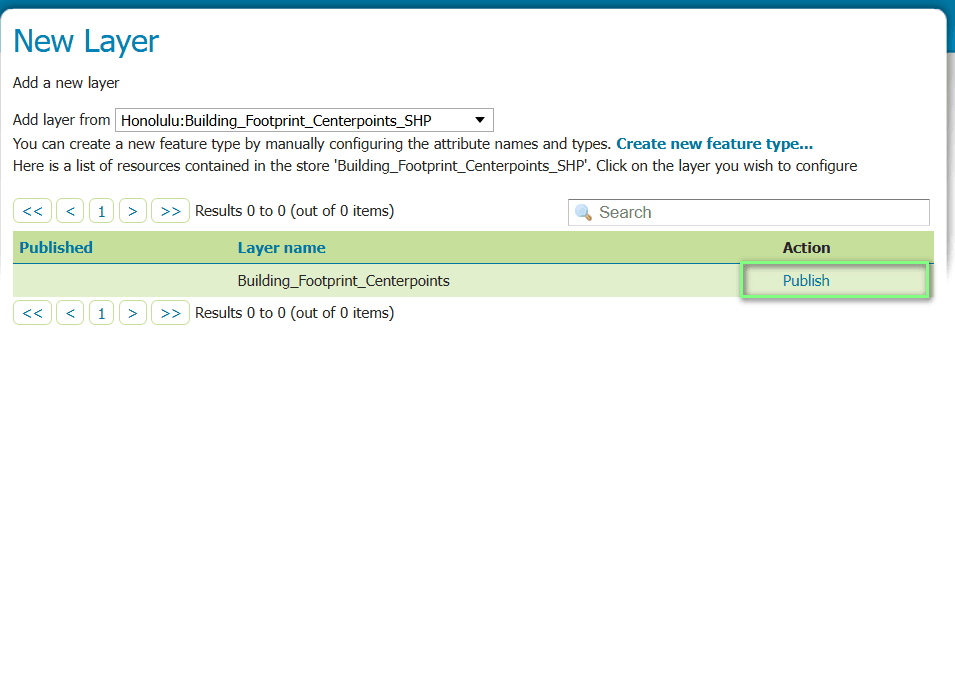
Simply navigate to Layers -> Add a new resource from the left-hand menu and select the corresponding data store.
Note: The procedure described below applies to all data generated and saved in the “GIS Data Selection” section. Therefore, please repeat this process for every individual SHP file.
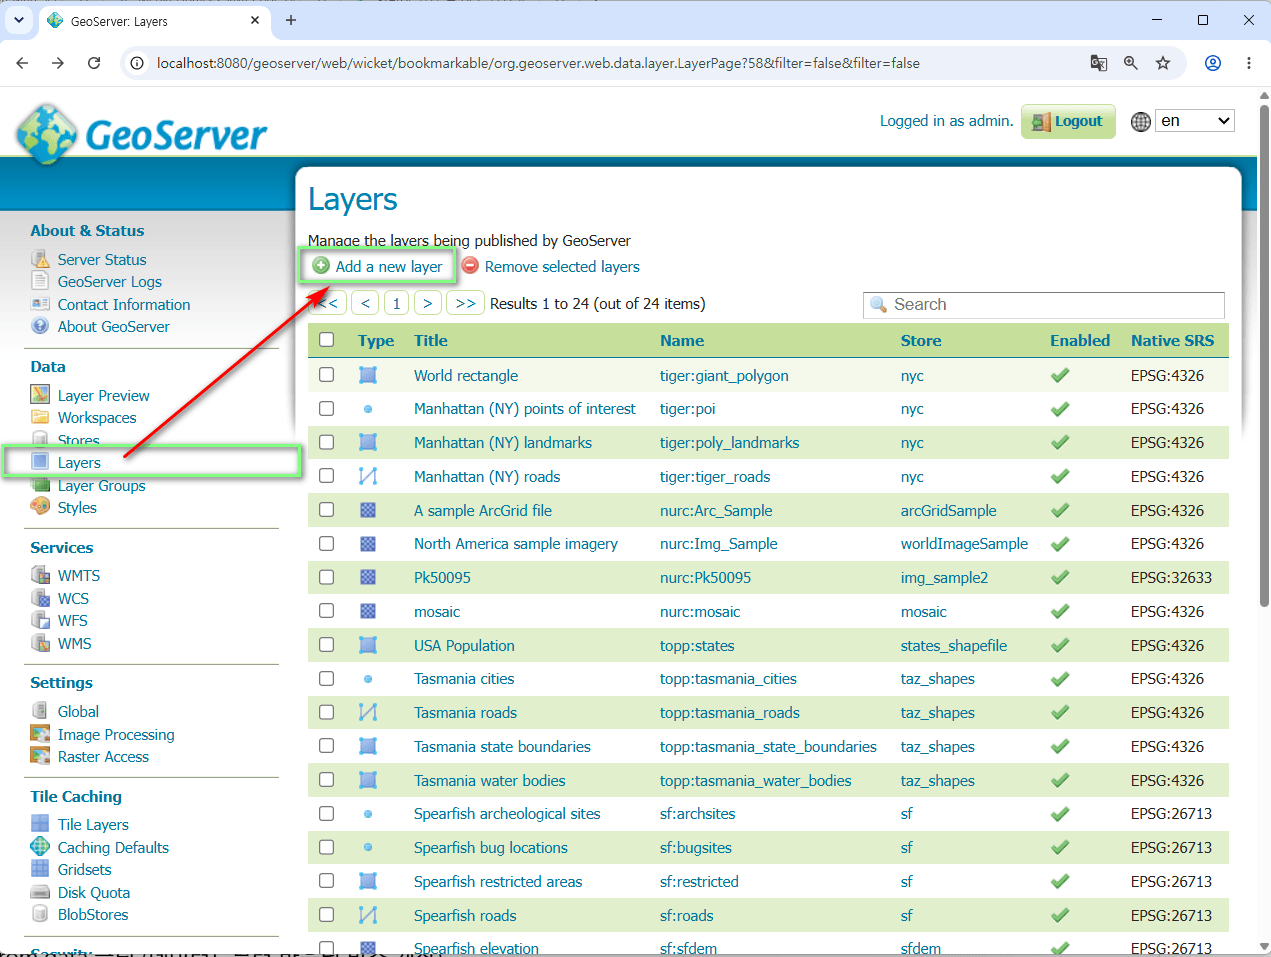
- Select the workspace/store you want to publish from the dropdown menu.

- Click the Publish link next to the SHP file name listed on the screen.

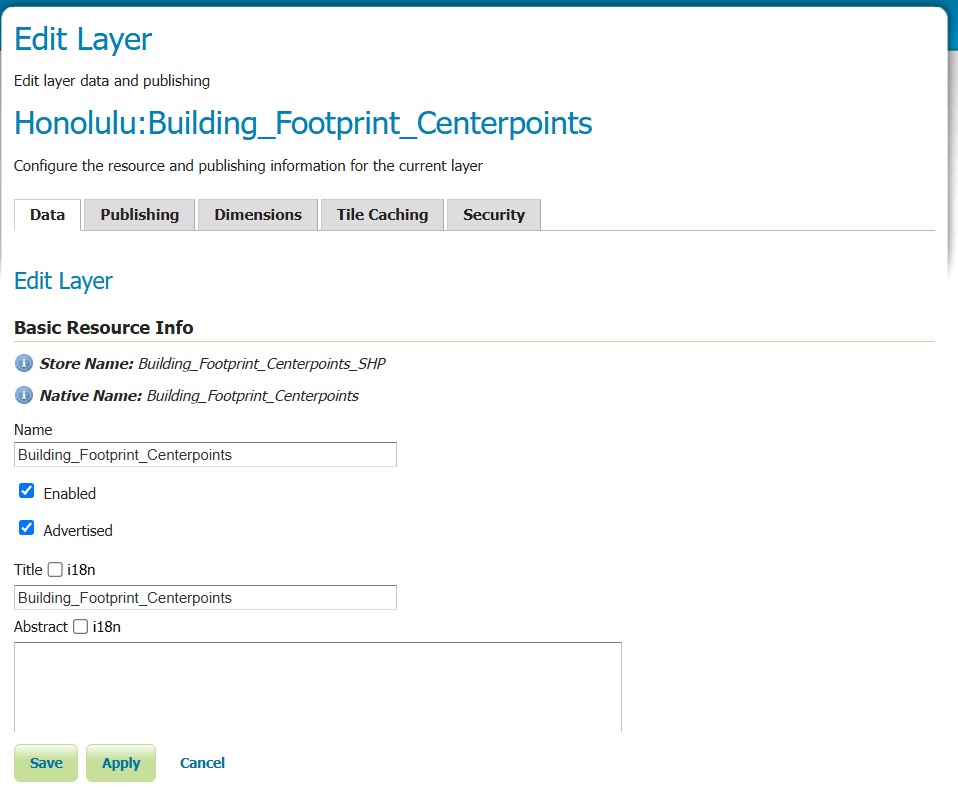
- On the Edit Layer page, configure the following mandatory fields:

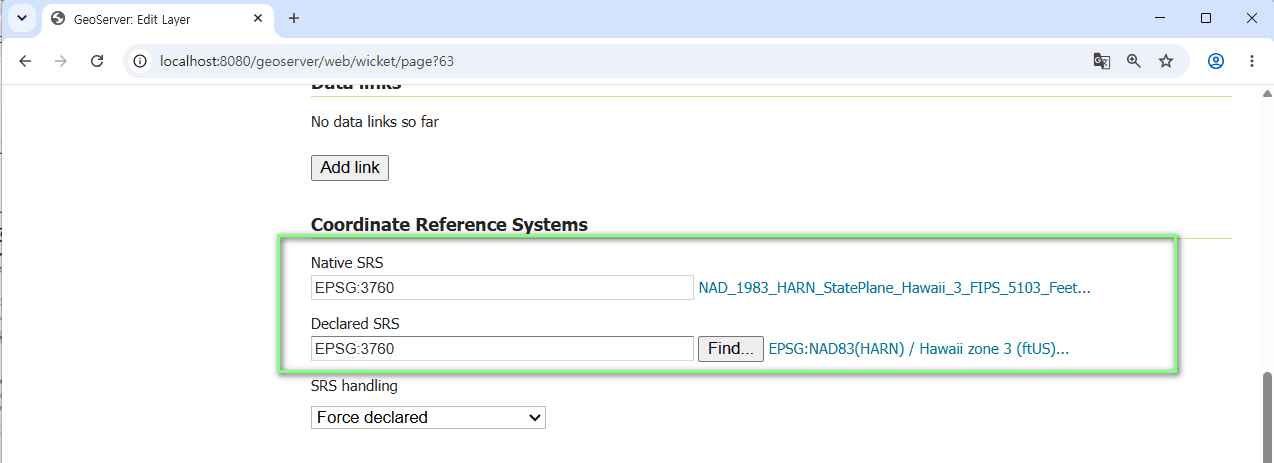
- Coordinate Reference Systems (공간 참조계)
- In most cases, GeoServer will automatically detect and configure the coordinate system. However, if the coordinate system for your SHP file is not automatically detected, click the Find… button next to Declared SRS, search for the correct EPSG code, and select it.

- In most cases, GeoServer will automatically detect and configure the coordinate system. However, if the coordinate system for your SHP file is not automatically detected, click the Find… button next to Declared SRS, search for the correct EPSG code, and select it.
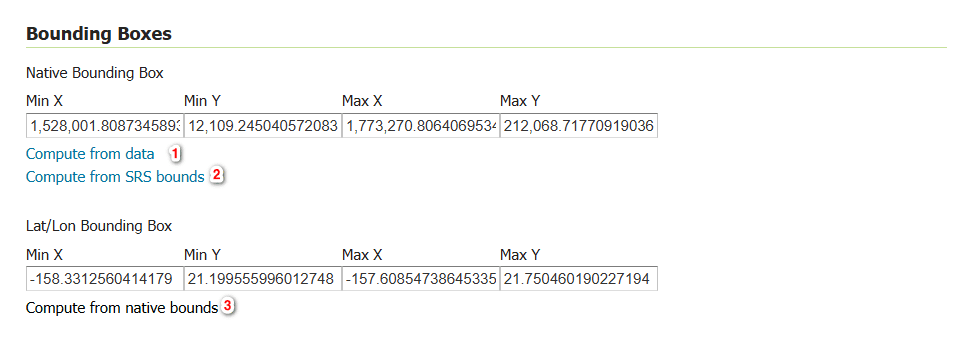
- Bounding Boxes
- You must compute the bounding boxes so GeoServer can recognize the spatial extent of your map. Simply click the buttons in the following order to let GeoServer calculate them automatically:
- Click Compute from data (Calculates the bounding box from the raw data).
- Click Compute from native bounds (Calculates the spatial extent bounds).

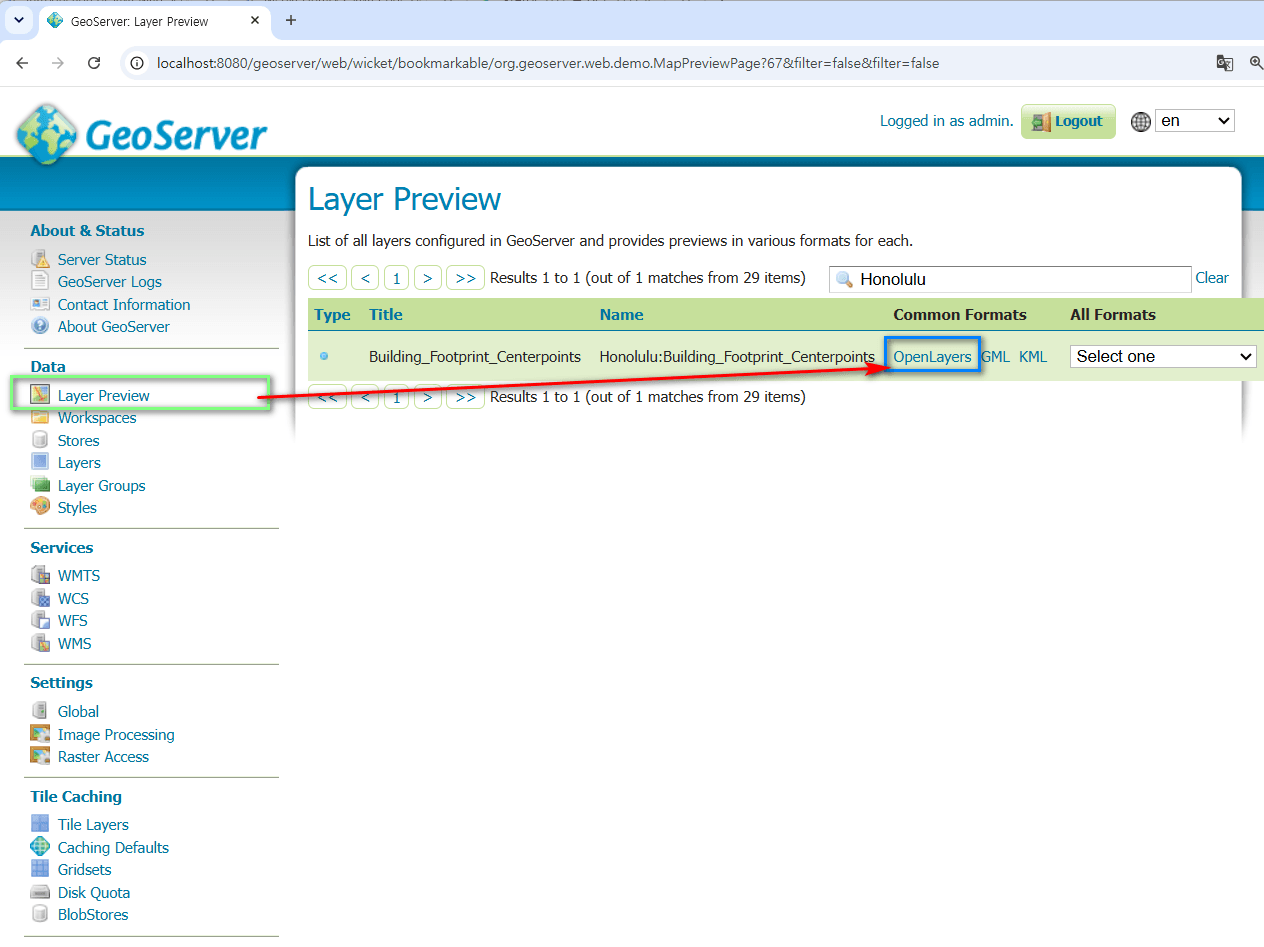
4. Completion and Verification (Layer Preview)
Click the Save button at the very bottom of the page to complete the data loading and publishing process. To verify that your layer has been successfully published, click on Layer Preview at the very top of the left-hand menu. Find the name of the layer you just published (e.g., honolulu:layer_name), and click the OpenLayers link on the right. A new window will open, and you will see your SHP file beautifully visualized as a live map!

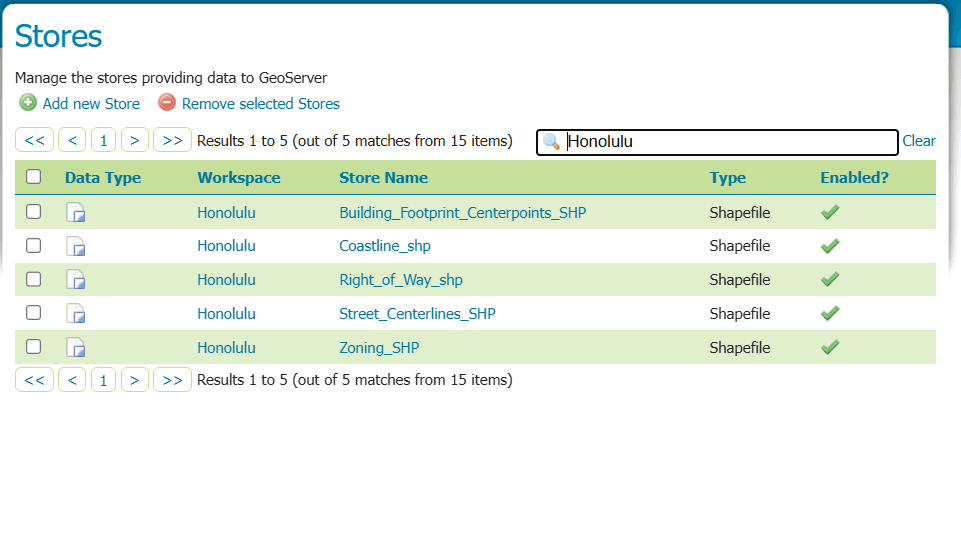
Once you have added layers for all the datasets from the “GIS Data Selection” section, you can search and verify the list of added layers as shown below.

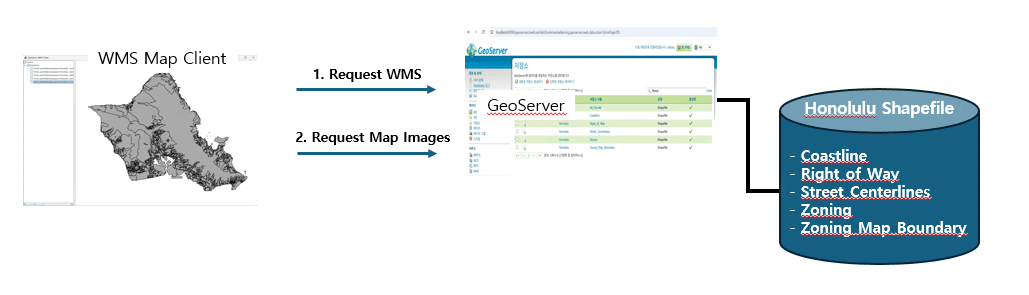
Now, we have successfully completed the data loading process for the Honolulu regional GIS map service. The next step is to verify whether the web service we created has been generated and deployed correctly..
8. Understanding Web Map Services
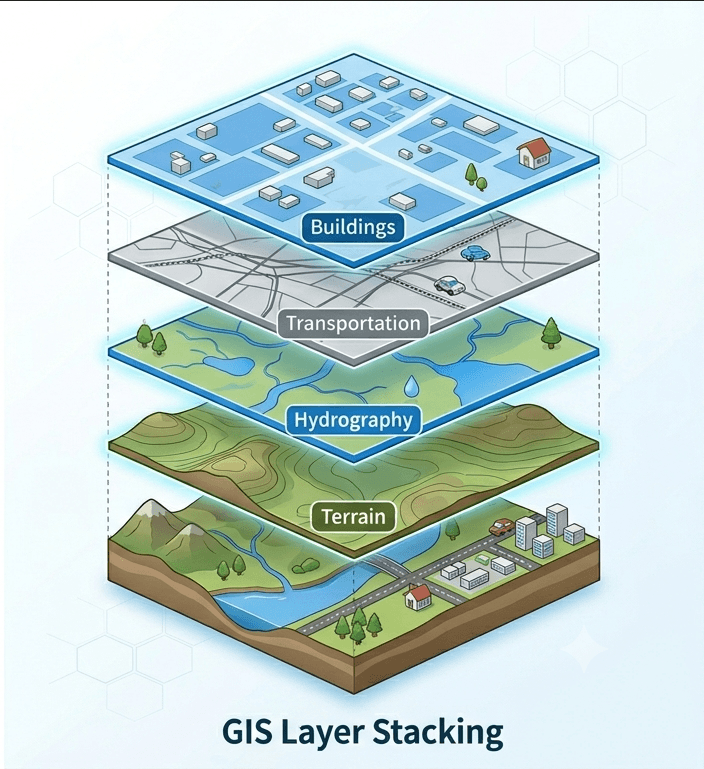
We decided to use data from the Honolulu area for our map service. Viewing a map of Honolulu essentially means overlaying and combining multiple layers of data into a single, cohesive view, as shown below. The data we have downloaded and processed so far represents only a tiny fraction of that entire ecosystem.
- Building Footprint Centerpoints
- Zoning
- Right of Way
- Coastline
- Oahu Street Centerlines
- Building Footprint Centerpoints
- Zoning Map Boundary
- All Parcels
To display this geospatial data, it is necessary to examine the GIS map service defined by the OGC (Open Geospatial Consortium), which serves as the industry standard.
8.1. WMS(Web Map Service)
WMS(Web Map Service) is a standard protocol that renders GIS data into map images (such as PNG or JPEG) on the server side and serves them to the web.
- Requires a slight processing overhead as images are generated by the server on demand.
- Reflects real-time data modifications instantly since the server queries the live data source for every request.
8.2. WFS(Web Feature Service)
A standard protocol that retrieves raw vector datasets (geographic features and attributes) from the server, allowing the client to handle the rendering and data processing.
- Increases client-side complexity and computational load, as the client application is responsible for rendering large amounts of coordinate data.
- Supports advanced GIS capabilities, enabling clients to query, manipulate, and directly edit/update (WFS-T) the underlying geospatial data attributes.
8.3. WPS(Web Process Service)
WPS provides client access to pre-defined spatial data processing algorithms and analytical functions (e.g., buffering, intersection, spatial analysis) on the server side.
- Enables highly customized geospatial services tailored specifically to complex user business logic and rules.
- Increases server-side computational load and architectural complexity exponentially as the business logic and analytical rules become more intricate.
8.4. WMTS(Web Map Tile Service)
WMTS serves pre-rendered, cached map tiles partitioned by predefined grids and LOD (Level of Detail) scales to maximize web map delivery performance.
- Guarantees exceptionally fast loading speeds by serving optimized, small-sized static image tiles instead of rendering on the fly.
- Widely adopted as the industry standard by major global map providers, including Google Maps and Bing Maps.
- Introduces a data reflection delay (near real-time) since changes in the raw spatial data require re-generating or purging the cached tiles.
9. Simple WMS Client Application
To verify and interact with the Honolulu geospatial data we configured earlier, we will build a simple WMS client application. We will implement this GIS map service client using the robust capabilities provided by the open-source GeoTools library.
When it comes to WMS, the behavior of a GIS map service client is actually very simple.
- It invokes the WMS service to check what kind of GIS map services are currently available.
- Then, it simply requests the specific map image it wants from the WMS list.
Although you can merge multiple map layers into a single view, handling this feature is beyond the scope of this post. I will make sure to explain it in detail in the next article.
9.1. Configuring the Client Environment
First, to ensure consistency and proper environment configuration, we will set up our map service client in the following folder.
C:\DEV\Works\MapService\MapClient
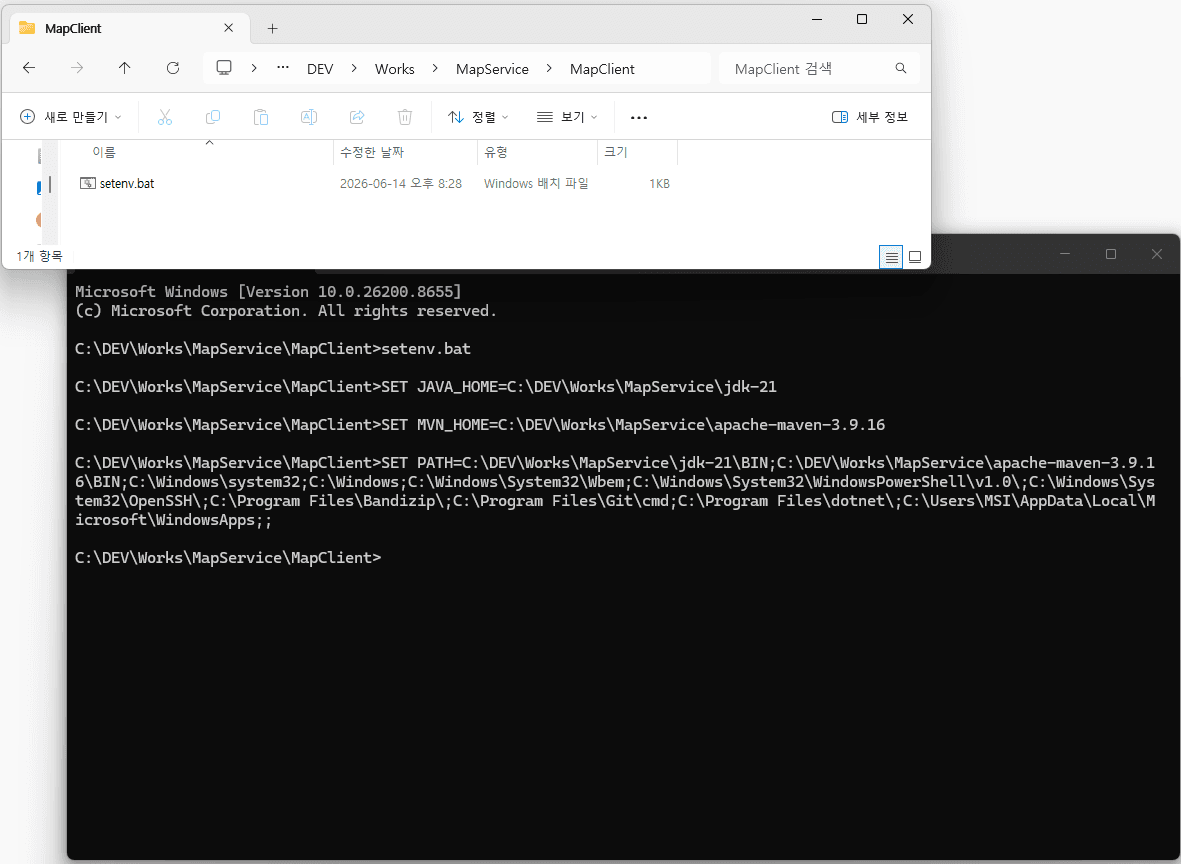
1. Batch File Configuration
To configure the Maven environment, the following two environment variables are required:
JAVA_HOME: The installation path of the downloaded OpenJDK 21.MVN_HOME: The installation path of the downloaded Apache Maven.
To streamline this setup, we have created a batch file named setenv.bat as shown below:
SET JAVA_HOME=C:\DEV\Works\MapService\jdk-21
SET MVN_HOME=C:\DEV\Works\MapService\apache-maven-3.9.16

SET PATH=%JAVA_HOME%\BIN;%MVN_HOME%\BIN;%PATH%;
2. Executing the Batch File
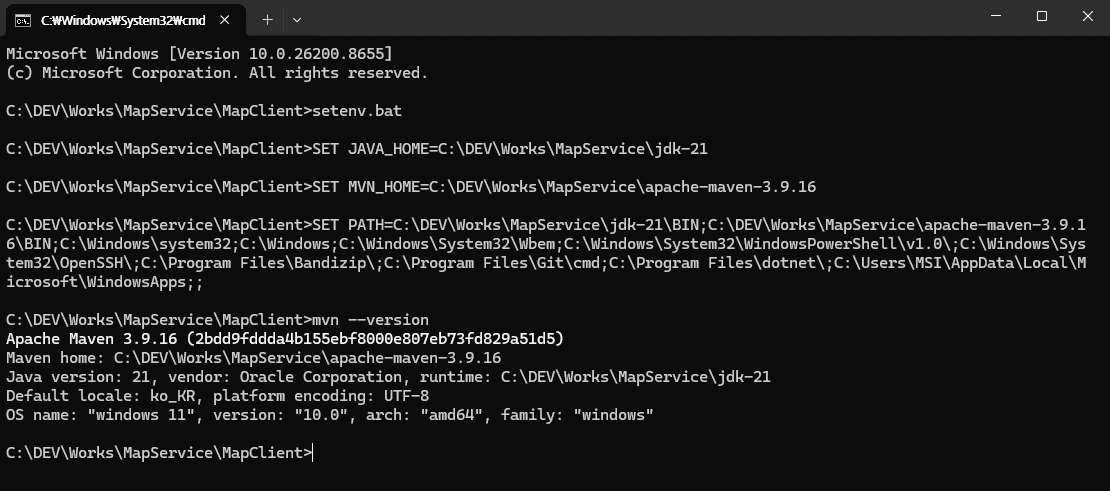
Open a Windows Command Prompt (cmd) window, navigate to the project directory, and enter setenv.bat as shown below.
3. Verifying the Maven Environment
Run the Maven version check command as shown below. If the output displays the exact Maven version you downloaded, your map service client environment configuration is successfully complete.
9.2. Configuring the Client Development Environment
First, create a pom.xml file as shown below to configure the project packages and manage the GeoTools library dependencies.
<project xmlns="http://maven.apache.org/POM/4.0.0"
         xmlns:xsi="http://www.w3.org/2001/XMLSchema-instance"
         xsi:schemaLocation="http://maven.apache.org/POM/4.0.0
         https://maven.apache.org/xsd/maven-4.0.0.xsd">

    <modelVersion>4.0.0</modelVersion>

    <groupId>com.honolulu.gis</groupId>
    <artifactId>map-client</artifactId>
    <version>1.0.0</version>

    <properties>
        <maven.compiler.source>21</maven.compiler.source>
        <maven.compiler.target>21</maven.compiler.target>
        <geotools.version>32.2</geotools.version>
    </properties>

    <repositories>
        <repository>
            <id>osgeo</id>
            <url>https://repo.osgeo.org/repository/release/</url>
        </repository>
    </repositories>

    <dependencies>

        <dependency>
            <groupId>org.geotools</groupId>
            <artifactId>gt-main</artifactId>
            <version>${geotools.version}</version>
        </dependency>

        <dependency>
            <groupId>org.geotools</groupId>
            <artifactId>gt-wms</artifactId>
            <version>${geotools.version}</version>
        </dependency>

    </dependencies>

    <build>
        <plugins>

            <plugin>
                <groupId>org.apache.maven.plugins</groupId>
                <artifactId>maven-compiler-plugin</artifactId>
                <version>3.13.0</version>
            </plugin>

            <plugin>
                <groupId>org.apache.maven.plugins</groupId>
                <artifactId>maven-shade-plugin</artifactId>
                <version>3.5.3</version>

                <executions>
                    <execution>
                        <phase>package</phase>
                        <goals>
                            <goal>shade</goal>
                        </goals>

                        <configuration>                           <createDependencyReducedPom>false</createDependencyReducedPom>

                            <filters>
                                <filter>
                                    <artifact>*:*</artifact>
                                    <excludes>
                                        <exclude>META-INF/*.SF</exclude>
                                        <exclude>META-INF/*.RSA</exclude>
                                        <exclude>META-INF/*.DSA</exclude>
                                    </excludes>
                                </filter>
                            </filters>

                            <transformers>

                                <transformer implementation=
                                        "org.apache.maven.plugins.shade.resource.ServicesResourceTransformer"/>

                                <transformer implementation=
                                        "org.apache.maven.plugins.shade.resource.ManifestResourceTransformer">

                                    <mainClass>
                                        com.honolulu.gis.Main
                                    </mainClass>
                                </transformer>
                            </transformers>
                        </configuration>
                    </execution>
                </executions>
            </plugin>
        </plugins>
    </build>
</project>
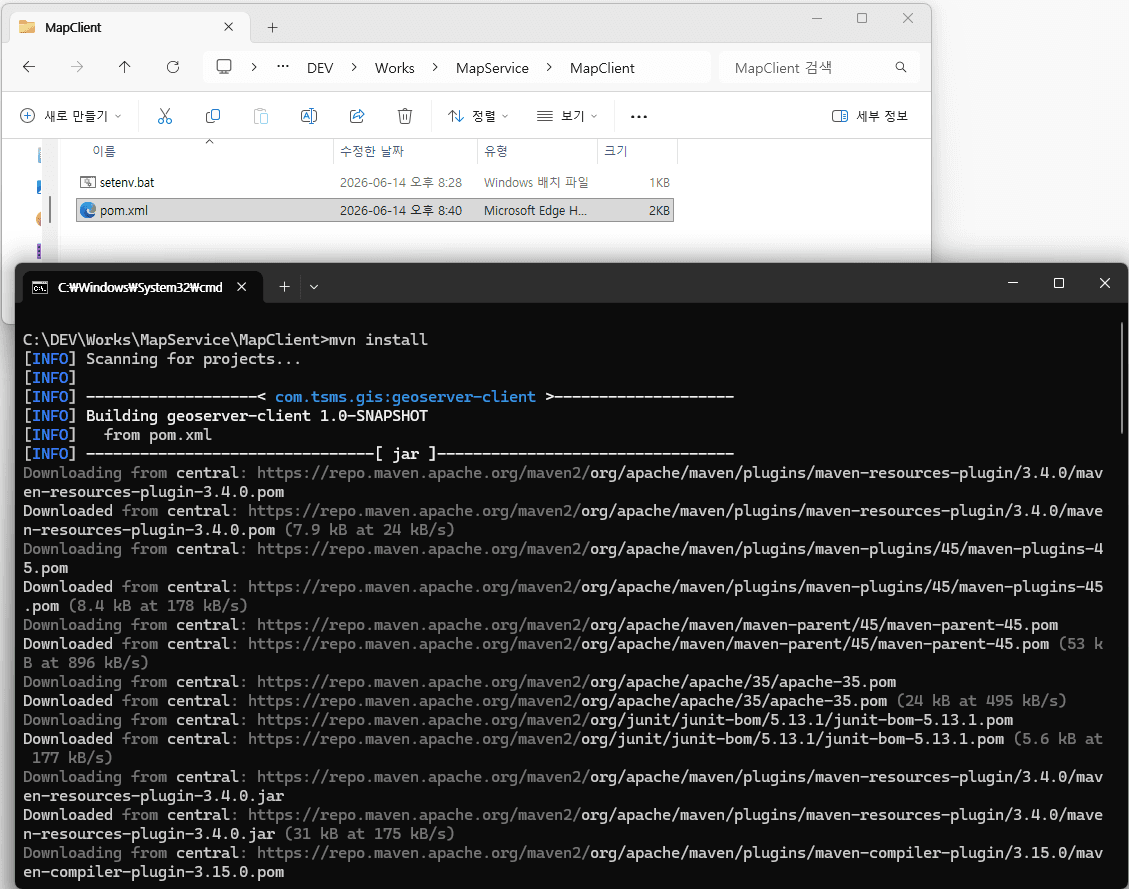
Subsequently, execute the mvn install command to validate the integrity of the build and ensure the absence of configuration errors. Upon a successful verification check, the system will autonomously resolve and download the necessary dependency artifacts, as depicted in the diagram below.
9.3. Establishing the Maven Source Directory Layout
To align with standard development practices, we will configure the Maven directory layout and provision the required folders to initialize the execution environment for the Java map service client application.
MapClient/                       (Project Root)
 ├── src/
 │    ├── main/
 │    │    ├── java/             (Java source code root)
 │    │    │    └── com/
 │    │    │         └── honolulu/
 │    │    │              └── gis/
 │    │    │                   ├── Main.java      (Application entry point)
 │    │    │                   ├── MainFrame.java (Main GUI window container)
 │    │    │                   ├── MapPanel.java  (Dedicated map rendering screen)
 │    │    │                   ├── GeoServerClient.java (WMS connection & communication handler)
 │    │    │                   └── WmsLayerInfo.java (Data model for WMS layer metadata)
 │    │    └── resources/        (Application resources and configurations)
 │    │         └── logback.xml  (Optional: Logging framework configuration)
 │    └── test/                  (Unit test source root)
 │         └── java/
 └── pom.xml             (Project object model for dependencies and build setup)
Please place and create the project folder structure within our designated workspace directory as shown below.
C:\DEV\Works\MapService10. Implementing the GeoServer WMS Client
All setups and environment configurations are now complete. It is time to implement the Java source code inside our established project directory.
The architecture consists of the MainFrame class as the primary UI window container. The core functionality is driven by two main components: GeoServerClient, which communicates with GeoServer to fetch map graphics via WMS, and MapPanel, which renders those retrieved map images onto the screen. This section provides a detailed breakdown and explanation of each source file.
10.1. The Main Class
The Main class serves as the application entry point. It handles the secure initialization of the graphical user interface.
- Event Dispatch Thread (EDT) Safety: By utilizing
SwingUtilities.invokeLater(), the application guarantees that the creation and manipulation of Swing UI components are executed strictly on the single-threaded Event Dispatch Thread, preventing potential concurrency or rendering anomalies. - Main Window Lifecycle: It instantiates the top-level UI container,
MainFrame, and invokessetVisible(true)to render it visible to the end user.
package com.honolulu.gis;

import javax.swing.*;

public class Main {

    public static void main(
            String[] args) {

        SwingUtilities.invokeLater(
                () -> {
                    try {
                        MainFrame frame = new MainFrame();
                        frame.setVisible(true);
                    } catch (Exception e) {
                        e.printStackTrace();
                    }
                }
        );
    }
}
10.2. The MainFrame Class
MainFrame extends JFrame and acts as the central coordinator of the application. It manages UI layout partitioning, layer data modeling, and WMS state transitions.
- Split Layout Architecture: It implements a
JSplitPanewith a divider to isolate concerns:- Left Pane (
createTree()): Displays a hierarchical tree view of remote GIS metadata layers. - Right Pane (
mapPanel): Hosts the customized image component designated for geospatial canvas rendering.
- Left Pane (
- Stream-driven Layer Categorization:
- The
createTree()method consumes list metadata fromclient.loadLayers(). - It leverages Java Streams to filter for targets matching the “Honolulu” namespace, groups them efficiently using
Collectors.groupingBy(), and builds a robust component hierarchy usingDefaultMutableTreeNode.
- The
public class GeoServerClient {
    private final String wmsUrl;
    private WebMapServer server;

    public GeoServerClient(String wmsUrl) throws Exception {
        this.wmsUrl = wmsUrl;

        server = new WebMapServer(new URL(
            wmsUrl + "?service=WMS&request=GetCapabilities"
        ));
    }

	...

	public List<WmsLayerInfo> loadLayers() {
        List<WmsLayerInfo> result = new ArrayList<>();
        collect(server.getCapabilities().getLayer(), result);
        return result;
    }

	...
}
- Asynchronous Selection and Map Refreshment:
- A
TreeSelectionListenercontinuously monitors user interactions. When a user selects a validWmsLayerInfoleaf node, the application updates the activeselectedLayerscache. - The
refreshMap()mechanism queries the GeoServer backend to parse the target layer bounds (BBox) and spatial reference system (CRS). It automatically calculates dimensions based on the currentmapPanelviewport scale and dispatches a WMSGetMaptransaction, dynamically mapping the incoming buffer stream straight to the canvas display.
- A
package com.honolulu.gis;

import javax.swing.*;
import javax.swing.tree.*;
import java.awt.*;
import java.util.*;
import java.util.List;
import java.util.stream.Collectors;

public class MainFrame extends JFrame {

    private final MapPanel mapPanel =
            new MapPanel();

    private final Set<String> selectedLayers =
            new HashSet<>();

    private final GeoServerClient client;

    public MainFrame() throws Exception {
        client
          = new GeoServerClient(                                                                 "http://localhost:8080/geoserver/wms");

        setTitle("GeoServer WMS Client");

        setSize(1400,900);

        setDefaultCloseOperation(
                JFrame.EXIT_ON_CLOSE
        );

        JSplitPane split =
                new JSplitPane();

        split.setDividerLocation(300);

        split.setLeftComponent(
                createTree()
        );

        split.setRightComponent(
                mapPanel
        );

        add(split);
    }

    private JScrollPane createTree()
            throws Exception {

        List<WmsLayerInfo> layers =
                client.loadLayers();

        DefaultMutableTreeNode root =
                new DefaultMutableTreeNode(
                        "Layers"
                );
        //Filter 'Honolulu' namespace only
        Map<String, List<WmsLayerInfo>> grouped =
			layers.stream()
                .filter(l -> "Honolulu".equals(l.namespace()))
                .collect(Collectors.groupingBy(WmsLayerInfo::namespace));

        for(var entry : grouped.entrySet()) {

            DefaultMutableTreeNode ns =
                    new DefaultMutableTreeNode(
                            entry.getKey()
                    );

            for(var layer : entry.getValue()) {

                ns.add(
                        new DefaultMutableTreeNode(
                                layer
                        )
                );
            }

            root.add(ns);
        }

        JTree tree =
                new JTree(root);

        tree.addTreeSelectionListener(e -> {

            Object node =
                    ((DefaultMutableTreeNode)
                            tree.getLastSelectedPathComponent())
                            .getUserObject();

            if(node instanceof WmsLayerInfo layer) {

                try {

                    selectedLayers.clear();

                    selectedLayers.add(
                            layer.name()
                    );

                    refreshMap();

                } catch (Exception ex) {
                    ex.printStackTrace();
                }
            }
        });

        return new JScrollPane(tree);
    }

    private void refreshMap()
            throws Exception {

		GeoServerClient.BBoxInfo binfo = client.getBoundsFromLayers(new ArrayList<>(selectedLayers));
		String bbox = binfo.bbox;
		String crs = binfo.crs;
		var image =
				client.getMap(
						new ArrayList<>(selectedLayers), // String OK
						bbox,crs,
						mapPanel.getWidth(),
						mapPanel.getHeight()
				);

        mapPanel.setImage(image);
    }
}
10.3. The GeoServerClient Class
The GeoServerClient class serves as the dedicated network interface controller that manages OGC WMS transactions with the remote GeoServer container using the GeoTools API capabilities.
- Capabilities Lifecycle Initialization:
- The constructor accepts the root WMS endpoint and instantiates a
WebMapServercomponent by issuing an implicitGetCapabilitiesmetadata handshake. This caches the entire server capabilities tree schema in application storage upon startup.
- The constructor accepts the root WMS endpoint and instantiates a
server = new WebMapServer(new URL(
    wmsUrl + "?service=WMS&request=GetCapabilities"
 ));
- Automated Bounding Box (BBox) and CRS Retrieval:
- The
getBoundsFromLayers()routine automates spatial boundary detection. It queries the target mapping layer properties, retrieves the primary Coordinate Reference System (CRS), maps it to a GeoToolsCRSEnvelope, and serializes the lower/upper bounds into a standard comma-delimited bounding box coordinate string ("minx,miny,maxx,maxy").
- The
- Recursive Metadata Tree Traversal (
loadLayers()&collect()):- GeoServer layers inherently possess nested hierarchical characteristics. To resolve this, the client deploys a recursive algorithm within the
collect()function. - It runs depth-first searches across all
getLayerChildren()arrays, splits namespace domains by identifying character colons (:), and constructs an iterable list model containing sanitizedWmsLayerInforecords.
- GeoServer layers inherently possess nested hierarchical characteristics. To resolve this, the client deploys a recursive algorithm within the
- Dynamic WMS
GetMapCompilation:- The
getMap()function compiles raw viewport geometries directly into compliant WMS URL specifications. - It binds array collections, spatial boundaries (
bbox), spatial references (srs), and target output resolutions (width,height) into a query pipeline. - By piping this connection stream through
ImageIO.read(), it smoothly captures the pixel-perfectimage/pngresponse and maps it seamlessly into an immutable nativeBufferedImagelayer context.
- The
package com.honolulu.gis;

import org.geotools.ows.wms.Layer;
import org.geotools.ows.wms.WebMapServer;
import org.geotools.ows.wms.WMSCapabilities;
import org.geotools.geometry.jts.ReferencedEnvelope;
import org.geotools.ows.wms.CRSEnvelope;

import javax.imageio.ImageIO;
import java.awt.image.BufferedImage;
import java.net.URL;
import java.util.ArrayList;
import java.util.List;


public class GeoServerClient {

    private final String wmsUrl;

    private WebMapServer server;

    public GeoServerClient(String wmsUrl) throws Exception {
        this.wmsUrl = wmsUrl;

        server = new WebMapServer(new URL(
                wmsUrl + "?service=WMS&request=GetCapabilities"
        ));
    }

	public static class BBoxInfo {
		public String bbox;
		public String crs;
	}

	public BBoxInfo getBoundsFromLayers(List<String> layers) {

		Layer layer = findLayerByName(layers.get(0));

		var map = layer.getBoundingBoxes();

		String crs = map.keySet().iterator().next();
		CRSEnvelope env = map.get(crs);

		double minx = env.getLowerCorner().getOrdinate(0);
		double miny = env.getLowerCorner().getOrdinate(1);
		double maxx = env.getUpperCorner().getOrdinate(0);
		double maxy = env.getUpperCorner().getOrdinate(1);

		BBoxInfo info = new BBoxInfo();
		info.bbox = minx + "," + miny + "," + maxx + "," + maxy;
		info.crs = crs;

		return info;
	}

    public List<WmsLayerInfo> loadLayers() {

        List<WmsLayerInfo> result = new ArrayList<>();

        collect(server.getCapabilities().getLayer(), result);

        return result;
    }

    private void collect(Layer layer, List<WmsLayerInfo> result) {

        if (layer.getName() != null) {

            String ns = "";

            if (layer.getName().contains(":")) {
                ns = layer.getName().split(":")[0];
            }

            result.add(new WmsLayerInfo(
                    ns,
                    layer.getName(),
                    layer.getTitle()
            ));
        }

        for (Layer c : layer.getLayerChildren()) {
            collect(c, result);
        }
    }

	private org.geotools.ows.wms.Layer findLayerByName(String name) {

		return find(server.getCapabilities().getLayer(), name);
	}

	private org.geotools.ows.wms.Layer find(
			org.geotools.ows.wms.Layer root,
			String name
	) {
		if (name.equals(root.getName())) {
			return root;
		}

		for (var c : root.getLayerChildren()) {
			org.geotools.ows.wms.Layer r = find(c, name);
			if (r != null) return r;
		}

		return null;
	}

    public BufferedImage getMap(
		List<String> layers,
		String bbox,
		String crs,
		int width,
		int height
    ) throws Exception {

        String url =
			wmsUrl +
			"?service=WMS" +
			"&request=GetMap" +
			"&version=1.1.1" +
			"&layers=" + String.join(",", layers) +
			"&bbox=" + bbox +
			"&width=" + width +
			"&height=" + height +
			"&srs=" + crs +
			"&format=image/png";

        return ImageIO.read(new URL(url));
    }
}
10.4. The MapPanel Class
The MapPanel class extends JPanel and serves as a custom graphics canvas dedicated to drawing the fetched WMS map imagery (BufferedImage) onto the client UI application framework.
- Image State Invalidation and Repainting (
setImage):- This method acts as a standard state mutator. When called by the master controller, it caches the newly fetched geospatial bitmap into the local
imagefield. - It immediately invokes
repaint(), which posts an asynchronous paint event to the Swing Event Dispatch Thread (EDT), prompting the framework to refresh the visible graphical region without lagging the main UI loop.
- This method acts as a standard state mutator. When called by the master controller, it caches the newly fetched geospatial bitmap into the local
- Graphics Pipeline Lifecycle Hooks (
paintComponent):- The class overrides
paintComponent(Graphics g)to inject custom drawing logic directly into the native window composite layer. super.paintComponent(g)is executed sequentially at the absolute beginning of the routine to properly clear the background buffer and purge the component canvas, eliminating potential artifact ghosts or visual rendering anomalies.
- The class overrides
- Dynamic Viewport Boundary Scaling (
g.drawImage):- If a valid
BufferedImageframe resides in the pipeline memory, the rendering engine triggersg.drawImage(). - It anchors the mapping source coordinates at the localized screen origin (0, 0). By supplying the dynamic runtime boundaries
getWidth()andgetHeight()into the layout matrix parameters, the client application ensures that the remote map grid stretches and conforms scaling matrices on the fly to perfectly snap fit into the container dimensions whenever window resizing triggers.
- If a valid
package com.honolulu.gis;

import javax.swing.*;
import java.awt.*;
import java.awt.image.BufferedImage;

public class MapPanel extends JPanel {

    private BufferedImage image;

    public void setImage(BufferedImage image) {
        this.image = image;
        repaint();
    }

    @Override
    protected void paintComponent(
            Graphics g) {

        super.paintComponent(g);

        if (image != null) {

            g.drawImage(
                    image,
                    0,
                    0,
                    getWidth(),
                    getHeight(),
                    null
            );
        }
    }
}
10.5. The WmsLayerInfo Class
The WmsLayerInfo component represents the lightweight data access model utilized to encapsulate the primary remote Web Map Service (WMS) layer specifications parsed from GeoServer.
- Immutable Java Record Architecture:
- The class leverages the modern Java Record configuration framework. This design pattern intrinsically eliminates traditional boilerplates such as boilerplate explicit Accessors (Getters),
equals(),hashCode(), andtoString()generation blocks. - By default, records evaluate fields as implicitly
private final, enforcing complete object immutability that ensures thread safety and component integrity throughout the data stream workflow.
- The class leverages the modern Java Record configuration framework. This design pattern intrinsically eliminates traditional boilerplates such as boilerplate explicit Accessors (Getters),
- Metadata Fields Breakdown:
namespace: Identifies the operational work domain workspace (e.g.,"Honolulu"), facilitating smooth upstream filter streams and grouping transformations inside the tree panel component.name: Contains the raw, fully qualified canonical system identifier required by the remote GeoServer container to compile target map visuals within WMS URL parameters.title: Represents the localized, human-readable display string used for populating label text within the user interface graphical component tree views.
package com.honolulu.gis;

public record WmsLayerInfo(
        String namespace,
        String name,
        String title
) {
}
10.6. Build and Execution
You can now proceed with building and running the application by executing the following commands in the currently open Windows Command Prompt (cmd) window.
mvn clean package
mvn exec:java -Dexec.mainClass=com.honolulu.gis.Main
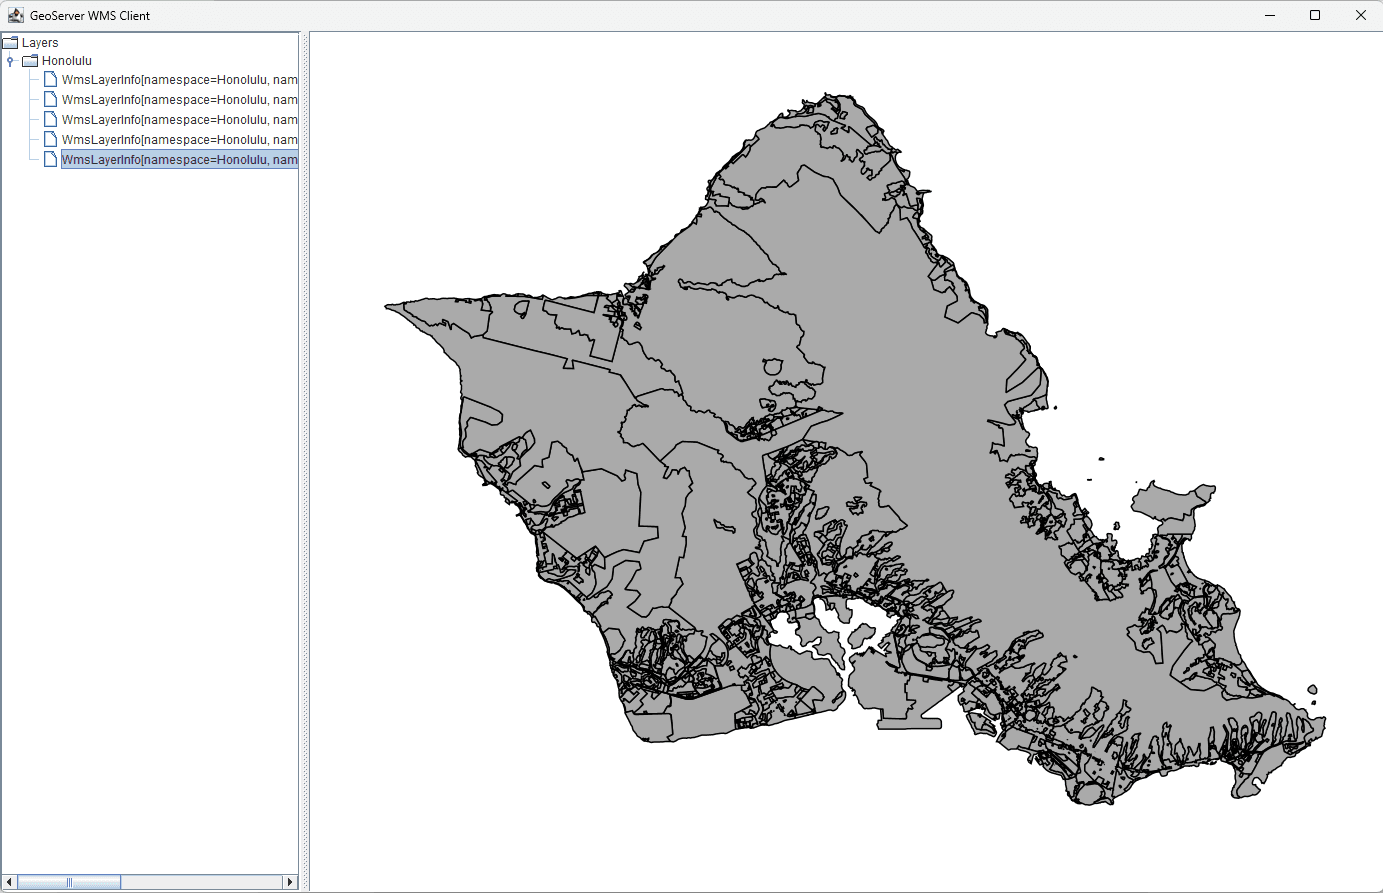
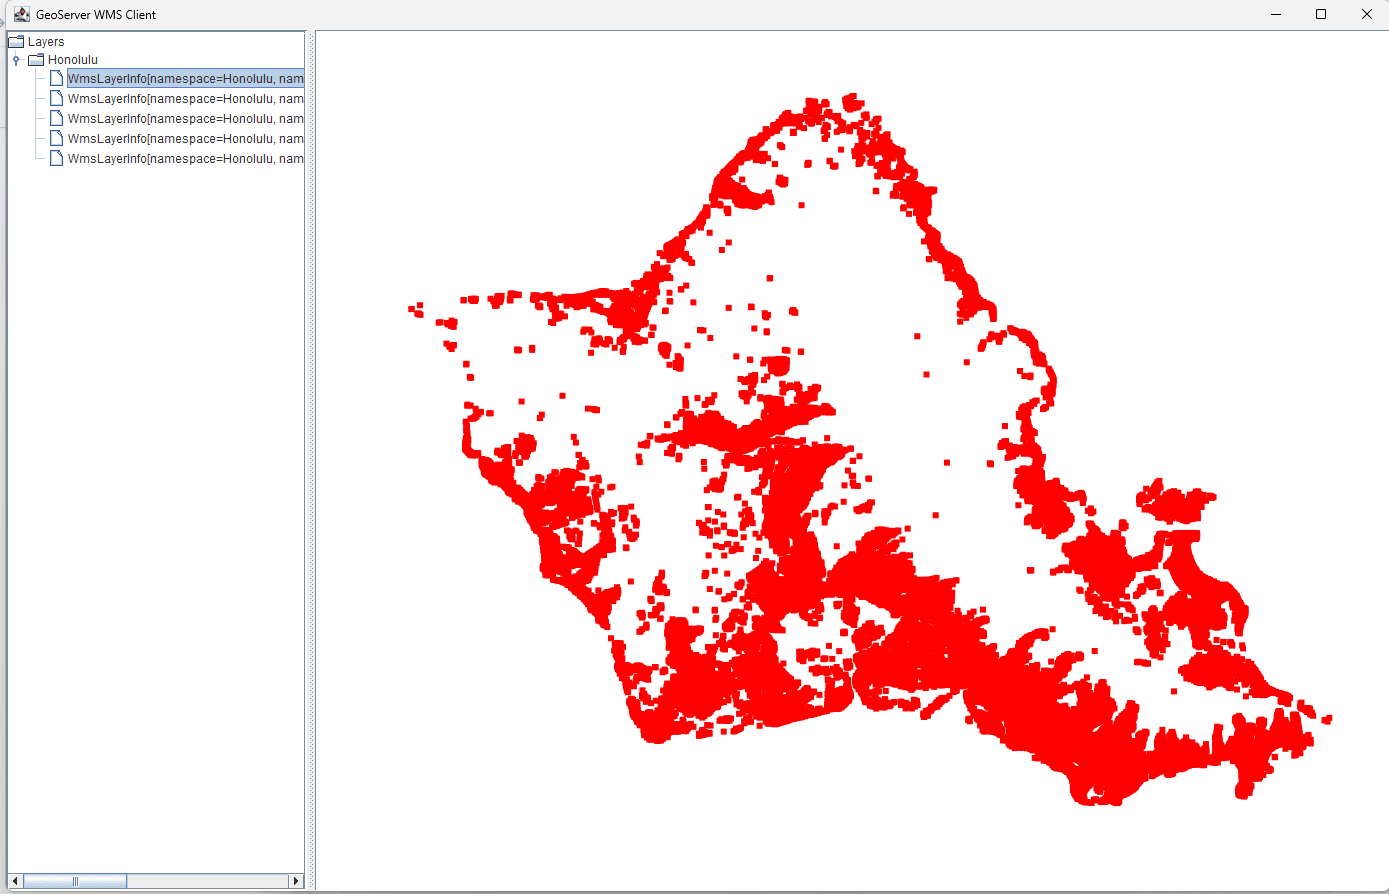
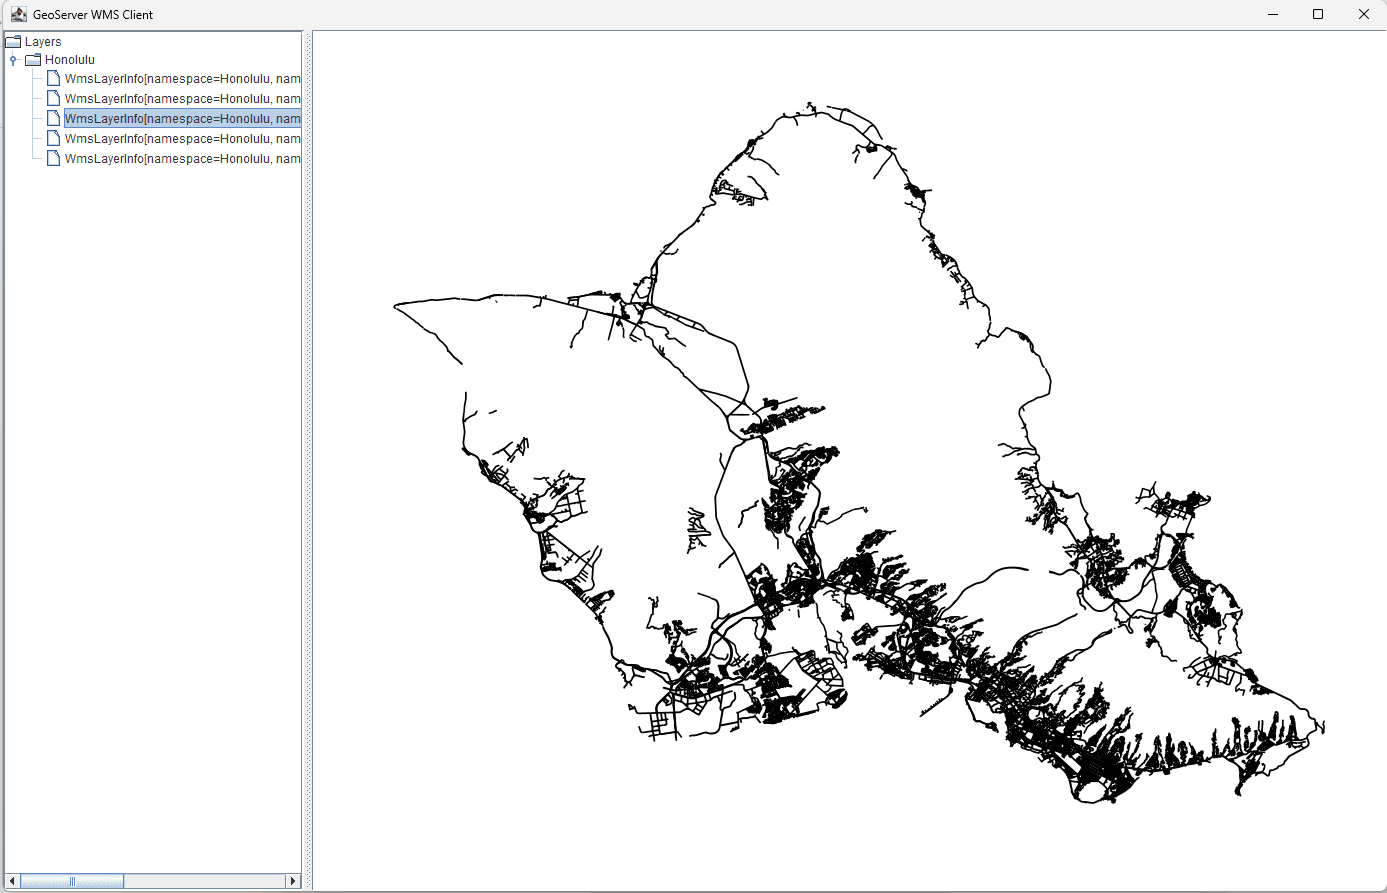
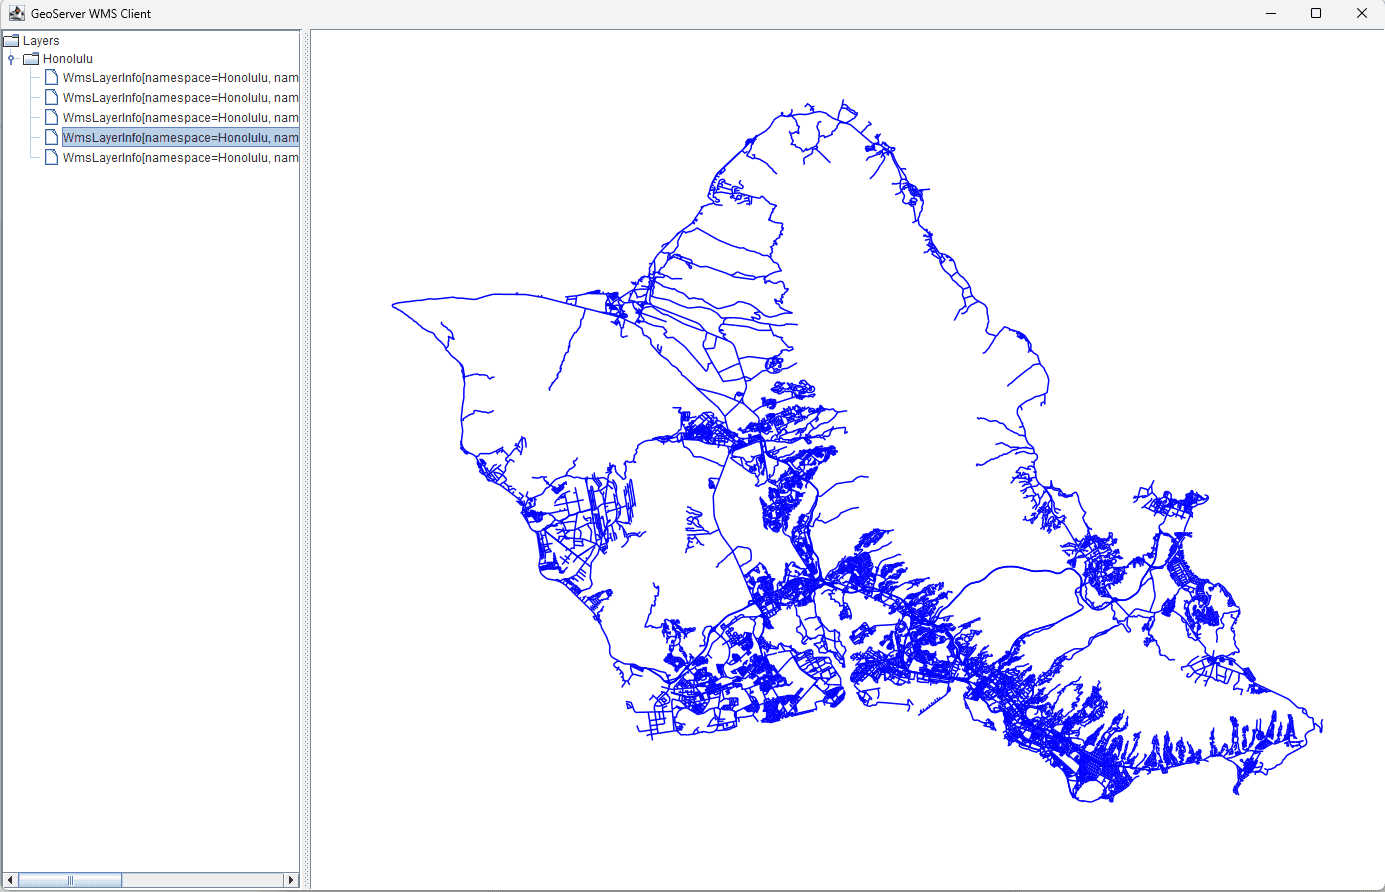
Once the application is running, you can use the developed WMS client to interactively view and inspect each geospatial dataset loaded into GeoServer, one layer at a time, as shown below.

11. Conclusion
In this post, we have briefly introduced how to load geospatial data into a map server and how to consume that loaded data via a Web Map Service (WMS). To transition this into a fully-featured, production-ready map service, various additional capabilities and advanced functionalities would need to be incorporated.
12. Download Links
- Open JDK : https://jdk.java.net/java-se-ri/21
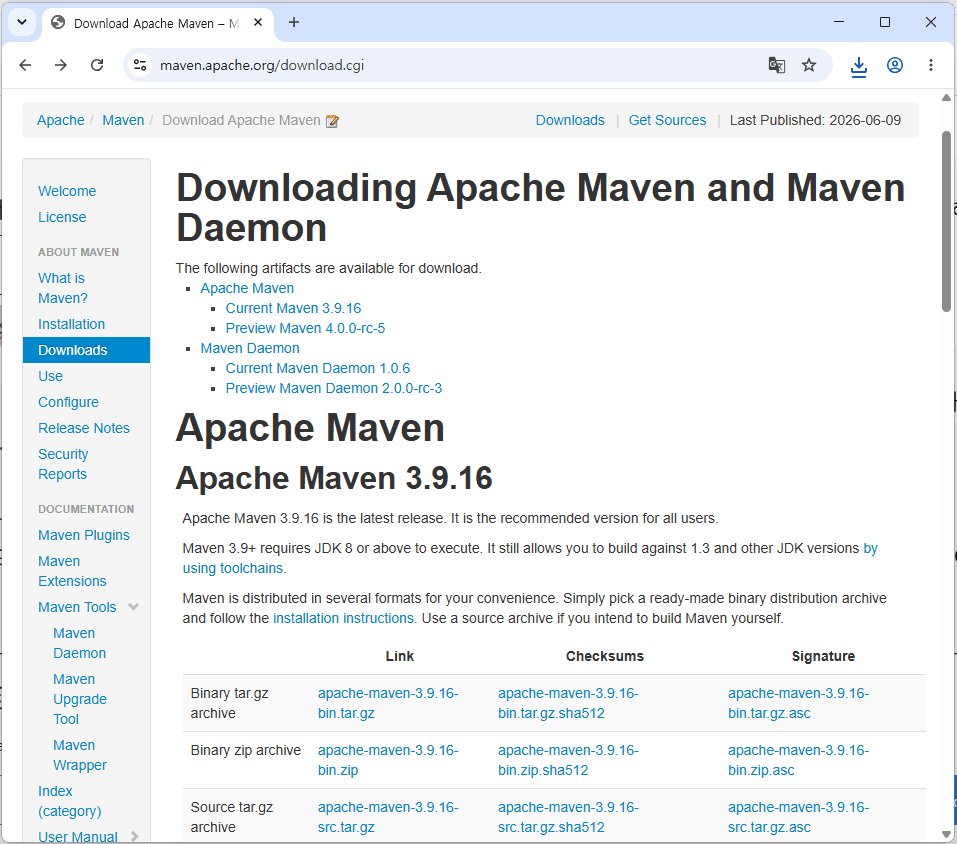
- Maven Project : https://maven.apache.org/download.cgi
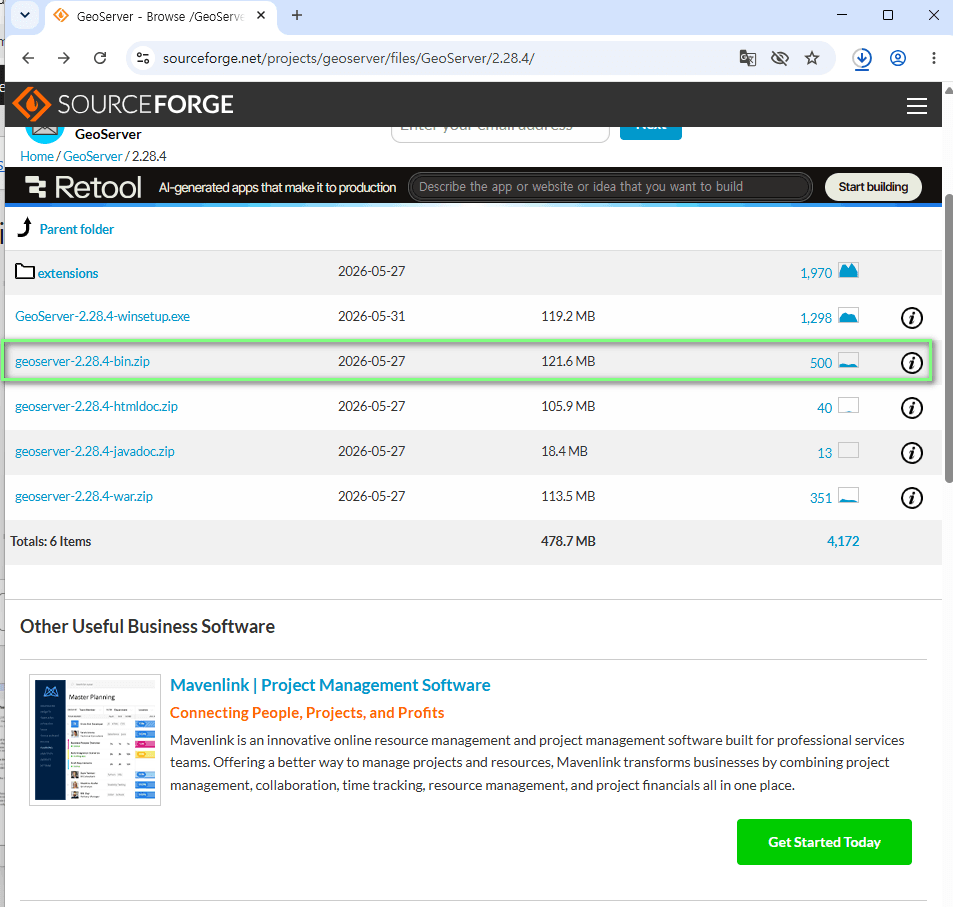
- GeoServer Project :
- Honolulu GIS Data : https://honolulu-cchnl.opendata.arcgis.com
13. Trouble Shooting
- In an intranet environment, you may need to recompile your project using Maven with the following flags to bypass SSL verification:
mvn clean compile -Dmaven.wagon.http.ssl.insecure=true -Dmaven.wagon.http.ssl.allowall=true
- Alternatively, you can update the Java certificate chain. First, open the osgeo website in your browser and download its certificate (
nexus.osgeo.org.crt). Then, run the following command to import it into your keystore:
keytool -importcert -keystore "C:\DEV\Works\MapService\jdk-21\lib\security\cacerts" -storepass changeit -file "C:\DEV\Works\MapService\MapClient\nexus.osgeo.org.crt" -alias osgeo_repo
14. Download the source code
The source code for this post is available for download. Keep in mind that the Object Detector App requires specific models and resources to run properly. You can download these essential model files and assets in Section 14: Resources below.
