A Quick Guide to Java on Netty
Easily deploy your app with Okta’s identity management platform Use Okta’s API to authenticate, manage, and secure users in any app within minutes. Try Okta today.
Netty is a non-blocking input/output (NIO) framework that makes it relatively simple to develop low-level network servers and clients. Netty provides an incredible amount of power for developers who need to work down on the socket level, for example when developing custom communication protocols between clients and servers. It supports SSL/TLS, has both blocking and non-blocking unified APIs, and a flexible threading model. It’s also fast and performant.
Netty’s asynchronous, non-blocking I/O model is designed for highly scalable architectures and may allow for higher throughput than an analogous blocking model. Basically, a non-blocking server runs all requests asynchronously on a single thread (no function should “block” the event loop). This contrasts with a blocking server model, which typically runs each request on a separate thread. By never having to switch threads or create new threads as load increases, the non-blocking model allows for reduced overhead and quicker expansion as traffic increases.
All of this power, however, comes at the cost of complexity. Non-blocking code is typically harder to read,to test, and to maintain, although this has improved greatly as the asynchronous paradigm has matured. Since Netty works at the socket level, it also requires a deeper understanding of the nuts and bolts of things like thread loops, byte buffers, and memory management.
The Netty.io team has done an admirable job of making Netty easy to use for all its power, but it’s still necessarily more complicated than higher-level libraries (such as Spring Boot WebFlux). So why use it?
Netty is designed to make the implementation of custom network protocols relatively easy. HTTP is great, but its a general-purpose protocol, basically well-suited to most things. But if you’re consistently passing custom, structured data back and forth between servers and clients (large files, streaming media, real-time game data, etc…), you can do better. Netty allows you to write your own network protocol tailored to your specific requirements, optimizing the traffic flow for your specific situation, without the unnecessary overhead of something like HTTP or FTP.
However, even if you’re not going to write your own custom TCP protocol, you can still use the power of Netty. Spring WebFlux is Spring’s answer to non-blocking and reactive programming. It’s an alternative to the traditional (blocking) Spring MVC architecture. By default, the Spring Boot WebFlux Starter runs on an embedded Netty server. In this configuration, you can think of WebFlux as a reactive, non-blocking HTTP application layer built on top of Netty’s NIO socket goodness.
In this tutorial, you are going to create a basic “Hello world” application in Netty. Next, you’re going to create the same “Hello world” application in Spring Boot WebFlux. Finally, you’re going to add OAuth 2.0 login to the application using Okta as the OAuth 2.0 provider.
Install the Project Dependencies
This project has a few required tools to install before you get started.
Java 11: This project uses Java 11. You can install OpenJDK via the instructions found on the OpenJDK website or using SDKMAN.
HTTPie: This is a simple command-line utility for making HTTP requests that you’ll use to test the REST application. It’s also beloved by Okta developers. Install per the instructions on their website.
Okta Developer Account: You’ll use Okta as an OAuth/OIDC provider to add OAuth2 login authentication to the application. Sign up for a free Okta developer account, if you haven’t already.
You should also go ahead and clone this blog’s GitHub repository.
<
git clone https://github.com/oktadeveloper/okta-netty-webflux-example.git
The project contains three subdirectories, corresponding to the three sections of this tutorial:
netty-hello-world: a very basic example of how to create a Netty serverwebflux-hello-world: how to create the same server in Spring WebFluxwebflux-oauth2login: an example of how to add OAuth2 login to a Spring WebFlux application
Use Netty to Build an HTTP Server
HTTP servers are application-layer implementations of the HTTP protocol (OSI Layer 7), so relatively high up in the internet stack. If you’re developing a REST API, you’re developing on top of an API that provides this implementation for you. By contrast, Netty doesn’t necessarily structure communication, provide session management, or even offer security like TLS. This is great if you’re building a super low-level networking application; however, perhaps not the best choice if you’re building a REST service.
Fortunately, the Netty API also provides some helper classes and functions that will allow us to easily integrate a higher level protocol like HTTP. In this part of the tutorial, you’ll use those to make a simple HTTP server.
Open the netty-hello-world project in your favorite IDE or text editor.
First, take a look at the src/main/java/com/okta/netty/AppServer.java file. This class is the entry point for the application and sets up the Netty server.
package com.okta.netty;

...

public class AppServer {

    private static final int HTTP_PORT = 8080;

    public void run() throws Exception {

        // Create the multithreaded event loops for the server
        EventLoopGroup bossGroup = new NioEventLoopGroup();
        EventLoopGroup workerGroup = new NioEventLoopGroup();

        try {
            // A helper class that simplifies server configuration
            ServerBootstrap httpBootstrap = new ServerBootstrap();

            // Configure the server
            httpBootstrap.group(bossGroup, workerGroup)
                .channel(NioServerSocketChannel.class)
                .childHandler(new ServerInitializer()) // <-- Our handler created here
                .option(ChannelOption.SO_BACKLOG, 128)
                .childOption(ChannelOption.SO_KEEPALIVE, true);

            // Bind and start to accept incoming connections.
            ChannelFuture httpChannel = httpBootstrap.bind(HTTP_PORT).sync();

            // Wait until server socket is closed
            httpChannel.channel().closeFuture().sync();
        }
        finally {
            workerGroup.shutdownGracefully();
            bossGroup.shutdownGracefully();
        }
    }

    public static void main(String[] args) throws Exception {
        new AppServer().run();
    }

}
The most important line is .childHandler(new ServerInitializer()), which creates ServerInitializer and ServerHandler and hooks into the Netty server.
Next look at src/main/java/com/okta/netty/ServerInitializer.java. This class configures the Netty channel that will handle our requests and connects it to the ServerHandler.
package com.okta.netty;

...

public class ServerInitializer extends ChannelInitializer<Channel> {

    @Override
    protected void initChannel(Channel ch) {
        ChannelPipeline pipeline = ch.pipeline();
        pipeline.addLast(new HttpServerCodec());
        pipeline.addLast(new HttpObjectAggregator(Integer.MAX_VALUE));
        pipeline.addLast(new ServerHandler());
    }

}
Finally, there is src/main/java/com/okta/netty/ServerHandler.java. This is where the actual request is mapped and the response is generated.
package com.okta.netty; ... public class ServerHandler extends SimpleChannelInboundHandler{ @Override protected void channelRead0(ChannelHandlerContext ctx, FullHttpRequest msg) { ByteBuf content = Unpooled.copiedBuffer("Hello World!", CharsetUtil.UTF_8); FullHttpResponse response = new DefaultFullHttpResponse(HttpVersion.HTTP_1_1, HttpResponseStatus.OK, content); response.headers().set(HttpHeaderNames.CONTENT_TYPE, "text/html"); response.headers().set(HttpHeaderNames.CONTENT_LENGTH, content.readableBytes()); ctx.write(response); ctx.flush(); } }
In this class, notice that you must convert the response string to a byte buffer. You actually generate an HTTP response and set some headers directly. This is the application layer of the internet (OSI Layer 7). When you call ctx.write(response), it sends the response as a byte stream over TCP. The Netty team has done a great job of hiding a ton of complexity from us, while staying at a low-level transport protocol.
Test Your Netty App
To test this Netty app, from the project root directory netty-hello-world, run:
./gradlew run
Once the application finished loading, from a separate shell, use HTTPie to perform a GET request:
$ http :8080

HTTP/1.1 200 OK
content-length: 12
content-type: text/html

Hello World!
That’s a simple HTTP server built in Netty. Next, you will climb the ladder of abstraction a rung and use Spring Boot and WebFlux to simplify things.
Say Hello to WebFlux on Netty
As I mentioned previously, WebFlux is a non-blocking alternative to Spring MVC. It supports reactive programming with its event-driven, asynchronous, and non-blocking approach to request handling. It also provides many functional APIs. Reactor, a reactive, server-side Java library developed in close collaboration with Spring provides the reactive streams aspect of WebFlux. However, you could also use other reactive streams libraries.
Recall that, by default, the Spring Boot WebFlux starter runs on a Netty server. You’ll notice how much complexity Spring Boot hides from you in the next example.
The Spring Boot WebFlux project is located in the webflux-hello-world sub-directory of the GitHub repository. It’s beguilingly simple.
Take a look at the ReactiveApplication class. It’s the bare-bones, standard Spring Boot application class. It simply leverages the public static void main() method and the @SpringBootApplication to start the whole Spring Boot application framework.
src/main/java/com/okta/webflux/app/ReactiveApplication.java
package com.okta.webflux.app;

...

@SpringBootApplication
public class ReactiveApplication {

   public static void main(String[] args) {
      SpringApplication.run(ReactiveApplication.class, args);
   }

}
The ReactiveRouter is a simple router class that links HTML endpoints with handler methods. You can see that it uses dependency injection to pass the ReactiveHandler to the router bean, which defines a single endpoint for the / route.
src/main/java/com/okta/webflux/app/ReactiveRouter.java
package com.okta.webflux.app;

...

@Configuration
public class ReactiveRouter {

    @Bean
    public RouterFunction route(ReactiveHandler handler) {

        return RouterFunctions
            .route(RequestPredicates
                .GET("/")
                .and(RequestPredicates.accept(MediaType.TEXT_PLAIN)), handler::hello);
    }
}
The ReactiveHandler is similarly simple. It defines one handler function that returns plain text. The Mono<ServerResponse> return type is a special type for returning a stream of one element. Take a look at the Spring Docs on Understanding Reactive types to learn more about return types. If you’re used to Spring MVC, this will likely be one of the more unfamiliar aspects of WebFlux.
package com.okta.webflux.app;

...

@Component
public class ReactiveHandler {

    public Mono<ServerResponse> hello() {
        return ServerResponse
            .ok()
            .contentType(MediaType.TEXT_PLAIN)
            .body(BodyInserters.fromObject("Hello world!"));
    }

}
Open a shell and navigate to the webflux-hello-world sub-directory of the project.
Run the project using: ./gradlew bootRun.
Open another shell to test the endpoint with http :8080.
HTTP/1.1 200 OK
Content-Length: 12
Content-Type: text/plain

Hello world!
See how much simpler Spring Boot was to use than Netty?
Create an OpenID Connect (OIDC) Application
Next, you will secure the application using OAuth 2.0 login. This might sound complicated, but don’t worry. Spring and Okta have conspired to make it pretty darn simple!
Okta is a SaaS (software-as-service) authentication and authorization provider. We provide free accounts to developers so you can develop OIDC apps without fuss. Head over to developer.okta.com and sign up for an account.
After you’ve verified your email, log in and perform the following steps (if it’s your first time to log in, you may need to click the yellow Admin button to get to the developer dashboard):
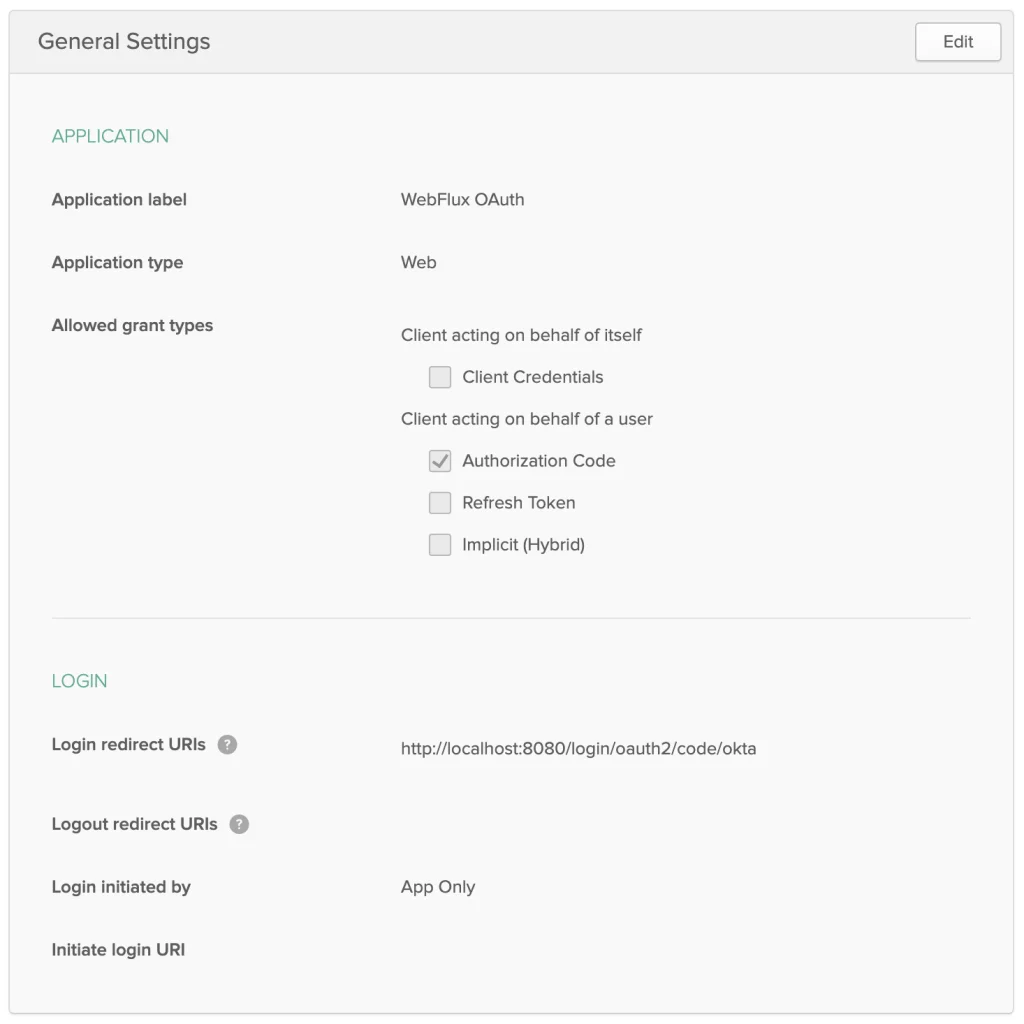
- Go to Application > Add Application.
- Select application type Web and click Next.
- Give the app a name. I named mine “WebFlux OAuth”.
- Under Login redirect URIs change the value to
http://localhost:8080/login/oauth2/code/okta. The rest of the default values will work. - Click Done.

Take note of the Client ID and Client Secret at the bottom. You’ll need them in a moment.
Secure Your App with OAuth 2.0
Once you’ve created the OIDC application on Okta, you need to make a few updates in the project. If you want to skip ahead the finished project for this part of the tutorial can be found in the webflux-oauth2login sub-directory, but I’m going to show you how to modify the webflux-hello-world to add login.
First, add the Okta Spring Boot Starter to the Gradle build file. We’ve worked hard to make this as easy as possible, and the Okta Spring Boot Starter simplifies OAuth configuration. Take a look at the GitHub project for the starter for more info.
Add the following dependency to the dependency block of your build.gradle file:
dependencies {
    ...
    implementation 'com.okta.spring:okta-spring-boot-starter:1.3.0'
}
Next, add the following properties to the src/main/resources/application.properties file. You need to replace the values in brackets with your own Okta domain and client ID.
You can find your Issuer URI by opening your Okta developer dashboard and going to API > Authorization Servers and looking in the table at the default server. The client ID and secret come from the OIDC application you created just a moment ago.
okta.oauth2.issuer={yourIssuerUri}
okta.oauth2.client-id={yourClientId}
okta.oauth2.client-secret={yourClientSecret}
Now run the application: ./gradlew bootRun.
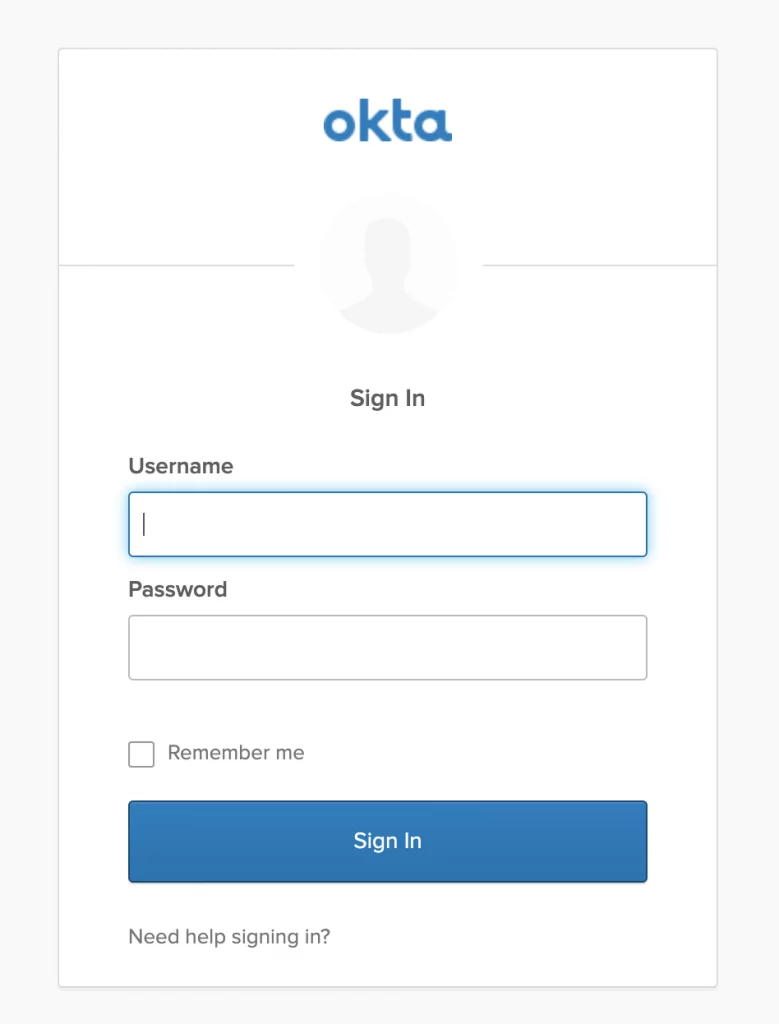
Either log out of your Okta developer account or use an incognito window and navigate to (in a browser): http://localhost:8080.
You’ll be directed to log in using your Okta account.

Once you’ve logged in, you’ll be redirected back to the app. Yay – success!
Learn More About Netty, Spring Boot, and OAuth 2.0
In this tutorial you created a basic “Hello world” application using Netty. You saw how Netty is a super-powerful framework for creating TCP and UDP network protocols. You saw how it supports non-blocking IO, and how Spring WebFlux builds on top of Netty to provide a reactive, non-blocking HTTP application framework. You then built a “Hello world” application in WebFlux, after which you used Okta as an OAuth 2.0 / OIDC provider to add OAuth 2.0 login to the application.
You can see the completed code for this tutorial on GitHub at oktadeveloper/okta-netty-webflux-example.
In addition to WebFlux, some powerful networking frameworks are built on top of Netty. Apple recently open-sourced ServiceTalk, a reactive microservices client/server library that supports HTTP, HTTP/2, and gRPC. There’s also Armeria, an open-source asynchronous HTTP/2 RPC/REST client/server library built on top of Java 8, Netty, Thrift, and gRPC. Its primary goal is to help engineers build high-performance asynchronous microservices.
If you’re interested in learning more about Spring Boot, Spring WebFlux, and OAuth 2.0, check out these useful tutorials:
- Get Started with Spring Boot, OAuth 2.0, and Okta
- Build Reactive APIs with Spring WebFlux
- What the Heck is OAuth?
- Get Started with Spring Security 5.0 and OIDC
- Identity, Claims, & Tokens – An OpenID Connect Primer, Part 1 of 3
- Build a Secure API with Spring Boot and GraphQL
If you have any questions about this post, please add a comment below. For more awesome content, follow @oktadev on Twitter, or subscribe to our YouTube channel!
Easily deploy your app with Okta’s identity management platform Use Okta’s API to authenticate, manage, and secure users in any app within minutes. Try Okta today.


Hi…
I’m Elena gillbert.A Quick Guide to Java on Netty. Netty is a non-blocking input/output (NIO) framework that makes it relatively simple to develop low-level network servers and clients