In the last article, I mentioned how I got around to creating an Open-Source android library. In this post, we’ll take a look at how to publish your android library to Bintray. Once your library is published on bintray, it’ll be available to be used via gradle.
There are essentially 5 steps to publish your library on bintray:
- Create an open-source/paid account on https://bintray.com/
- Create your repository on Bintray.
- Install the bintray plugin on Android Studio.
- Upload the library to Bintray.
- Submit the library for review to be finally published.
1. Create an Open-Source/Paid account on https://bintray.com/
You cannot publish your library on Bintray if you don’t have an account for open-source or if it isn’t paid.
With an open-source account, your libraries would be publicly available for use. If you want your packages to be private, then sign up for a paid account. They have a Pro Edition and an Enterprise edition.
Since we’re talking about publishing an open-source library, we’ll create a open-source account here.
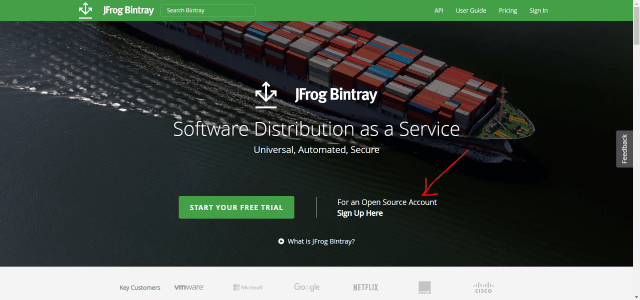
Follow the simple steps to create your account and activate it via confirmation mail. Once you’ve created your account, login and proceed to the next step.
2. Creating a Repository.
Let’s go ahead and create a repository for our android library. As you can see, I’ve already created one for pulsating button.
Go ahead and enter all the details for your repository. For library type, choose maven. For license, I think Apache 2.0 license works well.
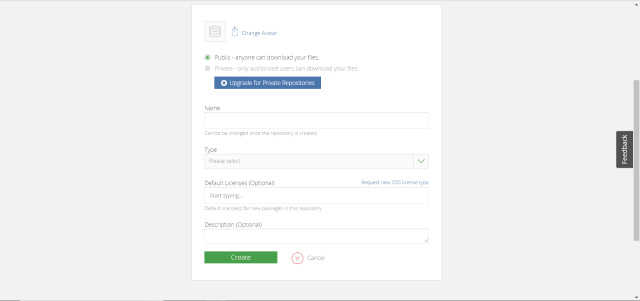
Once your done filling up the form, go ahead and click create.
3. Installing the Bintray plugin on Android Studio
Creating and publishing the library is really easy with the novoda/bintray-release plugin. Let’s go ahead and setup this plugin.
- First, go to your project level build.gradle file and add this line for classpath:
1 | classpath 'com.novoda:bintray-release:<latest-version>' |
Remember to replace <latest-version> with the latest version of the plugin. As of writing the latest version is 0.9.2
- Next, go to your app level build.gradle file and add this line to the top
1 | apply plugin: 'com.novoda.bintray-release' |
Then go ahead and sync the project. We’ve finally setup the bintray plugin. Now we’re ready to upload our library to bintray.
4. Uploading the library to Bintray.
To upload our android library to bintray, we’ll need to add some configuration/credentials to our app level build.gradle file. This is how my build.gradle looks like for PulsatingButton.
01 02 03 04 05 06 07 08 09 10 11 12 13 14 15 16 17 18 19 20 21 22 23 24 25 26 27 28 29 30 31 32 33 34 35 36 37 38 39 40 41 42 43 44 45 46 47 48 49 50 51 52 53 54 55 56 | apply plugin: 'com.novoda.bintray-release'apply plugin: 'com.android.library'apply plugin: 'kotlin-android'apply plugin: 'kotlin-android-extensions'//Step II: Add the below publish detailspublish { def groupProjectID = 'com.ayusch.pulsatingbutton' def artifactProjectID = 'pulsatingbutton' def publishVersionID = '1.1.1' userOrg = 'androidville' repoName = 'PulsatingButton' groupId = groupProjectID artifactId = artifactProjectID publishVersion = publishVersionID desc = 'Android library to display a pulsating (growing & shrinking) button'}android { compileSdkVersion 29 buildToolsVersion "29.0.2" defaultConfig { minSdkVersion 21 targetSdkVersion 29 versionCode 1 versionName "1.0" testInstrumentationRunner "androidx.test.runner.AndroidJUnitRunner" } buildTypes { release { minifyEnabled false proguardFiles getDefaultProguardFile('proguard-android-optimize.txt'), 'proguard-rules.pro' } }}dependencies { implementation fileTree(dir: 'libs', include: ['*.jar']) implementation"org.jetbrains.kotlin:kotlin-stdlib-jdk7:$kotlin_version" implementation 'androidx.appcompat:appcompat:1.1.0' implementation 'androidx.core:core-ktx:1.1.0' implementation 'androidx.constraintlayout:constraintlayout:1.1.3' testImplementation 'junit:junit:4.12' androidTestImplementation 'androidx.test.ext:junit:1.1.1' androidTestImplementation 'androidx.test.espresso:espresso-core:3.2.0'} |
Notice the publish block. This is required by the plugin to upload your android library to Bintray.All the credentials are pretty straightforward and you can find them in your Bintray account.
Finally, all we need to do is run an Android Studio command to upload our library.
1 | ./gradlew clean build bintrayUpload -PbintrayUser=BINTRAY_USERNAME -PbintrayKey=BINTRAY_KEY -PdryRun=false |
You can find the bintray username on the top right corner in your Bintray account. For finding your Bintray Key Go to: Top Right Corner (Your username) -> Edit Profile -> API Key and copy your api key.

Replace the BINTRAY_KEY with the API key and BINTRAY_USERNAME with your username. Then open up the terminal on Android Studio and paste and run this command. Wait for it to finish successfully. Once the build finishes, your library will be uploaded to bintray and we just have to submit it for final review.
5. Submitting the library for Review
In this final step, we need to submit the library to JCenter for final review post which our android library will be published.
Go to Your Repository -> Click on your package and at the bottom right corner in the Linked To section, you’ll see an option to submit to JCenter.
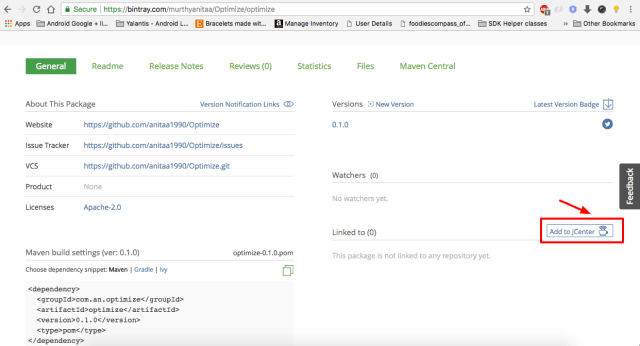
Click on Add to JCenter and you’ll be redirected to a form where you’ll need to add information about your project. Then finally click on submit.
It takes mostly 24 hours to get your project reviewed and published on JCenter. You’ll receive a confirmation via mail that your android library has been published.
Now you’re ready to include your library into any project with Gradle!
Published on Java Code Geeks with permission by Ayusch Jain, partner at our JCG program. See the original article here: Publishing your Android Library to Bintray (Gradle) Opinions expressed by Java Code Geeks contributors are their own. |

Hi…
I am Elena gillbert.Great guide! But is this still relevant? I can’t directly create a repository on Bintray, it asks me to create an organization first.. So I created the organization and its inner repository, but then the script fails saying that it can’t find the repo :(