The introduction of annotations with J2SE 5 has changed how we write and process Java. Besides Java SE’s predefined annotations, frameworks, IDEs, and toolkits have introduced their own custom annotations. The Checker Framework has provided examples of how custom annotations can be used to add greater type safety in Java. In this post, I look at the writing of a simple custom annotation and using it in NetBeans (8.0.2) and IntelliJ IDEA (14.0.3) to help developers identify issues in their code that need further attention.
In the article Making the Most of Java’s Metadata, Part 2: Custom Annotations, Jason Hunter demonstrates an @Unfinished annotation as an example of writing a custom Java annotation. I will demonstrate a different implementation of an @Unfinished annotation in this post. That’s the beauty of custom annotations: one can write an annotation to best fit one’s needs. The code for my @Unfinished annotation is shown in the next code listing.
Unfinished.java: Defining Custom @Unfinished Annotation
package dustin.examples.annotations;

import static java.lang.annotation.ElementType.*;

import java.lang.annotation.Documented;
import java.lang.annotation.Retention;
import java.lang.annotation.RetentionPolicy;
import java.lang.annotation.Target;

/**
 * Example of a custom annotation that marks Java code constructs
 * that are not yet completed.
 *
 * Notes about custom annotations specific to this example:
 *   - @Documented indicates available for public documentation
 *   - CLASS retention policy means that compiler places annotation
 *     information in compiled .class files, but JVM is NOT aware
 *     of the annotation at runtime.
 *   - @Target parameters (statically imported) indicate that this
 *     annotation can be applied to constructors, fields,
 *     local variables, methods, packages, parameters, and
 *     classes/interfaces.
 *   - Methods defined for this @interface without 'default' are
 *     required settings for application of this annotation. In
 *     this case, the "finishBy" element is NOT required (but
 *     recommended!) but the "value" element is required.
 *   - "value" element has special significance in custom Java
 *     annotations: it is the assumed annotation element if
 *     a String is provided to the annotation without explicit
 *     element name called out.
 */
@Documented
@Retention(RetentionPolicy.CLASS)
@Target({CONSTRUCTOR,FIELD,LOCAL_VARIABLE,METHOD,PACKAGE,PARAMETER,TYPE})
public @interface Unfinished
{
   /** Description of the unfinished construct. */
   String value();

   /**
    * Date, build, or event by which the annotated construct
    * is anticipated to be finished.
    */
   String finishBy() default "Unknown";
}
The next code listing shows application of @Unfinished in a simple class that has a lot of work still to be completed on it.
WorkInProgress.java: Applying @Unfinished Custom Annotation
package dustin.examples.annotations.demo;

import dustin.examples.annotations.Unfinished;

/**
 * Demonstrates custom Java annotation @Unfinished.
 */
public class WorkInProgress
{
   @Unfinished("This will do something good by Revision 2.")
   public void doSomethingGood()
   {
   }

   @Unfinished(value = "Do something good here.", finishBy = "Revision 2")
   public void doSomethingElseGood()
   {
   }
}
The incomplete class uses the annotation’s “value” element by default for one method and then adds use of the “finishedBy” element for the second method. There are a few observations that can be made from the last two code listings definition or and use of @Unfinished:
- Inclusion of “default” for an annotation element means that those who use the annotation are not required to provide a value for that element.
- The “value” element is assumed if only one value is provided to the annotation and is provided without an explicit element name.
- The name “value” does not need to be provided if only a single annotation element is specified, but must be provided if more than one annotation element is specified.
- The retention level of CLASS was used here because I felt like tools working with the compiled version of Java classes would be able to use this information and I don’t anticipate runtime use of the information.
- Careful selection of which annotation elements should have “default” values is desirable because not having a “default” requires an element to be specified, which can be the desired behavior in some cases.
Use of custom annotations can provide a standardized mechanism for building “executable” and more controlled descriptions for other developers and for tools. This approach is often advantageous when compared to leaving messages with comments as comments tend to be less standardized and subject to typos and differences in case sensitivity, spelling, and other discrepancies. Annotations enforce conventions better and allow for tooling to make more efficient use of what they communicate than parsing arbitrary text. Perhaps the most obvious way to gain some of this benefit of custom annotations over arbitrary comments is with an annotation processor. Several IDEs and frameworks such as the Checker Framework process annotations. There are also numerous online references regarding writing of custom annotations processors that can be used with the Jav compiler to provide warnings. In the remainder of this post, I focus on how one can apply two of the more popular Java IDEs (NetBeans and IntelliJ IDEA) to report these annotations as hints/inspections. I am not looking in this post at integrating an annotation processor into the IDEs’ compilation processes or at integrating a custom processor with the command-line Java compiler.
Inspecting the @Unfinished Annotation in NetBeans
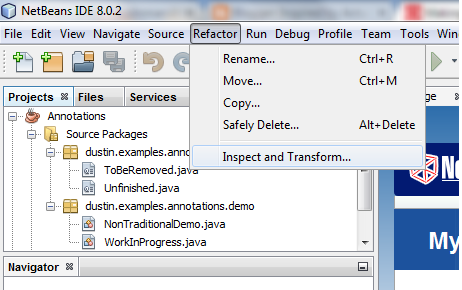
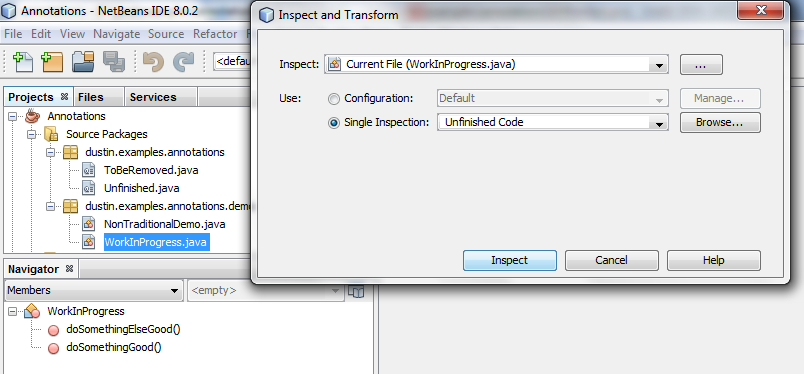
I have blogged before on Creating a NetBeans 7.1 Custom Hint and the process is pretty much the same still with NetBeans 8. The first step is to use the Refactor -> Inspect and Transform … option as shown in the next screen snapshot.
When Refactor -> Inspect and Transform… is selected, a popup like that shown next is seen.
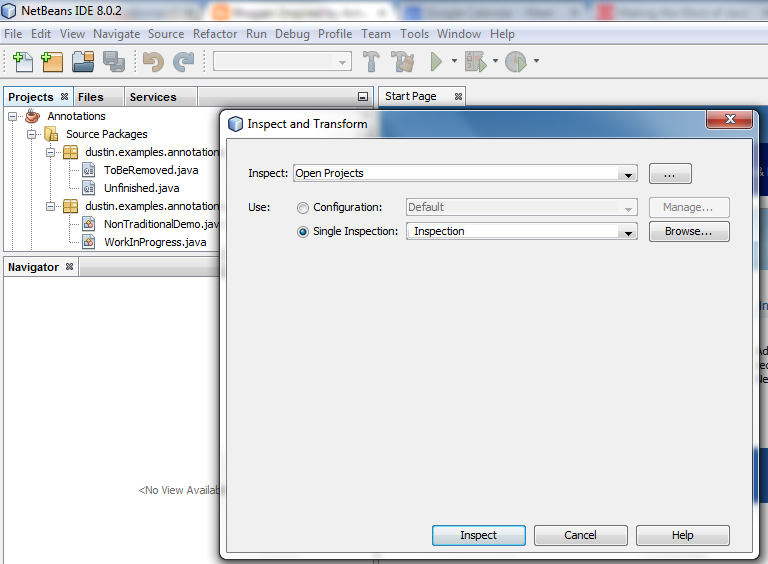
I’m going to apply this new inspection to all my open projects as shown in the last screen snapshot’s “Inspect” field. Clicking on the “Browse” button leads to the “Manage Inspections” window coming up as shown in the next screen snapshot.
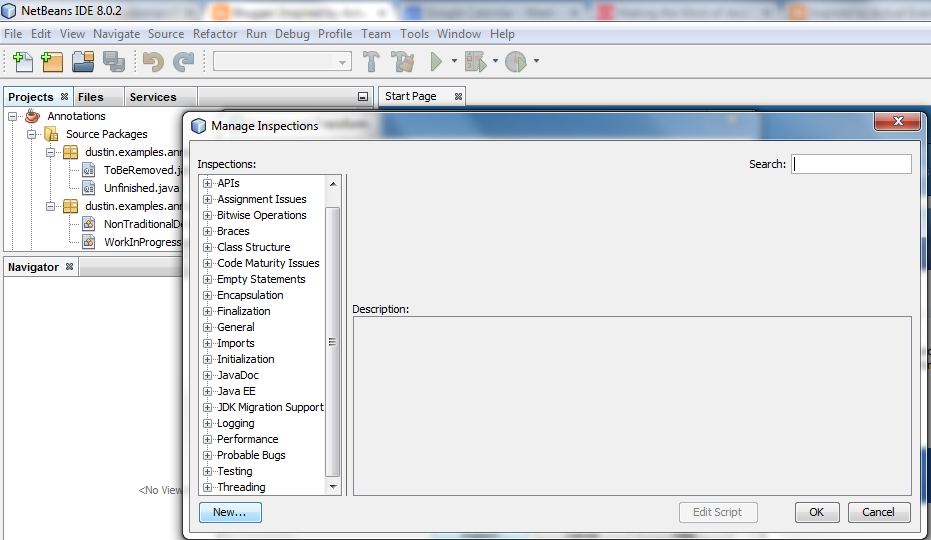
Clicking on the “New…” button allows the developer to create a custom inspection under Custom->Inspection.
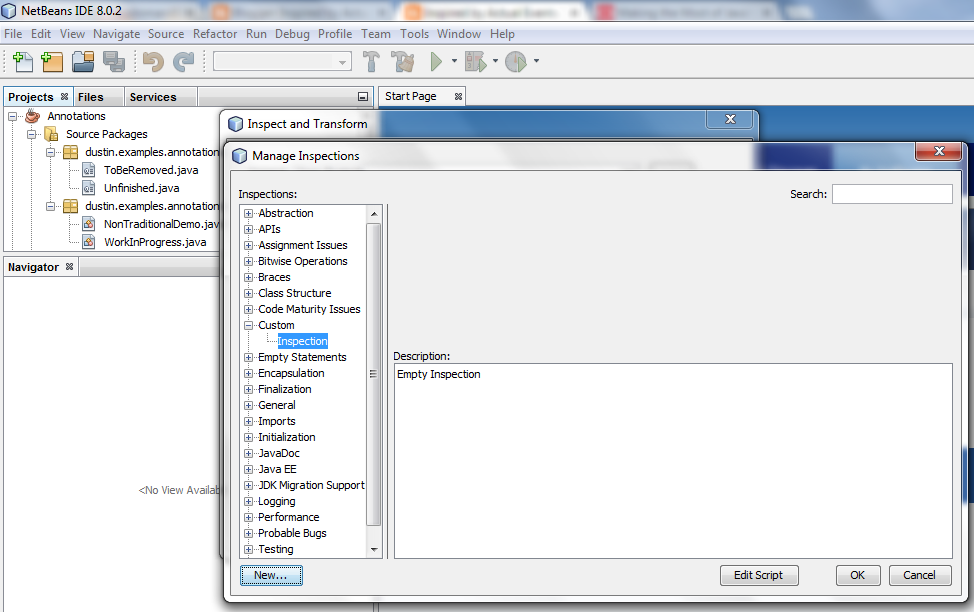
You can click the “Edit Script” button to create the custom inspection, which includes the ability to rename the inspection. I have renamed the Inspection “Unfinished Code.” The next screen snapshot shows the code I added to the “Unfinished Code” inspection.
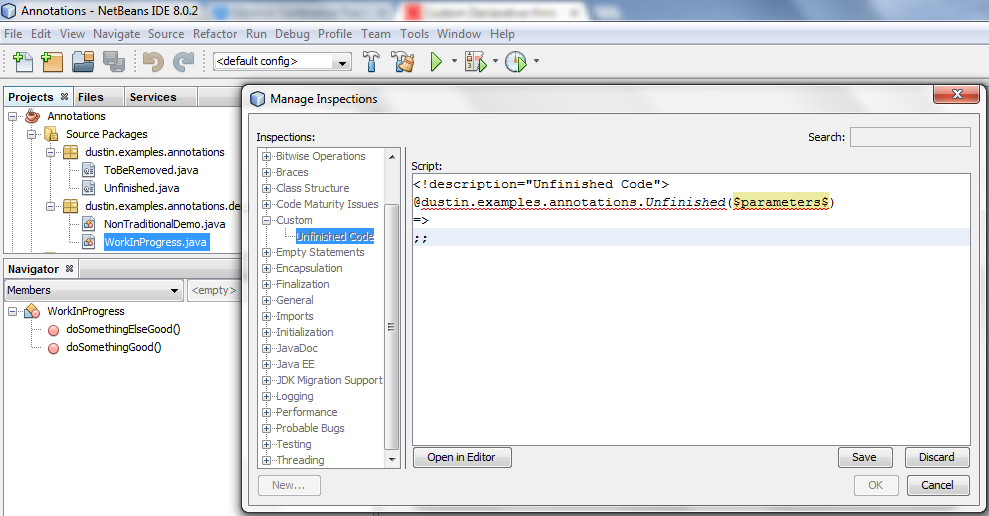
In the script code for this “Unfinished Code” inspection (which is also shown below), the description is specified as “Unfinished Code”. The source pattern is specified as @dustin.examples.annotations.Unfinished($parameters$) (the entire package name of the @interface defining the custom annotation with $parameters$ indicating one or more parameters). The => symbols point to the target pattern. In this case, the target pattern is empty, indicating that the proposed transformation is to remove the @Unfinished annotation. For more details on the syntax of the NetBeans inspections editor, see Geertjan Wielenga‘s post Custom Declarative Hints in NetBeans IDE 7.1.
<!description="Unfinished Code">
@dustin.examples.annotations.Unfinished($parameters$)
=>
;;
With the NetBeans inspection created, it is time try it out. The next two screen snapshots demonstrate selecting that Inspection to run and the results of running it.
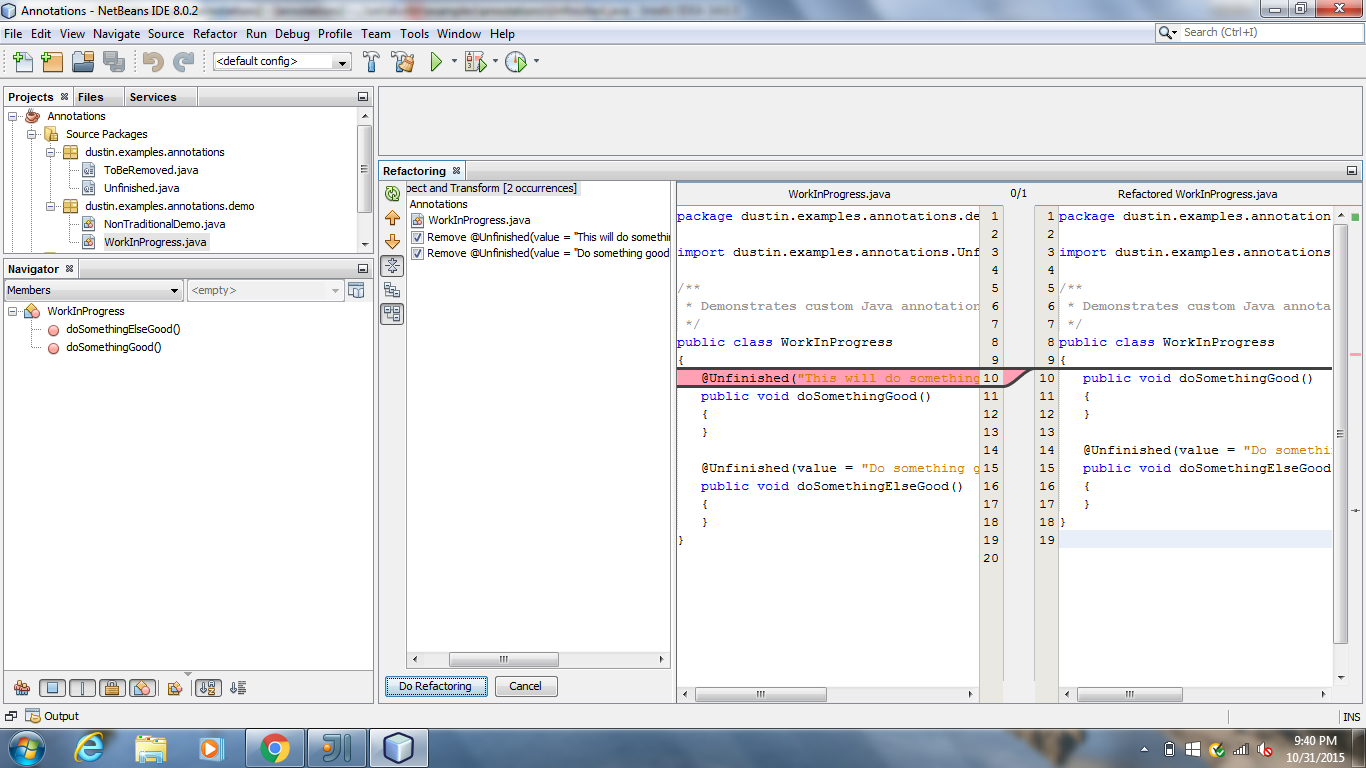
The output from running the inspection is an example of how we can use NetBeans in conjunction with a custom annotation to quickly identify annotated code and treat it appropriately.
Inspecting the @Unfinished Annotation in IntelliJ IDEA
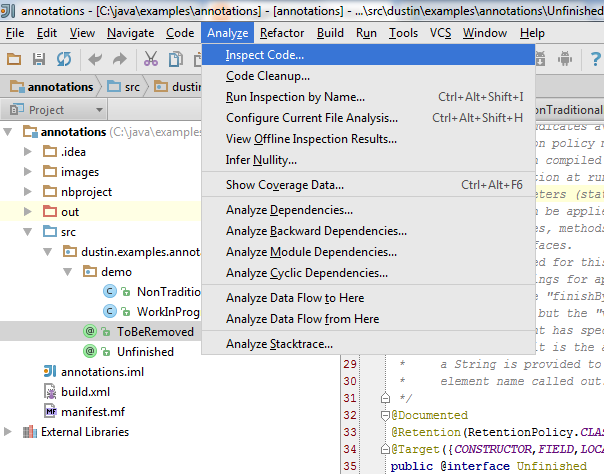
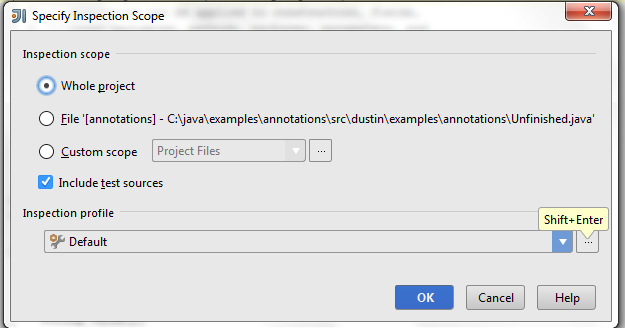
One way to start creating a custom annotation in IntelliJ IDEA is to open Analyze -> Inspect Code… and click on the “…” button in the “Specify Inspection Scope” pop-up as shown in the next two screen snapshots.
The next screen snapshot shows the “Inspections” dialog box.
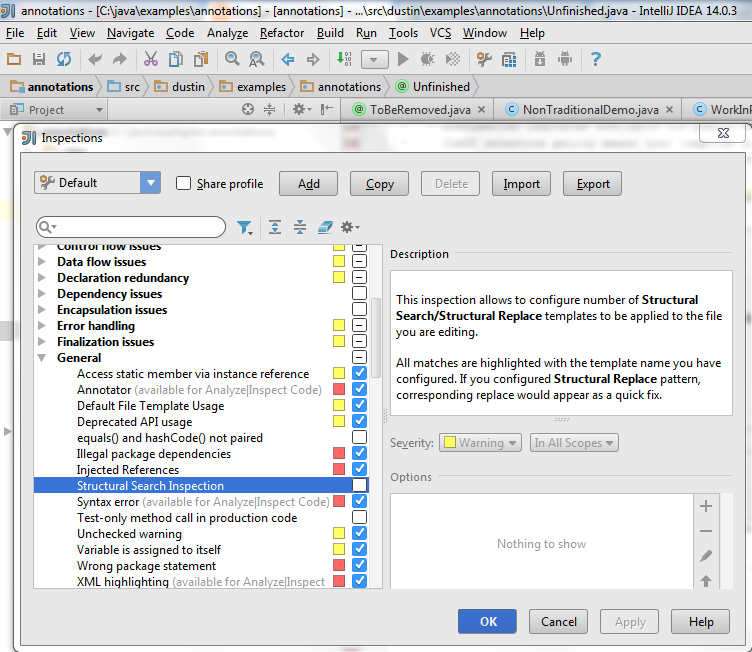
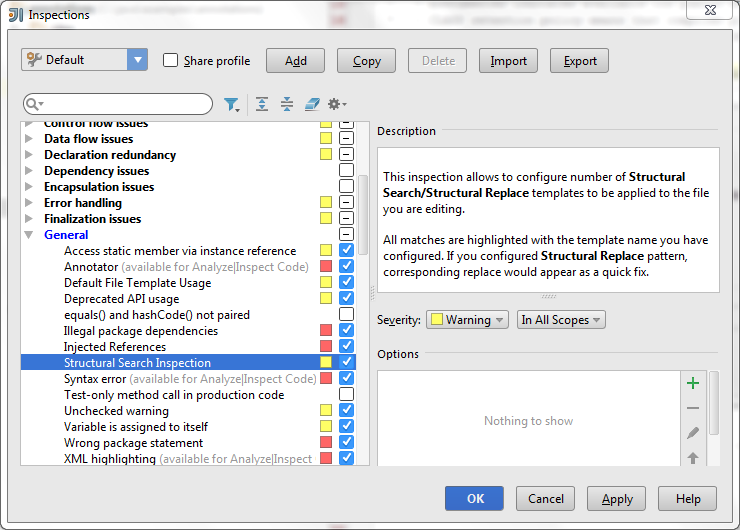
The screen snapshot just shown indicates that the “Structural Search Inspection” is NOT checked. Checking it (checkbox is to the right of the name “Structural Search Inspection”) leads to the “Severity” level being selectable and allows a particular inspection to be added (plus sign turns from gray to green).
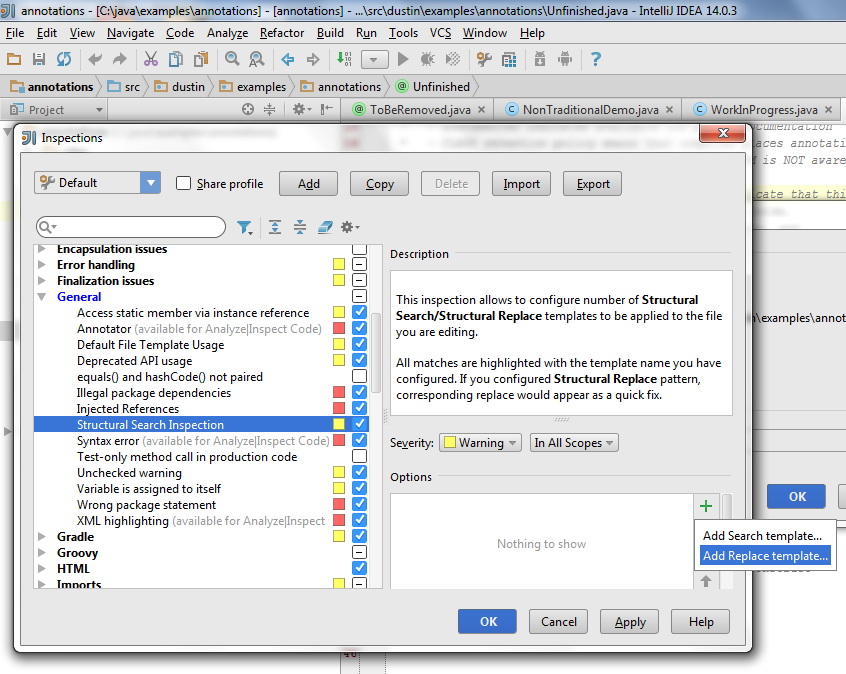
Clicking on the green plus sign (+), leads to two choices: “Add Search template…” or “Add Replace template…”. The differentiation here is similar to NetBeans’s differentiation between Source -> Inspect and Refactor -> Inspect and Transform… and I’ll focus on the “Replace template” here.
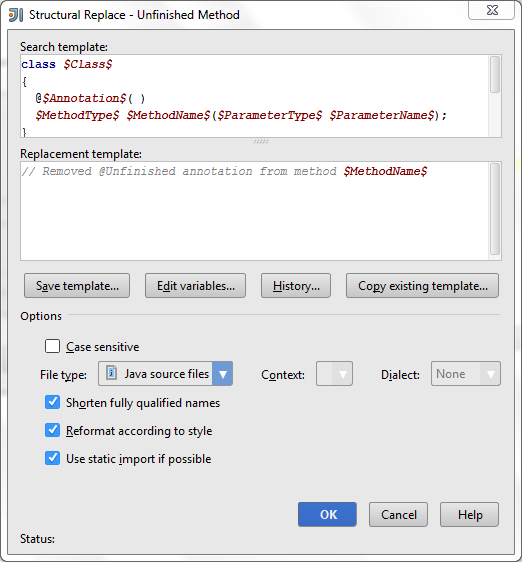
When “Add Replace template…” is selected, the “Structural Replace” dialog is displayed.
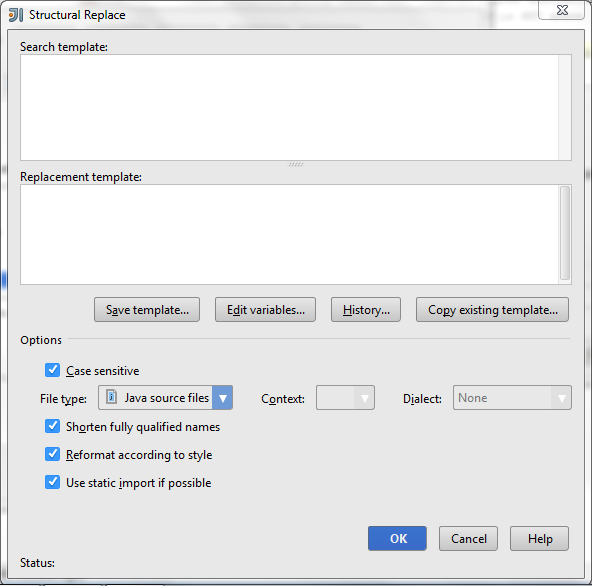
The easiest way to create a custom inspection here it to adapt an existing template. This is done by clicking on the “Copy existing template…” button. For the two inspections I create for this blog post, I copied the “annotated class” and “annotated methods” existing templates respectively to create my own custom templates “Unfinished Class” and “Unfinished Method.”
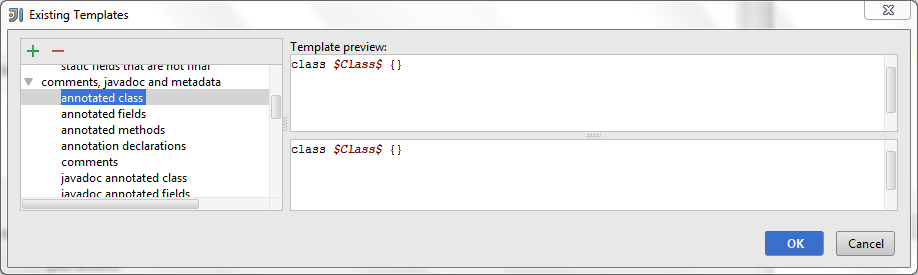
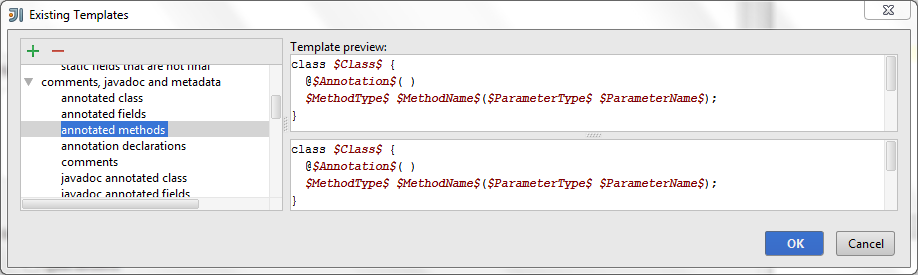
The screen snapshots above show the “existing templates” I copied and the screen snapshots below showed the custom templates I created from them for “Unfinished Class” and “Unfinished Method.”
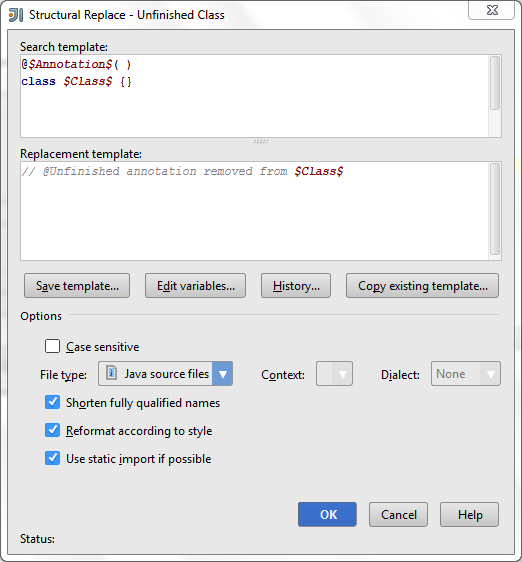
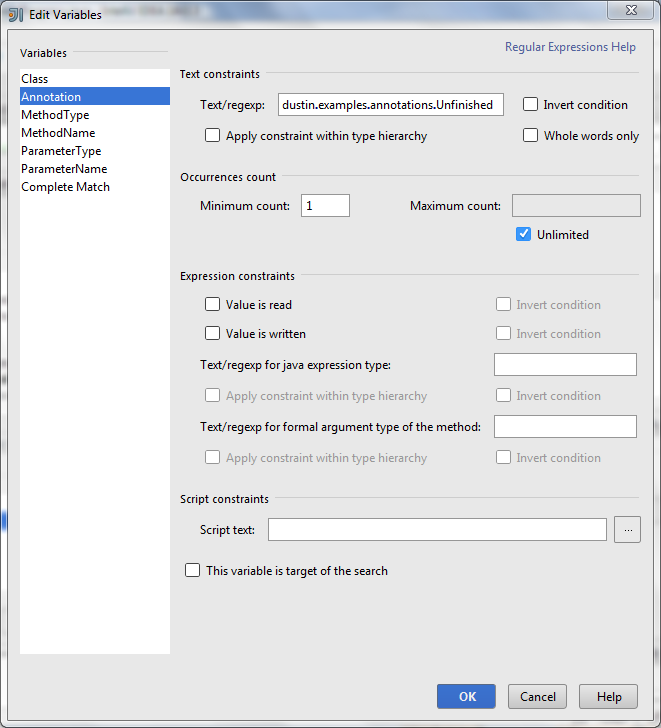
For each of the custom templates (“Unfinished Class” and “Unfinished Method”), I need to click on the “Edit variables…” button and specify the regular expressions for each variable (identifiers marked with $ on front and back) to be searched. For most variables (such as class name, method name, and so forth), I use an “all characters” regular representation (.*), but for the $Annotation$ in each of these templates, I use dustin.examples.annotations.Unfinished. The next screen snapshot is a representative sample of this that shows the Annotation variable setting for the “Undefined Method” template.
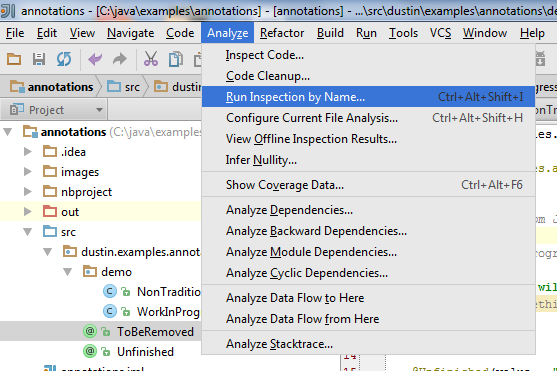
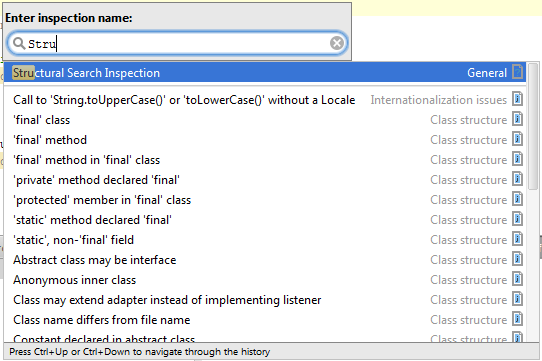
I can use Analyze -> Run Inspection by Name… to run either of my new inspections. The next three screen snapshots demonstrate running the new “Unfinished Method” inspection.
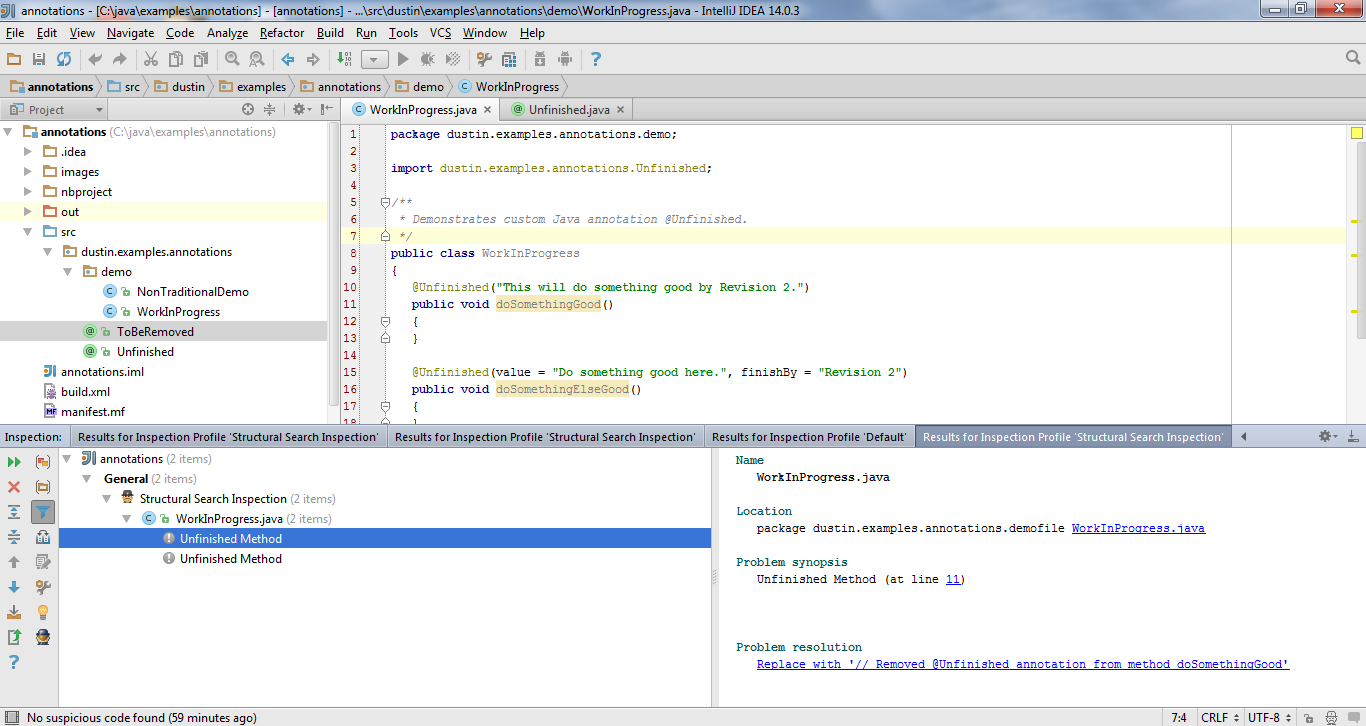
The output from running the inspection is an example of how we can use IntelliJ IDEA in conjunction with a custom annotation to quickly identify annotated code and treat it appropriately.
Conclusion
This post has demonstrated using NetBeans’s and IntelliJ IDEA’s abilities to create custom inspections to create inspections that can alert developers to the presence of custom annotations in their code. The post demonstrated a simple @Unfinished annotation and how to apply custom inspections in NetBeans and IntelliJ IDEA to help identify code that uses those annotations.
| Reference: | Applying IDE Inspections to Custom Java Annotations from our JCG partner Dustin Marx at the Inspired by Actual Events blog. |
