Introduction
This series of tutorials will show you how to build Java applications using the OpenMap GIS Java Swing library.
OpenMap’s Developer guide is a very useful document that describes OpenMap’s architecture but it doesn’t explain how to start and build up an application step-by-step. The examples that come together with the source code are useful but not enough.
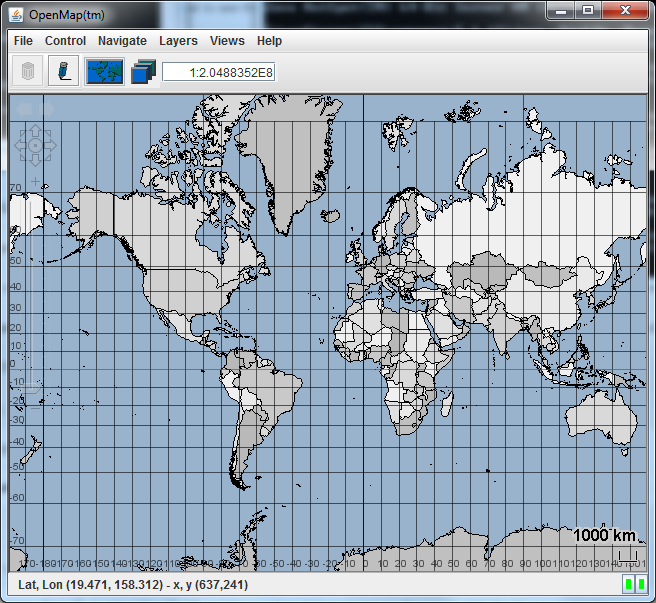
OpenMap is written in Swing. As of this writing the latest version is 5.1.12. You can download both source code and executable jars from GitHub. Once you copy/unzip/clone it to a directory, you can execute it by either running the relevant script for your platform (openmap.bat or openmap) or by double clicking on lib/openmap.jar. You should see a full GIS application like the one in Figure 1. We will try to build a similar application by the end of this series. The OpenMap source code also contains some examples of how to use OpenMap. In this tutorial we shall be based on com.bbn.openmap.app.example.SimpleMap. In the second tutorial we will be using code from com.bbn.openmap.app.example.SimpleMap2. Later tutorials will be based on other examples.
In this series of tutorials we shall use the latest NetBeans IDE 8.1 to create our applications.
Tutorial 1 – Build a basic map application
Create a JFrame application
In this first tutorial we shall build a basic JFrame application that contains a map (see Figure 2). Open NetBeans and create a new Java application by following these steps:
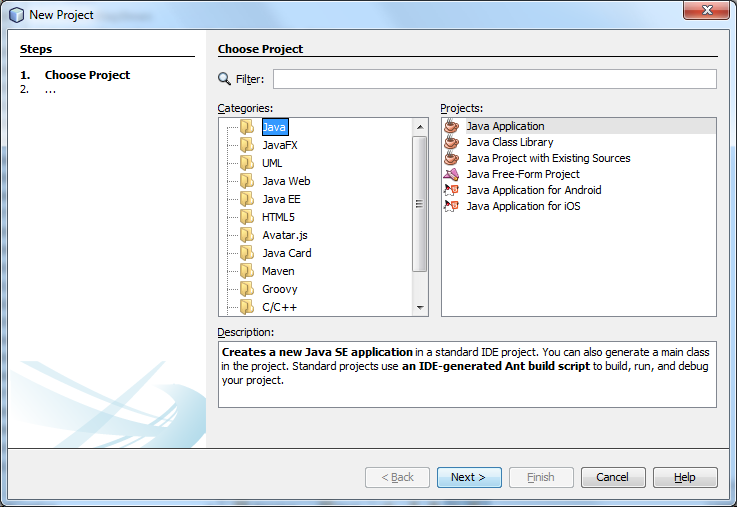
- Open menu File → New Project and select Category: Java and Project: Java Application (Figure 3). Click Next.
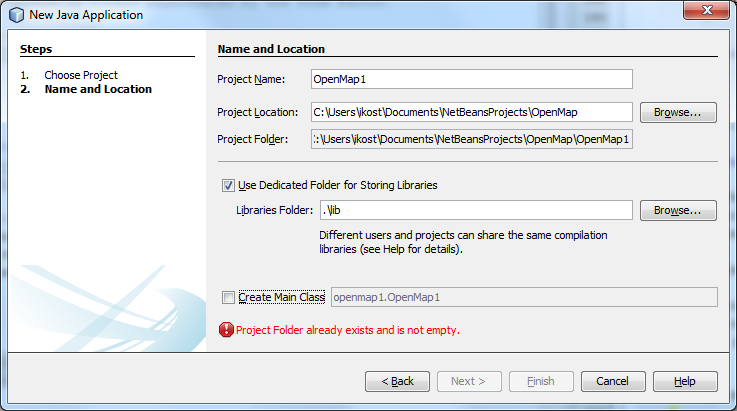
- In the next step, provide a name and a location. Make sure you use a dedicated folder for the libraries and that you don’t select a main class (Figure 4). Click on Finish.
- Once your new project has been created, create a new package named
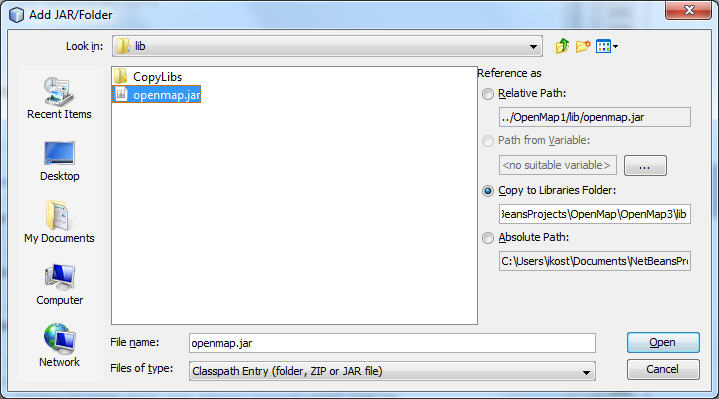
openmapby right-clicking on Source Packages and selecting New → Java Package from the popup menu. - Right-click on Libraries folder and select the action Add JAR/Folder from the popup menu. Navigate to the
libfolder of your OpenMap installation and selectopenmap.jar. You can use a relative path or better copy it to your Libraries folder (Figure 5). Click on Open to close the dialog box!

Figure 1: The OpenMap GIS application window - You also need to copy the map files. The most common format is
.shp(ESRI Shape). Create a new folder hierarchyresources/mapby selecting the Files window in NetBeans, right-clicking onOpenMap1project and selecting New → Folder from the popup menu. Enter the nameresourcesand click on OK. Right-click on theresourcesfolder and repeat the procedure to create the map folder inside it. Copyshare/data/shapefolder from your OpenMap installation to themapfolder - Create a new
JFrameform by right-clicking on theopenmappackage and selecting New → JFrame Form from the popup menu. Give it a name, e.g. MapFrame and click on Finish.

A Basic OpenMap Swing application - Click on Source button to see the generated code (see Listing 1).
- Add the line
super("Simple Map");in the constructor to set the window title. - The constructor initialises the
JFrame. Nothing is added to it so far. Since it is a GUI application, it needs to run in the EDT thread, and this is what NetBeans has written in themain()method for us. - Click back on Design button to see the empty form.

We can add OpenMap JavaBeans to the Palette. To do that:
- Right-click on the palette and select Palette Manager.
- Click on New Category and enter OpenMap as the category name. Click Click on Add from JAR button, navigate to the
openmap.jar, select the Show All JavaBeans radio button and select all available components. Click Next. - Select the OpenMap palette category and click on Finish. A new palette category has been added to the Palette.

3: Create a new Java application
Add the map
- Locate the
MapBeanand drag it to theMapFrame. - In the Navigator window of NetBeans, right-click
mapBean1, select Change Variable Name and set it tomapBean. - In the Navigator window, right-click on
JFrameand change its layout toBorderLayout - The resulting code is shown in Listing 2.

FFigure 4: Provide a Project name and location
The com.bbn.openmap.MapBean component is the main map window component in the OpenMap toolkit. The MapBean derives from the java.awt.Container class. Because it is a Swing component, it can be added to a Java window hierarchy like any other user interface component.
To create the map in the MapBean, Layers (com.bbn.openmap.Layer) are added to the MapBean. Layers derive from java.awt.Component and they are the only components that can be added to a MapBean. Because Layers are Components contained within a MapBean container, the rendering of Layers onto the map is controlled by the Java component rendering mechanism. This mechanism controls how layered components are painted on top of each other. To make sure that each component gets painted into the window in the proper order, the Component class includes a method that allows it to tell the rendering mechanism that it would like to be painted. This feature allows Layers to work independently from each other, and lets the MapBean avoid knowing what is happening on the Layers.
Listing 1: Basic Swing application
public class MapFrame extends javax.swing.JFrame {

   /** Creates new form MapFrame */
   public MapFrame() {
      super("Simple Map");
      initComponents();
   }

  @SuppressWarnings("unchecked")
   // <editor-fold defaultstate="collapsed" desc="Generated Code">
   private void initComponents() {
     // Content suppressed
   }

   /**
    * @param args the command line arguments
    */
   public static void main(String args[]) {

      /* Create and display the form */
      java.awt.EventQueue.invokeLater(new Runnable() {
         @Override
         public void run() {
            new MapFrame().setVisible(true);
         }
      });
   }
}
Listing 2: Add a MapBean
  @SuppressWarnings("unchecked")
   // <editor-fold defaultstate="collapsed" desc="Generated Code">
   private void initComponents() {
     mapBean = new com.bbn.openmap.MapBean();
 setDefaultCloseOperation(javax.swing.WindowConstants.EXIT_ON_CLOSE);
      getContentPane().add(mapBean, java.awt.BorderLayout.CENTER);

      pack();
   }
Listing 3: Add a ShapeLayer to the MapBean
/**
  * Create a ShapeLayer to show world political boundaries. Set the properties of the layer. This assumes that
  * the datafiles {@code dcwpo-browse.shp} and {@code dcwpo-browse.ssx} are in a path specified in the CLASSPATH variable.
  * These files are distributed with OpenMap and reside in the toplevel "share" subdirectory.
  */
private void initMap() {
      Properties shapeLayerProps = new Properties();
      shapeLayerProps.put("prettyName", "Political Solid");
      shapeLayerProps.put("lineColor", "000000");
      shapeLayerProps.put("fillColor", "BDDE83");
      shapeLayerProps.put("shapeFile", "resources/map/shape/dcwpo-browse.shp");
      shapeLayerProps.put("spatialIndex", "resources/map/shape/dcwpo-browse.ssx");

      ShapeLayer shapeLayer = new ShapeLayer();
      shapeLayer.setProperties(shapeLayerProps);

      // Add the political layer to the map
      mapBean.add(shapeLayer);
}
Layers in an OpenMap application can use data from many sources:
- By computing them
- From data files of a local hard drive.
- From data files from a URL.
- From data files contained in a jar file.
- Using information retrieved from a database (JDBC).
- Using information received from a map server (images or map objects).
- Listing 3 shows a new method
initMap()added in the constructor ofMapFrameafterinitComponents()which shows how to add aShapeLayerto theMapBeanin order to render a map of political borders retrieved fromshape (.shp)files. Right-click onMapFrameclass and select Run File. You should see the window of Figure 2. Well done.The OpenMap application is configured with an
openmap.properties file. The contents of this file specify which components are created and added to the application framework, including layers. Applications can be configured without recompilation, simply by modifying the openmap.propertiesfile with a text editor. Components that have be written with an understanding of the framework can be added to the application simply by making additions to the above properties file. Components written to use properties will be given their settings in order to initialize themselves properly. Layers that rely on the location of data files or servers, for example, usually have properties that let those locations be set at run-time. This properties file is usually located either in the application folder or better to the user’s home folder. In the later case, each user can customize the application to their needs.Let’s move the properties for the shape layer to a properties file and read them from there.
- Right-click on OpenMap project and select New → Properties File from the popup menu. Give it the name properties and click on Finish.
- You can view this file in the Projects window, show click on the Files window and double click on it to open it in the NetBeans editor.
- Paste the contents of Listing 4.
- Comment out the lines where the properties of the shape layer are set in
initMap()method and replace them with the code of Listing 5. - Run the application again to see the exact same window (Figure 2).Listing 4: openmap.properties
prettyName=Political Solid
lineColor=000000
fillColor=BDDE83
shapeFile=resources/map/shape/dcwpo-browse.shp
spatialIndex=resources/map/shape/dcwpo-browse.ssx
OpenMap provides a special class to handle properties.
com.bbn.openmap.PropertyHandleris a component that uses anopenmap.propertiesfile to configure an application. It can be told which file to read properties from, or left to its own to find anopenmap.propertiesfile in the Java classpath and in the application user’s home directory.Listing 5: initMap() contents
      InputStream is = null;
      try {
         is = new FileInputStream("openmap.properties");
         shapeLayerProps.load(is);
      } catch (FileNotFoundException ex) {
         Logger.getLogger(OpenMap.class.getName()).log(Level.SEVERE, null, ex);
      } catch (IOException ex) {
         Logger.getLogger(OpenMap.class.getName()).log(Level.SEVERE, null, ex);
      } finally {
         if (is != null) {
            try {
               is.close();
            } catch (IOException ex) {
              Logger.getLogger(OpenMap.class.getName()).log(Level.SEVERE, null, ex);
            }
         }
      }
- Listing 6 shows the updated
initMap()You don’t need aPropertiesinstance anymore. Just make sure that you tellPropertyHandler.Builder()to use theopenmap.propertiesin the local directory (a.k.a. ./openmap.properties) otherwise it might pick-up one from the user’s home directory or another location. Of course,PropertyHandlercan do much more than this as we shall see in future tutorials.Listing 6: initMap() contents using a PropertyHandlerprivate void initMap() { PropertyHandler propertyHandler = null; try { propertyHandler = new PropertyHandler.Builder().setPropertiesFile("./openmap.properties").build(); } catch (IOException ex) { Logger.getLogger(MapFrame.class.getName()).log(Level.SEVERE, null, ex); } ShapeLayer shapeLayer = new ShapeLayer(); if (propertyHandler != null) { shapeLayer.setProperties(propertyHandler.getProperties()); } // Add the political layer to the map mapBean.add(shapeLayer); }
What about concurrency?
The only remaining hitch is that we load the map files in the EDT thread. If we need to load a big map this would delay the start of the application waiting for the big map to be loaded. We need to delegate this task to another thread.
There are (at least) four ways to do this:
javax.swing.SwingWorkercom.bbn.openmap.util.SwingWorkerjava.awt.SecondaryLoopjava.util.concurrent.CompletableFuture
Let’s start looking at each one of them.
javax.swing.SwingWorker
The traditional way is to use a SwingWorker to do the dirty job (Listing 7). The generic class SwingWorker provides two parameterised types. The first parameterised type (ShapeLayer) is the return type for methods doInBackground() and get(). The object returned by doInBackground() is accessible by get() when the background task completes. The second parameterized type applies to periodically published values. This is useful when long‐running tasks publish partial results. Here, we use Void, since we don’t publish partial results. The code inside doInBackground() is executed in a background thread. Here we read the properties using the PropertyHandler and create and return the ShapeLayer.
To start the background thread, we invoke the SwingWorker's execute() method. This schedules the thread for execution and immediately returns. The overridden done() method is invoked in the EDT after the background task completes. This method is where you put code to update or refresh the GUI. Method get() blocks until the background task completes. However, if you call get() within method done(), no block occurs since the background task has finished. In this method we add the layer to the mapBean. However, since the MapFrame has already been rendered, it needs to be refreshed for the map layers to be rendered too. This is achieved by revalidating the MapFrame.
Listing 7: initMap() contents using a javax.swing.SwingWorker
private void initMap() {
   SwingWorker<ShapeLayer, Void> worker = new SwingWorker<ShapeLayer, Void>() {

     @Override
     public ShapeLayer doInBackground() {
       PropertyHandler propertyHandler = null;
       try {
           propertyHandler = new PropertyHandler.Builder().setPropertiesFile("./openmap.properties").build();
       } catch (IOException ex) {
          Logger.getLogger(MapFrame.class.getName()).log(Level.SEVERE, null, ex);
       }
       ShapeLayer shapeLayer = new ShapeLayer();
       if (propertyHandler != null) {
          shapeLayer.setProperties(propertyHandler.getProperties());
       }
       return shapeLayer;
     }

     @Override
     protected void done() {
        try {
            if (!isCancelled()) {
               // Add the political layer to the map
               mapBean.add(get());
               MapFrame.this.revalidate();
            }
        } catch (InterruptedException | ExecutionException ex) {
          Logger.getLogger(MapFrame.class.getName()).log(Level.SEVERE, null, ex);
        }
     }
   };
   // invoke background thread
   worker.execute();
}
com.bbn.openmap.util.SwingWorker
The second solution uses the SwingWorker provided by OpenMap (Listing 8). This is a simplified version of Java Swing’s SwingWorker. The parameterised type (ShapeLayer) is the return type of the construct() method. Here, we have refactored the creation of the ShapeLayer to its own method getShapeLayer() (Listing 9).
Listing 8: initMap() contents using a com.bbn.openmap.util.SwingWorker
private void initMap() {
      com.bbn.openmap.util.SwingWorker<ShapeLayer> worker = new com.bbn.openmap.util.SwingWorker<ShapeLayer>() {

         @Override
         public ShapeLayer construct() {
            return getShapeLayer();
         }

         @Override
         public void finished() {
            // Add the political layer to the map
            mapBean.add(get());
            MapFrame.this.revalidate();
         }

      };
      // invoke background thread
      worker.execute();
}
To start the background thread, we invoke the SwingWorker’s execute() method. This schedules the thread for execution and immediately returns. The overridden finished() method is invoked in the EDT after the background task completes. This method is where you put code to update or refresh the GUI. Method get() blocks until the background task completes. However, if you call get() within method finished(), no block occurs since the background task has finished. In this method we add the layer to the mapBean. However, since the MapFrame has already been rendered, it needs to be refreshed for the map layers to be rendered too. This is achieved by revalidating the MapFrame.
You can do this more obvious in a fast machine if you add a Thread.sleep(10_000); statement before the return statement in construct() method. You should see that the application’s window is not waiting for the SwingWorker to finish its work in order to be displayed.
Listing 9: getShapeLayer() refactored method
private ShapeLayer getShapeLayer() {
    PropertyHandler propertyHandler = null;
    try {
        propertyHandler = new PropertyHandler.Builder().setPropertiesFile("./openmap.properties").build();
    } catch (IOException ex) {
        Logger.getLogger(MapFrame.class.getName()).log(Level.SEVERE, null, ex);
    }
    ShapeLayer shapeLayer = new ShapeLayer();
    if (propertyHandler != null) {
        shapeLayer.setProperties(propertyHandler.getProperties());
    }
//    try {
//        Thread.sleep(10_000);
//    } catch (InterruptedException ex) {
//        Logger.getLogger(MapFrame.class.getName()).log(Level.SEVERE, null, ex);
//    }
    return shapeLayer;
}
java.awt.SecondaryLoop
The third solution uses the SecondaryLoop (Listing 11). The interface provides two methods, enter() and exit(), which can be used to start and stop the event loop. Even though the loading of the properties and the creation of the shape layer are done in a different thread, the UI is not responsive and is waiting for the work thread to finish before it is rendered on the screen.
From the JavaDoc: “When the enter() method is called, the current thread is blocked until the loop is terminated by the exit() method. Also, a new event loop is started on the event dispatch thread, which may or may not be the current thread. The loop can be terminated on any thread by calling its exit() method. […] A typical use case of applying this interface is AWT and Swing modal dialogs. When a modal dialog is shown on the event dispatch thread, it enters a new secondary loop. Later, when the dialog is hidden or disposed, it exits the loop, and the thread continues its execution.” In other words, it does block the current thread so it is not a ‘replacement’ of SwingWorker for all cases. There isn’t any done() callback method like in SwingWorker where you can call get() without blocking the current thread.
Listing 10: initMap() contents using a SecondaryLoop
private void initMap() {
   final ShapeLayer shapeLayer = new ShapeLayer();
   final SecondaryLoop loop = Toolkit.getDefaultToolkit().getSystemEventQueue().createSecondaryLoop();
   Thread work = new Thread() {

       @Override
       public void run() {
         PropertyHandler propertyHandler = null;
         try {
             propertyHandler = new PropertyHandler.Builder().setPropertiesFile("./openmap.properties").build();
         } catch (IOException ex) {
            Logger.getLogger(MapFrame.class.getName()).log(Level.SEVERE, null, ex);
         }

         if (propertyHandler != null) {
            shapeLayer.setProperties(propertyHandler.getProperties());
         }
         loop.exit();
      }

   };

   // We start the thread to do the real work
   work.start();

   // Blocks until loop.exit() is called
   loop.enter();

   // Add the political layer to the map
   mapBean.add(shapeLayer);
}
java.util.concurrent.CompletableFuture
Java 8 provides a new class, CompletableFuture. CompletableFuture<T> extends Future<T> by providing functional, monadic operations and promoting asynchronous, event-driven programming model, as opposed to blocking in older Java.
You need to have JDK 8 or later to be able to use it. If you don’t, right-click on the OpenMap project and select Properties. Select the category Libraries and select a Java 8 Java Platform (you may need to add a new Java 8 platform by clicking on Manage Platforms button and navigating to the folder where you downloaded and installed JDK 8). Then, select the Sources category and change the Source/Binary Format to JDK 8.
Typically Futures represent piece of code running by other thread, but they are not asynchronous, i.e. you can not tell them to execute a task asynchrously and return back sometime in the future with the result. In this case you can simply create a CompletableFuture, return it to your client and whenever you think your results are available, simply complete() the future and unlock all clients waiting on that future. There is of course a blocking get() method like in the case of SwingWorker.
CompletableFuture provides async methods which execute their task in another thread than the previous task as well as non-async methods which execute their task in the same thread as the previous task. In async methods, the task is submitted to a fork-join thread pool and when it finishes, the result is passed to the next task. When the next task finishes, its result is sent further and so on. It’s quite neat and simple.
Listing 11: initMap() contents using a CompletableFuture
private void initMap() {
   CompletableFuture.supplyAsync(() -> getShapeLayer()).thenAcceptAsync(
      shapeLayer -> {
          // Add the political layer to the map
          mapBean.add(shapeLayer);
          MapFrame.this.revalidate();
      });
}
The modified initMap() is shown in Listing 11. You can supply a new task to the global, general purpose ForkJoinPool.commonPool() introduced in JDK 8 by calling supplyAsync() and passing a Supplier (() -> getShapeLayer()). There is also an overriden supplyAsync() method which accepts an Executor if you don’t want to use the common thread pool. A Supplier<R> is a new interface introduced in Java 8 which accepts no parameters and returns a value of type R (a ShapeLayer in our case).
You can apply further processings by using thenApply() or thenApplyAsync() methods (which accept a Function<T, R>) but this is not needed for our example.
You can get the result back asynchronously by using the non-blocking thenAccept() or thenAcceptAsync() methods, which accepts a Consumer<T>. They allow you to consume future value when it’s ready. A Consumer<T> is the oposite to a Supplier<R>; it accepts a parameter of type T and returns void.
See how elegant this last solution is.
Conclusion
We went a long way in this first tutorial of OpenMap. We learned how to create a MapFrame in NetBeans IDE which is a Swing JFrame and saw how to use the IDE to add OpenMap JavaBeans to the Palette and then drag a MapBean onto the MapFrame. We learned how to add layers to the MapBean in order to display .shp map files. Layers are configured via property files. We saw how to use the PropertyHandler to read our properties. We also saw four ways of how to load our map files from a different thread in order to keep our MapFrame responsive even when the map files take too long to load.
In the next tutorial we shall go into more depth into the internals of OpenMap learning about MapHandler.

Interesting tutorial! I do have a couple of comments: The MapBean is the main mapping component, but there are subclasses that provide better performance using different buffering mechanisms. I always use the BufferedLayerMapBean. Layers have a ‘background’ setting, and the BufferedLayerMapBean treats those layers differently. They are rendered into a separate image buffer (better for animated maps) and are used by the MapBean to control repainting when the projection changes (eliminates a flashing effect when fast top layers react faster that slower bottom layers). When using the GUI builder in NetBeans, you have the option of adding a MapPanel to… Read more »
Hi John,
really nice to see additional info for OpenMAP. Thanks for your effort. Will study it in detail.
Maybe forward pointers between the parts will be helpful.
regards
Wolfgang R.
Hi Wolfgang. Thanks for your comment. I noticed that Internet, unfortunately, lacks some tutorials on OpenMap.
Unfortunately, forward pointers are not possible. Once an article is being published, I ‘m not allowed to edit it again. However, google can easily help here.
Regards,
John.
Can we integrate OpenMap with a Spring mvc application? Appreciate any help in this route.
Really nice tutorial, but I suggest to correct a few wordings.
OpenMap is written in Java and using the Swing framework for the UI, not written in Swing (it is not a language ;-) ).
Hello, I have some troubles with initMap() method…
I got error: Cannot find symbol: method build location: class Builder
Can you help me, please?