In this post, we take a step-by-step look at localization using JavaScript. We let the user choose the language to display the page in. This gives the user the maximum amount of freedom with respect to the language they want to interact with the page in. We will not just be changing textual information but also things like dates, currency, and time formats to reflect the selected locale/language. So without further ado let us get started with building a simple webpage to put these ideas into action.
1. Project Layout
The project layout is simple and looks like below:
2. Tools and Frameworks
To keep things simple, we use express to build a static resource server in Node.js. Apart from this, we will use Vanilla JavaScript on the client-side. I have chosen to use Visual Studio Code IDE as it is my favorite development environment but you are free to follow along in a different one.
3. Localization
3.1 Resource Files
We take the first step in our implementation by creating resource files. These resource files will contain string texts in the language indicated by the file name. The data is stored in a simple JSON format for easy retrieval and consumption. We create three files named, French.json, German.json, and English.json. Each of these files will have the same structure and content albeit in different languages. The files will look like below:
britain.json
{
    "Name": "Name",
    "Company": "Company",
    "Email Address":"Email Address",
    "Mobile No.": "Mobile No.",
    "Application Form": "Application Form",
    "Telephone No.":"Telephone No.",
    "Gender":"Gender",
    "Male":"Male",
    "Female": "Female",
    "Prefer not to say":"Prefer not to say",
    "LocaleFormat": "en-GB",
    "CurrencySymbol" :"£",
    "Currency":"GBP"
}
france.json
{
    "Name": "Prénom",
    "Company": "Compagnie",
    "Email Address":"Adresse e-mail",
    "Mobile No.": "Numéro de portable",
    "Application Form":"Formulaire de demande",
    "Telephone No.":"Numéro de téléphone",
    "Gender":"Le genre",
    "Male": "Mâle",
    "Female":"Femelle",
    "Prefer not to say":"Je préfère ne pas le dire",
    "LocaleFormat":"fr-FR",
    "CurrencySymbol" :"€",
    "Currency":"EUR"
}
germany.json
{
    "Name": "Name",
    "Company": "Unternehmen",
    "Email Address":"E-Mail-Addresse",
    "Mobile No.": "Handynummer",
    "Application Form": "Anmeldeformular",
    "Telephone No.":"Telefonnummer",
    "Gender":"Geschlecht",
    "Male":"Männlich",
    "Female": "Weiblich",
    "Prefer not to say":"Mache lieber keine Angabe",
    "LocaleFormat": "de-de",
    "CurrencySymbol" :"€",
    "Currency":"EUR"
}
3.2 HTML Page
Now let us create a page where we will see the results of our efforts. We call it index.html. The markup looks like below
index.html
<!DOCTYPE html>
<html lang="en">
  <head>
    <meta charset="utf-8">
    <meta http-equiv="X-UA-Compatible" content="IE=edge">
    <meta name="viewport" content="width=device-width, initial-scale=1">
    <!-- The above 3 meta tags *must* come first in the head; any other head content must come *after* these tags -->
    <title>JCG -- JavaScript Localization Example</title>

    <link rel="stylesheet" href="css/html5.internationalization.css" type="text/css" />
    <!-- HTML5 shim and Respond.js for IE8 support of HTML5 elements and media queries -->
    <!-- WARNING: Respond.js doesn't work if you view the page via file:// -->
    <!--[if lt IE 9]>
      <script src="https://www.javacodegeeks.com/wp-content/litespeed/localres/aHR0cHM6Ly9vc3MubWF4Y2RuLmNvbS8=html5shiv/3.7.3/html5shiv.min.js"></script>
      <script src="https://www.javacodegeeks.com/wp-content/litespeed/localres/aHR0cHM6Ly9vc3MubWF4Y2RuLmNvbS8=respond/1.4.2/respond.min.js"></script>
    <![endif]-->
  </head>
  <body>
    <h1>JCG -- JavaScript Localization Example</h1>
    <div id='languages'>
        <img src='images/if_FR_167740.png' class='language' data-lang='france' alt='French Flag' />
        <img src="images/if_DE_167808.png" class='language' data-lang='germany' alt='German Flag' />
        <img src="images/if_GB_167794.png" class='language' data-lang='britain' alt='British Flag' />
    </div>
    <fieldset>
    <legend>
        <span data-langkey="Application Form">Application Form</span>
    </legend>
        <span data-langkey="Name">Name</span><br /><input type="text" /><br />
        <span data-langkey="Company">Company</span><br /><input type='text' /><br />
        <span data-langkey="Mobile No.">Mobile No.</span><br /><input type='text' /><br />
        <span data-langkey="Telephone No.">Telephone No.</span><br /><input type='text' /><br />
        <label data-langkey="Gender">Gender</label><br />
        <select>
          <option data-langkey="Male">Male</option>
          <option data-langkey="Female">Female</option>
          <option data-langkey="Prefer not to say">Prefer not to say</option>
        </select><br/>
        <span data-datetime="CurrentDateTime">Current Date Time</span><br/>
        <span id="dobdisplay" type="text" data-picker="picker"></span><br />
        <span>Amount

        </span><br/>
        <input data-currency="Currency" type="text"/>
    </fieldset>

    <script src='js/localization.js' ></script>
  </body>
</html>
Things to note in the above markup is that I have created a form. Which the users need to fill up. And above the form are three flags representing language options namely Britain (English), France (French), German ( Deutsche). Also, I have decorated tags in the form with data-* attributes, these tags participate in the localization effort and their content is affected. As you read further the utility of the data-* attributes will become clearer. So, let us move forward to writing JavaScript.
3.3 JavaScript
With our resource files and markup setup, let us write some JavaScript to wire up these two. Our JS Code will reside in a file named localization.js which is pulled in at the bottom of the body tag. Our completed file would look like below:
localization.js
var languages = Array.from(document.getElementsByClassName('language'));
var xhttp = new XMLHttpRequest();
var langDocument = {};
languages.forEach(function(value, index){
    languages[index].addEventListener('click', function(){
        switchLanguage(this.dataset.lang);
    });
});
xhttp.onreadystatechange = function(){
    if (this.readyState === 4 && this.status === 200) {
        langDocument = JSON.parse(this.responseText);
        processLangDocument();
        processCurrencyDocument();
        processDateTimes();
    }
};
function switchLanguage(language){
    xhttp.open("GET", "i18n/" + language + ".json", true);
    xhttp.setRequestHeader("Content-type", "application/json");
    xhttp.send();
}
function processLangDocument(){
    var tags = document.querySelectorAll('span,img,a,label,li,option,h1,h2,h3,h4,h5,h6');
    Array.from(tags).forEach(function(value, index){
        var key = value.dataset.langkey;
        if(langDocument[key]) value.innerText = langDocument[key];
    });
}
function processDateTimes() {
    var tags = document.querySelectorAll('span');
    Array.from(tags).forEach(function(value, index) {
        var key  = value.dataset.picker;
        if(!key) return;
        var val = new Date();
        val = val.toLocaleString(langDocument['LocaleFormat']);
        value.innerText = val;
    });
}
function processCurrencyDocument() {
    var tags = document.querySelectorAll('input');
    Array.from(tags).forEach(function(value, index) {
        var key = value.dataset.currency;
        value.value = "";
        if(!key) return;
        value.addEventListener("change", function(evt) {
            var val =  evt.target.value;
            val =  Number(val.replace(/[^0-9.-]+/g,""));
            evt.target.value = (val).toLocaleString(langDocument['LocaleFormat'], { style: 'currency', currency: langDocument['Currency']});
        });
    });
}
In this code we are doing the following:
Attaching click event handlers to the map icons. And in the event handler, we are calling switchLanguage. The switchLanguage fetches the corresponding resource file for the map clicked. On successfully fetching the resource file we call three functions, namely, processLangDocument, processDatetimes and processCurrencyDocument. These functions get all tags and iterate over them setting their innerText property with values from the resource file.
One thing to notice is the decoration of each tag with text data with the attribute data-langkey. This proves to be a key in our attempt to translate all the text on the page to another language. We use the key of a tag to look up the translation of its text in our resource files. We replace the innerText of a tag with the value from the resource file.
4. Running the Application
Let us now run the application we have built and view the results. we do so by running the below command at the root of the project.
>node index.js
Subsequently navigating to the URL http://localhost:8090 should show the following web page:
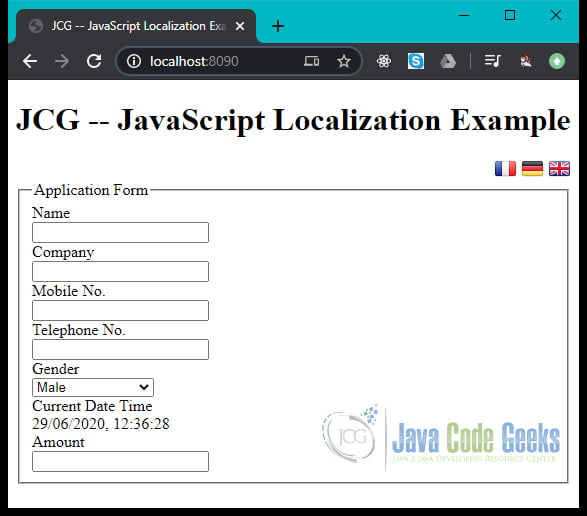
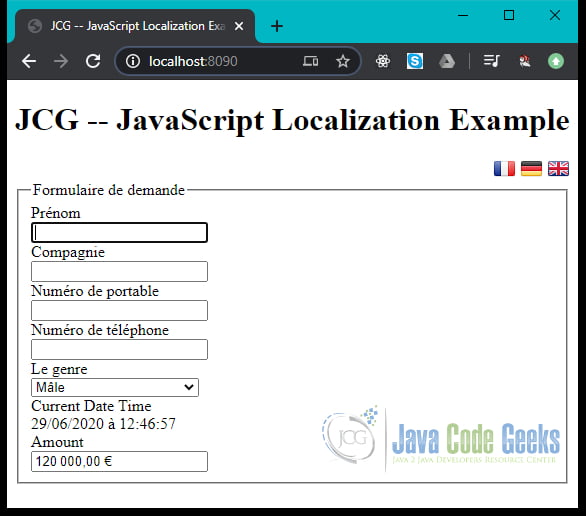
Now let us switch from the default britain locale to french and see the results:
This wraps up our effort and you can download the source code from the next section:
5. Download the Source Code
You can download the full source code of this example here: Step-by-Step Guide to JavaScript Localization
