In the previous part of our intellij plugin development tutorial, we saw how to get started with creating a plugin in intellij. We created a simple notification and learnt how to create actions, add actions to the group and perform a task when the user clicks an action.
In this following tutorial, we’ll see how to handle user input. We’ll create a simple plugin to take input of the firstName and lastName from the user. And then show a balloon notification.
If you have not taken a look at the previous article on getting started with intellij plugin development, I recommend going through it quickly. While it is not mandatory, it’s a good read to get you familiar with actions.
1. Getting Started
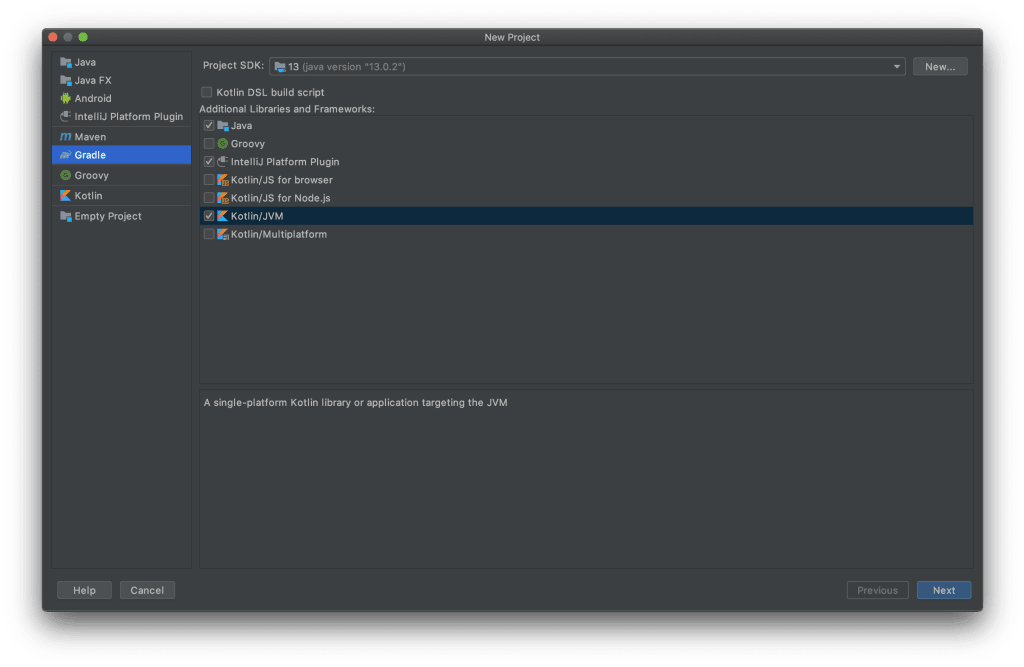
First things first, create a new Intellij plugin project. The process is similar as explained in the previous post.
We’ll be using gradle as our build tool and including dependencies for Java and Kotlin.
2. Creating the action
Next up, create a Kotlin class in kotlin directory. I’ve named mine DisplayInputDialog.kt, you can name it whatever you want.
Extend this class from AnAction class and override the onActionPerformed method. This method will contain our code to show input dialog to the user.
|
1
2
3
4
5
6
7
8
|
class DisplayInputBox : AnAction() { override fun actionPerformed(e: AnActionEvent) { }} |
Finally, we’ll need to register this action class in plugin.xml. We’ll add it to our MainMenu at the last.
|
1
2
3
4
5
6
|
<actions> <group id="TopMenu" text="InputBox" description="Handling user input demo"> <add-to-group group-id="MainMenu" anchor="last"/> <action id="DisplayInputBox" class="DisplayInputBox" text="InputBox Demo"/> </group></actions> |
3. Creating the Dialog
Now we need to create a dialog for our input box. We’ll create a custom DialogWrapper. DialogWrapper is an abstract class in intellij.openapi.ui package.
Create a class named MyCustomDialog.kt and extend it from DialogWrapper class.
Override the createPanel function, we’ll return our panel (dialog box) from this function. For this part of our intellij plugin development tutorial we’ll need: 2 text labels and 2 input fields.
|
01
02
03
04
05
06
07
08
09
10
|
class MyCustomDialog(val project: Project) : DialogWrapper(true) { override fun createCenterPanel(): JComponent? { }} |
Initialize a container (JPanel) and two text input fields (JTextFields). Also, we’ll be using JBLabel for creating labels.
|
01
02
03
04
05
06
07
08
09
10
11
12
13
14
15
16
17
18
19
20
21
22
23
|
class MyCustomDialog(val project: Project) : DialogWrapper(true) { private val firstName: JTextField = JTextField() private val lastName: JTextField = JTextField() val centerPanel: JPanel = JPanel(GridBagLayout()) override fun createCenterPanel(): JComponent? { } private fun getLabel(text: String): JComponent { val label = JBLabel(text) label.componentStyle = UIUtil.ComponentStyle.SMALL label.fontColor = UIUtil.FontColor.BRIGHTER label.border = JBUI.Borders.empty(0, 5, 2, 0) return label }} |
We’ll be using GridBagLayout as our layout manager. It is used to layout the components horizontally, vertically or along the baseline. It’s equivalent to LinearLayout in Android Development or <div> in Web Development.
Next up, create a GridBag. This’ll be used to provide constraints to our components while layout. To add the text fields and labels, have a look at the code below.
|
01
02
03
04
05
06
07
08
09
10
11
12
13
14
15
16
17
18
19
20
21
22
23
24
25
26
|
class MyCustomDialog(val project: Project) : DialogWrapper(true) { private val firstName: JTextField = JTextField() private val lastName: JTextField = JTextField() val centerPanel: JPanel = JPanel(GridBagLayout()) override fun createCenterPanel(): JComponent? { val gridbag = GridBag() .setDefaultWeightX(1.0) .setDefaultFill(GridBagConstraints.HORIZONTAL) .setDefaultInsets(Insets(0, 0, AbstractLayout.DEFAULT_VGAP, AbstractLayout.DEFAULT_HGAP)) return centerPanel } private fun getLabel(text: String): JComponent { val label = JBLabel(text) label.componentStyle = UIUtil.ComponentStyle.SMALL label.fontColor = UIUtil.FontColor.BRIGHTER label.border = JBUI.Borders.empty(0, 5, 2, 0) return label }} |
Horizontally the total weight amounts to 1. Notice that we’ve assigned 0.2 weight to labels and 0.8 to input fields. This means that 20% of available space will be taken up by label and 80% by text field. This makes it flexible for small screens. Here’s the code to add labels and text input fields.
|
01
02
03
04
05
06
07
08
09
10
11
12
13
14
15
16
17
18
19
20
21
22
23
24
25
26
27
28
29
30
31
32
|
class MyCustomDialog(val project: Project) : DialogWrapper(true) { private val firstName: JTextField = JTextField() private val lastName: JTextField = JTextField() val centerPanel: JPanel = JPanel(GridBagLayout()) override fun createCenterPanel(): JComponent? { val gridbag = GridBag() .setDefaultWeightX(1.0) .setDefaultFill(GridBagConstraints.HORIZONTAL) .setDefaultInsets(Insets(0, 0, AbstractLayout.DEFAULT_VGAP, AbstractLayout.DEFAULT_HGAP)) centerPanel.preferredSize = Dimension(400, 50) centerPanel.add(getLabel("First Name: "), gridbag.nextLine().next().weightx(0.2)) centerPanel.add(firstName, gridbag.next().weightx(0.8)) centerPanel.add(getLabel("Last Name: "), gridbag.nextLine().next().weightx(0.2)) centerPanel.add(lastName, gridbag.next().weightx(0.8)) return centerPanel } private fun getLabel(text: String): JComponent { val label = JBLabel(text) label.componentStyle = UIUtil.ComponentStyle.SMALL label.fontColor = UIUtil.FontColor.BRIGHTER label.border = JBUI.Borders.empty(0, 5, 2, 0) return label }} |
4. Finalizing the input dialog
Now we’ve set up our dialog box, all we need to do is show a notification when the user clicks on OK.
To handle this, override the doOkAction function. This get’s called whenever the user clicks OK button. This is where we’ll trigger our notification to the user.
|
01
02
03
04
05
06
07
08
09
10
11
12
13
14
15
16
17
18
19
20
21
22
23
24
25
26
27
28
29
30
31
32
33
34
35
36
37
|
class MyCustomDialog(val project: Project) : DialogWrapper(true) { private val firstName: JTextField = JTextField() private val lastName: JTextField = JTextField() val centerPanel: JPanel = JPanel(GridBagLayout()) override fun createCenterPanel(): JComponent? { val gridbag = GridBag() .setDefaultWeightX(1.0) .setDefaultFill(GridBagConstraints.HORIZONTAL) .setDefaultInsets(Insets(0, 0, AbstractLayout.DEFAULT_VGAP, AbstractLayout.DEFAULT_HGAP)) centerPanel.preferredSize = Dimension(400, 50) centerPanel.add(getLabel("First Name: "), gridbag.nextLine().next().weightx(0.2)) centerPanel.add(firstName, gridbag.next().weightx(0.8)) centerPanel.add(getLabel("Last Name: "), gridbag.nextLine().next().weightx(0.2)) centerPanel.add(lastName, gridbag.next().weightx(0.8)) return centerPanel } private fun getLabel(text: String): JComponent { val label = JBLabel(text) label.componentStyle = UIUtil.ComponentStyle.SMALL label.fontColor = UIUtil.FontColor.BRIGHTER label.border = JBUI.Borders.empty(0, 5, 2, 0) return label } override fun doOKAction() { NotificationManager.createAndShowNotification(project, firstName.text, lastName.text) super.doOKAction() }} |
Notice, we add our code before super.doOkAction() call. This is done to ensure that the user input can be validated before the default action kicks in! But we’re going to focus on just showing our notification.
Create a class called NotificationManager inside kotlin directory and create a method named createAndShowNotification. It takes 3 parameters: a project, firstName and lastName. Finally add the code to show the notification.
|
01
02
03
04
05
06
07
08
09
10
11
12
13
14
|
class NotificationManager { companion object { @JvmStatic fun createAndShowNotification(project: Project, firstName: String, lastName: String) { val notification = NotificationGroup("AndroidVille", NotificationDisplayType.BALLOON, true) notification.createNotification( "Hola!", "Welcome to AndroidVille $firstName $lastName", NotificationType.INFORMATION, null ).notify(project) } }} |
Reminder: check out the last article where actions, groups and how to create a notification in intellij plugin are covered in detail.
We’re almost done! Go into MyCustomDialog class and inside the init{…} block call the init() method and set a title for your dialog. The final result looks like this.
|
01
02
03
04
05
06
07
08
09
10
11
12
13
14
15
16
17
18
19
20
21
22
23
24
25
26
27
28
29
30
31
32
33
34
35
36
37
38
39
40
41
42
43
44
45
46
47
48
49
50
51
52
53
54
55
56
57
|
import com.intellij.openapi.project.Projectimport com.intellij.openapi.ui.DialogWrapperimport com.intellij.ui.components.JBLabelimport com.intellij.uiDesigner.core.AbstractLayoutimport com.intellij.util.ui.GridBagimport com.intellij.util.ui.JBUIimport com.intellij.util.ui.UIUtilimport java.awt.Dimensionimport java.awt.GridBagConstraintsimport java.awt.GridBagLayoutimport java.awt.Insetsimport javax.swing.JComponentimport javax.swing.JPanelimport javax.swing.JTextFieldclass MyCustomDialog(val project: Project) : DialogWrapper(true) { private val firstName: JTextField = JTextField() private val lastName: JTextField = JTextField() val centerPanel: JPanel = JPanel(GridBagLayout()) init { init() title = "AndroidVille Dialog" } override fun createCenterPanel(): JComponent? { val gridbag = GridBag() .setDefaultWeightX(1.0) .setDefaultFill(GridBagConstraints.HORIZONTAL) .setDefaultInsets(Insets(0, 0, AbstractLayout.DEFAULT_VGAP, AbstractLayout.DEFAULT_HGAP)) centerPanel.preferredSize = Dimension(400, 50) centerPanel.add(getLabel("First Name: "), gridbag.nextLine().next().weightx(0.2)) centerPanel.add(firstName, gridbag.next().weightx(0.8)) centerPanel.add(getLabel("Last Name: "), gridbag.nextLine().next().weightx(0.2)) centerPanel.add(lastName, gridbag.next().weightx(0.8)) return centerPanel } private fun getLabel(text: String): JComponent { val label = JBLabel(text) label.componentStyle = UIUtil.ComponentStyle.SMALL label.fontColor = UIUtil.FontColor.BRIGHTER label.border = JBUI.Borders.empty(0, 5, 2, 0) return label } override fun doOKAction() { NotificationManager.createAndShowNotification(project, firstName.text, lastName.text) super.doOKAction() }} |
5. Displaying the input dialog
All we need to do now is to display our input dialog. We create a new instance of the MyCustomDialog inside our DisplayInputBox class within the actionPerformed method.
Finally, call the showAndGet method on the instance. This method returns true if “OK” was clicked and false otherwise.
|
01
02
03
04
05
06
07
08
09
10
11
12
13
14
15
16
|
import com.intellij.openapi.actionSystem.AnActionimport com.intellij.openapi.actionSystem.AnActionEventclass DisplayInputBox : AnAction() { override fun actionPerformed(e: AnActionEvent) { if (e.project == null) return val wrapper = MyCustomDialog(e.project!!) if (wrapper.showAndGet()) { println("Successfully handled user input") } }} |
We’re done with our intellij plugin development tutorial. All we need to do is test out our plugin. So click on the play button. A new IDE instance will open up and you’ll notice your plugin at the rightmost on MainMenu!
6. A task for you!
I have a simple task for you to help you understand the concepts much better. I want you to handle validations in this project. Implement the following functionalities:
- If the user tries to enter empty fields, show him an error dialog/notification.
- If the user presses the cancel button, show him a notification/dialog.
These are quick and easy to implement and would get your hands dirty with creating UIs, dialogs, notifications for your own plugin 🙂 Let me know once you’ve completed the task in the comments section.
If you face any blockers, let me know in the comments section and I’ll be happy to reply and help you out personally.
Welcome to AndroidVille
AndroidVille is a community of Mobile Developers where we share knowledge related to Android Development, Flutter Development, React Native Tutorials, Java, Kotlin and much more.
We have a SLACK workspace where we share updates related to new job opportunities, articles on Mobile Development/updates from the industry. We also have channels to help you with any questions, dev-help that you require. Just post a question and people would be ready to help you out 🙂
|
Published on Java Code Geeks with permission by Ayusch Jain, partner at our JCG program. See the original article here: IntelliJ Plugin Development Tutorial Pt. 2 – Handling User Input Opinions expressed by Java Code Geeks contributors are their own. |
