Welcome readers, in this tutorial, we will implement an Angular Google Sign-in application.
1. Introduction
- Angular is a Typescript-based open-source framework that helps developers build single page applications
- Offers Object-oriented features and supports the dynamic loading of the pages
- Supports Two-way data-binding, Property (
[]), and Event (()) binding techniques - Supports command-line-interface to easily initiate and manage the angular projects from the command line
Now open the visual studio code and let us see how to implement this tutorial in the angular framework.
2. Angular Google Sign-in Example
Here is a systematic guide for implementing this tutorial.
2.1 Tools Used
We are using Visual Studio Code and Node Terminal to compile and execute the angular code on a browser.
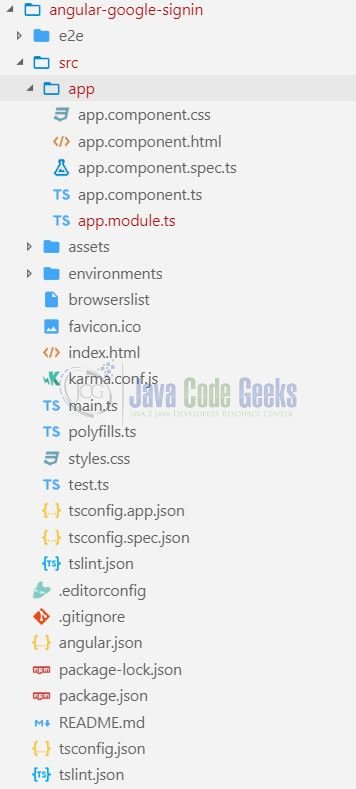
2.2 Project Structure
In case you are confused about where you should create the corresponding files or folder, let us review the project structure of the angular application.
3. Creating Angular application
Run the ng new angular-google-signin command in the npm console to create a new angular project. Once the new project is created, execute the following commands in the npm console to install and save angularX-social-login dependency required for this example (where ‘X’ is the version number).
npm install --save angular4-social-login
3.1 Importing Social Login Module & Google Login Provider
Import and inject the Social Login module, Authentication Service, and Google Login provider in the src/app/app.module.ts file. In this file, we’ll also specify the client id for the google oauth. Add the following code to the file.
app.module.ts
import { BrowserModule } from '@angular/platform-browser';
import { NgModule } from '@angular/core';
// Importing social login module and google login provider.
import { SocialLoginModule, AuthServiceConfig, GoogleLoginProvider } from 'angular4-social-login';

import { AppComponent } from './app.component';

// Client id for the google oauth. This is used for validation of our application to google.
// https://developers.google.com/identity/sign-in/web/sign-in#before_you_begin
const google_oauth_client_id:string = 'Your-google-client-id';
let config = new AuthServiceConfig([
  {
    id: GoogleLoginProvider.PROVIDER_ID,
    provider: new GoogleLoginProvider(google_oauth_client_id)
  }
]);

@NgModule({
  declarations: [
    AppComponent
  ],
  // Injecting the social-login-module during the application startup!
  imports: [
    BrowserModule, SocialLoginModule.initialize(config)
  ],
  providers: [],
  bootstrap: [AppComponent]
})

export class AppModule { }
3.2 Subscription to Authentication State
To start working with socio login we’ll inject the provider id (i.e. client id) in the src/app/app.component.ts file. Here we’ll receive a user object on successful login and a null object on log out. This user object contains the basic profile information of the user.
app.component.ts
import { Component } from '@angular/core';
import { AuthService, GoogleLoginProvider } from 'angular4-social-login';

@Component({
  selector: 'app-root',
  templateUrl: './app.component.html',
  styleUrls: ['./app.component.css']
})

export class AppComponent {
  title = 'Angular Socio login via Google!';
  user: any;

  constructor(private _socioAuthServ: AuthService) { }

  // Method to sign in with google.
  singIn(platform : string): void {
    platform = GoogleLoginProvider.PROVIDER_ID;
    this._socioAuthServ.signIn(platform).then(
      (response) => {
        console.log(platform + " logged in user data is= " , response);
        this.user = response;
      }
    );
  }

  // Method to log out.
  signOut(): void {
    this._socioAuthServ.signOut();
    this.user = null;
    console.log('User signed out.');
  }
}
3.3 User Information
Add the following code to src/app/app.component.html for displaying the user’s information.
app.component.html
<p>
  {{title}}
</p>

<button (click)="singIn('Google');">Sign in with Google</button><br /><br />
<button (click)="signOut();">Sign out</button><br /><br />

<div *ngIf="user">
  <img src="{{ user.photoUrl }}">
  <h4>{{ user.name }}</h4>
  <p>{{ user.email }}</p>
</div>
4. Run the Application
As we are ready with all the changes, let us compile and run the angular application with ng serve command. Once the projects are successfully compiled and deployed, open the browser to test it.
5. Project Demo
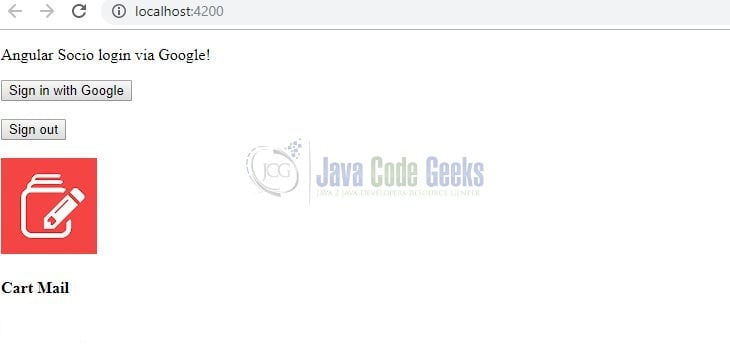
Open your favorite browser and hit the angular application url (http://localhost:4200/) to display the welcome page of the application.

Users can click the sign-in button for authentication via Google. On successful login, the user object is received from Google and the user information is displayed.
On sign-out, the user is logged out of the application the user object is nullified. That is all for this tutorial and I hope the article served you whatever you were expecting for. Happy Learning and do not forget to share!
6. Conclusion
In this section, we learned how to support Google Social Login in the angular application. Developers can download the sample application as an Eclipse project in the Downloads section.
7. Download the Eclipse Project
This was a tutorial of implementing Social Login via Google in an angular application.
You can download the full source code of this example here: Angular Google Sign-in Example
