This article describes how to apply Machine Learning to Android using Fritz.ai. Before diving into the details about how to develop a Machine learning Android app, it is useful to describe briefly what is Fritz.ai platform. As you may know, Machine Learning is an interesting topic that is gaining importance and promises to transform several areas including the way we interact with Android apps.
To experiment how to apply Machine Learning to Android using Fritz.ai we will develop an Android app that uses Machine Learning Image Classification.
Machine Learning is an application of AI that gives to a system the capability to accomplish tasks without using explicit instructions but learning from the data and improving from experience.
What is a Fritz.ai Machine Learning platform?
Fritz.ai is a Machine Learning platform for Android and iOS that simplifies the development of an Android Machine Learning app. When developing a Machine Learning Android app, usually it is necessary to create a ML-model that will be used by the Android app. The process to build a ML-model is tedious and difficult. Fritz.ai provides a set of built-in models ready to use that speeds up the development of a Machine Learning Android app.
The built-in ML-models provided by Fritz.ai are:
- Image Labeling
- Object detection
- Style transfer
- Image segmentation
- Pose extimation
Moreover, it is possible to upload a custom model if we want to use a specific model.
How to configure Fritz.ai
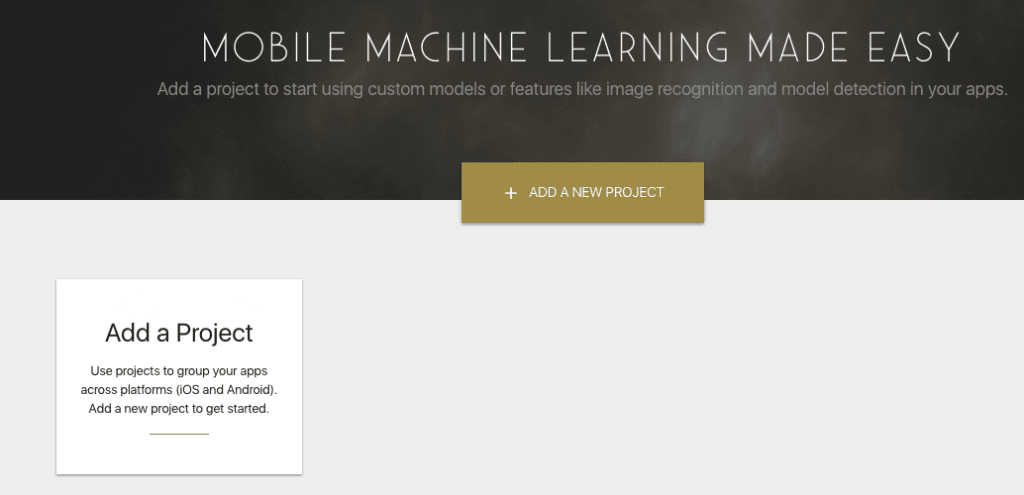
The first step to use Fritz.ai Machine Learning platform is creating a free account and then create a new Machine Learning Android project, as shown in the picture below:
Now, it is possible to add a new project:
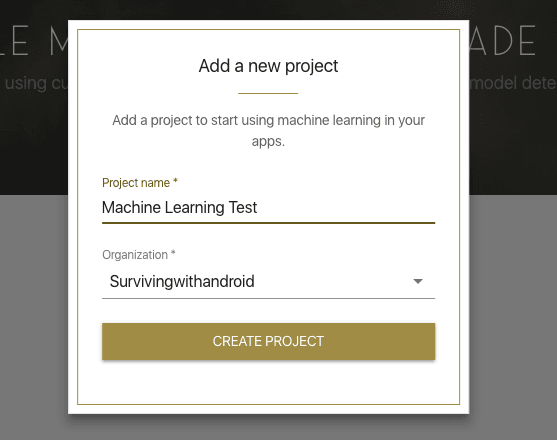
You have to provide the Project name. Once the project is created, it is necessary to provide the project package:
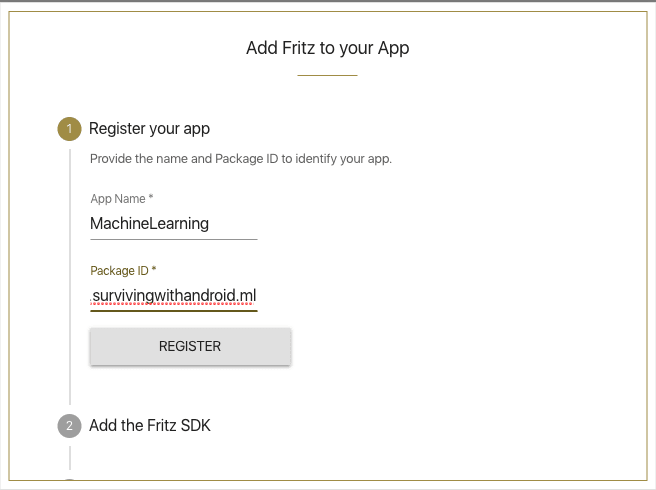
How to set up an Android project using Fritz.ai
Once the project is correctly configured in Fritz.ai console, we can set up the Android project to include Fritz.ai. At the project-level, it is necessary to modify build.gradle in this way:
...
allprojects {
 repositories {
    google()
    jcenter()
    maven { url "https://raw.github.com/fritzlabs/fritz-repository/master" }
  }
}
...
and in the build.gradle at app-level:
dependencies {
    ....
    implementation 'ai.fritz:core:3.0.1'
    implementation 'ai.fritz:vision:3.0.1'
}
The last step is registering a service so that the Android app can receive model updates. To do it in the Manifest.xml it is necessary to add:
<service
   android:name="ai.fritz.core.FritzCustomModelService"
   android:exported="true"
   android:permission="android.permission.BIND_JOB_SERVICE" />
That’s all. We are now ready to start developing our Machine Learning Android app.
More useful resources
Firebase ML Kit: Build a face features detecting app with Face Detection API
9 Ways Machine Learning Is Revolutionizing Supply Chain Management
Implementing Machine Learning image labeling in Android
To implement an Android app that uses Machine Learning image labeling we have follow these steps:
- Configure Fritz.ai SDK in the Android app
- Label the image detected
Configure Fritz.ai SDK in Android app
The first step is configuring the Fritz.ai SDK in our Android app so that we can use it later when we need to label the captured image. Let us create an activity and in onCreate() method add the following lines:
protected void onCreate(Bundle savedInstanceState) {
    super.onCreate(savedInstanceState);
    setContentView(R.layout.activity_main);
    Fritz.configure(this, "your_fritz.ai_key");
     downloadModel();
 }
In line 4, it is necessary to configure Fritz using the API_KEY we get during the project set up in the console. The next step, it is downloading the model from the cloud:
private void downloadModel() {
  FritzManagedModel model = new ImageLabelManagedModel();
  Log.d(TAG, "Download model...");
  FritzVision.ImageLabeling.loadPredictor(model, new PredictorStatusListener<FritzVisionLabelPredictor>() {
      @Override
      public void onPredictorReady(FritzVisionLabelPredictor predictor) {
         Log.d(TAG, "Model downloaded");
         MainActivity.this.predictor = predictor;
      }
   });
}
In this case, the Android app uses the ImageLabelManageModel because we want to label the image using Machine Learning.
<?xml version="1.0" encoding="utf-8"?>
<RelativeLayout xmlns:android="http://schemas.android.com/apk/res/android"
    xmlns:app="http://schemas.android.com/apk/res-auto"
    xmlns:tools="http://schemas.android.com/tools"
    android:layout_width="match_parent"
    android:layout_height="match_parent"
    tools:context=".MainActivity">

    <TextureView
        android:layout_width="wrap_content"
        android:layout_height="wrap_content"
        android:layout_alignParentTop="true"
        android:id="@+id/preview"/>

    <Button
        android:layout_width="match_parent"
        android:layout_height="wrap_content"
        android:id="@+id/btnLabel"
        android:text="Label it"
        android:layout_alignParentBottom="true"/>

</RelativeLayout>
TheTextureView
will
hold the image stream coming from the camera, while the button will be used to label the image, as we will see later.
How to use Machine Learning to label an image
To use Machine Learning to classify the image, once we have an image from the camera, it is necessary to create an instance of FritzVisionImage. Let us suppose, by now, that we have an instance of ImageReader that holds the image captured from the camera. It is necessary to convert it into a bitmap and then use the predictor to label the image:
Image image = reader.acquireLatestImage();
ByteBuffer buffer = image.getPlanes()[0].getBuffer();
byte[] bytes = new byte[buffer.capacity()];
buffer.get(bytes);
Bitmap bitmapImage = BitmapFactory.decodeByteArray(bytes, 0, bytes.length, null);

FritzVisionImage fvi = FritzVisionImage.fromBitmap(bitmapImage);
Finally, at line 8, the predictor, that will label the image, is ready to be used. Now, the Android app can retrieve a list of labels with
the relative
accuracy:
FritzVisionLabelResult labels = predictor.predict(fvi);
List<FritzVisionLabel> labelList = labels.getVisionLabels();
if (labelList != null && labelList.size() > 0) {
    FritzVisionLabel label = labels.getVisionLabels().get(0);
    System.out.println("Label [" + label.getText() + "]");
}
The app gets the first element of the list, that has an higher accuracy. Now we can describe how to use camera in Android to capture an image.
Handle the Camera in Android
Once the Machine Learning engine is ready, we have to focus our attention on how to capture the image. As stated before,
the
TextureView
will
hold the image stream coming from the camera. It is necessary to add a listener to the TextureView to know when we can use the camera:
TextureView.SurfaceTextureListener surfaceListener = new TextureView.SurfaceTextureListener() {
   @Override
   public void onSurfaceTextureAvailable(SurfaceTexture surface, int width, int height) {
       Log.d(TAG, "Surface available");
       openCamera();
   }
   @Override
   public void onSurfaceTextureSizeChanged(SurfaceTexture surface, int width, int height) {}
   @Override
   public boolean onSurfaceTextureDestroyed(SurfaceTexture surface) {
      return false;
   }
   @Override
   public void onSurfaceTextureUpdated(SurfaceTexture surface) {
    }
 };
When the surface is ready, the app can open the camera and start using it. Please notice that:
preview = (TextureView) findViewById(R.id.preview);
preview.setSurfaceTextureListener(surfaceListener);
Now it is possible to open the camera:
private void openCamera() {
    CameraManager manager = (CameraManager)
    getSystemService(Context.CAMERA_SERVICE);
    // We get the first available camera
     try {
         cameraId = manager.getCameraIdList()[0];
         CameraCharacteristics characteristics =
               manager.getCameraCharacteristics(cameraId);
         StreamConfigurationMap streamConfMap = characteristics.get(CameraCharacteristics.SCALER_STREAM_CONFIGURATION_MAP);
         imageDimension = streamConfMap.getOutputSizes(SurfaceTexture.class)[0];

         // We can open the camera now
         manager.openCamera(cameraId, new cameraDevice.StateCallback() {
             @Override
             public void onOpened(@NonNull CameraDevice camera) {
                Log.i(TAG, "Camera opened");
                cameraDevice = camera;
                createPreview();
             }
             @Override
             public void onDisconnected(@NonNull CameraDevice camera) {      }
             @Override
             public void onError(@NonNull CameraDevice camera, int error) {
                Log.e(TAG, "Error opening the camera");
                }
            }, null);
        }
        catch(CameraAccessException cae) {
            // Let us handle the error
        }
        catch(SecurityException se) {

        }
    }
When the camera is opened and ready to use, the Android app can starts streaming images:
private void createPreview() {
        SurfaceTexture surfaceTexture = preview.getSurfaceTexture();
        surfaceTexture.setDefaultBufferSize(imageDimension.getWidth(), imageDimension.getHeight());
        Surface surface = new Surface(surfaceTexture);
        try {
            previewRequestBuilder = cameraDevice.createCaptureRequest(CameraDevice.TEMPLATE_PREVIEW);
            previewRequestBuilder.addTarget(surface);

            cameraDevice.createCaptureSession(Arrays.asList(surface),
                new CameraCaptureSession.StateCallback() {
                   public void onConfigured(@NonNull CameraCaptureSession cameraCaptureSession) {
                       cameraSession = cameraCaptureSession;
                       previewRequestBuilder.set(
                              CaptureRequest.CONTROL_AF_MODE,
                               CaptureRequest.CONTROL_AF_MODE_CONTINUOUS_PICTURE);
                       // Flash is automatically enabled when necessary.
                       previewRequestBuilder.set(
                               CaptureRequest.CONTROL_AE_MODE,
                               CaptureRequest.CONTROL_AE_MODE_ON_AUTO_FLASH);

                       // Finally, we start displaying the camera preview.
                       CaptureRequest previewRequest = previewRequestBuilder.build();
                       try {
                           cameraSession.setRepeatingRequest(
                                   previewRequest, new CameraCaptureSession.CaptureCallback() {
                                       @Override
                                       public void onCaptureProgressed(
                                               final CameraCaptureSession session,
                                               final CaptureRequest request,
                                               final CaptureResult partialResult) {
                                       }

                                       @Override
                                       public void onCaptureCompleted(
                                               final CameraCaptureSession session,
                                               final CaptureRequest request,
                                               final TotalCaptureResult result) {
                                       }
                                   }, backgroundHandler);
                       }
                       catch(CameraAccessException cae) {}
                  }

                 @Override
                    public void onConfigureFailed(@NonNull CameraCaptureSession cameraCaptureSession) {
                    Log.e(TAG, "Configuration failed");
                   }
               }, null);
        }
        catch (CameraAccessException cae) {}
    }
Labeling the image captured by the camera
In this last step, it is necessary to capture the image and labeling it using Machine Learning. To this purpose, the Android app uses the button defined in the previous layout:
labelBtn = (Button) findViewById(R.id.btnLabel);
labelBtn.setOnClickListener(new View.OnClickListener() {
     @Override
     public void onClick(View v) {
          takePicture();
      }
});
In
thetakePicture
method
, the Android app takes the picture and label it (as shown above). If you want to have the full code you can go to Github and download it.
Summary
At the end of this article, you hopefully gained the knowledge about how to apply Machine Learning to Android using Fritz.ai. You have discovered how to use Machine Learning image classification to label an image capture by the camera.
|
Published on Java Code Geeks with permission by Francesco Azzola, partner at our JCG program. See the original article here: How to apply Machine Learning to Android using Fritz.ai Opinions expressed by Java Code Geeks contributors are their own. |
