Spring Tutorial: Creating a Hello World REST API Using Spring Framework and Spring Boot
Spring Framework was created as a result of disappointment of Java community with earlier versions of Enterprise Java. Since then it has grown into huge ecosystem that allows one to solve every problem in building a Web-based Java application and more. Spring is often criticized because it used to rely on XML for configuration purposes. As a response to that the Spring Boot framework was released, which relies on convention over configuration principle and can do without XML at all.
In this tutorial series we’ll go over how to create an application using Spring Framework and Spring Boot. While Spring Boot allows one to create an application faster, Spring is widely used today in enterprise environment and even by startups, so knowing Spring is definitely a marketable skill, and also learning it can provide one with the insight how Spring Boot works. The code for a simple Spring Framework application can be found here and the Spring Boot version here.
Creating Spring Web Application Using Maven Archetype
To create a Spring web application one can rely on maven-archetype-webapp archetype. After that, one should add Spring-related modules to the pom.xml file. One way to go is to use the so-called BOM (Bill of Materials) which allows one not to add version to dependencies. The pom.xml file for our project is shown below.
<project xmlns="http://maven.apache.org/POM/4.0.0" xmlns:xsi="http://www.w3.org/2001/XMLSchema-instance"
         xsi:schemaLocation="http://maven.apache.org/POM/4.0.0 http://maven.apache.org/maven-v4_0_0.xsd">
    <modelVersion>4.0.0</modelVersion>
    <groupId>com.javaeeeee</groupId>
    <artifactId>SpringREST</artifactId>
    <packaging>war</packaging>
    <version>1.0-SNAPSHOT</version>
    <name>SpringREST Maven Webapp</name>
    <url>http://maven.apache.org</url>

    <!-- Versions of artifacts-->
    <properties>
        <java.version>1.8</java.version>
        <spring.version>4.3.6.RELEASE</spring.version>
    </properties>

    <!-- Spring BOM -->
    <dependencyManagement>
        <dependencies>
            <dependency>
                <groupId>org.springframework</groupId>
                <artifactId>spring-framework-bom</artifactId>
                <version>${spring.version}</version>
                <type>pom</type>
                <scope>import</scope>
            </dependency>
        </dependencies>
    </dependencyManagement>

    <!-- Dependencies -->
    <dependencies>
        <dependency>
            <groupId>org.springframework</groupId>
            <artifactId>spring-context</artifactId>
        </dependency>
        <dependency>
            <groupId>org.springframework</groupId>
            <artifactId>spring-web</artifactId>
        </dependency>
        <dependency>
            <groupId>org.springframework</groupId>
            <artifactId>spring-webmvc</artifactId>
        </dependency>
        <dependency>
            <groupId>javax.servlet</groupId>
            <artifactId>javax.servlet-api</artifactId>
            <version>3.1.0</version>
            <scope>provided</scope>
        </dependency>
        <dependency>
            <groupId>org.springframework</groupId>
            <artifactId>spring-test</artifactId>
            <scope>test</scope>
        </dependency>
        <dependency>
            <groupId>junit</groupId>
            <artifactId>junit</artifactId>
            <version>4.12</version>
            <scope>test</scope>
        </dependency>
    </dependencies>
    <build>
        <finalName>SpringREST</finalName>
        <plugins>
            <plugin>
                <groupId>org.apache.maven.plugins</groupId>
                <artifactId>maven-compiler-plugin</artifactId>
                <version>3.6.1</version>
                <configuration>
                    <source>${java.version}</source>
                    <target>${java.version}</target>
                    <encoding>UTF-8</encoding>
                </configuration>
            </plugin>
        </plugins>
    </build>

</project>
Now, while we added no code to our application, we can try to build it and deploy. The Maven archetype we used created a index.jsp file located in the webapp/ folder, which we’ll remove later but for now we’ll use to learn how to deploy an application to Tomcat 9 Web-profile application server. To build the application one can use an IDE or execute the following command from CLI.
mvn clean package
Independent of the way you built the application a war file is produced in the target/ sub-folder of the project folder.
Deploying Spring Web Application To Tomcat
The application can be deployed either using an IDE or manually, but before that it is necessary to download Tomcat if it’s not installed on your system and configure it. The installation process is simple: it’s necessary to unzip the downloaded file to some folder and add the path to the bin sub-folder to the PATH variable on your system. In addition, it is necessary to create a CATALINA_HOME environment variable and set it to the path to Tomcat installation folder.
To make possible the access to the Web interface it is necessary to add a single role and a single user to the tomcat-users.xml configuration file situated in the conf/ sub-folder as shown below.
<?xml version="1.0" encoding="UTF-8"?>

<tomcat-users xmlns="http://tomcat.apache.org/xml" xmlns:xsi="http://www.w3.org/2001/XMLSchema-instance" version="1.0" xsi:schemaLocation="http://tomcat.apache.org/xml tomcat-users.xsd">

    <role rolename="manager-gui"/>
    <user password="1" roles="manager-gui,manager-script,admin" username="admin"/>
</tomcat-users>
It’s way more faster to deploy the application using an IDE, but here we’ll talk about how to manually deploy the application to Tomcat 9. To start Tomcat server one has to type
catalina.bat start on Windows and catalina.sh start on Linux.
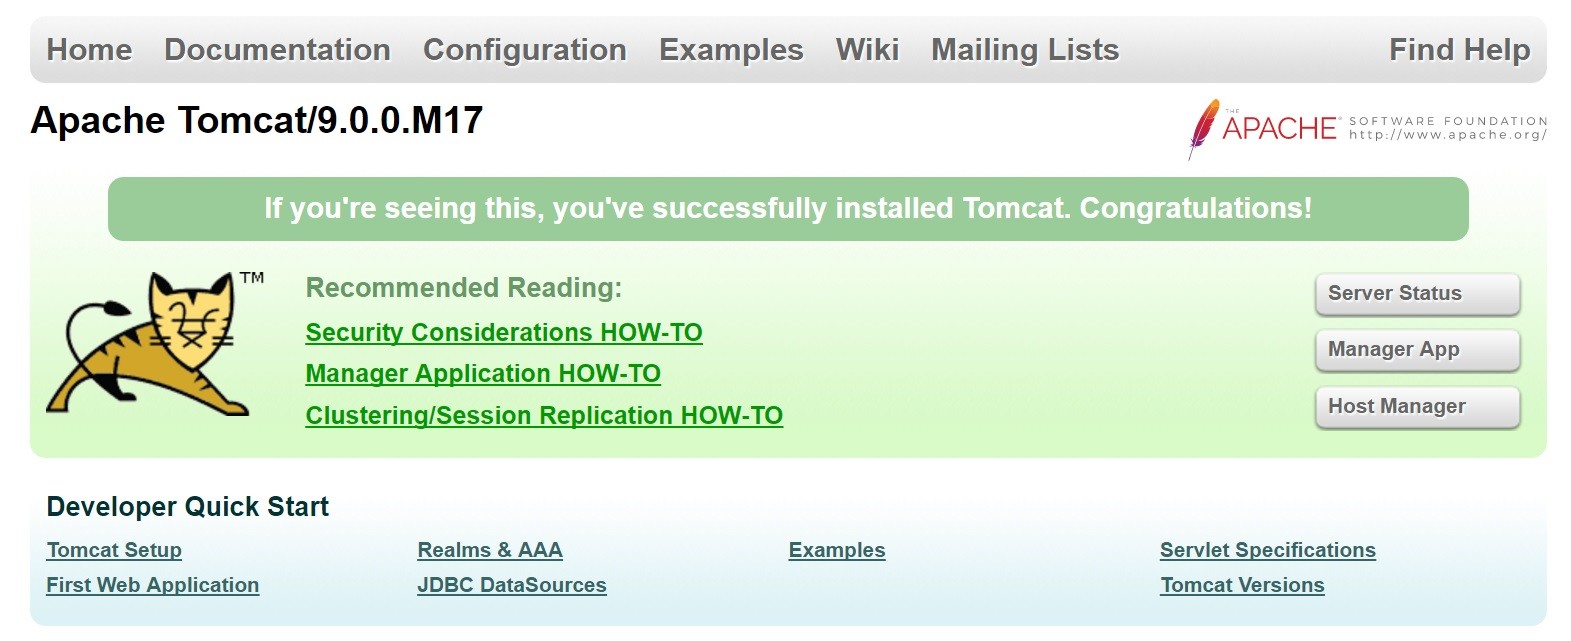
To check that the server has actually started, navigate to localhost:8080 and the picture shown below should appear.
To stop the server one has to type the same commands with stop instead of start.
The simplest way to manually deploy an application to Tomcat is to copy the generated war file, in our case SpringREST.war, to the webapps/ subfolder of the Tomcat installation folder. After that, just navigate to http://localhost:8080/SpringREST/ , where SpringREST is the name of the application, and you should see “Hello World!” greeting in your browser. Another way to deploy an application is to use Manager App from the aforementioned Tomcat Web console.
Adding Configuration Necessary to Run Spring Web Application
Now we’ll remove index.jsp file and create a REST API that returns a greeting instead. First, we need to add a Dispatcher Servlet to web.xml file in the WEB-INF/ subfolder of webapp/ sub-folder. The web.xml file is shown below.
<!DOCTYPE web-app PUBLIC
        "-//Sun Microsystems, Inc.//DTD Web Application 2.3//EN"
        "http://java.sun.com/dtd/web-app_2_3.dtd" >

<web-app>
    <display-name>Archetype Created Web Application</display-name>
    <servlet>
        <servlet-name>dispatcher</servlet-name>
        <servlet-class>org.springframework.web.servlet.DispatcherServlet</servlet-class>
        <load-on-startup>1</load-on-startup>
    </servlet>
    <servlet-mapping>
        <servlet-name>dispatcher</servlet-name>
        <url-pattern>/*</url-pattern>
    </servlet-mapping>
</web-app>
The name of the servlet is dispatcher and Spring will be looking for a file named dispatcher-servlet.xml in the same sub-folder for configuration settings. The file is shown below and instruct Spring to scan classpath in search of the REST controller that serves HTTP requests and returns a greeting.
<?xml version="1.0" encoding="windows-1252"?>
<beans xmlns="http://www.springframework.org/schema/beans"
       xmlns:xsi="http://www.w3.org/2001/XMLSchema-instance"
       xmlns:context="http://www.springframework.org/schema/context"
       xmlns:mvc="http://www.springframework.org/schema/mvc"
       xsi:schemaLocation="http://www.springframework.org/schema/beans
http://www.springframework.org/schema/beans/spring-beans-4.0.xsd
http://www.springframework.org/schema/context
http://www.springframework.org/schema/context/spring-context-4.0.xsd
http://www.springframework.org/schema/mvc
http://www.springframework.org/schema/mvc/spring-mvc-4.0.xsd">

    <context:component-scan base-package="com.javaeeeee.springrest"/>
    <mvc:annotation-driven />
</beans>
Now we are ready to create a controller.
Adding Hello World Spring MVC REST Controller
The code for the controller is shown below. The controller is marked with @RestController annotation. Previously we instructed Spring to scan particular packages to look for classes marked with this and some other annotations and use those classes. The annotation tells Spring that this class will serve HTTP requests using Spring MVC.
package com.javaeeeee.springrest.controllers;

import org.springframework.web.bind.annotation.GetMapping;
import org.springframework.web.bind.annotation.RestController;

@RestController
public class HelloController {

    @GetMapping("/hello")
    public String getGreeting() {
        return "Hello Spring World!";
    }
}
Also, there is the @GetMapping annotation specifying the path at which the resource can be reached. In our case that means that one can obtain the greeting by localhost:8080/SpringREST/hello URL using HTTP GET method. In earlier Spring version the @RequestMapping annotation was used for specifying paths and HTTP methods used to access a resource.
Testing Spring MVC controllers
A code for a simple test for our controller is shown below. For testing purposes we use the same configuration file but named test-dispatcher-servlet.xml and placed to src/test/resources/ subfolder of our project’s folder.
package com.javaeeeee.springrest.controllers;

import org.junit.Test;
import org.junit.Before;
import org.junit.runner.RunWith;
import org.springframework.beans.factory.annotation.Autowired;
import org.springframework.test.context.ContextConfiguration;
import org.springframework.test.context.junit4.SpringRunner;
import org.springframework.test.context.web.WebAppConfiguration;
import org.springframework.test.web.servlet.MockMvc;

import static org.springframework.test.web.servlet.result.MockMvcResultMatchers.content;
import static org.springframework.test.web.servlet.request.MockMvcRequestBuilders.get;
import static org.springframework.test.web.servlet.result.MockMvcResultMatchers.status;

import org.springframework.test.web.servlet.setup.MockMvcBuilders;
import org.springframework.web.context.WebApplicationContext;

@RunWith(SpringRunner.class)
@WebAppConfiguration
@ContextConfiguration("classpath:test-dispatcher-servlet.xml")
public class HelloControllerTest {

    @Autowired
    private WebApplicationContext webApplicationContext;

    private MockMvc mockMvc;

    @Before
    public void setUp() {
        this.mockMvc = MockMvcBuilders
                .webAppContextSetup(this.webApplicationContext)
                .build();
    }

    @Test
    public void testGetGreeting() throws Exception {
        this.mockMvc.perform(get("/hello"))
                .andExpect(status().isOk())
                .andExpect(content().string("Hello Spring World!"));
    }
}
The test class is decorated with @RunWith annotation that instructs JUnit to run our test with a SpringRunner . The Spring MVC Test framework allows us to test our controller without a servlet container. Inside the test method we make a GET request to our resource and check the response.
Creating a Hello World REST API using Spring Boot
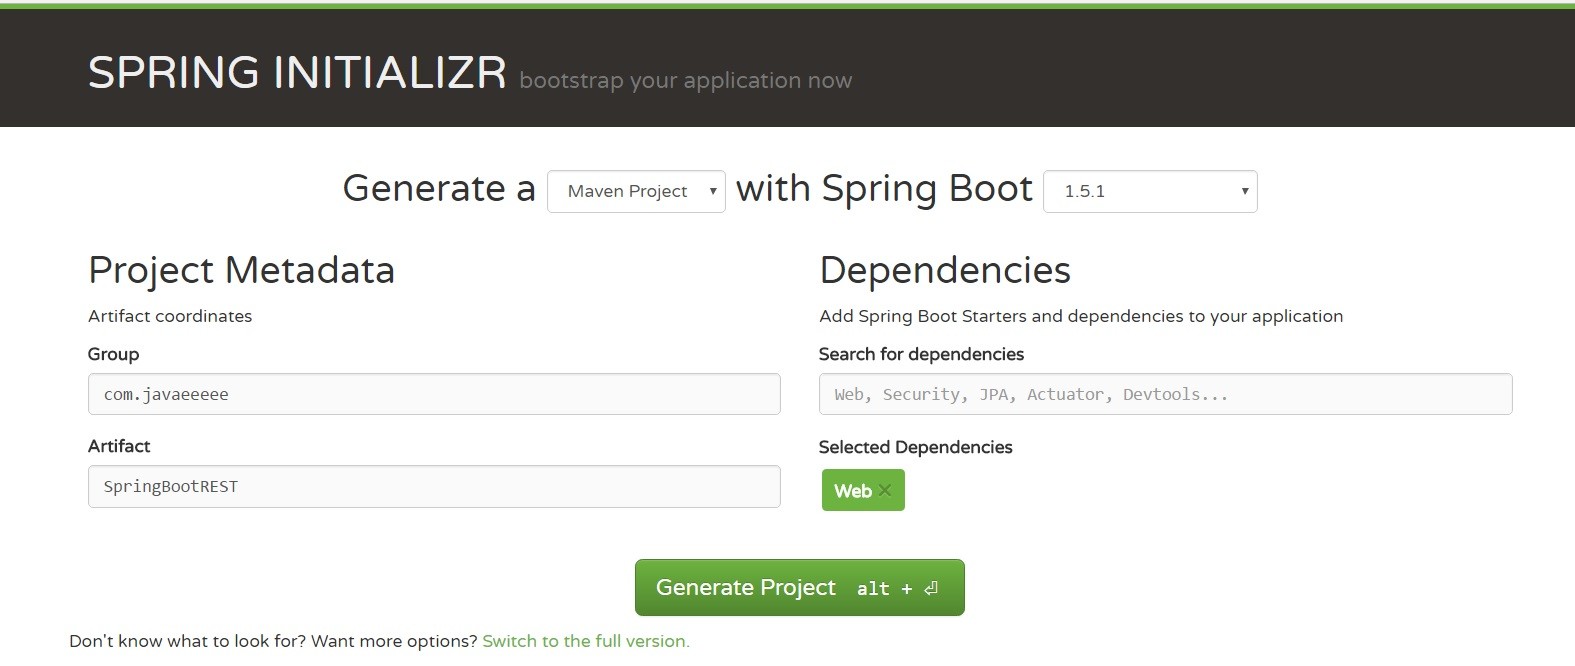
To create a seed Spring Boot project we’ll use Spring Initializr and then open the project using an IDE. We type Web in “Search for dependencies” input field and select “Web” as shown on the picture below and press the “Generate Project” button. The zip file is downloaded after that.
Now, we should add the same REST controller to our Spring Boot project as we created previously. The project can be built using the same command as before, but result is packaged as a jar file by default and uses an embedded Tomcat, so no deployment is necessary, but don’t forget to stop Tomcat before launching the Spring Boot version. The project is launched using the following command.
java -jar target/SpringBootREST-0.0.1-SNAPSHOT.jar
The application is accessible using the URL shown below.
localhost:8080/hello
As to testing the controller, the code of the test method is the same, but annotations on the class change; we do not use XML configuration for this project. The following snippet shows the test class for our controller.
package com.javaeeeee.controllers;

import org.junit.Test;
import org.junit.runner.RunWith;
import org.springframework.beans.factory.annotation.Autowired;
import org.springframework.boot.test.autoconfigure.web.servlet.AutoConfigureMockMvc;
import org.springframework.boot.test.context.SpringBootTest;
import org.springframework.test.context.junit4.SpringRunner;
import org.springframework.test.web.servlet.MockMvc;

import static org.springframework.test.web.servlet.request.MockMvcRequestBuilders.get;
import static org.springframework.test.web.servlet.result.MockMvcResultMatchers.content;
import static org.springframework.test.web.servlet.result.MockMvcResultMatchers.status;

@RunWith(SpringRunner.class)
@SpringBootTest
@AutoConfigureMockMvc
public class HelloControllerTest {
    @Autowired
    private MockMvc mockMvc;

    @Test
    public void getGreeting() throws Exception {
        this.mockMvc.perform(get("/hello"))
                .andExpect(status().isOk())
                .andExpect(content().string("Hello Spring World!"));
    }

}
It is seen that it takes less steps to recreate the same application using Spring Boot as a lot of things is inferred by the framework.
Summary
In this post we discussed how to create a simple Hello World REST API using both Spring Framework and Spring Boot. Also, we discussed how to test code using Spring MVC Test Framework. While it’s faster to develop applications using Spring Boot and that’s definitely a benefit for the purposes of learning that it is not necessary to do a lot of configuration, Spring framework is often found in job descriptions and it may be useful to know how a framework works under the hood.
It should be noted, that a Web application can consist of several modules, e.g. it could be a REST API that exposes all the application functionality that can be consumed by an Angular or React front end, a hybrid or native mobile application or a front-end part written in Spring, which consumes the REST API data and republishes it using HTML and some template or component-based Java framework. Creation of Maven multi-module application could be accomplished using
pom-root
Maven archetype.
Resources:
- Spring Framework Reference Documentation
- Apache Tomcat 9 Documentation
- A Complete Guide to Tomcat Startup
- How to Install Tomcat on Ubuntu
- Spring Boot Reference Guide
- Building an Application with Spring Boot
- Building a RESTful Web Service
| Reference: | Spring Tutorial: Creating a Hello World REST API Using Spring Framework and Spring Boot from our JCG partner Dmitry Noranovich at the Java and JavaEE blog blog. |

Good tutorial. Here is the another tutorial for building a REST API using spring boot.
http://mydevgeek.com/building-a-simple-rest-service-with-spring-boot/
I’m not very experienced with Maven. For the second part of the tutorial, I keep getting build errors. Example:
[ERROR] /D:/MarsWorkspace/SpringBootREST/src/main/java/com/javaeeeee/springrest/controllers/HelloController.java:[3,17] package org.junit does not exist
[ERROR] /D:/MarsWorkspace/SpringBootREST/src/main/java/com/javaeeeee/springrest/controllers/HelloController.java:[4,17] package org.junit does not exist
[ERROR] /D:/MarsWorkspace/SpringBootREST/src/main/java/com/javaeeeee/springrest/controllers/HelloController.java:[5,24] package org.junit.runner does not exist
[ERROR] /D:/MarsWorkspace/SpringBootREST/src/main/java/com/javaeeeee/springrest/controllers/HelloController.java:[7,40] package org.springframework.test.context does not exist
What can I do to fix these errors? I’ve tried editing the pom file and I know that junit is in .m2 repository so I don’t understand what the problem is.
Thank you much.
Hello, Jorge,
Try to run mvn clean package from the main project folder. It will download all the dependencies.
Found a couple of free Maven courses on Udemy https://www.udemy.com/mavencrashcourse and https://www.udemy.com/maven-quick-start. Hope it helps.
I really don’t understand this tutorial (which is meant for someone new to the technology, yes/no?)… There’s no build xml so how can I create a WAR for deployment; meaning will a boilerplate build script work or are there any considerations I need to be aware of? More than once in the text above it says to remove the index.jsp. Without the web page file, how does one see the result? In HelloController.java, I cannot resolve “package springframework.web.bind.annotation does not exist” errors on the two import statements as written. It seems one needs to explicit make a dependency in the… Read more »
Hello, Chris, Sorry about that. The project is Maven-based, you can find pom.xml file in the example project folders. If we talk about index.jsp file, it is used to generate server-side HTML response. In this particular tutorial, we talk about REST API which can return data that is not HTML. In a more recent trend, the server side returns not HTML, but some data in a human-readable format such as JSON and HTML is generated in the client’s browser by a framework such as Angular or other. In addition, this data can be consumed by a native client on a… Read more »