The idea behind this article is to explore ways to deploy releases with Jenkins to Docker Swarm without downtime. We’ll use blue-green procedure. More info about the process and one possible implementation can be found in the Blue-Green Deployment, Automation and Self-Healing Procedure article. One of the downsides of the process we used in that article is Ansible itself. While it is probably the best tool for provisioning and orchestration, it had some downsides when we tried to use it as the tool to deploy containers. This is especially evident when the process is complex. Ansible lacks some constructs common in most programming languages. This time we’ll try to implement the same process but using the Jenkins Workflow Plugin that was developed and contributed to Jenkins open source project by CloudBees.
In a nutshell, we’ll do the following.
- Provision the Swarm cluster
- Provision the proxy service
- Pull the latest release
- Deploy the latest release in parallel with the current one
- Run pre-integration tests that will confirm that everything seems to be working correctly
- Update the proxy service
- Run post-integration tests that will confirm that everything seems to be working correctly through the proxy service
- Stop the previous release
During the first five steps, users will be using the current release oblivious of the existence of the new version we deployed. Since we’ll be running two versions at the same time, there will be no downtime during the deployment.
On top of those steps, the process should be capable of rolling back in case something goes wrong. Additional feature we’ll introduce is the request to scale the service and maintain the scaled number of instances in subsequent deployments.
First we’ll see the job in action and then discuss how it was done.
Setting Up Docker Swarm Cluster and Jenkins
We’ll start by creating the cluster we’ll need for running Docker Swarm. We’ll use VirtualBox and Vagrant to create the VMs and then provision them with Ansible. I won’t go into details how the Ansible playbooks that we’ll run work since that information can be found in other posts in this blog. The setup will be similar to the one described in the Deploying Containers with Docker Swarm and Docker Networking article published recently. The major difference will be the addition of Jenkins and the Workflow Plugin.
I’ll assume that you already have VirtualBox, Vagrant and Git installed. If you are a Windows user, please follow the instructions described in Running Linux VMs on Windows before diving into those described below.
Let’s get going! We can create the servers by running the following command.
git clone https://github.com/vfarcic/blue-green-docker-jenkins.git

cd blue-green-docker-jenkins

vagrant plugin install vagrant-cachier

vagrant up swarm-master swarm-node-1 swarm-node-2
Next, we should provision servers with Docker Swarm, Docker Compose, Consul, Consul Template and Registrator. If you are new to Docker Swarm, you might benefit from reading the Docker Clustering Tools Compared: Kubernetes vs Docker Swarm article. Information about Consul and the other tools we’ll use for service discovery can be found in the Service Discovery: Zookeeper vs etcd vs Consul article.
It might take some time to create all three servers especially if this is the first time you’re using Vagrant with Ubuntu. Once they are up and running, we can use Ansible to configure the cluster. Since the creation of VMs included installation of Ansible in the swarm-master node, we can use it to run the swarm.yml playbook.
vagrant ssh swarm-master

ansible-playbook /vagrant/ansible/swarm.yml \
    -i /vagrant/ansible/hosts/prod
Finally, the only thing left is to set up Jenkins. We’ll continue using Ansible for this task. It will create few directories, run the Jenkins container, fiddle with few configurations, install plugins we’ll need and, finally, create the job that will do the actual deployment. The key is to automate as much as possible and Jenkins setup is no exception. Since the focus of this article is to experiment with Jenkins Workflow in the context of blue-green deployment to the Swarm cluster, I’ll skip explanations how the jenkins.yml playbook works. The setup resembles the one I used in the Continuous Integration, Delivery or Deployment with Jenkins, Docker and Ansible article with few improvements. Feel free to take a look at the code.
ansible-playbook /vagrant/ansible/jenkins.yml \
    -i /vagrant/ansible/hosts/prod
Exploring The Jenkins Workflow
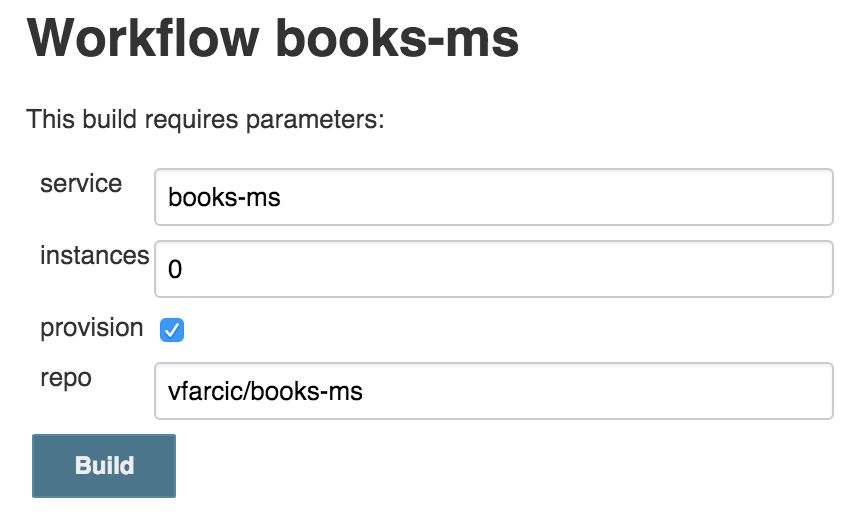
Let’s start the build. Since the first run lasts a bit longer than consecutive ones, we’ll use that time to discuss the solution. Please open http://10.100.192.200:8080/job/books-ms/build?delay=0sec and click the Build button. You can monitor the progress by opening the http://10.100.192.200:8080/job/books-ms/lastBuild/console page.
While the job is running, let’s take a quick look at the docker-compose.yml that we’ll use to run tests and deploy the service.
app:
image: vfarcic/books-ms
ports:
– 8080
environment:
– SERVICE_NAME=books-ms
– DB_HOST=books-ms-db

app-blue:
environment:
– SERVICE_NAME=books-ms-blue
extends:
service: app

app-green:
environment:
– SERVICE_NAME=books-ms-green
extends:
service: app

db:
container_name: books-ms-db
image: mongo
environment:
– SERVICE_NAME=books-ms-db

integ:
image: vfarcic/books-ms-tests
volumes:
– ./src:/source/src
environment:
– TEST_TYPE=integ
– DOMAIN=$DOMAIN
The app target represents our main service. However, since we’ll need to distinguish blue from green deployments, there are two additional targets called app-blue and app-green. The truly important part are target names. They both extend the app target in order to avoid repetition. We’re passing the environment variable SERVICE_NAME that will help Registrator better define the service before sending the information to Consul. Apart from the app* targets, we have the MongoDB identified as db and the integ target that we’ll use for running tests.
With Docker Compose out-of-the-way, we can proceed and explore the Groovy script service-flow.groovy that will do the actual deployment. Please note that, for simplicity, I skipped steps that build containers, run unit and functional tests and push containers to the registry. You’re advised to put them inside the workflow we are about to explore. In this case, the Groovy script assumes that those steps were already performed in a separate process and that the container we are about to deploy is validated.
First we should declare few variables.
def swarmMaster = "10.100.192.200"
def proxy = "10.100.192.200"
def currentColor = getCurrentColor(swarmMaster, service)
def nextColor = getNextColor(currentColor)
def instances = getInstances(swarmMaster, service)
The swarmMaster and proxy represent IPs that we’ll use later on. The currentColor and the nextColor variable values are set through functions that consult Consul and retrieve values of the color that is currently deployed as well as the color we are about to deploy. Finally, we are discovering how many instances we should deploy. The getInstances function has two conditionals. If instances parameter from the Jenkins build screen is set to 0 (default value), the function will request this information from Consul that will return the number of instances we are currently running or 1 if this is the first deployment. On the other hand, if the Jenkins job build parameter is not 0, it will be used as the instances variable. In other words, we can decide how many instances to deploy by setting some value in the Jenkins build screen or let the script deploy the same number of containers as the current release. Please consult the service-flow.groovy script if you are interested how those functions work (they are at the bottom of the script).
We should start by provisioning the cluster. Even though we already set up Swarm and service discovery tools, it is always a good idea to make sure that everything is still running as expected. Besides the cluster we’ll need load balancer as well (in this case nginx). If everything is properly set, provisioning will take only few seconds. On the other hand, if some process stopped or, as in case of nginx, it was never even running, our provisioning stage will correct that.
Steps:
- Provision Docker Swarm cluster
- Provision load balancer (nginx)
node("cd") {
    env.PYTHONUNBUFFERED = 1

    stage "> Provisioning"
    if (provision.toBoolean()) {
        sh "ansible-playbook /vagrant/ansible/swarm.yml \
            -i /vagrant/ansible/hosts/prod"
        sh "ansible-playbook /vagrant/ansible/nginx.yml \
            -i /vagrant/ansible/hosts/prod --extra-vars \
            \"proxy_host=swarm-master\""
    }
We started by declaring that the steps will run inside the Jenkins node called or labeled cd (short for continuous deployment). For simplicity, in this case cd is one of the labels of the swarm-master node. In production, you should run as much as possible in servers dedicated to continuous delivery and not in production. Next is the stage declaration that serves multiple purposes. It marks a group of steps, allows us to constrain concurrency and, if you choose to use CloudBees Jenkins Enterprise Edition, provides visualization, ability to restart from selected stage and few other features. Below the stage, you’ll notice that the commands are inside an if statement. The value of the provision variable comes from the checkbox that you’ve seen in the Jenkins build screen. The “meat” of this snippet are two sh statements. ‘sh’ is one of the step types provided by the Workflow Plugin and, as you might have guessed, it runs any shell command we specify. In this case, we’re using it to run Ansible playbooks that will take care of provisioning. Please note that we did not install nginx when we set up the servers. The nginx.yml playbook will do that for us.
With provisioning out-of-the-way, we should start the deployment. Since we are deploying docker containers that were already built and pushed to Docker Hub, all we need is a docker-compose.yml file that is best kept in the same repository as the service code. That way the team that maintains the code is in full control to define how should the containers be deployed and tested and do not need to be knowledgable of Jenkins. We can get the file by cloning the repository with a simple git step.
Steps:
- Clone the code from the repository
stage "> Deployment"
    git url: "https://github.com/${repo}.git"
Please note the usage of the ${repo}. This is another case of the utilization of parameters that can be specified in the Jenkins build screen.
Now we are ready to deploy the new release.
Steps:
- Pull the new release
- Run the new release
- Store the number of instances we deployed in Consul
env.DOCKER_HOST = "tcp://${swarmMaster}:2375"
    sh "docker-compose -f docker-compose-jenkins.yml \
        pull app-${nextColor}"
    sh "docker-compose -f docker-compose-jenkins.yml \
        --x-networking up -d db"
    sh "docker-compose -f docker-compose-jenkins.yml \
        rm -f app-${nextColor}"
    sh "docker-compose -f docker-compose-jenkins.yml \
        --x-networking scale app-${nextColor}=$instances"
    sh "curl -X PUT -d $instances \
        http://${swarmMaster}:8500/v1/kv/${service}/instances"
First we are setting the DOCKER_HOST variable to point to the Swarm Master. From now on, all Docker commands will be sent to that IP/port. Next we’re pulling the application. That is followed with deployment of the database and removal of the target we are about to deploy. Than we are running the service itself. Please note that we are utilizing the instances variable to scale the service. Finally, we are sending the number of instances to Consul so that the same number is used the next time we run the deployment (unless we change it explicitly in the Jenkins build screen).
Now that the service is deployed somewhere inside the Swarm cluster, we can move into post-deployment tasks. Please note that if this would not be the first deployment, our proxy service would be pointing to the old release and our users would be oblivious to the existence of the new version we just deployed. Before we reconfigure the proxy, we should test whether the new release is working properly.
Steps:
- Locate the newly deployed service
- Run pre-integration tests
- Stop the new release if tests fail
stage "> Post-Deployment"
    def address = getAddress(swarmMaster, service, nextColor)
    try {
        env.DOCKER_HOST = ""
        sh "docker-compose -f docker-compose-jenkins.yml \
            run --rm -e DOMAIN=http://$address integ"
    } catch (e) {
        env.DOCKER_HOST = "tcp://${swarmMaster}:2375"
        sh "docker-compose -f docker-compose-jenkins.yml \
            stop app-${nextColor}"
        error("Pre-integration tests failed")
    }
The thing about Swarm is that we are not in full control any more. We do not decide where will the containers be deployed. Docker Swarm did that job for us and we had to find out where did it deploy our service. Since Registrator stored the information related to the newly deployed release to Consul, all we have to do to find the IP and the port was to query it. That’s what the getAddress function does. Please consult the service-flow.groovy source code if you are interested in seeing the function code.
Once we got the location of our service, we run integration tests. Since we do not want to waste resources in production servers, we had to remove the value of the DOCKER_HOST variable so that tests are run locally. You’ll notice that the execution of the tests is inside try block. If they fail, script will jump into the catch statement. If such a thing happens, we are stopping the container we just deployed and exiting the script with an error.
Now that we know that the release we deployed is working correctly, we can reconfigure the proxy service so that our users can start using it.
Steps:
- Generate nginx configuration
- Copy the configuration to the proxy server
- Reload nginx
updateProxy(swarmMaster, service, nextColor);
Changing the nginx configuration is easy with Consul Template. We need a template that, in this case, is stored in the service repository (nginx-upstreams-blue.ctmpl and nginx-upstreams-green.ctmpl) and run the command. The result is, in this case, the nginx-upstreams.conf file generated from the template and data stored in Consul.
Please note that everything we did by now was executed in the cd node so that there is minimal impact on production servers. Now came the moment to switch to the proxy server (lb). For details of the implementation, please take a look at the updateProxy function in the service-flow.groovy source code.
With the first round of tests (pre-integration) we verified that everything was deployed and configured correctly except the proxy itself. The goal was to test as much as possible without affecting our users (proxy was until recently pointing to the old release). Even though it is not part of this article, before the container was built and pushed to the hub, I run all sorts of unit, functional and any other type of tests that can be performed without having the service deployed.
Now is the time to do the final round of tests (post-integration). We should verify that the changes in the proxy configuration were done correctly and the service is indeed accessible through the proxy.
Steps:
- Run post-integration tests
- Revert proxy configuration if tests failed
- Stop the new release if tests fail
try {
        env.DOCKER_HOST = ""
        sh "docker-compose -f docker-compose-jenkins.yml \
            run --rm -e DOMAIN=http://${proxy} integ"
    } catch (e) {
        if (currentColor != "") {
            updateProxy(swarmMaster, service, currentColor)
        }
        env.DOCKER_HOST = "tcp://${swarmMaster}:2375"
        sh "docker-compose -f docker-compose-jenkins.yml \
            stop app-${nextColor}"
        error("Post-integration tests failed")
    }
    sh "curl -X PUT -d ${nextColor} http://${swarmMaster}:8500/v1/kv/${service}/color"
This block is almost the same as the one we have for pre-integration tests. The major difference is that this time we are not testing the service directly through its IP and port but going through the proxy in the same way service consumers will be accessing it. If tests fail, not only that we need to stop the new release but we also have to revert changes to the nginx configuration. Finally, if everything passed successfully, we’re updating Consul with the information about the color we just deployed.
We’re almost done. The service is deployed, tested (multiple times) and the proxy has been changed accordingly. The only thing left is a bit of a clean up.
Steps:
- Stop the old release (unless this was deployment of the first release)
if (currentColor != "") {
        env.DOCKER_HOST = "tcp://${swarmMaster}:2375"
        sh "docker-compose -f docker-compose-jenkins.yml \
            stop app-${currentColor}"
    }
We’re finished with the exploration of the Jenkins workflow script used to perform blue-green deployment to Docker Swarm. Hopefully, by this time, the first run of the Jenkins build is finished. The main culprit for the slowness is the tests container with its virtual size being over 2GB. While in this case we used it only to run backend integration tests, in few other occasions I used it to run front-end tests running on FireFox and Chrome and full back-end test suite. It contains JDK, Scala, NodeJS, a lot of Bower and Scala libraries, and so on. It is a monster container that holds everything I need to test this service. The same container was used to perform unit and functional tests before I pushed the container to the Docker Hub. While such a big size is OK for testing purposes, please note that production containers should be as small as possible. The books-ms container, for example, is a bit over 300MB of virtual size.
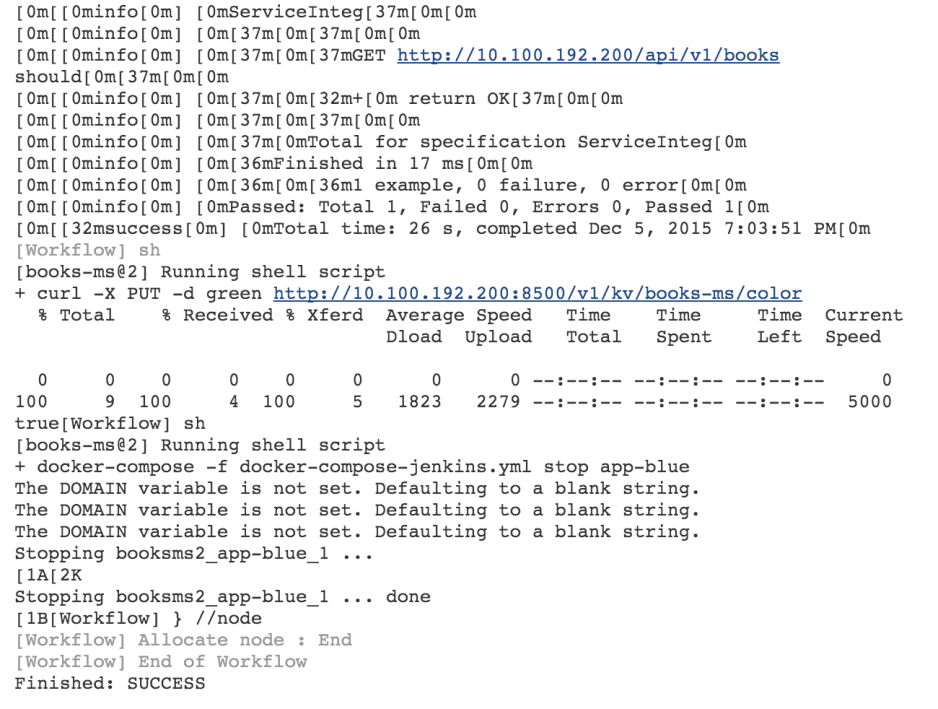
Please go back to the Jenkins console screen and confirm that the build finished. The last entry should be Finished: SUCCESS. Accept my apologies if it is still running and please be patient. I haven’t had time to create a smaller sample only for this article.
If looking at this huge log is too demanding, experiment with the Workflow Steps screen. The link is located in the left-hand menu and it shows separate logs for each step in the script.
You can also take a look at containers that were deployed.
export DOCKER_HOST=tcp://10.100.192.200:2375

docker ps --filter name=books --format "table {{.Names}}"
The output of the docker ps command, in my case, is as follows.
NAMES
swarm-node-1/booksms_app-blue_1
swarm-node-2/books-ms-db
Swarm deployed the app container to the node 1 and the db container to the node 2. Please note that there is no guarantee that your output will be the same. Swarm might have decided to deploy containers to different nodes.
Go ahead and repeat the build multiple times. Experiment with different values of the instances parameter. For example, see what happens if you choose to deploy five instances of the next release. Once such a deployment is finished you can repeat the docker ps command and see where did Swarm deploy the containers. Every time you run the build the color will change and there will be no downtime during the process. More over, the release will be tested in production without affecting the users. If you are adventurous, try stopping the nginx container or one of the swarm nodes. Since provisioning is part of the deployment, everything will go back to normal once a new build is finished executing. Don’t be discouraged by the long time it took to run the job for the first time. All servers are now provisioned and all the containers are already pulled. Consecutive runs will be much faster.
Farewell Thoughts
Hopefully this article gave you an overview of possible steps we might need to run for the successful execution of blue-green deployment to Docker Swarm. What we did is a combination of provisioning and configuration of the cluster with blue-green deployment process. More importantly, I hope you saw the advantages Jenkins Workflow plugin gives over more common ways to organize Jenkins jobs. The same process would probably require multiple jobs that would be much harder to maintain. Moreover, reading and writing Groovy scripts is much easier and faster than trying to fight the standard Jenkins jobs XML syntax. This script can and should be in the source code repository. Any change to this job can be done in the same way as we normally change the code. All we’d need to do is re-run the Ansible playbook and the job would be updated.
Please note that even though this script might look daunting at the beginning, with a small adaptation for your own organization, it could easily be reused to deploy many different services. As long as certain naming conventions are used (mainly in the way we name docker-compose.yml targets), you should be able to reuse it across most (if not all) deployments. All you’d have to do is add more entries to the jobs variable inside defaults/main.yml file and run the playbook again.

The major drawback of the way we did things is the creation of Jenkins jobs through Ansible. While it did what we needed, it feels more like a workaround than a long-term solution. The problem is, in my opinion, that the current Jenkins OSS solutions to manage jobs are even less productive. CloudBees Jenkins Platform Enterprise Edition solves this problem with templating plugins and offer more power behind Jenkins Workflow. If you are interested in trying it out, CloudBees support will be happy to give guidance.
| Reference: | Blue-Green Deployment To Docker Swarm with Jenkins Workflow Plugin from our JCG partner Viktor Farcic at the Technology conversations blog. |

