This article is part of our Academy Course titled Introduction to Nginx.
This course will introduce you to the magic of nginx. You will learn to install and configure nginx for a variety of software platforms and how to integrate it with Apache. Additionally, you will get involved with more advanced concepts like Load Balancing, SSL configuration and Websockets proxying. Check it out here!

Table Of Contents
1. Introduction
Nginx and Apache can certainly work together, not necessarily replacing each other as our web server of choice. This solution offers many advantages and solves the issues that most system administrators are familiar with, such as slowdowns and complex configurations. You can just take a look at the Apache configuration file and chances are you’ll probably agree with me!
2. Nginx as reverse proxy
A reverse proxy is a device or service placed between a client and a server in a network infrastructure. Incoming requests are handled by the proxy, which interacts on behalf of the client with the desired server or service residing on the server1. In this case, Nginx will act as reverse proxy between the client (your computer, for example) and Apache, the backend web server (see Fig. 1).
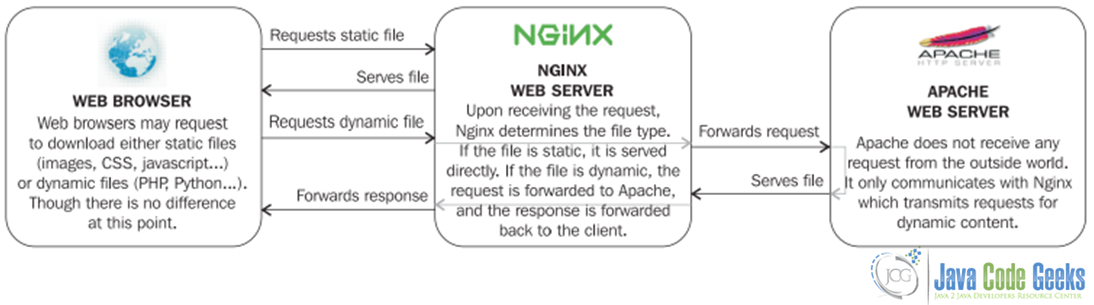
In this above diagram, Nginx acts as reverse proxy (or in other words, as frontend server) and receives all requests from the outside world. At this point those requests can be filtered or “delivered” to Apache (acting as HTTP client) in the backend. These two services can even be hosted in the same physical server with the caution to use different listening ports for each of them. This whole operation is handled by the proxy module of Nginx.
The main purpose of setting up Nginx as a frontend server and giving Apache a simple backend role is to improve the serving speed, given the fact that great amount of requests coming from clients are for static files (html pages, cascading style sheets, regular images, and so on), and static files are served much faster by Nginx. The overall performance sharply improves both on the client side and server side.
3. Nginx proxy module
Fortunately, the proxy module is enabled by default during the installation of Nginx. The main directives of the module can be seen in Table 1.
| Directive/Context | Description |
proxy_buffersContext: http, server, | The request is sent to the backend server by specifying its location. Syntax: TCP sockets: proxy_pass http://hostname:port;UNIX domain sockets: proxy_pass http://unix:/path/to/file.socket;(https can be used instead of http for secure traffic) Examples: proxy_pass http://localhost:8080;proxy_pass http://127.0.0.1:8080;proxy_pass http://unix:/tmp/nginx.sock; |
| Allows overriding the HTTP method of the request to be forwarded to the backend server. Syntax: proxy_method method;Example: proxy_method POST; |
| By default, as Nginx prepares the response received from the backend server to be forwarded back to the client, it ignores some of the http headers4. With this directive, you can specify an additional header line to be hidden from the client. This directive can be inserted multiple times with one header name for each. Syntax: proxy_hide_header header_name;Example: proxy_hide_header Cache-Control; |
| Forces some of the ignored headers to be passed on to the client. Syntax: proxy_pass_header header_name;Example: proxy_pass_header Date; |
proxy_pass_request_bodyproxy_pass_request_headersContext: http, server, location | Defines whether or not, respectively, the request body and extra request headers should be passed on to the backend server. Syntax: on or off; |
proxy_redirectContext: http, server, | Allows you to rewrite the URL appearing in the Location HTTP header on redirections triggered by the backend server. Syntax: off, default, or the URL of your choiceoff: Redirections are forwarded as it is.default: The value of the proxy_pass directive is used as the hostname and the current path of the document is appended.Note that the proxy_redirect directive must be inserted after the proxy_pass directive as the configuration is parsed sequentially.URL: Replace a part of the URL by another.Additionally, you may use variables in the rewritten URL. Examples: proxy_redirect off;proxy_redirect default;proxy_redirect http://localhost:8080/ http://mysite.com/; |
Table 1: Main directives of the proxy module
The best scenario is to limit to the extent possible the number of requests that are forwarded to the backend server. To that end, the proxy module comes with a group of directives that will help us build a caching system as well as control buffering options and the way Nginx deals with temporary files (see Table 2 for more information on most of these directives).
| Directive/Context | Description |
proxy_passContext: location, if | Sets the amount and size of buffers that will be used for reading the response data from the backend server. If the buffers aren’t large enough the data will be saved to disk before being served to the user. Syntax: proxy_buffers amount size;Default: 8 buffers, 4k or 8k each depending on platform Example: proxy_buffers 8 4k; |
proxy_method | Sets the size of the buffer for reading the beginning of the response from the backend server, which usually contains simple header data. Syntax: Numeric value (size) Example: proxy_buffer_size 4k; |
proxy_cache_keyContext: http, server, | This directive defines the cache key, in other words, it differentiates one cache entry from another. Syntax: proxy_cache_key key;Example: proxy_cache_key "$scheme$host$request_Note: strings beginning with “$” (dollar sign) are variables. The proxy module offers 4 built-in variables; others can be created at the user’s will. |
proxy_cacheContext: http, server, | Defines a shared memory zone used for caching. The same zone can be used in several places. The off parameter disables caching inherited from the previous configuration level. Syntax: proxy_cache zone | off;Default: proxy_cache off; |
proxy_cache_pathContext: http | Sets the path and other parameters of a cache. Cache data are stored in files. Both the key and file name in a cache are a result of applying the MD5 function to the proxied URL. The levels parameter defines hierarchy levels of a cache. Syntax: proxy_cache_path path [levels=levels] keys_zone=name:size [inactive=time] [max_size=size] [loader_files=number] [loader_sleep=time] [loader_threshold=time];[Optional parameters are indicated inside square brackets] Example: proxy_cache_path /tmp/nginx_cache |
proxy_cache_min_usesContext: http, server, | Defines the minimum amount of hits before a request is eligible for caching. By default, the response of a request is cached after one hit (next requests with the same cache key will receive the cached response). Syntax: Numeric value Example: proxy_cache_min_uses 1; |
Table 2: Some caching / buffering directives
There are even more directives that let you define the behavior of Nginx in the case of timeouts or other limitations regarding communications with the backend server (see Table 3):
| Directive/Context | Description |
proxy_connect_timeoutContext: http, server, | Defines the backend server connection timeout. This is different from the read/send timeout. If Nginx is already connected to the backend server, the proxy_connect_ timeout is not applicable. It should be noted that this timeout cannot usually exceed 75 seconds. Syntax: Time value (in seconds) Example: proxy_connect_timeout 15; |
proxy_read_timeoutContext: http, server, | Defines a timeout for reading a response from the proxied server. A timeout is set only between two successive read operations, not for the transmission of the whole response. If a proxied server does not transmit anything within this time, a connection is closed. Syntax: Time value (in seconds) Default value: 60 Example: proxy_read_timeout 60; |
proxy_send_timeoutContext: http, server, | This timeout is for sending data to the backend server. The timeout isn’t applied to the entire response delay but between two write operations instead. Syntax: Time value (in seconds) Default value: 60 Example: proxy_send_timeout 60; |
proxy_ignore_client_abortContext: http, server, | Determines whether the connection with a proxied server should be closed when a client closes a connection without waiting for a response. If set to on, Nginx will continue processing the proxy request, even if the client aborts its request. In the other case (off), when the client aborts its request, Nginx also aborts its request to the backend server. Default value: off |
Table 3: Some directives regarding communications with the backend server (Apache)
4. A note on variables
The proxy module comes with the following variables that can be used as arguments for the directives listed above:
$proxy_host:the hostname of the backend server.$proxy_port:the port of the backend server.$proxy_add_x_forwarded_for:Contains client request-header “X-Forwarded-For” with separated by comma $remote_addr. If there is no X-Forwarded-For request-header, than $proxy_add_x_forwarded_for is equal to $remote_addr.$proxy_internal_body_length:Length of the request body (set with theproxy_set_bodydirective or 0).
5. Configuring Apache
By default, web servers are configured to listen on tcp port 80. So the first thing that we need to do is to change the settings of Apache in order to avoid conflicts with Nginx (which will be running as the frontend server).
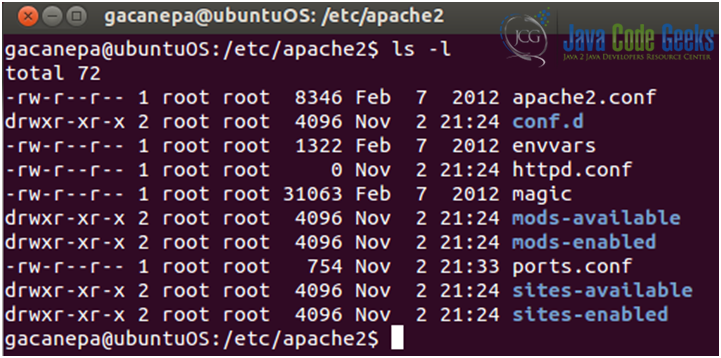
In Ubuntu 12.04, the main configuration file for Apache is located in /etc/apache2 under the name ports.conf (see Fig. 2).
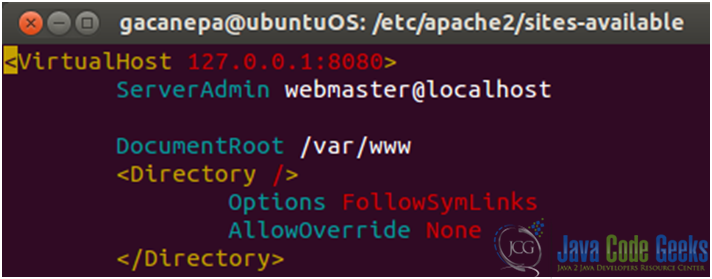
There are 3 main elements that need to be replaced in our Apache configuration (see Fig. 3a and 3b):
1) The Listen directive must be changed to a port other than 80, such as 8080.
2) The following configuration directive is present in the main configuration file:
NameVirtualHost A.B.C.D:8080
where A.B.C.D is the IP address of the main network interface on which server communications (between the frontend and the backend servers) go through. In this case, we use the loopback interface and its IP address since both Apache and Nginx are installed in the same physical server. If you do not host Apache on the same server, you will need to specify the IP address of the network interface that can communicate with the server hosting Nginx.
3) The port that was just selected must be reported in all our virtual hosts configuration sections (in /etc/apache2/sites-available/default).

After restarting Apache, we can open a web browser and confirm that it is listening on port 8080 (see Fig. 4):

As a extra security measure, we can tell Apache to only serve requests coming from the frontend server. This can be performed in 2 ways: 1) system wide or by 2) establishing per-virtual-host restrictions.
1) As discussed earlier, the Listen directive of Apache lets you specify a port, but also an IP address. However, by default, no IP address is selected which results in communications coming from all interfaces. All you have to do is replace the Listen *:8080 directive by Listen 127.0.0.1:8080, Apache should then only listen on the local IP address.
2) Using the allow and deny Apache directives we can define which IP addresses will be able to access each virtual host.
Once the changes are made, Apache must be restarted (or its configuration reloaded) in order to reflect the changes that we have just made.
6. Configuring Nginx
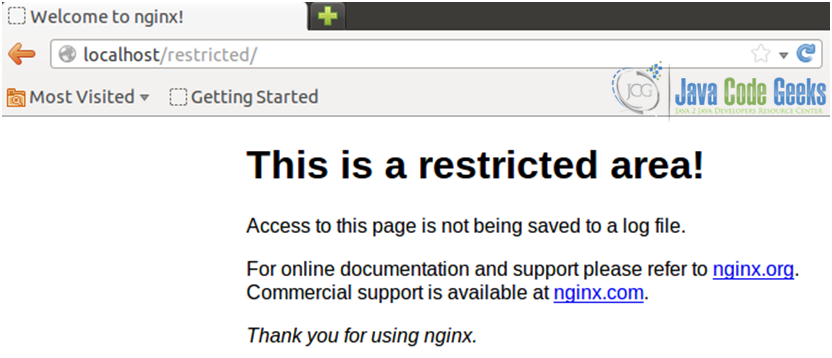
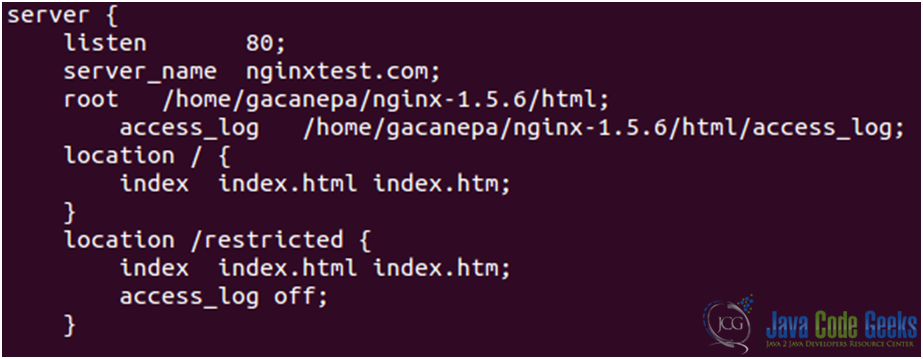
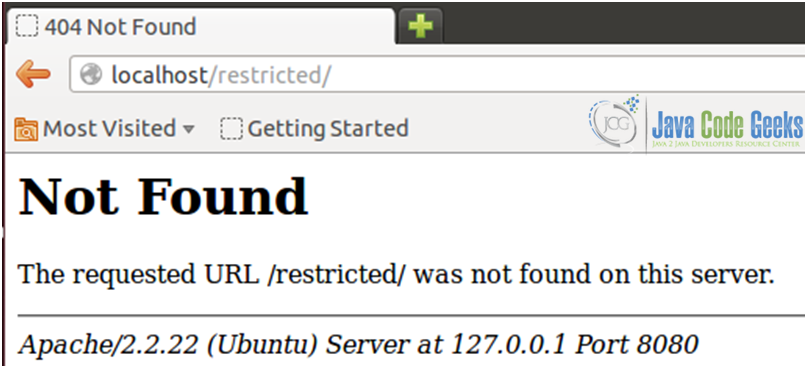
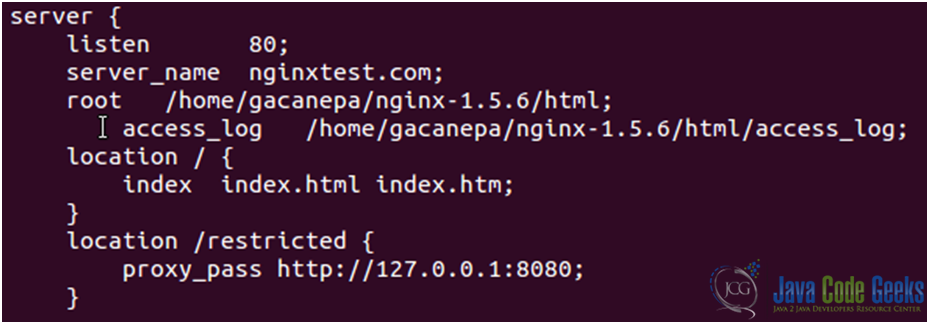
The first directive that we will use in the process of enabling proxy options is proxy_pass. Since it can’t be used at the http or server level, we will include it in every single place that we want to be forwarded. As a preliminary example, we will have all requests made to the restricted folder be forwarded to the Apache web directory (/var/www). See Figs. 5a and 5b, 6a and 6b:
7. Separating content
In order to take better advantage of this Nginx-Apache setting, we can separate the content that each one will deliver upon request.
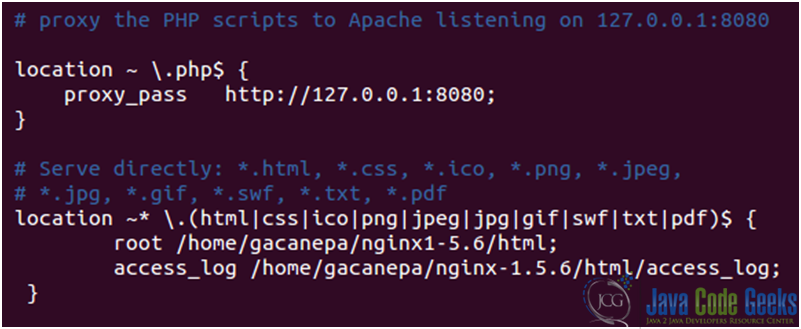
Apache will serve dynamic files, that is, files that require some sort of processing before being sent to the client, such as php files, Python scripts, and so on.
Nginx will serve static files – all other content that does not require additional processing (html pages, cascading style sheets, images, media, and so on).
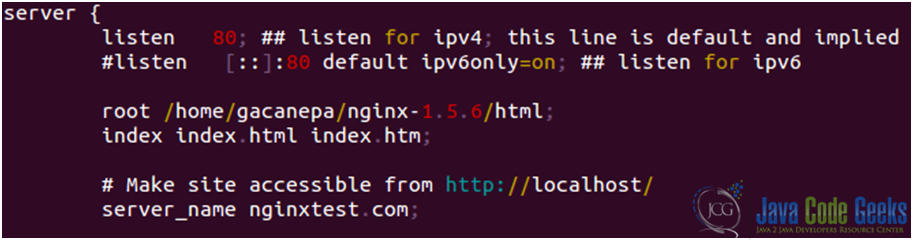
To do this, add the following blocks in the nginx.conf file (see Fig. 7):
When we restart Nginx, we may run into the following issue (see Fig. 8):

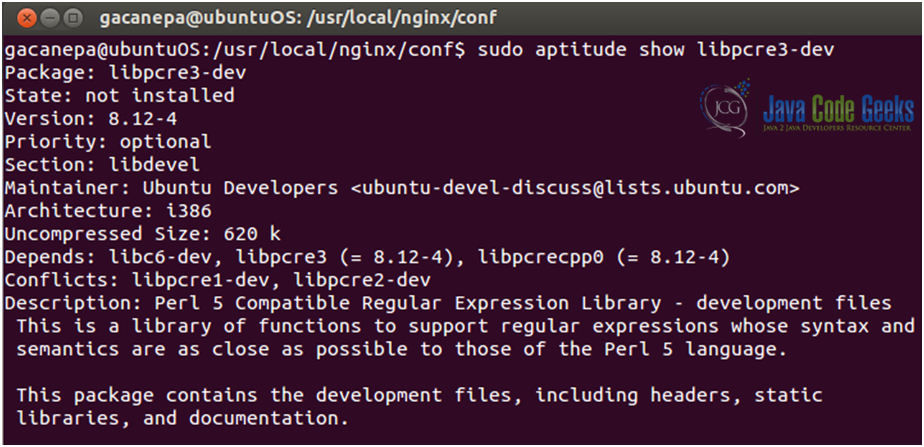
We will go ahead and install the PCRE library that is available in the libpcre3-dev package (refer to tutorial 1: Nginx installation on Linux). See Fig. 9 for details on this package. Once installed, we will have to recompile Nginx.
Let’s create a sample php file in /var/www (see Fig. 10):
Now we will point our web browser to http://localhost/test.php. Please note that localhost per se points to the frontend server, so when it receives a request for a php file, it will forward the request to Apache (see Fig. 11)
8. Download the configuration files
Here you can download the configuration files used in this tutorial: Config_files.zip
