Introduction
In this multi-part series, I am going to run you through Amazon S3 Service.
In first part, you will see the basics of Amazon S3 Service and why one should use it. Later, we will walk through S3 Web Management Console, which is a website interface for S3.
Next parts of this article will go through, accessing S3 programmatically with REST interface and with NodeJS SDK (S3 npm module), securing content on Amazon S3
What is Amazon S3
Amazon Simple Storage Service better known as The Amazon S3. It is Storage as a service solution and provides the simple interface for storing and retrieving the data on cloud.
In other words, it provides the infrastructure for any application storage needs. Your application can store and retrieve larger files up to 5TB, which is fast, efficient and reliable. And it provides the nice interfaces for accessing such as Web Management Console for accessing from Web browsers and REST API and SOAP interface via programmatically
Why use Amazon S3
- It is fast enough to support high-performance applications.
- It is inexpensive. The initial setup does not require any cost. But later as the storage grows you can pay for what you utilize which is very low cost
- It is very secure, it provides access control tools to completely provides security to your resources stored on s3
- As the storage of files kept on S3, it makes core application becomes lighter and faster to respond to other requests
- It provides better scalability in terms of storage, request rate.
- It is secure. All access happens over HTTPS
- It is well integrated with other Amazon AWS services
- It is used by big players such as Dropbox for their backend storage facility
Basic units of Amazon S3
Before starting anything further, lets have look at little explanation basic units of Amazon S3.
While working with Amazon S3, following two main units are base of Amazon S3 that you need to know:
Buckets
Buckets are the fundamental container to storing data. Every object is stored inside bucket. Each bucket can have any no. of data objects stored inside it. Buckets name are unique across the Amazon S3. So, name the bucket carefully, once bucket is created. it cannot be renamed.
With following two formats buckets can be accessed, following is format for bucket url- bucket name as sub-domain http://<bucket-name>.s3.amazonaws.com/<object-name> or bucket name as path http://s3.amazonaws.com/ <bucket-name>/<object-name>
Where, bucket-name is name of bucket object-name is objects name which is stored inside bucket For eg,. we stored photos file inside mypics bucket then https://mypics.s3.amazonaws.com/photo.png
Buckets provide namespace at higher level and way to organize the data objects stored inside s3. Also, you can apply access control to bucket for restricting access by creating policies around it.
Objects
Objects are basic entities stored in Amazon S3. Objects are stored in buckets.
Objects consists of data and meta-data. The data part can be anything but meta-data is typically set of key-value pairs that describes object. This meta-data can be common stuff like date- created, date-modified, mime-type or custom meta-data provided
So, as a user you can read, write, delete data objects inside bucket with simple web services interface provided, which is very simple to use and anyone gets started with it in no time.
Accessing Amazon S3 with Web Management Console
As said earlier, we will go through accessing the Amazon S3 with Web Management Console, which is website interface for S3. If you do not have AWS account, sign up
If you do not have AWS account, sign up here or login if you already have an account.
After that you will redirected to access AWS console here, which provides view of services provided by Amazon AWS. Our interest is in S3, So in Click S3 in Storage and Content Delivery category.
or
After successful sign in, access the S3 here, You will see something like following:
(i already have amazon s3 account, so few buckets i have already created. In your case, if you are new user you wont see anything)
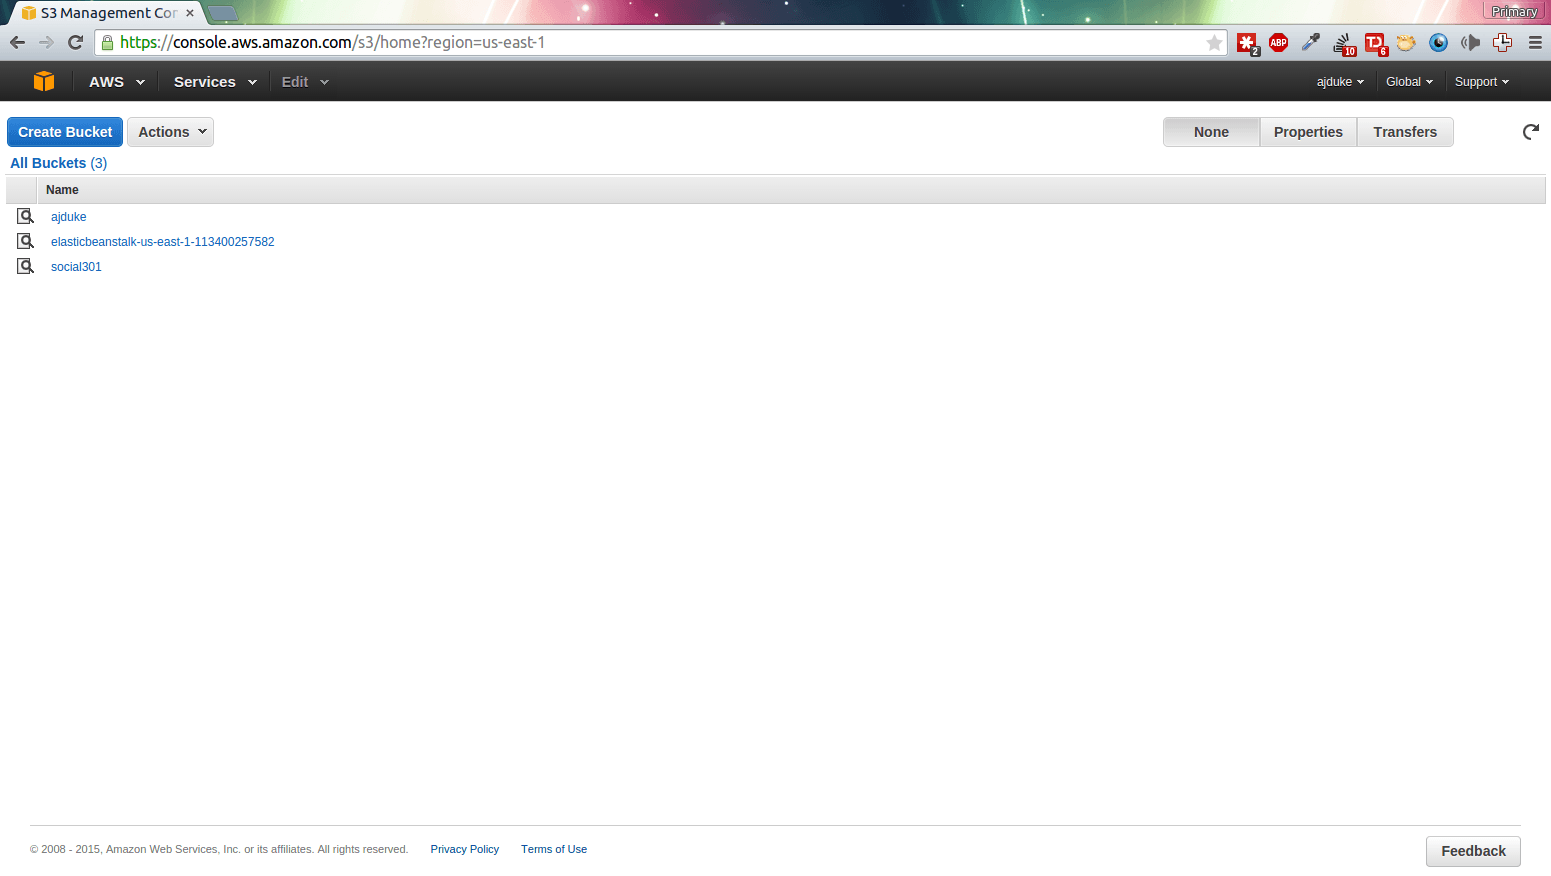
Web interface is simple and very minimal having only required functionality.left, side we have list of buckets created in your account. righ pane is floating meaning it gives information about various aspects as such properties (meta-data) of bucket, objects meta-data, etc.
left, side we have list of buckets created in your account. righ pane is floating meaning it gives information about various aspects as such properties (meta-data) of bucket, objects meta-data, etc.
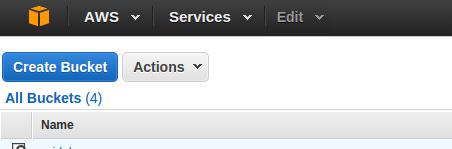
Creating Bucket
Now, Lets create the bucket. Click fat blue button “Create Bucket” at top-left corner as in above figure.
Upon clicking, you will see modal, as shown in following figure, for setting basic details:
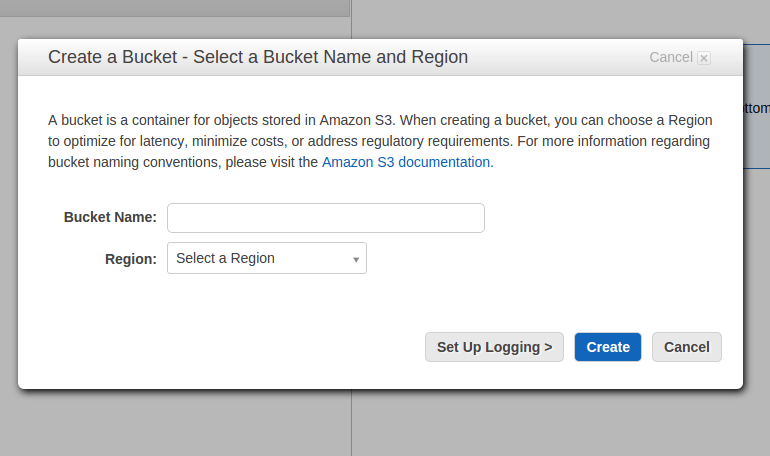
Name the bucket whatever you want and select region as appropriate:

After that, bucket will be created and listed in the left panel as shown in following figure:
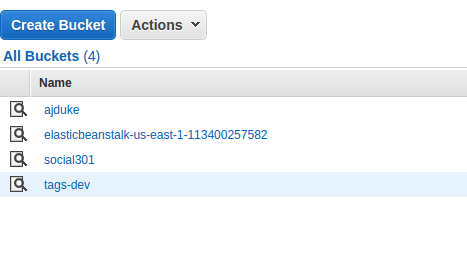
Now, for our bucket tags-dev, it has now unique url, to which we can access the contents inside it as follows – https://tags-dev.s3.amazonaws.com/photo.png
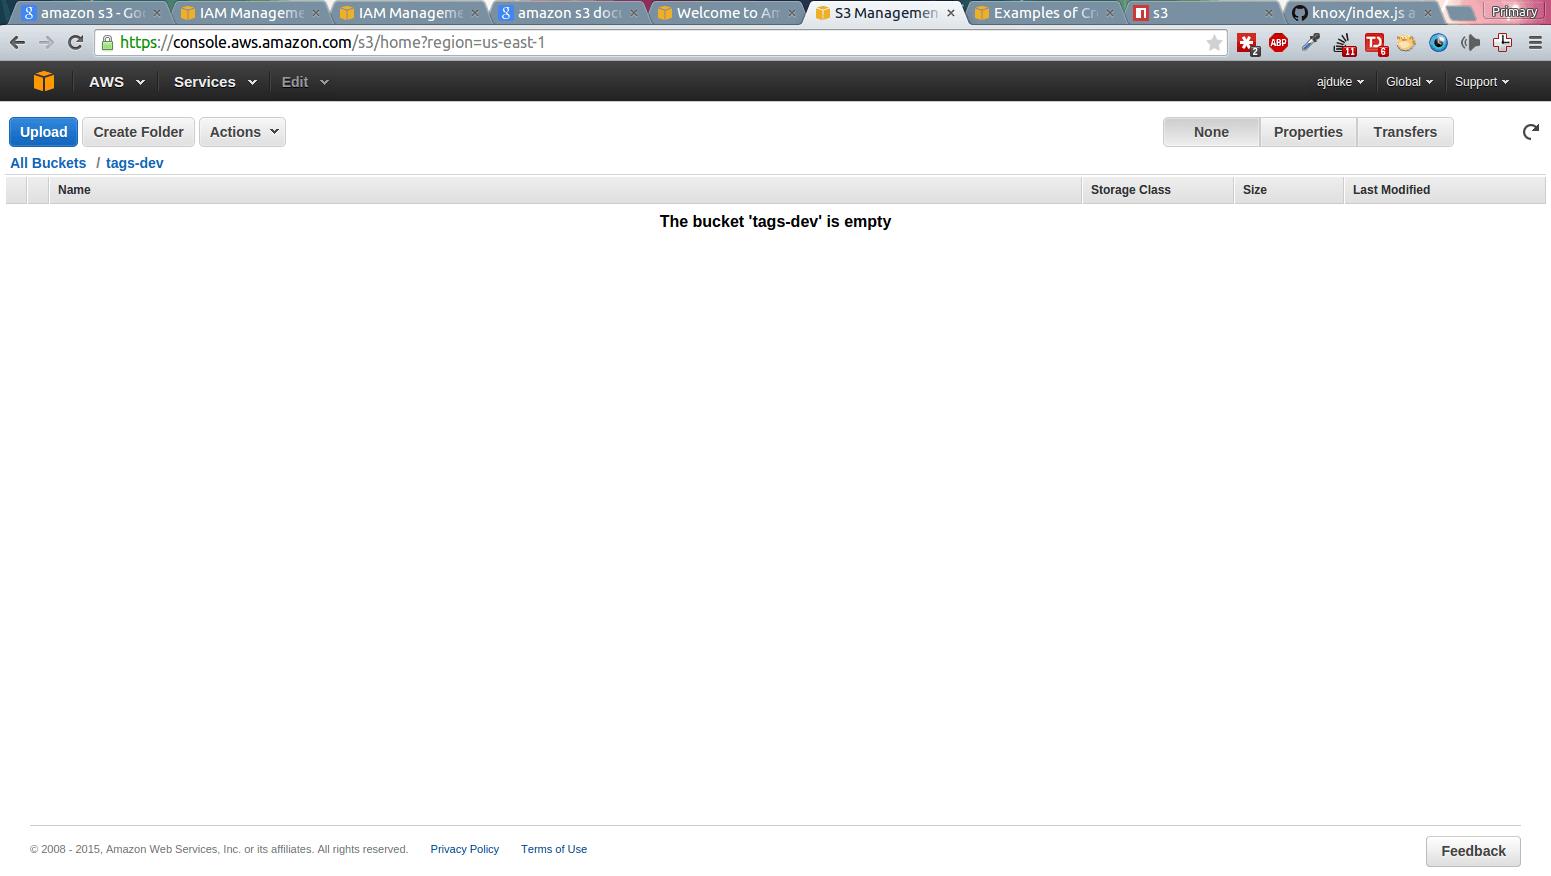
Lets, go inside created bucket by clicking from list, it will initially show empty as we don’t have anything inside it.
Uploading content
Its time to put some contents inside it. Lets upload few files. Also, we will create the folders inside to further organize objects.
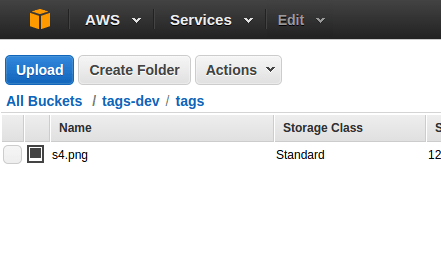
Now, i have uploaded two files to S3 bucket and created a folder called “tags” as shown as follows:
I created folder from top left corner from white button named “Create Folder”:

The panel on right shows upload transfer progress, for each file you uploaded.
I also uploaded file inside “tags” folder:
The folder inside bucket gives extra namespace for organizing the content inside bucket. We can have as many folder we want in a bucket. Even nesting of folders also we can do.
Now, upload is done, lets try access the files as follows:
- https://s3.amazonaws.com/tags-dev/s1.png
- https://s3.amazonaws.com/tags-dev/s2.png
- https://s3.amazonaws.com/tags-dev/tags/s4.png
Now, if you tried to access it file you uploaded, you won’t to access it. This is because buckets are initially accessible to everyone by just URL, we have a read only policy to bucket which brings to following new topic.
Configuring bucket policies
Following are the steps to create bucket policy:
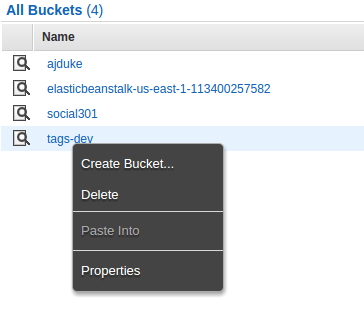
- Click to All Buckets link in breadcrumb at top-left, which will show all all bucket in left panel
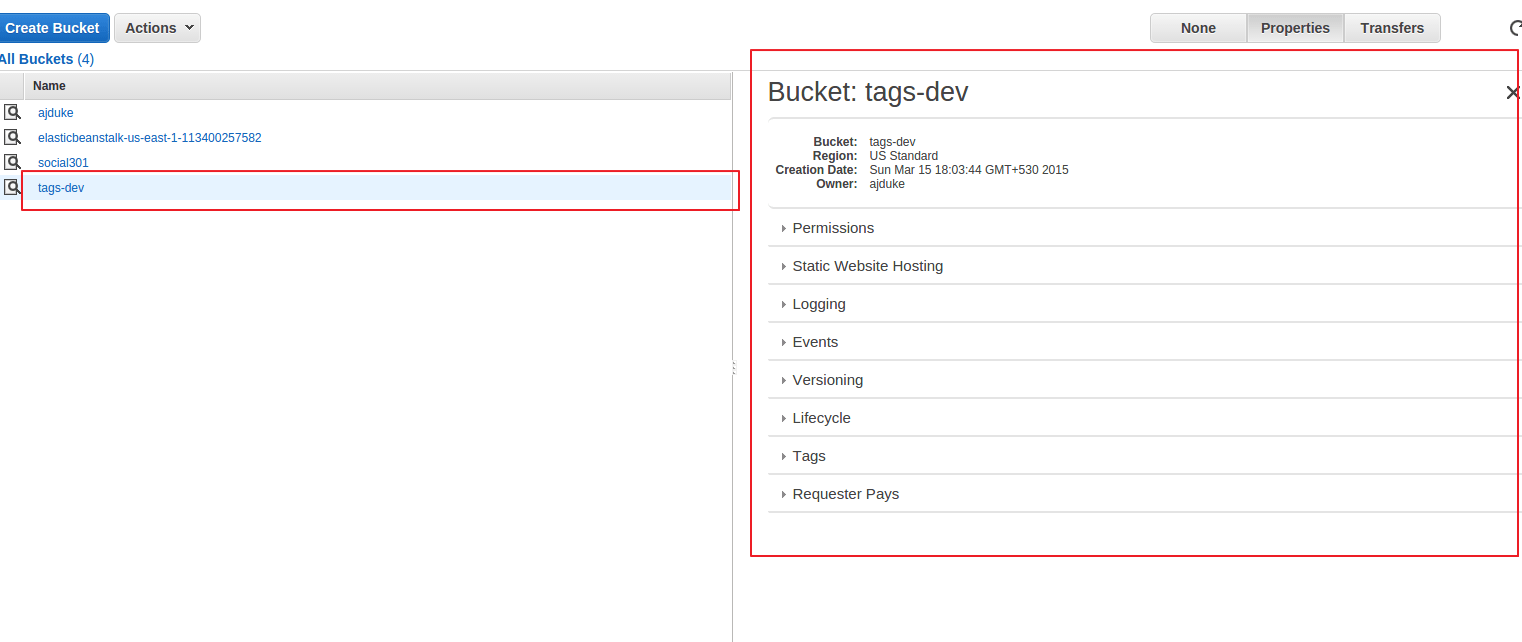
- Right Click on our bucket of interest, in our case “tags-dev”, then from menu select “Properties”
- Now, right panel we will have the Properties of selected bucket as shown in following figure:
- Now, from right panel, click on Permission category, which will expand to give access controls tools for the bucket:
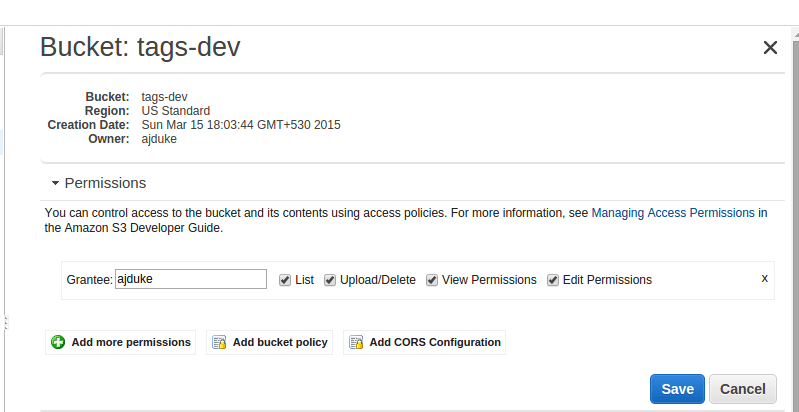
Which are Add more permission, Add bucket policy, Add CORS configurations.
Now, for this article, i will go into only adding bucket policy.
- So, let’s create bucket policy for read-only content. Which is very common to give access to resources. Go ahead and click “Add bucket policy”, it will open following:

For now, Go ahead and paste following and also replace name of your bucket in place of “ExampleBucket”
{
  "Version":"2012-10-17",
  "Statement":[
    {
      "Sid":"AddPerm",
      "Effect":"Allow",
      "Principal": "*",
      "Action":["s3:GetObject"],
      "Resource":["arn:aws:s3:::ExampleBucket/*"]
    }
  ]
}
Hit Save button, which will create the policy for bucketNow, if you try to acess the any object inside bucket, it will get access to it. https://s3.amazonaws.com/tags-dev/s1.png
Deleting bucket
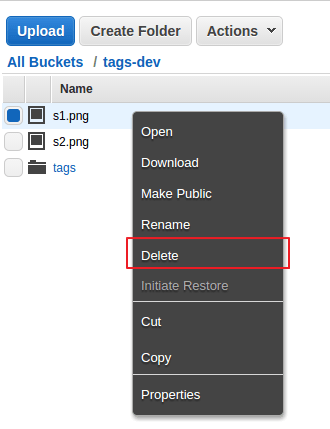
Finally, you may want to delete any objects it can be done by the right clicking on file, which reveal context menu which is shown as follows:
For deleting bucket, you need to empty bucket. i.e remove all the objects inside it. Then, you can delete it by right clicking and selecting Delete option.Which is shown as follows:
Thats Lots thing have been covered and this is end of first part of article.
Conclusion
In this article, we saw basic units of Amazon S3, why one should use it. and after that we tried to access the one of interface of Amazon S3 Infrastructure which is Web Management Console.
In which, we saw some basics of creating buckets, uploading files, giving them read only access and finally deleting objects and buckets.
Stick around for next article, where we will walk through programmatically accessing Amazon S3 with REST interface and a NodeJS module.
| Reference: | Working with Amazon S3 – Part I from our JCG partner Abhijeet Sutar at the ajduke’s blog blog. |

Might as well write it in C though. Don’t bother with Java. I mean since we are chaining ourselves to a vendor that is.