Automating the Deployment and Upload of Snapshot Java Artifacts Using Jenkins on Window
This post will show how to automate the deployment process of a Java Web Application (Student Enrollment Application developed using MYSQL DB with Hibernate ORM in a REST based Jersey2 Spring environment) using Jenkins Continuous Integration – to build the project, run the unit tests, upload the built artifacts to a Sonatype Snapshot repository, run the Cobertura Code Coverage reports and deploy the application to the Amazon EC2. The details of the actual application are explained in the earlier post given by the link Building Java Web Application Using Jersey REST With Spring.
1. Install Jenkins as a Windows Service
Navigate to jenkins-ci.org website using an Internet browser and download the Windows native package (the link is underlined for easy identification) as shown from the right side pane of the Download Jenkins tab.

Once the download is complete, uncompress the zip file and click on the jenkins-1.xxx.msi file. Proceed through the configuration steps to install the Jenkins as a Windows service.
2. Modify Default Jenkins Port
By default Jenkins runs on the port 8080. In order to avoid conflict with other applications, the default port can be modified by editing the jenkins.xml found under C:\Program Files (x86)\Jenkins location. As shown below, modify the httpPort to 8082.
<service>
  <id>jenkins</id>
  <name>Jenkins</name>
  <description>This service runs Jenkins continuous integration system.</description>
  <env name="JENKINS_HOME" value="%BASE%"/>
  <!--
    if you'd like to run Jenkins with a specific version of Java, specify a full path to java.exe.
    The following value assumes that you have java in your PATH.
  -->
  <executable>%BASE%\jre\bin\java</executable>
  <arguments>-Xrs -Xmx256m -Dhudson.lifecycle=hudson.lifecycle.WindowsServiceLifecycle -jar "%BASE%\jenkins.war" --httpPort=8082</arguments>
  <!--
    interactive flag causes the empty black Java window to be displayed.
    I'm still debugging this.
  <interactive />
  -->
  <logmode>rotate</logmode>

  <onfailure action="restart" />
</service>
Once the modification is saved in jenkins.xml file, restart the Jenkins service from the Windows Task Manager->Services and right clicking on the Jenkins service and choose Stop Service to stop the service as shown below.
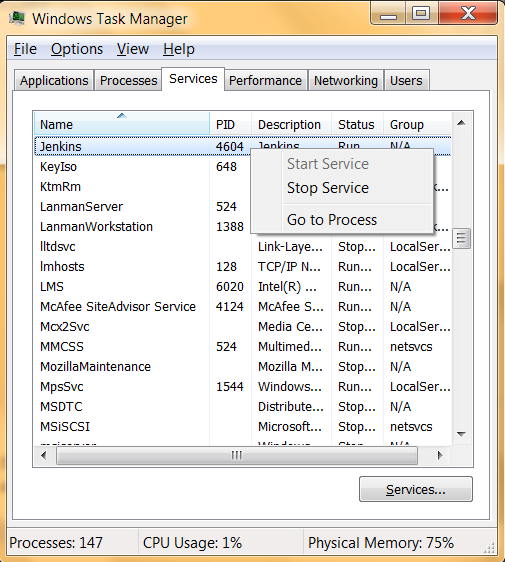
Once the status of the service changes to stopped, restart the service by right clicking on the Jenkins service and choose Start Service to start the service again.

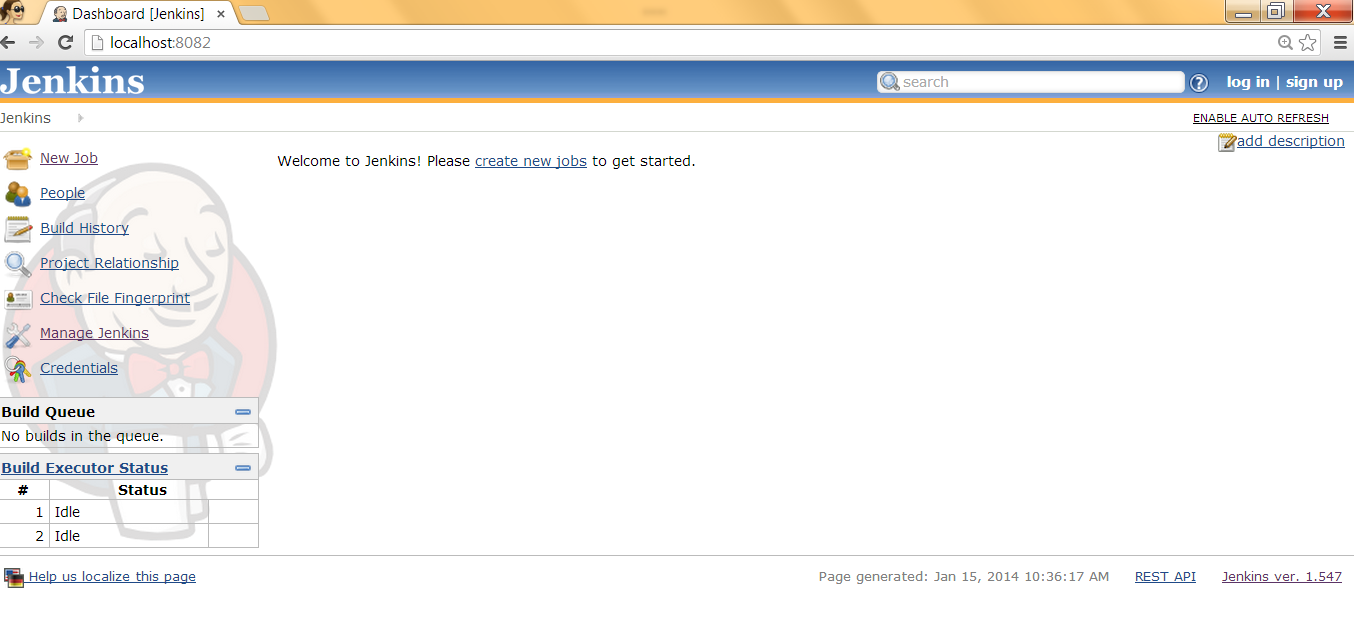
Navigate to localhost:8082 to verify if the Jenkins restart was successful as shown below – Jenkins Dashboard will be displayed. Note that it takes a while before the Jenkins service becomes available.
3. Install Plugins
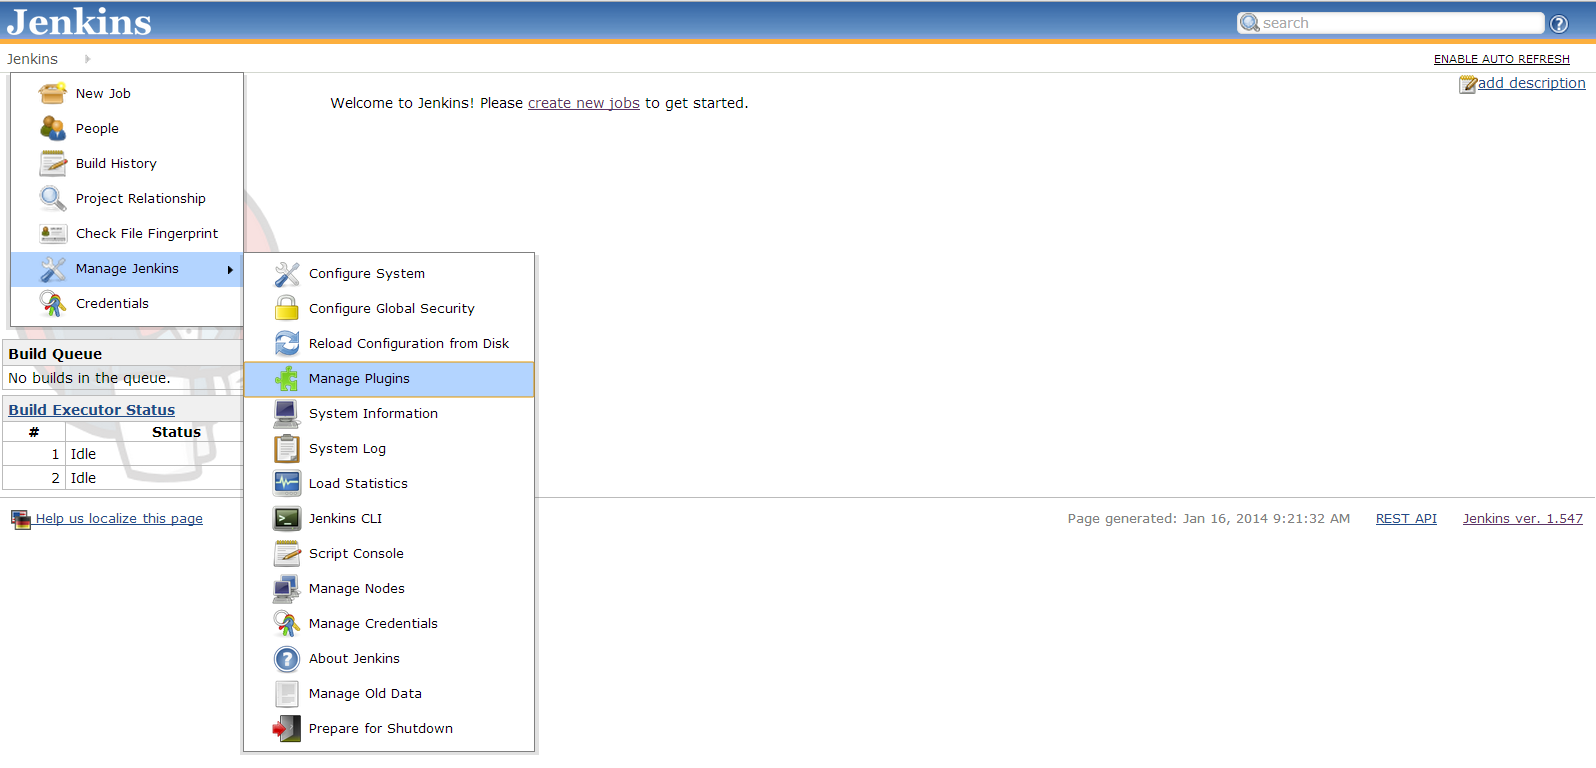
On the Jenkins Dashboard, navigate to Manage Jenkins –> Manage Plugins as shown in the snapshot below.
Install the following plugins and restart Jenkins for the changes to take effect.
- GitHub Plugin (for integrating Github with Jenkins)
- Jenkins Cobertura Plugin (for Cobertura support)
- Deploy to Container Plugin (for deploying the WAR to the Tomcat Container on EC2 instance)
- Jenkins Artifactory Plugin (for deploying the built Maven artifacts to the Snapshot repository)
4. Configure System
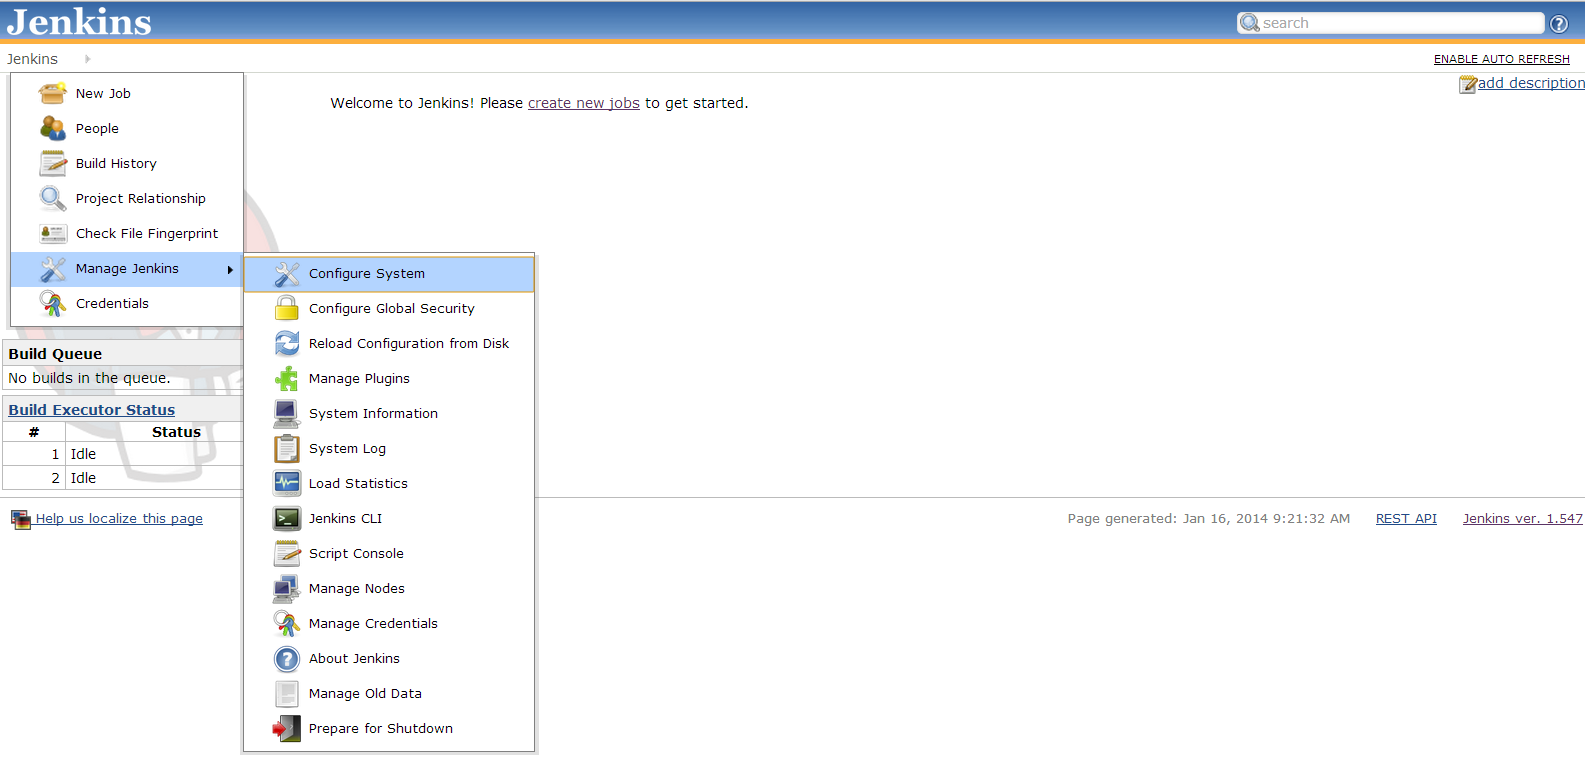
On the Jenkins Dashboard, navigate to Manage Jenkins –> Configure System as shown in the snapshot below.
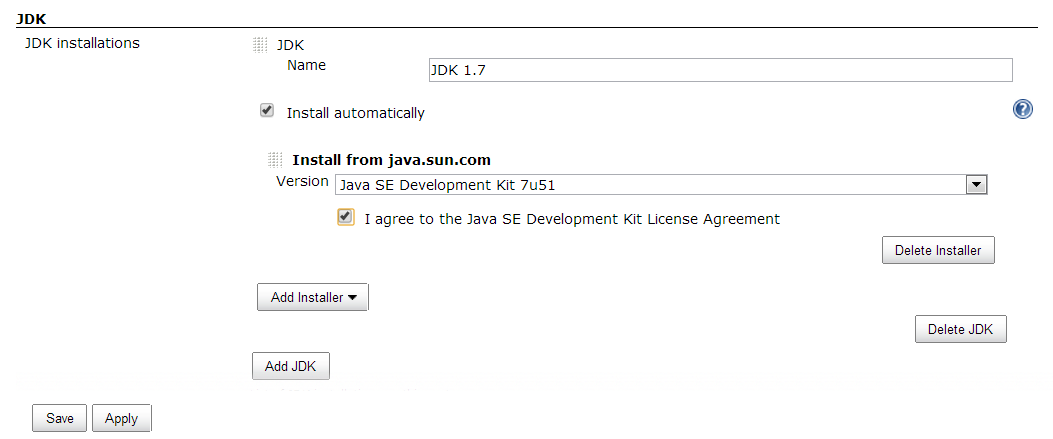
Navigate to the JDK section and click on “Add JDK” to add the JDK installation as shown in the snapshot below. Specify a JDK Name, choose the JDK Version to install and follow the on-screen instructions to save the Oracle Login credentials. Save the changes.
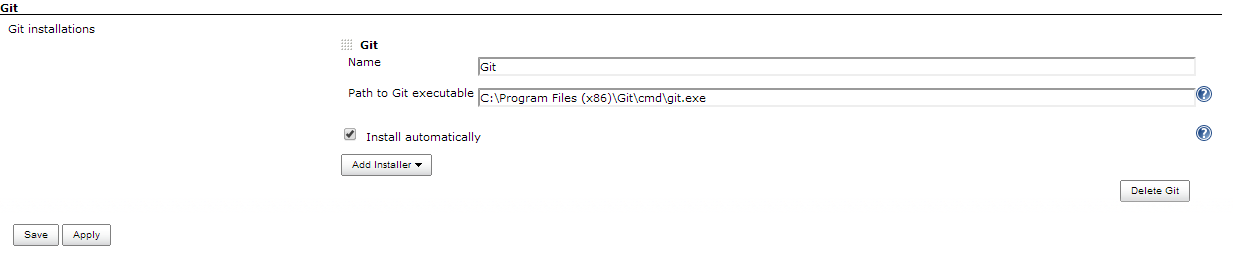
Next, proceed to the Git section and click on “Add Git” to add the Git installation as shown in the snapshot below. Specify Git Name, specify the path to Git executable and Save the changes.
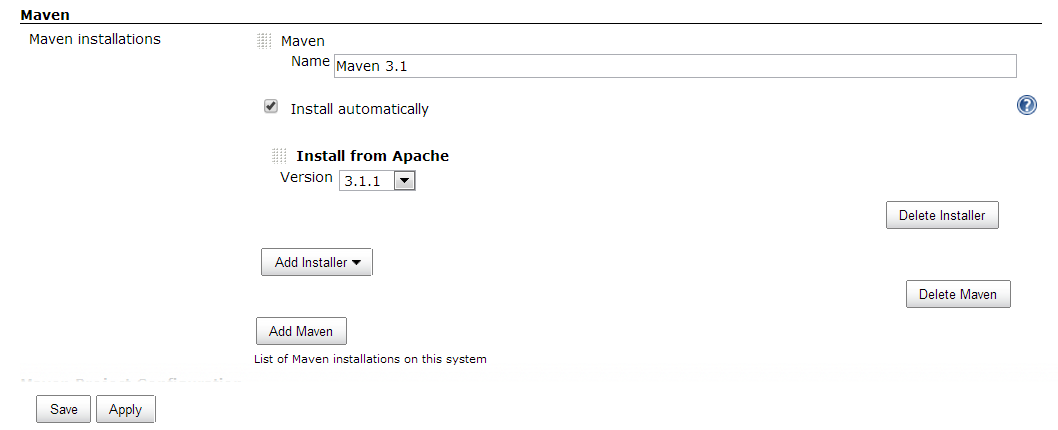
Next, proceed to the Maven section and click on “Add Maven” to add the Maven installation as shown in the snapshot below. Specify Maven Name, choose the Maven Version to install and Save the changes.
Proceed to the Git plugin section and enter the values for Github Username and Email Address as credentials as shown below. Save the changes.

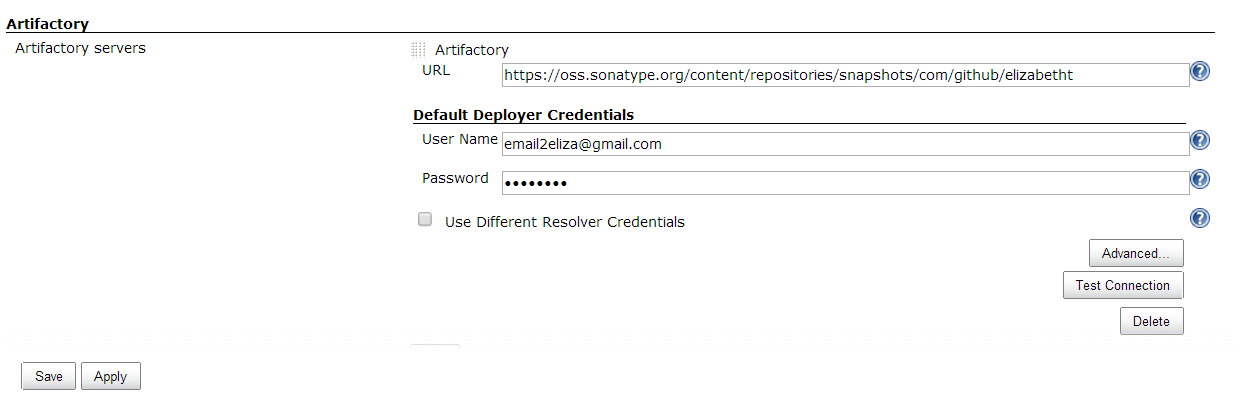
Proceed to the Artifactory section and click on “Add” to add the information about the artifactory servers. Specify the URL for the snapshot repository and provide the deployer credentials created from the Artifactory server website as shown below. Click on “Test Connection” to test if the connection parameters are good to save and Save the changes.
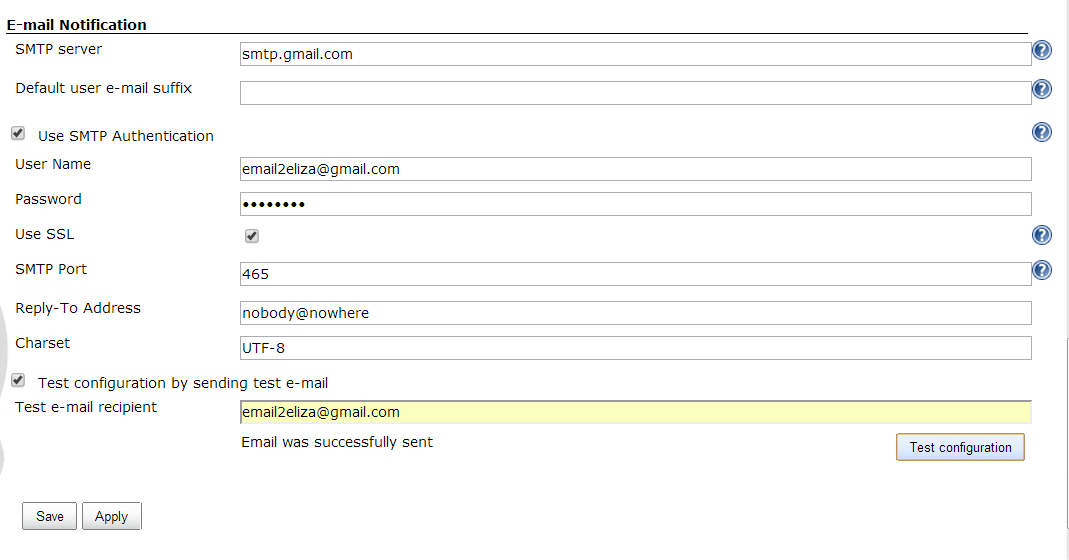
Next, proceed to the Email Notification section and enter the SMTP Server details as shown below. Click on the Advanced button to add the further details required and Save the changes. Click on “Test configuration by sending test e-mail”, enter the test e-mail recipient and click on “Test configuration” to see if the email is successfully sent.
5. Create a New Jenkins Job
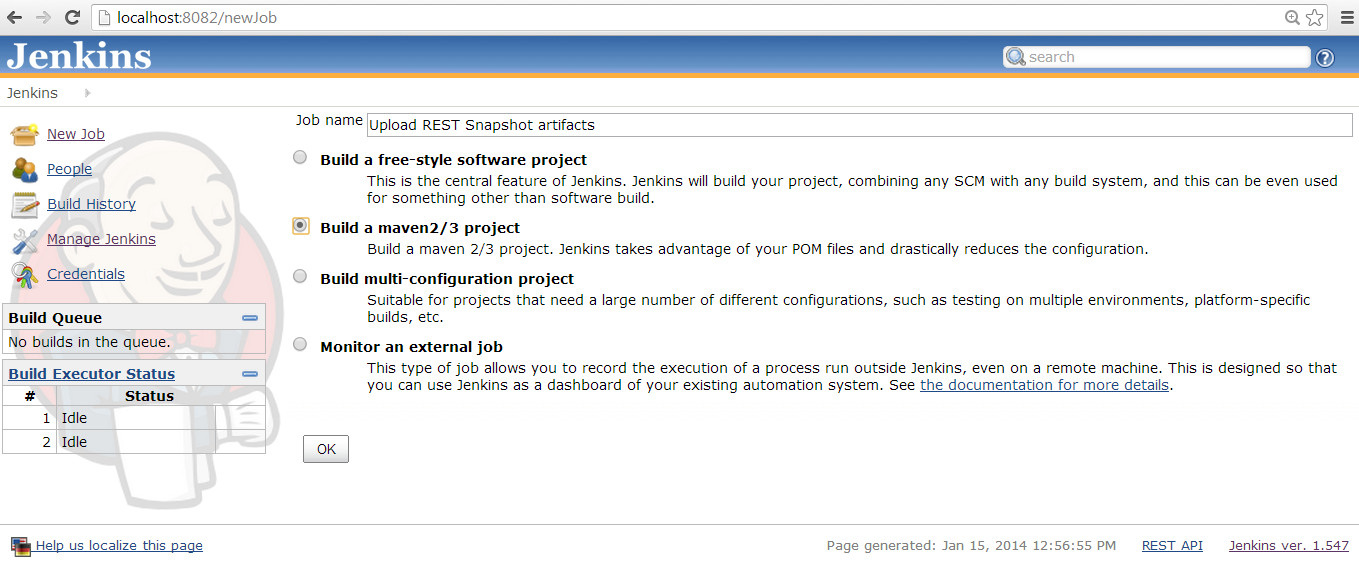
From the Jenkins Dashboard, click on “New Job” to create a new job. Enter a name for the job and choose “Build a maven2/3 project” as option and click on OK as shown below.
From the New Job Configuration screen, proceed to the Source Code Management section and specify the Git Repository URL for the project as shown below. Save the changes.

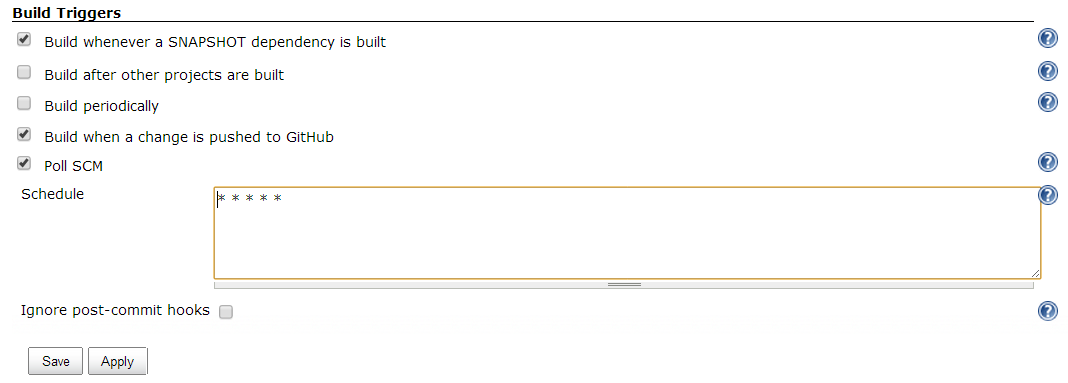
Next, from the Build Triggers section, select the options desired as shown below and Save the changes.
Proceed to the Build section, enter the maven goals for building a snapshot as shown below and Save the changes.
![]()
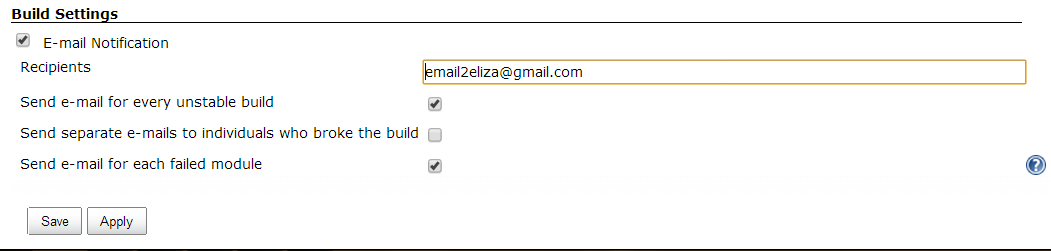
Proceed to the Build Settings section. Select the option for Email Notification and enter the values for the email recipients as shown below. Save the changes.
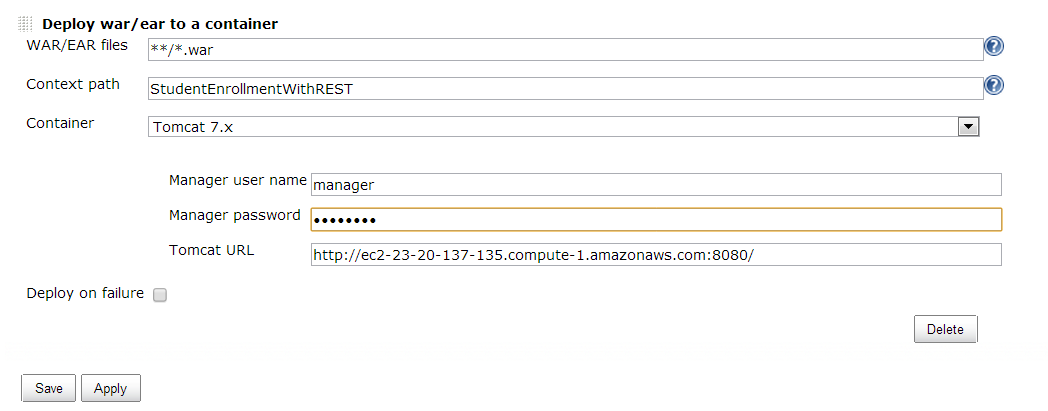
Under the Post-build Actions, click on “Add post-build action” button and select “Deploy war/ear to a container”. In the Amazon EC2, a Tomcat Manager (manager as username) instance has to be configured with roles manager-gui and manager-script to allow the remote deployment of the WAR/EAR to the Tomcat Container. The configuration steps can be found in the link https://help.ubuntu.com/13.04/serverguide/tomcat.html under the section of “Tomcat administration webapps”
Once the Tomcat Manager webapp configuration is complete in the Amazon EC2 instance, enter the details necessary for the deployment as shown below. Save the changes.
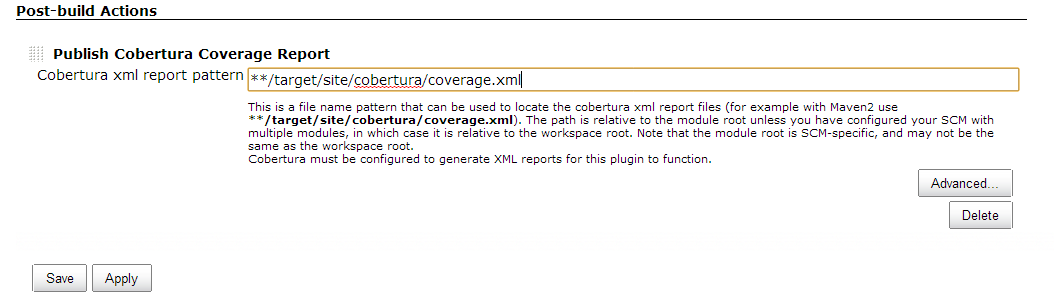
Similarly, from the Post-build Actions, click on “Add post-build action” button and select “Publish Cobertura Coverage Report”. Enter the Cobertura XML Report Pattern as shown below and save the changes.
6. Configure settings.xml
In order to upload the built Maven artifacts to the artifactory server, configure the Jenkins settings.xml found in C:\Program Files (x86)\Jenkins\tools\hudson.tasks.Maven_MavenInstallation\Maven_3.1\conf folder with the same parameters as found in the default settings.xml (usually found under C:\Program Files\Apache Software Foundation\apache-maven-3.1.0\conf for a Windows machine) of the Maven installation on the system.
Typically, the server section needs to be configured in the settings.xml for Jenkins matching with the details of the Artifactory server.
<servers>
    <server>
      <id>sonatype-nexus-snapshots</id>
      <username>username</username>
      <password>password</password>
    </server>
    <server>
      <id>sonatype-nexus-staging</id>
      <username>username</username>
      <password>password</password>
  </server>
</servers>
7. Update pom.xml
The pom.xml file for the project needs to be configured with the following plugins under the build section for the deployment to snapshot repository and for running the Cobertura Coverage report.
- maven-compiler-plugin
- maven-deploy-plugin
- cobertura-maven-plugin
Also add parent, scm and developer section to comply with the requirements put forth by the Artifactory server management as shown below.
<parent>
  <groupId>org.sonatype.oss</groupId>
  <artifactId>oss-parent</artifactId>
  <version>7</version>
</parent>

<scm>
  <connection>scm:git:git@github.com:elizabetht/StudentEnrollmentWithREST.git</connection>
  <developerConnection>scm:git:git@github.com:elizabetht/StudentEnrollmentWithREST.git</developerConnection>
  <url>git@github.com:elizabetht/StudentEnrollmentWithREST.git</url>
  <tag>StudentEnrollmentWithREST-1.3</tag>
</scm>
<developers>
  <developer>
      <id>elizabetht</id>
      <name>Elizabeth Thomas</name>
      <email>email2eliza@gmail.com</email>
  </developer>
</developers>

<build>
  <finalName>StudentEnrollmentWithREST</finalName>
  <plugins>
      <plugin>
          <groupId>org.apache.maven.plugins</groupId>
          <artifactId>maven-compiler-plugin</artifactId>
          <version>2.5.1</version>
          <inherited>true</inherited>
          <configuration>
              <source>1.6</source>
              <target>1.6</target>
          </configuration>
      </plugin>

      <plugin>
          <groupId>org.apache.maven.plugins</groupId>
          <artifactId>maven-deploy-plugin</artifactId>
          <version>2.8.1</version>
          <executions>
              <execution>
                  <id>default-deploy</id>
                  <phase>deploy</phase>
                  <goals>
                      <goal>deploy</goal>
                  </goals>
              </execution>
          </executions>
      </plugin>

      <plugin>
          <groupId>org.codehaus.mojo</groupId>
          <artifactId>cobertura-maven-plugin</artifactId>
          <version>2.6</version>
          <configuration>
              <formats>
                  <format>html</format>
                  <format>xml</format>
              </formats>
          </configuration>
          <executions>
              <execution>
                  <phase>package</phase>
                  <goals>
                      <goal>cobertura</goal>
                  </goals>
              </execution>
          </executions>
      </plugin>
  </plugins>
</build>
8. Build Now
Once the above configuration steps are complete, click on “Build Now” under the Jenkins –> Upload REST Snapshot Artifacts (or the respective Job name) to build the project based on the configuration.
The console output has the detailed logs of what steps were initiated by the configuration and the outcome of the entire build.
The timestamp of the WAR deployed to Amazon EC2 instance can be checked to see if the deployment is successful. In the same way, the snapshot repository can be checked to see if the upload of the artifacts is successful.
Thus the entire process of building the project along with unit tests whenever a SCM change is triggered or under another condition, running code coverage reports, uploading the artifacts built to the snapshot artifactory repository, deploying the WAR to the remote server container and triggering emails to the recipients can be automated with a click of a button through Jenkins.
