In short OSGi is a group of specifications that enable the modular assembly of software built with Java technology. It defines the creation and registration (in a OSGi enabled container) of components – services so as to inter-intra communicate. Another benefit of OSGi is that all these services can be installed/un-installed/started/stopped at runtime (i.e. code can be hot deployed at runtime). Similar to Servlet container implementations like Tomcat and EJB containers found in popular J2EE application servers like WebSphere, JBoss, WebLogic, OSGi also has some popular container implementations like Equinox (which is the base for Eclipse), Apache Felix …etc
The service oriented approach is one of the strong points in OSGi but I should not forget to mention another one that I feel is very important when you have to deal with an application with tons of dependencies. OSGi solves the problem of “Jar Hell”.
An example. Suppose you use two libraries, libX and libY, in your application. Let’s also assume each one of them has a dependency in libZ, but with different versions. libX depends on libZ 2.0 and libY depends on libZ 1.0
If libZ 2.0 is incompatible with libZ 1.0 you might end with a difficult issue to solve when you use both of them in the same application.
OSGi can handle this kind of problems. OSGi supports the Import-Package directive, that can be used to specify a version for any Java package your application – service should use. The OSGi classloader is able to locate the correct bundle/jar based on this information.
In my previous example, if the libraries libX, libY and libZ were OSGi compatible it would be possible to have all of them loaded in the same JVM without issues:
libZ 1.0 would use the Export-Package directive org.libz; version=1.0
libZ 2.0 would use Export-Package directive org.libz; version=2.0
libX would use Import-Package directive org.libz; version=2.0
libY would use Import-Package directive org.libz; version=1.0
OSGi also brings a stronger concept of modularity to java applications. Only packages exported using Export-Package directive can be used outside of the bundle.
In this article I am going to explain OSGi using the Eclipse Equinox container. Anyone who has Eclipse IDE installed on their machine has the OSGi container also installed in Eclipse plugin’s folder.
The name of the OSGi container jar file looks like org.eclipse.osgi_<version>.jar
You can start OSGi like this
java -jar org.eclipse.osgi_3.5.2.R35x_v20100126.jar -console
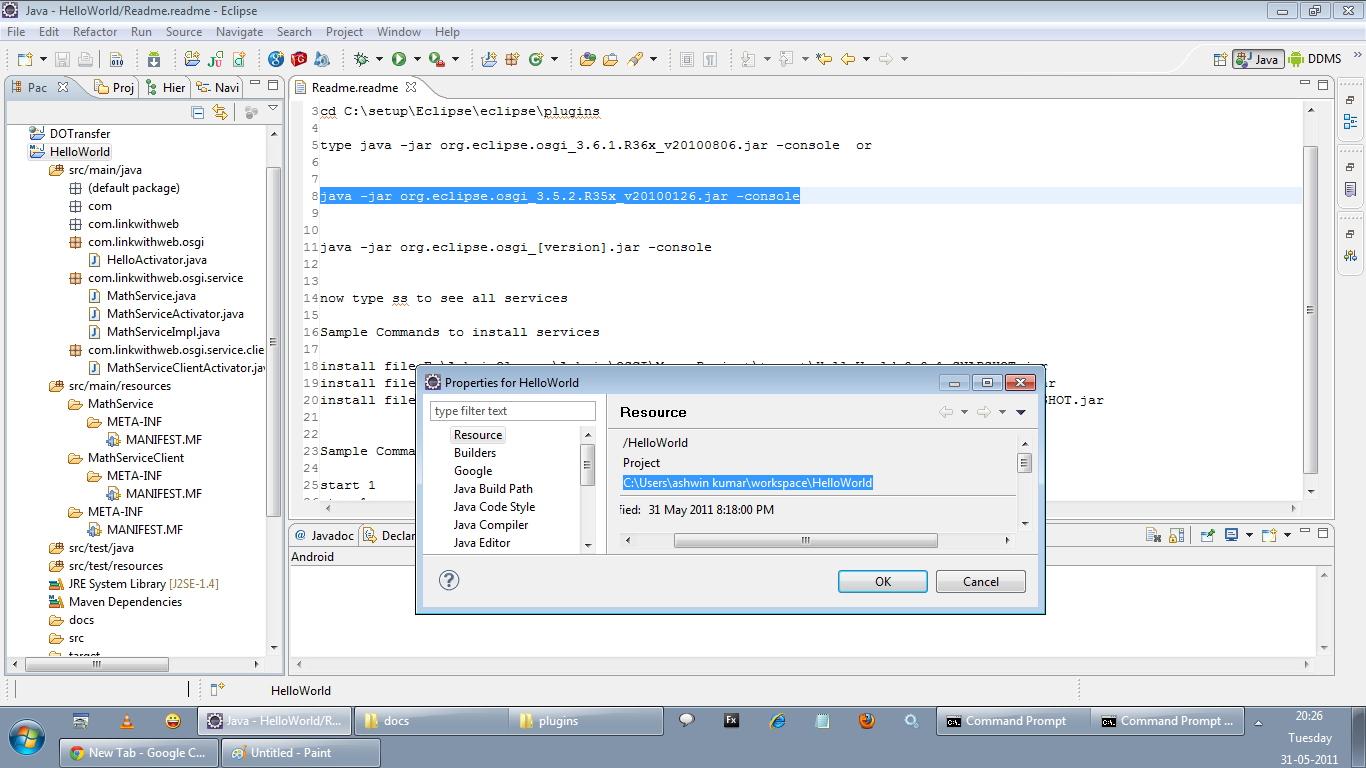
Attached is a sample screenshot of how I started my OSGi container ( Its analogous to starting Tomcat)

Now that we have started the OSGi container, let’s create a “HelloWorld” OSGi application using Maven. The project structure is showing below :
Following is the pom.xml for the project. The pom.xml has 2 more profiles added to it so as to create 2 more new modules (MathService and MathServiceClient) which will be explained later in this article.
<project xmlns="http://maven.apache.org/POM/4.0.0" xmlns:xsi="http://www.w3.org/2001/XMLSchema-instance"
	xsi:schemaLocation="http://maven.apache.org/POM/4.0.0 http://maven.apache.org/xsd/maven-4.0.0.xsd">
	<modelVersion>4.0.0</modelVersion>
	<groupId>com.linkwithweb.osgi</groupId>
	<artifactId>HelloWorld</artifactId>
	<version>0.0.1-SNAPSHOT</version>
	<name>HelloWorld</name>
	<dependencies>
		<dependency>
			<groupId>org.osgi</groupId>
			<artifactId>org.osgi.core</artifactId>
			<version>4.2.0</version>
		</dependency>
	</dependencies>

	<build>
		<finalName>HelloWorld-${version}</finalName>
		<plugins>
			<plugin>
				<groupId>org.apache.maven.plugins</groupId>
				<artifactId>maven-compiler-plugin</artifactId>
				<version>2.3.1</version>
				<configuration>
					<source>1.5</source>
					<target>1.5</target>
				</configuration>
			</plugin>

			<plugin>
				<groupId>org.apache.maven.plugins</groupId>
				<artifactId>maven-jar-plugin</artifactId>
				<configuration>
					<archive>
						<manifestFile>src/main/resources/META-INF/MANIFEST.MF</manifestFile>
					</archive>
				</configuration>
			</plugin>
		</plugins>
	</build>

	<profiles>
		<profile>
			<id>MathService</id>
			<build>
				<finalName>MathService-${version}</finalName>
				<plugins>
					<plugin>
						<groupId>org.apache.maven.plugins</groupId>
						<artifactId>maven-compiler-plugin</artifactId>
						<version>2.3.1</version>
						<configuration>
							<source>1.5</source>
							<target>1.5</target>
						</configuration>
					</plugin>

					<plugin>
						<groupId>org.apache.maven.plugins</groupId>
						<artifactId>maven-jar-plugin</artifactId>
						<configuration>

							<excludes>
								<exclude>**/*.xml</exclude>
								<exclude>**/*.bsh</exclude>
								<exclude>**/*.properties</exclude>
							</excludes>
							<archive>
								<manifestFile>src/main/resources/MathService/META-INF/MANIFEST.MF</manifestFile>
							</archive>
						</configuration>
					</plugin>

				</plugins>
			</build>
		</profile>
		<profile>
			<id>MathServiceClient</id>
			<build>
				<finalName>MathServiceClient-${version}</finalName>
				<plugins>
					<plugin>
						<groupId>org.apache.maven.plugins</groupId>
						<artifactId>maven-compiler-plugin</artifactId>
						<version>2.3.1</version>
						<configuration>
							<source>1.5</source>
							<target>1.5</target>
						</configuration>
					</plugin>

					<plugin>
						<groupId>org.apache.maven.plugins</groupId>
						<artifactId>maven-jar-plugin</artifactId>
						<configuration>

							<excludes>
								<exclude>**/*.xml</exclude>
								<exclude>**/*.bsh</exclude>
								<exclude>**/*.properties</exclude>
							</excludes>
							<archive>
								<manifestFile>src/main/resources/MathServiceClient/META-INF/MANIFEST.MF</manifestFile>
							</archive>
						</configuration>
					</plugin>

				</plugins>
			</build>
		</profile>
	</profiles>

</project>
If you observe the pom.xml closely you will see that there are 3 MANIFEST.MF definitions one for each different OSGi bundle we are creating. Saying so let me explain what OSGi bundles are. An OSGi bundle is essentially the same as a standard Java “jar” file with the bundle’s specific configuration defined in the “jar’s” Manifest file. All OSGi specific entries in the “jar’s” Manifest file are read by the OSGi container so as to activate the bundle. Isn’t that cool? With OSGi we avoid learning any new metadata formats like with other frameworks!
Here is the sample Manifest.MF I have defined for the MathServiceClient bundle
Manifest-Version: 1.0
Bundle-Name: MathServiceClient
Bundle-Activator: com.linkwithweb.osgi.service.client.MathServiceClientActivator
Bundle-SymbolicName: MathServiceClient
Bundle-Version: 1.0.0
Import-Package: org.osgi.framework,com.linkwithweb.osgi.service
As you can see all the entries except Manifest-Version are OSGi specific. These entries define how to activate the bundle, the bundle’s name and version, all of it’s dependent libraries and what extension points it exposes for other services to consume.. etc
Let me show you how to install the “HelloWorld” bundle into Equinox OSGi Container. Below are the MANIFEST.MF file and Activator class for the “HelloWorld” bundle.
package com.linkwithweb.osgi;

import org.osgi.framework.BundleActivator;
import org.osgi.framework.BundleContext;

/**
 * @author Ashwin Kumar
 *
 */
public class HelloActivator implements BundleActivator {
	public void start(BundleContext context) {
		System.out.println("Hello World");
	}

	public void stop(BundleContext context) {
		System.out.println("Goodbye All");
	}
}
Manifest-Version: 1.0
Bundle-Name: HelloWorld
Bundle-Activator: com.linkwithweb.osgi.HelloActivator
Bundle-SymbolicName: HelloWorld
Bundle-Version: 1.0.0
Import-Package: org.osgi.framework
To build your bundle run “mvn clean package”
It will create HelloWorld-0.0.1-SNAPSHOT.jar in the target folder of your Maven project. Here is the image which shows how to install and start our “HelloWorld” bundle into Equinox

As you can see we used the install command to install the bundle and the start command, using the bundle id returned by the container after bundle installation, to start the bundle.
Now, as far as the bundle’s lifecycle is concerned, starting the bundle triggers a call to the “start” method of the bundle’s Activator class whereas stopping the bundle triggers a call to the “stop” method of the bundle’s Activator class. We can see the results of the aforementioned behavior in the container’s terminal where the “Hello World” message is displayed upon module start!
Congratulations you have learned the basics of OSGi and you have just deployed your first bundle!
Exposing and Consuming Services
To explain this I’ll implement a very simple example where I’ll publish a service which can add 2 numbers.
First we need to define an Interface for exposing our “adding” functionality to external bundles (clients)
package com.linkwithweb.osgi.service;

/**
 * @author Ashwin Kumar
 *
 */
public interface MathService {

	/**
	 * @param a
	 * @param b
	 * @return
	 */
	public int add(int a, int b);
}
Now the implementation Class
package com.linkwithweb.osgi.service;

/**
 * @author Ashwin Kumar
 *
 */
public class MathServiceImpl implements MathService {

	/* (non-Javadoc)
	 * @see com.linkwithweb.osgi.service.MathService#add(int, int)
	 */
	public int add(int a, int b) {
		// TODO Auto-generated method stub
		return a+b;
	}

}
What follows is the Activator class which registers the “Adding” service to the OSGi container.
package com.linkwithweb.osgi.service;

import org.osgi.framework.BundleActivator;
import org.osgi.framework.BundleContext;

/**
 * @author Ashwin Kumar
 *
 */
public class MathServiceActivator implements BundleActivator {
	/*
	 * (non-Javadoc)
	 *
	 * @see org.osgi.framework.BundleActivator#start(org.osgi.framework.BundleContext)
	 */
	public void start(BundleContext context) {
		MathService service = new MathServiceImpl();
		// Third parameter is a hashmap which allows to configure the service
		// Not required in this example
		context.registerService(MathService.class.getName(), service, null);
		System.out.println("Math Service Registered");
	}

	/*
	 * (non-Javadoc)
	 *
	 * @see org.osgi.framework.BundleActivator#stop(org.osgi.framework.BundleContext)
	 */
	public void stop(BundleContext context) {
		System.out.println("Goodbye From math service");
	}
}
Below is the manifest file for the “adding” service bundle.
Manifest-Version: 1.0
Bundle-Name: MathService
Bundle-Activator: com.linkwithweb.osgi.service.MathServiceActivator
Bundle-SymbolicName: MathService
Bundle-Version: 1.0.0
Import-Package: org.osgi.framework
Export-Package: com.linkwithweb.osgi.service
If you observe the manifest above you will notice that we are exporting some packages so that they can be consumed later. Also all the package that will be needed at runtime have to be defined here (using the Import-Package directive).
Just like the previous section of this article, use the following command to build the jar file
mvn -PMathService package
You can see below the commands to install and start the OSGi bundle.

Below is the implementation of a consumer for the “adding” service. The consumer is packed in an OSGi bundle activator class for demonstration purposes only. You are free to implement the consumer as a separate OSGi service since OSGi services can inter-communicate!
package com.linkwithweb.osgi.service.client;

import org.osgi.framework.BundleActivator;
import org.osgi.framework.BundleContext;
import org.osgi.framework.ServiceReference;

import com.linkwithweb.osgi.service.MathService;

/**
 * @author Ashwin Kumar
 *
 */
public class MathServiceClientActivator implements BundleActivator {
	MathService service;
	private BundleContext context;

	/*
	 * (non-Javadoc)
	 *
	 * @see org.osgi.framework.BundleActivator#start(org.osgi.framework.BundleContext)
	 */
	public void start(BundleContext context) {
		this.context = context;
		// Register directly with the service
		ServiceReference reference = context
				.getServiceReference(MathService.class.getName());
		service = (MathService) context.getService(reference);
		System.out.println(service.add(1, 2));
	}	/*
	 * (non-Javadoc)
	 *
	 * @see org.osgi.framework.BundleActivator#stop(org.osgi.framework.BundleContext)
	 */
	public void stop(BundleContext context) {
		System.out.println(service.add(5, 6));
	}
}
Follwing is the manifest file for the “adding” service consumer bundle.
Manifest-Version: 1.0
Bundle-Name: MathServiceClient
Bundle-Activator: com.linkwithweb.osgi.service.client.MathServiceClientActivator
Bundle-SymbolicName: MathServiceClient
Bundle-Version: 1.0.0
Import-Package: org.osgi.framework,com.linkwithweb.osgi.service
To create, install and start the “adding” service client bundle follow the steps shown below :
mvn -PMathServiceClient package

That’s all! Hope you liked it!
You can download the source code of this article here
Reference: OSGI for Beginners Using Maven with Equinox (HowTo) from our JCG partner Aswin at the Felicitas and Beatitudo blog.

You need to give empty line at the end of MANIFEST file else it just skips the last line